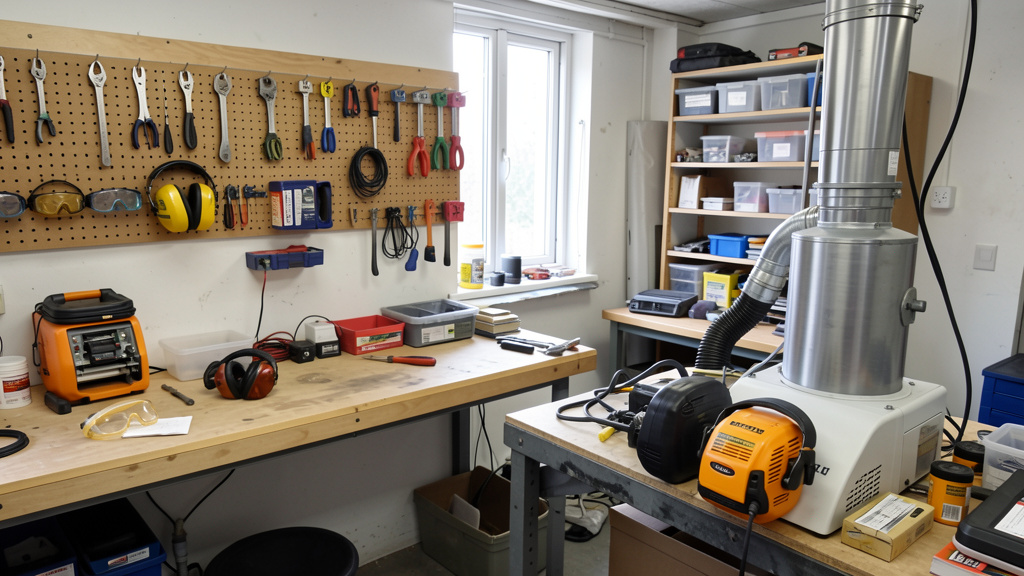
Transform your workshop from a hazard zone into a sanctuary of focused creation—with a proactive safety system that works while you work.
Every woodworker, metalworker, or DIY enthusiast has felt it: the split-second lapse that turns a routine cut into a trip to the emergency room. But what if you could rewire your workshop experience so that safety becomes automatic, invisible, and empowering? This guide moves beyond fragmented tips to deliver a unified safety framework adapted from high-reliability industries for the home workshop. By integrating human behavior insights, ergonomic design principles, and tool-specific protocols, you’ll learn to anticipate risks before they materialize. Drawing on consensus standards from ANSI, OSHA guidelines for non-industrial settings, and ergonomic research frameworks, this guide offers a structured approach to making safety an inseparable part of your creative process.
Introduction: Why “Be Careful” Isn’t Enough
For decades, workshop safety advice boiled down to vague warnings: “Pay attention,” “Wear safety glasses,” “Don’t rush.” Yet injury reports consistently show that momentary lapses remain common. The flaw in traditional advice? It places 100% of the burden on moment-to-moment vigilance, ignoring how workspace design, tool maintenance, and habitual routines either support or undermine safe behavior.
Consider two scenarios. In Workshop A, tools are stored haphazardly on the floor, lighting casts deep shadows across the table saw, and dust accumulates unnoticed. The user relies solely on “being careful.” In Workshop B, zones are clearly defined with non-slip flooring, task lighting eliminates shadows at every workstation, and a pre-work ritual is as routine as plugging in a tool. Which workshop is safer? The answer isn’t about skill level—it’s about system design. Safety isn’t the absence of danger; it’s the presence of overlapping defenses that make injury statistically improbable.
This guide introduces a layered methodology inspired by risk management models used across aviation, healthcare, and manufacturing—adapted specifically for home workshops of any size or specialty. Whether your space is a dedicated garage bay or a compact basement corner, these principles scale. You’ll move beyond fear-based compliance to confident creation, where safety fuels creativity rather than stifling it. This isn’t about restricting your passion—it’s about protecting your ability to pursue it for decades to come.
The Three-Layer Safety Framework: Your Blueprint for Accident Prevention
Imagine safety as three interlocking shields. If one layer has a gap—a momentary distraction, a worn tool part, a spilled solvent—the next layer catches the risk before it reaches you. Adapted from established risk management models, this framework transforms safety from a mental burden into a tangible, engineered system. Each layer addresses a distinct dimension of risk:
- Layer 1: The Human Layer focuses on mindset, physical readiness, and habitual routines—the foundation of all safe actions.
- Layer 2: The Environmental Layer covers workspace layout, lighting, air quality, storage, and emergency infrastructure—designing hazards out before you even touch a tool.
- Layer 3: The Tool Layer delivers precise protocols for specific equipment, maintenance rhythms, and task-appropriate personal protective equipment (PPE).
These layers are interdependent. A well-maintained table saw (Layer 3) won’t prevent injury if you’re fatigued and rushing (Layer 1) in a cluttered space with poor lighting (Layer 2). True safety emerges where all three converge. Let’s build each layer deliberately.
The Fundamental Principle: Safety is not the absence of danger; it is the presence of overlapping defenses that make injury statistically improbable.
Layer 1: The Human Layer — Mastering Your Mindset and Body
Your decisions, physical state, and ingrained habits form the first—and most dynamic—line of defense. This layer isn’t about blame (“If only I’d been paying attention…”) but about building resilient routines that compensate for inevitable human fallibility. Neuroscience confirms: willpower depletes, attention wanders, and fatigue impairs judgment. Systems, not sheer vigilance, create lasting safety.
Step 1: Conduct a Pre-Workshop Safety Huddle (Even If You’re Alone)
Before powering on a single tool, invest 60 seconds in a mental reset. Stand in your workspace and ask three deliberate questions:
– Am I physically ready? Assess your fatigue level. Are you dehydrated? Did you take medication that may cause drowsiness? Are your hands steady? If you feel significantly fatigued, consider rescheduling complex or high-risk tasks. Save simple organization or planning for today.
– What’s the single biggest risk in today’s project? Is it kickback during a narrow table saw cut? Fumes from applying finish? Pinch points on the drill press? Verbally naming the top hazard primes your awareness and triggers precautionary behaviors.
– Do I have the right PPE within arm’s reach? Verify safety glasses are clean, hearing protection is functional, respirator cartridges are fresh, and gloves are appropriate for the task. Do not proceed until confirmed.
Why this works: This ritual mirrors structured pre-task assessments used in high-stakes fields. Research in occupational safety indicates that brief, intentional risk acknowledgment significantly reduces procedural errors. The act of verbalizing risks shifts the brain from autopilot to intentional mode.
Common mistake: Skipping the huddle on “simple” or “quick” tasks. Incident reviews consistently show that many incidents occur during routine operations—changing a drill bit, clearing a jammed sander, or making a final trim cut. Complacency is a known risk accelerator. Treat every session with consistent respect.
Real-world example: A furniture maker performing her huddle noticed she’d forgotten her respirator cartridge for sanding walnut—a wood known for potential sensitizing properties. That brief pause prevented unprotected exposure to fine particulates. She now keeps spare cartridges in a labeled pouch at her sanding station.
Step 2: Engineer Focus Through Task Chunking and Scheduled Breaks
Breaking projects into discrete, timed segments combats decision fatigue, rushing, and attention drift. Adapt a focused-work approach:
– Work in concentrated intervals (e.g., 45–50 minutes).
– After each interval, take a mandatory short break: stretch wrists and shoulders, hydrate with water, walk briefly, and visually scan your workspace for emerging hazards (accumulating dust, misplaced tools).
– After several intervals, take a longer reset break to refresh mentally and physically.
Why this works: Cognitive load theory demonstrates that complex motor tasks deplete mental resources. Studies tracking workshop incidents note a correlation between extended continuous work sessions and increased risk of errors. Scheduled breaks maintain consistent alertness and prevent “tunnel vision.”
Budget alternative: No timer? Use natural project transitions. “After I cut these three panels, I will wipe down the saw table, drink water, and check my push sticks.” Anchor breaks to tangible milestones.
Advanced application: Pair chunking with “transition rituals.” At the end of each work block, perform three actions: 1) Power down active tools, 2) Return hand tools to designated spots, 3) Wipe down your primary work surface. These micro-habits maintain environmental order (Layer 2) while reinforcing mental closure.
Step 3: Build Unconditional “Stop Work” Authority
Grant yourself explicit, non-negotiable permission to halt any task if something feels uncertain. This is not hesitation—it is professional discipline. Triggers to stop immediately include:
– An unfamiliar sound, vibration, or smell from a tool
– Uncertainty about a measurement, setup, or procedure
– Feeling rushed, frustrated, or distracted by external stressors
– Noticing a safety feature is compromised (e.g., guard loose, cord frayed)
When you stop, follow this protocol: Power down completely. Step away briefly. Reassess the situation calmly. Consult a manual, video, or trusted resource if needed. Resume only when confidence is restored.
Counter-example: A woodworker noticed a faint burning smell from his router motor but dismissed it as “normal under load” and continued. Shortly after, the collet failed. A brief pause to investigate could have prevented tool damage and potential injury. His workshop now includes a posted “Stop Work” trigger reminder beside the main power strip.
Psychological insight: Overcoming the “sunk cost fallacy” (“I’ve already spent time setting this up…”) requires reframing. Stopping isn’t wasting time—it’s investing in preventing far costlier outcomes. This disciplined pause is a hallmark of experienced practitioners across skilled trades.
Step 4: Master Physical Readiness Beyond “Just Resting”
Physical state directly impacts safety margins. Implement these supportive practices:
– Hydration awareness: Keep water accessible. Dehydration can reduce fine motor control and increase perceived effort.
– Vision care: Schedule regular eye exams. Update prescriptions for safety glasses. Poor depth perception or peripheral vision can increase risks during precise operations.
– Hearing awareness: Consider a baseline hearing check. Workshop noise exposure is cumulative; early awareness supports proactive protection.
– Ergonomic warm-ups: Before heavy lifting or repetitive tasks, spend a few minutes on gentle dynamic stretches: wrist circles, shoulder rolls, torso twists. This primes tendons and ligaments, potentially reducing strain.
Critical nuance: Medication awareness matters. Some common medications (antihistamines, muscle relaxants, cold remedies) may cause drowsiness or slowed reflexes. Review labels. When uncertain, postpone high-focus tasks. This reflects physiological responsibility, not overcaution.
Layer 1 Cognitive Peak: Your greatest safety tool isn’t mounted on the wall—it’s the disciplined routine you cultivate between your ears. Train it with intention, and it becomes your most reliable defense.
Layer 2: The Environmental Layer — Designing a Self-Defending Workspace
Your workshop layout should passively guide safe behavior. Poor design forces constant vigilance; intelligent design makes the safe choice the easy choice. This layer transforms your space into an active participant in safety—reducing cognitive load so you can focus on creation. Every element, from floor markings to airflow, communicates expectations.
Step 1: Map and Define Workflow Zones for Minimum Conflict
Divide your space into dedicated, visually distinct zones. This prevents cross-contamination (sawdust near finishes), reduces tripping hazards, and creates mental transitions between tasks. Essential zones for most workshops:
- Cutting Zone: Houses table saw, miter saw, bandsaw. Requires clear space on all sides for safe material handling. Floor marked with high-visibility tape.
- Assembly Zone: Clear, flat surface (workbench) away from dust-generating tools. Good task lighting essential. No power tools operating nearby during glue-ups.
- Finishing Zone: Ideally a separate ventilated area. If shared space, use portable exhaust vented outside during use. Strictly no sparks or heat sources nearby.
- Storage Zone: Organized tool racks, chemical cabinet, lumber storage. Located near entrance for easy access without crossing active work zones.
- Cleanup Zone: Dust collection equipment, vacuum, brooms, spill kit. Positioned near exit for end-of-session routine.
Why this works: Zone separation aligns with principles found in industrial safety standards and lean methodology. Visual boundaries trigger automatic behavioral shifts—like slowing down when entering a designated caution area.
How to implement: Sketch your floor plan to scale. Measure tool footprints including swing radii (e.g., miter saw arm extension). Ensure adequate pathways between zones (minimum 36 inches supports safe movement and emergency egress). Use contrasting floor tape (yellow for caution zones, green for safe paths), interlocking mats with texture changes, or painted boundaries. Label zones with simple icons: saw blade for Cutting, paintbrush for Finishing.
Common mistake: “I’ll just cut this one piece here…” leads to tools operating in aisles or assembly zones. Enforce zone discipline—even for quick tasks. The slight friction of moving a tool reinforces intentional action. Place a small “Zone Reminder” sign at each boundary: “Entering Cutting Zone: Verify PPE, Clear Path.”
Step 2: Engineer Lighting to Eliminate Shadow Traps and Glare
Insufficient or poorly directed light contributes to misalignment, missed measurements, and hand placement errors. Target ample, layered illumination on all primary work surfaces:
– Ambient Lighting: LED high-bay fixtures (4000K–5000K color temperature for neutral white light) mounted evenly across the ceiling. Avoid single overhead bulbs creating deep shadows. Use diffusers to minimize glare on shiny surfaces.
– Task Lighting: Adjustable LED arms mounted directly on drill presses, bandsaws, router tables, and workbenches. Position lights so shadows fall away from your cutting line or work area. For table saws, mount lights on the overhead guard assembly.
– Accent Lighting: LED strip lights under shelves, inside cabinets, and along stair edges (if applicable). Critical for finding tools and preventing trips during low-light hours.
– Emergency Lighting: Battery-backed LED path lights along primary egress routes. Activates automatically during power loss—essential for safely exiting after a tool malfunction or injury.
Real-world example: A woodworker upgraded from minimal overhead lighting to layered LED lighting. While adjusting his miter saw, he noticed the blade guard’s alignment pin was casting a shadow that previously hid a loose bolt. That visual clarity prevented a potential guard issue during his next cut. He now includes shadow checks in his pre-work huddle.
Budget alternative: Clamp-on LED work lights positioned strategically at each workstation. Replace older bulbs with 5000K LEDs for truer color rendering (helpful for matching wood tones or detecting material flaws). Use reflective tape behind clamp lights to amplify output.
Advanced tip: Install dimmer switches on ambient lighting. Lower ambient light when task lighting is sufficient to reduce eye strain from contrast. Use motion sensors in storage zones to conserve energy while ensuring light when needed.
Step 3: Engineer Air Quality from the Source—Health and Fire Safety
Wood dust is recognized as a respiratory irritant; metal fumes and solvent vapors carry additional risks. Your ventilation strategy should address multiple levels:
1. Source Capture: Dust ports on tools connected directly to a collector. Critical for table saws, sanders, routers. Use blast gates to maximize suction at the active tool. For sanders, use a vacuum with HEPA-rated filtration and anti-static hose.
2. Room Filtration: Air scrubber with true HEPA filtration running during work and for a period after. Mounted high to capture rising fine particles.
3. Dilution Ventilation: Exhaust fan near the ceiling (heat and fine particles rise) vented outside, paired with an intake vent low on the opposite wall to encourage cross-flow. Essential for chemical work and larger dust events.
Critical nuance: A standard shop vacuum is generally insufficient for fine dust control. Standard filters may allow sub-micron particles to recirculate. Cyclone separators protect vacuum motors, improve suction consistency, and capture the majority of chips before they reach the filter. For chemical work, use exhaust equipment rated for flammable vapors (spark-proof motor), vented outside—never recirculate fumes indoors.
Table: Air Quality Solutions by Workshop Context
| Workshop Context | Primary Activity | Minimum Dust Collection | Air Scrubber | Chemical Ventilation | Critical Considerations |
|——————|——————|————————-|————–|———————–|————————–|
| Small space (< 200 sq ft) | Light woodworking | 2 HP dust collector + cyclone | Portable HEPA unit (runs during/after session) | Window exhaust fan (200+ CFM) | Anti-static hoses, grounded metal ducts |
| Medium space (200–500 sq ft) | Mixed (wood/metal) | 3 HP system with blast gates | Ceiling-mounted HEPA unit | Dedicated exhaust near finishing area | Spark awareness, fire extinguisher nearby |
| Large space (> 500 sq ft) | Heavy production | 5 HP system + cyclone | Multiple HEPA units + monitoring | Make-up air system + dedicated exhaust | Review relevant safety standards, static bonding |
Common mistake: Relying solely on a respirator. PPE is Layer 3—ventilation (Layer 2) reduces airborne contaminants at the source, minimizing PPE dependency and user error (e.g., poor seal). Think of ventilation as the primary defense; respirators as the essential backup.
Dust awareness: Fine wood dust suspended in air can pose fire risks under specific conditions. Practices to support safety: regular vacuuming of floors/walls (avoid dry sweeping), bonding/grounding metal duct components where applicable, and storing minimal dust in collectors. Install spark detection sensors on ducts if budget and risk profile allow. Seasonal note: Static electricity risks increase during dry winter months—grounding becomes especially critical.
Step 4: Implement Foolproof Storage Systems—Clutter is a Hazard
Clutter contributes to trips, hides dangers, delays emergency response, and increases stress. Apply organization principles adapted from lean methodology:
- Tools: Hang frequently used tools on shadow-board pegboard at eye level. Outline each tool with paint for instant “missing item” detection. Store heavy tools on low, stable shelves. Use blade guards on all cutting tools before storage.
- Chemicals: In a locked, well-ventilated cabinet away from heat sources, direct sun, and incompatible materials. Original containers only—never repurpose food/drink bottles. Label secondary containers clearly with contents and hazards.
- Lumber & Sheet Goods: Vertical racks with positive stops. Stack dimensional lumber on level platforms with stickers between layers for airflow. Limit stack height without bracing. Use sheet goods carts with locking casters.
- Sharp Objects: Chisels in rolls or wall-mounted slots, points down. Utility knives stored with blades retracted. Broken blades disposed of in puncture-proof “sharps” container.
- Cords & Hoses: Retractable reels mounted overhead or on walls. Prevents tripping and cord damage. Label reels by tool type.
Why this works: Visual organization reduces search time and makes hazards visible. When everything has a designated home, anomalies stand out immediately.
Emergency prep integration: Mount an ABC-type fire extinguisher (5-lb minimum) near the main exit—not buried in a cabinet. Place it on a bracket at eye level with clear access. Check pressure gauge monthly; note inspection date on a log taped beside it. Keep a spill kit (absorbent pads, nitrile gloves, disposal bag) under the chemical cabinet. Post emergency contacts (local ER, poison control: 1-800-222-1222) beside the phone or main workstation.
Pro tip: Conduct a “5-minute reset” at the end of every session. Return tools, sweep major debris, wipe spills. This habit prevents hazard accumulation and starts each session with a clean baseline. Play a specific song during reset—it becomes an auditory cue for closure.
Layer 2 Cognitive Peak: A well-designed workshop doesn’t demand perfection from you—it makes the safe choice the effortless choice through intentional design.
Layer 3: The Tool Layer — Precision Protocols for Every Machine
Tools demand respect, not fear. This layer provides actionable, principle-based protocols for high-risk equipment, emphasizing why rules exist and how to adapt them to your context. Safety features aren’t obstacles—they’re engineered solutions to documented failure modes. Understanding the “why” builds intuitive compliance.
Universal Tool Safety Principles (Apply to Every Device)
Before using any tool—power or hand—perform this four-step ritual. Make it as automatic as buckling a seatbelt:
- Inspect: Check cords for damage. Verify guards are secure and undamaged. Examine blades/bits for cracks or excessive wear. Test switches. Never use a tool that fails inspection—tag it “OUT OF SERVICE” and repair immediately.
- Secure: Clamp or vise all workpieces. Never hold small items by hand near blades, bits, or moving parts. Use featherboards, hold-downs, or jigs for consistent pressure and hand placement.
- Clear: Remove wrenches, chuck keys, measuring tapes, or debris from the tool and work area before powering on. Do a 360-degree visual sweep. Ensure bystanders (including pets) are at a safe distance.
- Position: Stand to the side of blade paths (avoid kickback zones). Keep hands clear of moving parts using push sticks/blocks. Maintain balanced footing. Know your emergency stop location.
Why these matter: Incident analyses consistently show that compromised guards or skipped pre-use checks contribute significantly to injuries. These steps create a consistent ritual that builds muscle memory and interrupts autopilot behavior.
Teaching moment: When showing others your workshop, demonstrate this ritual explicitly. “Watch how I check the guard before starting—this is non-negotiable.” Modeling builds shared understanding.
Table Saw Safety: Engineering Out Kickback and Contact
The table saw requires particular attention due to its combination of power and common use. Mastery involves understanding physics: kickback occurs when the kerf closes and pinches the blade. Your protocols should prevent kerf closure and maintain hand separation.
- Riving Knife Consideration: This thin metal plate mounted directly behind the blade moves with the blade and stays close to the kerf. It helps prevent wood from pinching the blade. Consult your saw’s manual—many modern saws include this feature. If your saw lacks one and you frequently make narrow cuts, consider using a bandsaw for those operations or exploring aftermarket solutions. ANSI standards emphasize the importance of this feature on new equipment.
- Push Sticks and Push Blocks: Use a push stick for cuts narrower than 6 inches. For ripping, use a push block with a heel hook that engages the back edge of the board, keeping hands behind the blade line.
DIY Option: Cut an “L”-shaped push block from ¾” scrap plywood. Sand edges smooth. The vertical leg pushes down; the horizontal hook pulls the board forward. Store it magnetically on the saw fence. - Zero-Clearance Insert: Replace the stock throat plate with a custom insert cut from ¼” plywood or phenolic. With the blade raised slightly, lower it through the insert to create a perfect opening. This supports the workpiece on all sides, reducing tear-out and preventing small offcuts from falling into the blade.
- Anti-Kickback Devices: Install compatible anti-kickback pawls on the splitter/riving knife if your saw supports them. These spring-loaded teeth can help stop kickback momentum. Verify manufacturer compatibility.
- Fence Alignment: Ensure the fence is parallel to the blade. Misalignment increases pinch risk. Use a reliable method (dial indicator or consistent measurement technique) to verify alignment periodically.
Real-world scenario: A woodworker was cutting a narrow strip without a push stick. His hand slipped forward as the board bound. The blade contacted his knuckle. With a push stick, the same slip would have only damaged the stick. He now keeps multiple push sticks magnetically mounted on his fence—always within reach.
Myth Busting: “I’m experienced—I don’t need the guard.” Evidence suggests otherwise. Incident reviews indicate that complacency, not inexperience, often underlies severe incidents. Respect the tool’s capabilities, not your past success. Safety features exist for documented reasons.
Router Safety: Taming High-Speed Rotation
Routers spin at high speeds. Safety hinges on secure mounting and controlled feed.
- Bit Installation Protocol: Insert shank fully into the collet, then retract slightly before tightening per manufacturer guidance. Use two wrenches—one on the collet nut, one on the spindle lock—to achieve proper torque. Never overtighten.
- Depth Adjustments: Always unplug before changing bits or adjusting depth. If using a router table with a lift, verify the lift mechanism is locked before reaching under the table. Develop an “unplug habit” for all stationary tool adjustments.
- Feed Direction: Move the router against the bit’s rotation (conventional cutting). For handheld edge routing, push the router left-to-right along the workpiece edge. Climb cutting (with rotation) requires advanced skill and extreme caution.
- Collet Maintenance: Clean collet and bit shank periodically with isopropyl alcohol and a soft brush. Remove resin buildup. Replace collets showing wear.
- Base Plate Check: Ensure the router base plate is clean and flat. Warping causes uneven cuts and vibration. For plunge routers, verify the plunge mechanism operates smoothly.
Critical nuance: Plunge routers require two-handed operation until the base is fully seated on the workpiece—one hand on the handle, one controlling the plunge lever. Never plunge with one hand while holding the workpiece with the other.
Safety upgrade: If your router lacks variable speed, consider a speed controller compatible with your model. Match RPM to bit diameter and material (slower for large bits/hardwoods). Excessive speed causes burning; too slow causes grabbing.
Angle Grinder Safety: Managing Extreme Energy
Angle grinders generate intense heat, sparks, and rotational force. Disc integrity and body positioning are paramount.
- Disc Inspection Ritual: Before every use, inspect the disc for cracks, chips, or warping. Perform the “ring test”: gently tap the disc with a non-metal object. A clear ring indicates integrity; a dull thud means discard immediately. Check for expiration dates—abrasive discs degrade over time.
- Guard Positioning: Always position the guard between you and the disc. Adjust so sparks fly away from your body and flammable materials. Never operate without the guard installed correctly.
- Work Rest (for bench grinders): Set the tool rest close to the wheel face. Prevents workpieces from jamming between wheel and rest—a common cause of wheel issues.
- PPE Minimum: Face shield worn over safety glasses, heavy leather gloves, flame-resistant clothing (avoid synthetics that melt), and hearing protection. Secure long hair and avoid loose sleeves.
- Operation Protocol: Allow the grinder to reach full speed before contact. Apply light, even pressure. Never force the disc. If the disc binds, release pressure immediately. After use, let the disc spin down completely before setting down.
Emergency protocol: If the disc shatters, maintain grip and let the grinder spin down in a safe direction (away from body and others). Dropping it can cause secondary injuries. Practice this mentally.
Advanced tip: For metal grinding, Type 27 depressed-center discs may run cooler and reduce kickback risk compared to Type 1 flat discs. Always use discs rated for your grinder’s RPM (marked on disc and tool).
Drill Press Safety: Stability and Precision
The drill press seems simple but requires consistent attention to stability.
- Chuck Key Discipline: Make this a sacred ritual: chuck key goes directly into your pocket before powering on. Many workshops drill a small hole in the key and attach it via lanyard to the press column—so it cannot be left inserted.
- Speed Selection: Hardwoods and metals generally require slower speeds; softwoods and plastics tolerate higher RPM. Consult the speed chart taped to your press. Too fast = burning; too slow = poor cut quality.
- Clamping Protocol: Use a drill press vise or clamp for all drilling. Hand-holding invites slips, especially as the bit breaks through. For round stock, use V-blocks. Place a sacrificial backing board under workpieces.
- Depth Stop Usage: Set the depth stop for consistent hole depth and to prevent over-penetration. Critical for repetitive tasks to avoid fatigue-induced errors.
- Clearance Check: Ensure no obstructions (clamps, vises) are in the drill bit’s path before starting. Do a dry run with the machine off.
Pro tip: Place a small magnetic parts tray on the drill press table to hold bits, center punches, and measuring tools. Keeps essentials nearby without cluttering the work area.
PPE Selection Guide: Right Gear for the Right Task
PPE is your last line of defense—but only if chosen, fitted, and used correctly. Ill-fitting or inappropriate PPE creates false confidence. This guide moves beyond “wear safety glasses” to precise, task-based selection.
Table: Comprehensive PPE Selection by Task and Hazard
| Task Category | Primary Hazards | Eye/Face Protection | Hearing Protection | Respiratory Protection | Hand Protection | Body Protection | Critical Notes |
|—————|—————–|———————|———————|————————-|—————–|—————–|—————-|
| Wood Cutting (Sawing, Routing) | Flying chips, dust, kickback | Safety glasses with side shields (ANSI Z87.1+) | Ear muffs (NRR 25+) or electronic muffs | N95 mask (light dust); P100 respirator (heavy dust/sanding) | Cut-resistant gloves (handling rough lumber ONLY; remove near blades) | Shop apron, non-slip shoes | Never wear gloves near rotating blades—risk of entanglement |
| Sanding (Orbital, Belt) | Fine dust, vibration | Sealed safety goggles (prevents dust ingress) | Ear plugs under muffs (NRR 30+) | P100 respirator cartridge (replace when breathing resistance increases) | Nitrile gloves (if using chemical sanding aids) | Long sleeves, dust mask integrated into respirator | Goggles must seal—regular glasses allow dust entry |
| Metal Grinding/Cutting | Sparks, UV radiation, metal fragments, fumes | Face shield over safety glasses (ANSI Z87.1+) | Ear muffs (NRR 28+) | P100 + organic vapor cartridge (for coated metals) | Heavy leather gloves (gauntlet style) | Flame-resistant clothing (cotton, wool; no synthetics) | Face shield protects from UV “arc eye” and fragments |
| Chemical Application (Stains, Paints) | Solvent vapors, splashes, skin absorption | Chemical splash goggles (sealed) | Not typically needed | Organic vapor respirator with P100 pre-filter | Nitrile gloves (check chemical compatibility) | Chemical-resistant apron, long sleeves | Verify cartridge type matches chemical |
| Welding (if applicable) | Intense UV/IR radiation, sparks, fumes | Auto-darkening welding helmet (shade 10+) | Ear muffs | P100 respirator with welding fume cartridge | Welding gloves (gauntlet) | Leather welding jacket, spats | Helmet must auto-darken before striking arc |
| General Workshop Tasks | Trips, bumps, minor cuts | Safety glasses | Optional (if ambient noise <85 dB) | None | Light mechanics gloves (for handling materials) | Closed-toe shoes, fitted clothing | Remove jewelry, secure long hair |
Critical Details Explained:
– Safety Glasses vs. Goggles: Glasses protect from front/side impacts but leave gaps. Goggles create a sealed barrier against dust, chemicals, and fine particles. Use goggles for sanding, chemical work, or any task generating aerosols. Look for “indirect vent” goggles to prevent direct splash entry while allowing airflow to reduce fogging.
– Hearing Protection Fit: Ear muffs must form a complete seal around the ear. If you wear prescription glasses, choose muffs with deep, soft ear cups. Test fit: with protection on, hum—you should hear mostly internal sound. For extended wear, electronic muffs amplify speech below hazardous levels but compress loud noises—improving situational awareness.
– Respirator Fit and Maintenance: Half-mask respirators require a clean-shaven face on the seal area. Follow manufacturer fit-test guidance. Cartridges have limited service life—mark installation date. For wood dust, replace P100 filters when visibly dirty or per usage guidelines. Store respirators in a sealed bag when not in use.
– Glove Selection Nuance: Material matters. Nitrile resists oils; leather protects against abrasion and heat; cut-resistant fibers guard against blades. Critical rule: Never wear gloves near rotating tools (drill press, lathe, table saw)—entanglement risk outweighs cut protection. Gloves are for material handling before and after machining.
Common mistake: Using a single pair of “shop glasses” for all tasks. Scratched lenses reduce visibility. Keep multiple pairs: one for dusty tasks, one for chemical work, one spare. Replace immediately if scratched or damaged.
Layer 3 Cognitive Peak: Tools don’t cause accidents—unsafe interactions do. Master the interaction through ritual, respect, and precise protocol, and you master the tool.
Critical Risk Deep Dives: Addressing High-Stakes Scenarios
Dust Awareness: Health and Fire Considerations
Fine wood dust requires thoughtful management for both health and fire safety. Prevention involves multiple approaches:
- Housekeeping Discipline: Vacuum floors, walls, and overhead surfaces regularly using a HEPA-filtered vacuum. Avoid using compressed air to “blow off” surfaces—it aerosolizes dust. Sweep only after vacuuming to capture settled particles.
- Dust Collector Safety: Bond and ground metal components of your dust collection system where applicable. Static sparks inside ducts can be an ignition source. Empty collection bins frequently—never let dust accumulate excessively.
- Ignition Source Awareness: Keep potential ignition sources (space heaters, open flames, unapproved electrical equipment) away from dust collection areas. Use lighting and motors rated for workshop environments per electrical codes.
- Seasonal Note: During dry winter months, static electricity risks increase. Ensure grounding connections are secure and consider humidifying your workshop slightly if conditions are extremely dry.
Real incident insight: Investigations into workshop dust-related incidents often reveal multiple contributing factors: ungrounded ducts, significant dust accumulation, and proximity to ignition sources. Daily vacuuming, proper grounding, and mindful placement of equipment support prevention. Many workshops post a simple “Dust Safety Checklist” beside the collector as a visual reminder.
Chemical Safety: From Label Literacy to Spill Response
Chemicals—finishes, solvents, adhesives, cleaners—demand informed handling. Safety begins with understanding labels and ends with preparedness.
- Label Literacy (GHS Compliance): Every container should display:
- Product identifier and supplier info
- Hazard pictograms (flame = flammable; skull = toxic; corrosion = acid/base)
- Signal word (“Danger” or “Warning”)
- Hazard and precautionary statements
-
First aid measures
Action: Review labels on all chemicals in your workshop. If any lack required elements, contact the supplier or replace the product. -
Storage Protocols:
- Flammables stored in UL-approved safety cabinet, away from heat sources and direct sun. Cabinet should be grounded.
- Acids and bases stored separately to prevent reactions if mixed.
- Original containers only—never repurpose food/drink bottles. Secondary containers must be labeled clearly.
-
Ventilated storage: Cabinet should have passive vents or be placed in a well-ventilated area.
-
Spill Response Kit Essentials:
- Absorbent pads/socks
- Nitrile gloves
- Plastic scoop and scraper
- Sealable disposal bag
- Neutralizing agent (e.g., baking soda for acid spills)
-
Spill response guide (laminated)
Placement: Keep kit within reach of chemical storage and usage areas. Ensure all household members know its location and basic use: contain, absorb, dispose properly. -
Disposal Responsibility: Never pour chemicals down drains. Contact your municipal household hazardous waste program for drop-off locations. Keep original containers for identification during disposal.
Electrical Safety: Engineering Reliability
Workshop electrical systems face unique demands: high-wattage tools, frequent cord movement, dust exposure. Safety requires proactive design.
- Circuit Load Awareness: Understand the wattage demands of your tools. Overloading circuits can cause overheating. Map your circuits: label the breaker panel with which outlets power which tools. When adding major tools, consult a qualified electrician about circuit capacity.
- GFCI and AFCI Protection: GFCI outlets are required near water sources per electrical codes. Test monthly. AFCI protection helps prevent fires from damaged cords or loose connections. Recommended for workshop circuits. Upgrade older panels with a licensed electrician.
- Cord Selection and Management:
- Use only heavy-duty, oil-resistant extension cords rated for workshop use. Gauge matters: thicker cords (lower gauge number) for longer runs or high-wattage tools.
- Never run cords under rugs, through doorways, or where they can be pinched. Use overhead retractable reels, floor cord covers, or wall-mounted channels.
- Inspect cords before each use: fraying, exposed wires, cracked insulation = immediate retirement.
- Tool Electrical Safety: Ensure tools have intact grounding (three-prong plugs). Never remove the ground pin. For double-insulated tools (marked with square-within-square symbol), two-prong plugs are acceptable.
Pro tip: Install additional wall outlets at strategic locations to minimize extension cord use. Hire an electrician to add circuits if your workshop consistently trips breakers. This is risk mitigation, not just convenience. Humidity note: During damp seasons or in humid climates, electrical risks may increase—ensure connections stay dry and inspect cords more frequently.
Emergency Preparedness: Hope for the Best, Plan for the Worst
Preparation transforms panic into purposeful action during crises. Your emergency system has three components: equipment, knowledge, and practice.
- First Aid Kit Specifications (Beyond the Basic Box):
- Tourniquet (practice application)
- Hemostatic gauze for severe bleeding
- Burn gel packets and non-adherent burn dressings
- Sterile eye wash solution (16 oz minimum) and eyecup
- Triangular bandages, roller gauze, adhesive tape
- CPR face shield
- Emergency blanket, instant cold packs
-
Critical: Check expiration dates quarterly. Restock after any use. Mount kit in a visible, accessible location. Consider a secondary kit near the main exit.
-
Emergency Contact Protocol:
- Post clearly near phone/main workstation:
- Local emergency number
- Nearest hospital ER address and phone
- Poison Control: 1-800-222-1222
- Trusted neighbor/family member contact
-
Program ICE (In Case of Emergency) contacts in your phone. Enable Medical ID on smartphone lock screen.
-
Evacuation and Communication Plan:
- Mark two clear exit paths on your floor plan. Keep exits unobstructed.
- Designate a family meeting point outside.
-
For workshops shared with others, establish a communication signal (e.g., three sharp knocks = emergency stop all tools).
-
Monthly Emergency Drill: Simulate one scenario:
- Scenario: “Table saw incident caused hand injury.”
- Step 1: Power off tool immediately.
- Step 2: Apply direct, firm pressure to wound with clean cloth.
- Step 3: Elevate injured limb if possible.
- Step 4: Call for help; send someone to meet EMS.
- Step 5: Do not remove embedded objects; do not apply tourniquet unless bleeding is life-threatening and uncontrollable.
- Debrief: What went well? What needs improvement?
Psychological note: Drills reduce panic. The brain under stress reverts to trained responses. Make the correct action the practiced action.
When Safety Feels Like a Hassle: Overcoming Real-World Friction
Safety systems fail when they feel burdensome. Address friction head-on with empathy and practical solutions.
“I Don’t Have Time for All This”
Reframe with perspective: A single moderate injury can lead to significant lost time, medical costs, and recovery. The “60-second safety huddle” prevents hours of disruption. Safety isn’t time consumed—it’s time protected.
Actionable path: Start microscopically. Tomorrow, implement only the pre-work huddle. Next week, add the 5-minute end-of-session reset. In 30 days, these feel automatic. Track near-misses in a small notebook—”Today, my push stick slipped but didn’t contact the blade.” Review monthly. Seeing prevented incidents builds motivation.
“My Workshop is Too Small”
Adaptation strategies for tight spaces:
– Vertical Storage: Wall-mounted pegboard, slatwall, or magnetic strips free floor space. Store frequently used tools at waist-to-eye level; heavy items low.
– Mobile Bases: Mount tools on mobile bases with locking casters. Roll into position for use, tuck against wall when not. Creates flexible zone definition.
– Fold-Down Solutions: Wall-mounted fold-down workbench for assembly tasks. Retractable cord reels overhead. Collapsible sawhorses stored vertically.
– Zone Definition Without Space: Use colored floor tape to mark “virtual zones.” Even in a small room, tape a defined area for cutting. The visual cue triggers behavioral shifts. Store finishing supplies in a lidded plastic tub labeled “Finishing Zone”—only bring out during use.
Real example: A maker with a 12×12 shed uses fold-down benches on three walls, stores sheet goods vertically, and marks zones with colored tape. Her pre-work huddle includes verifying zone integrity. “It feels spacious because everything has a purposeful place,” she notes.
“Safety Gear is Uncomfortable”
Solve with modern solutions:
– Safety Glasses: Look for models with anti-fog coating, ventilation slots, and rubberized nose pads. Brands like Uvex, Pyramex, and 3M offer lightweight, wraparound styles. Try on multiple pairs—comfort is personal. Keep a microfiber cloth attached for quick cleaning.
– Hearing Protection: Electronic earmuffs amplify speech and ambient sounds below hazardous levels but compress loud noises. Lets you hear radio or conversations while protecting ears. For extended wear, choose low-clamp-force models. Foam earplugs with cord are a lightweight alternative—learn proper insertion technique.
– Respirators: Choose models with exhalation valves to reduce heat/moisture buildup. Silicone facepieces conform better. For hot environments, consider a powered air-purifying respirator (PAPR) system—higher initial cost but superior comfort for long sessions. Always perform a user seal check before each use.
Budget path: Prioritize one upgrade per month. Month 1: New safety glasses. Month 2: Electronic earmuffs. Month 3: Quality respirator. Your body will thank you with reduced fatigue.
“I’ve Never Had an Accident—Why Change?”
Perspective shift: Past luck is not a strategy. Near-misses are valuable data points, not blessings. Track them objectively: “Today, my hand slipped near the drill press chuck but the machine was off.” Analyze why it happened (rushed setup? oily hands?) and adjust the system. Complacency is a documented precursor to incidents. Experienced professionals maintain rigorous protocols precisely because they understand how quickly circumstances change. Safety isn’t for the accident you’ve had—it’s for the one you haven’t had yet.
Your Questions, Answered
Q: Do I really need a riving knife on my table saw if I use a splitter?
A: A riving knife is generally considered more effective than a traditional splitter for kickback prevention because it mounts directly to the saw arbor, moves with the blade, and stays consistently close to the kerf—providing protection during non-through cuts where splitters are often removed. ANSI standards strongly recommend riving knives on new saws. If your saw lacks one, consider an aftermarket upgrade or use a bandsaw for narrow cuts. Never remove the riving knife for routine cuts; it’s engineered to stay in place. Consult your saw’s manual for specific guidance.
Q: Can I use a shop vacuum instead of a dust collector for woodworking?
A: For occasional light sanding or small projects, a HEPA-filtered shop vacuum with anti-static hose is acceptable. However, for regular woodworking, it’s often insufficient. Shop vacuums typically lack the airflow to capture fine dust effectively at the source and may recirculate particles. A dedicated dust collector with a cyclone separator protects your vacuum motor, maintains suction, and captures the majority of chips. If budget-limited, prioritize a HEPA vacuum for sanding tasks and wear a P100 respirator during cutting operations. Remember: ventilation (Layer 2) reduces reliance on respirators (Layer 3).
Q: How often should I replace my respirator cartridges?
A: Replacement depends on usage duration, contaminant concentration, humidity, and cartridge type. Key indicators: increased breathing resistance, smell or taste of contaminants (for organic vapors), or visible dirt on P100 filters. Manufacturer guidelines typically suggest replacing P100 filters after moderate use in wood dust environments. For organic vapor cartridges, replace when you detect odor breakthrough. Pro tip: Mark the installation date on the cartridge. Keep a log. When in doubt, replace—it’s a prudent investment in health.
Q: Is it safe to wear prescription glasses under safety goggles?
A: Only if the goggles are specifically designed as “OTG” (Over-The-Glasses) models with deep, contoured seals that accommodate frames without compromising the seal. Standard goggles will not seal properly over glasses. Better solutions: get prescription safety glasses, or use safety glasses with clip-on prescription inserts. For chemical splash protection, OTG goggles are the minimum standard—never compromise seal integrity.
Q: What’s the single most common mistake beginners make with power tools?
A: Forcing the tool. Pushing wood too aggressively through a table saw, pressing a drill too hard, or rushing a cut causes loss of control, kickback, tool damage, and injury. Power tools are engineered to work at specific feed rates. Let the tool do the work: maintain steady, moderate pressure. If the tool bogs down, slows significantly, or burns the material, reduce feed rate, adjust depth of cut, or check for dull blades. Patience isn’t slowness—it’s precision. This principle applies universally.
Q: How do I effectively childproof my workshop if it’s accessible from the house?
A: Implement multiple, redundant barriers—never rely on a single method. 1) Install a keyed lock or digital keypad lock on the workshop door. 2) Unplug all tools after use and store cords out of reach. 3) Use safety covers on all electrical outlets. 4) Store chemicals, sharp tools, and power tools in locked cabinets. 5) Install motion-activated LED lights near the door to deter curious exploration. 6) Teach children early: “This is a tool space, not a play space. We enter only with an adult.” Post a friendly but clear sign on the door. Safety is about layers, not lectures.
Q: Are laser guides on tools safe for eyes?
A: Most consumer tool lasers (e.g., on miter saws, levels) are Class 2 (<1mW output) and considered low-risk for accidental, brief exposure. However, never stare directly into the beam. For extended alignment tasks, consider laser safety glasses rated for the specific wavelength. Check the tool’s label for laser class. If the laser is damaged or misaligned, disable it until repaired. Remember: the greater risk with lasers is distraction—ensure the beam doesn’t cause you to overlook physical hazards like blade position.
Q: What should I do immediately if I get wood dust or a particle in my eye?
A: Do NOT rub your eye—this can scratch the cornea. Immediately flush with clean, lukewarm water or sterile saline solution for several minutes, holding eyelids open. Use an eyewash station if available. Tilt head so water flows from nose to ear (prevents contaminating the other eye). After flushing, if irritation, redness, or vision changes persist, seek medical attention promptly. Prevention is critical: always wear sealed safety goggles during sanding, routing, or any task generating fine particles. Keep an eyewash bottle mounted at every dusty workstation.
Q: Can I use heavy-duty extension cords permanently in my workshop?
A: Electrical codes generally state that extension cords are for temporary use. Permanent wiring requires proper installation by a qualified electrician. For tool mobility, install additional wall outlets at strategic locations, or use overhead retractable power reels designed for workshop use. Frayed or damaged extension cords are a fire risk. If you see cords running across floors daily, it’s a sign your permanent wiring may need upgrading—treat it as a priority safety project.
Q: How do I know if my fire extinguisher is still functional and ready?
A: Perform a monthly visual inspection: 1) Check the pressure gauge—the needle must be in the green zone. 2) Verify the safety pin and tamper seal are intact. 3) Inspect for physical damage, corrosion, or blocked nozzles. 4) Ensure it’s mounted securely and accessible. Note the manufacture date; most ABC extinguishers require professional servicing periodically. Replace units over 10–12 years old, even if they appear functional. Keep the instruction label clean and legible. When in doubt, have it serviced or replaced—fire safety is non-negotiable.
Q: Is it ever acceptable to bypass a tool’s safety guard?
A: Almost never. Safety guards are engineered solutions to documented failure modes. Bypassing them removes a critical layer of defense. Rare exceptions require engineered alternatives: using a zero-clearance insert and featherboards on a table saw instead of removing the blade guard for a non-through cut; using a jig that fully encloses the bit on a router table. If a guard genuinely prevents a necessary operation (verify with the manual first), consult the manufacturer for approved alternatives or use a different tool/method. Never bypass a guard out of convenience. Document any temporary modification and restore the guard immediately after the task. Safety is about systems, not shortcuts.
Q: How can I encourage family members or workshop guests to follow safety protocols?
A: Lead with education, not enforcement. When someone enters, calmly state: “In this space, we all wear safety glasses—here’s a clean pair for you.” Keep guest PPE readily available in multiple sizes. Explain the “why” briefly: “The glasses protect from invisible dust particles.” For children, make it engaging: “These are your maker goggles—put them on to join the creation zone!” Post simple, visual reminders near entrances. If resistance occurs, frame it as shared responsibility: “I care about your safety as much as mine.” Consistency and calm modeling build culture faster than rules.
Conclusion and Your 24-Hour Safety Launch Plan
Workshop safety isn’t a destination you reach—it’s a daily practice of mindful creation. By implementing the Three-Layer Framework, you shift from reacting to hazards to designing them out of existence. You move beyond fear to confident competence, where safety fuels creativity rather than restricting it. Every intentional habit, every organized shelf, every verified guard transforms your space into a sanctuary where focus thrives and anxiety fades. This is the legacy of care you build—not just for yourself, but for everyone who enters your workshop.
Recap: Your Three Non-Negotiable Foundations
- Human Layer: Begin every session with a 60-second safety huddle—assess readiness, identify top risk, verify PPE.
- Environmental Layer: Define zones with visual markers and eliminate shadow traps with dedicated task lighting at your primary workstation.
- Tool Layer: Never bypass guards; use push sticks for table saw cuts under 6 inches; inspect every tool before use.
These three actions, practiced consistently, create compounding safety dividends. They are the keystone habits upon which all other protocols rest.
The 24-Hour Rule: One Tiny Action to Start Today
Within the next 24 hours, complete this single, specific task: Mount a bright, adjustable LED work light above your most-used tool. This takes less than 15 minutes but immediately addresses one of the most pervasive yet overlooked risk factors—poor visibility. Use a clamp-on light if permanent mounting isn’t feasible today. Position it to eliminate shadows across your cutting line or work surface. Test it: place your hand where you typically work—does the shadow fall away from your path? This small win builds tangible momentum. It proves that safety enhancements are achievable, immediate, and empowering. Tomorrow, you’ll be more likely to tackle the next step.
The Big Picture: Safety as Creative Freedom
When safety becomes woven into the fabric of your workshop practice, something profound shifts. The mental energy once spent on anxiety—Did I unplug that? Is my hand too close?—frees up for creativity, precision, and joy. You’ll find yourself experimenting with more complex joinery, teaching a child to sand safely, or losing yourself in the rhythmic flow of creation without the shadow of fear. Your workshop transforms from a place of potential danger into a sanctuary of focused making—a legacy of care you build with every safe cut, every organized shelf, every conscious breath. This is not restriction; it is liberation. Protect your hands, your eyes, your breath—not just for today’s project, but for the thousands of creations still waiting in your future.
Explore Our Complete Workshop System:
Building a Dust Collection System That Actually Works | The Ultimate Workshop Layout Guide for Small Spaces | Tool Maintenance Calendar: Keep Every Machine Running Smoothly | Chemical Storage Solutions for Home Workshops | First Aid Kit Checklist: Beyond the Basics | Ergonomic Workbench Height Calculator | Emergency Drill Scenarios for Makers