Stop Guessing and Start Understanding: A Systematic Framework to Identify, Locate, and Address Plumbing Issues Safely and Thoughtfully
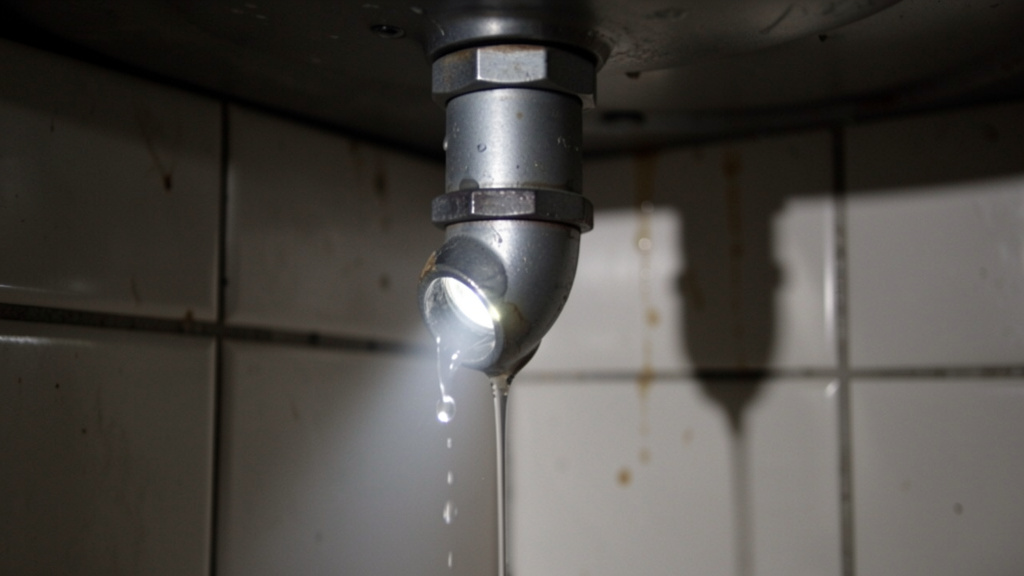
Water dripping rhythmically into a bucket. A sink refusing to drain after dinner prep. That unsettling gurgle from your basement floor drain. Plumbing problems often announce themselves subtly before escalating—and learning to recognize early signals can help prevent further complications. This guide offers a structured diagnostic approach adapted from established plumbing principles, designed to build your foundational understanding of why issues occur, how to methodically locate their source with minimal disruption, and when professional support is the wisest path forward. Whether you’re observing a mysterious ceiling stain or a persistent drain slowdown, this framework supports calm, informed responses—not reactive fixes.
Introduction: Why Diagnosis Precedes Action
Plumbing systems function as interconnected networks within your home. A symptom appearing in one location—a slow-draining bathtub, for instance—may originate from a different zone entirely, such as a partial blockage in a shared drain line or a vent obstruction. Addressing only the visible symptom without exploring underlying causes often leads to temporary relief at best, and unintended complications at worst. Experience across residential maintenance contexts shows that many significant water-related incidents stem not from the initial anomaly itself, but from misinterpretation of symptoms or premature intervention. This guide draws upon widely accepted diagnostic protocols reflecting standards referenced by organizations like the International Association of Plumbing and Mechanical Officials (IAPMO), emphasizing safety as the essential foundation of every step. Before handling tools, establish situational awareness: locate your main water shutoff valve and confirm you can operate it confidently; distinguish between supply-side concerns (pressurized water escaping) and drain-side behaviors (wastewater flow issues); and recognize clear indicators that warrant immediate professional engagement. Shifting your perspective—from “What’s broken?” to “What is the system communicating?”—becomes your most valuable diagnostic asset.
The Diagnostic Tree Framework: Your Roadmap to Clarity
Imagine a detective arriving at a scene. They observe, gather evidence, eliminate possibilities, and follow logical pathways. Plumbing diagnosis benefits from identical rigor. The Diagnostic Tree Framework replaces uncertainty with a calm, sequential process. It transforms complexity into manageable decision points. This isn’t about memorizing every failure mode; it’s about cultivating a repeatable thought process applicable to any plumbing observation. The framework progresses through five sequential branches. Skipping steps risks misdirection. Rushing invites oversight. Mastery emerges through disciplined progression. Visualize this as a mental flowchart: each observation guides the next precise inquiry. This approach has proven effective across diverse residential contexts—whether your home features older pipe materials or modern installations. Material differences influence tool selection and repair methods, but never the core diagnostic logic. Let’s move through the tree, branch by branch.
Step 1: Symptom Identification and Initial Assessment – Becoming a Plumbing Observer
Diagnosis begins with deliberate, sensory observation. Most overlooked clues stem from focusing solely on the most obvious symptom (water on the floor) while missing contextual evidence (pattern, timing, associated sounds). This step is about gathering neutral, factual data. Keep a simple log—digital or paper—and move through these sub-steps methodically.
Document the Primary Symptom with Precision:
Avoid vague terms like “leaky faucet” or “slow drain.” Capture specifics:
* For Leaks: Is it a steady drip, intermittent spray, constant seepage, or sudden flow? Note the water’s appearance: clear, discolored, or containing particles? Temperature offers clues—hot water leakage typically relates to supply lines or water heater components; cold water points elsewhere. Photograph the area with a timestamp. Place a dry paper towel beneath the drip for 60 seconds; the saturation pattern reveals flow characteristics invisible to casual observation.
* For Clogs: Define “slow.” Does water take seconds or minutes to drain from a full basin? Does it drain fully overnight but struggle during use? Note gurgling sounds (and which drains produce them when water runs elsewhere). Does flushing one toilet affect another fixture? Document recent activities: cooking involving grease, disposal of non-flushable items, or use of chemical cleaners. These details serve as contextual evidence.
Map the Symptom’s Behavior Over Time:
Plumbing behaviors often follow patterns. Maintain a brief log:
* Time of Day: Does the issue worsen when specific appliances run? Does it appear consistently during certain hours?
* Trigger Events: Did symptoms begin after installing a new fixture, heavy rainfall, or seasonal temperature shifts?
* Progression: Was the drip barely noticeable last week and now more pronounced? Did drainage slow gradually or change suddenly? Gradual changes often suggest buildup (mineral scale, grease, organic matter); abrupt changes may indicate mechanical shifts (loose connection, displaced debris).
Conduct the Whole-House Water Audit (Critical for Hidden Concerns):
Suspect unseen water movement? This straightforward test provides clarity. First, ensure all water sources are inactive: no running taps, dishwashers, washing machines, ice makers, or humidifiers. Locate your water meter (typically in the basement, crawlspace, or near the street). Note the exact reading, especially the small sweep hand or digital display. Wait at least two hours without using any water. Recheck the meter. If the reading changed, water is moving somewhere in the system. For toilets: place a few drops of food coloring in the tank (not the bowl). Wait 30 minutes without flushing. If color appears in the bowl, the flapper valve may not be sealing fully—a common source of unnoticed water movement. This audit transforms suspicion into documented observation, guiding your next steps with greater confidence.
Common Pitfall to Avoid: Assuming the symptom location equals the failure origin. A damp spot on a basement ceiling below a bathroom sink rarely stems from the sink itself. Trace logically: is moisture centered under the sink’s drain pipe (suggesting a P-trap connection), or offset toward the wall (indicating a supply line within the wall)? Water follows gravity and the path of least resistance—it may travel horizontally inside a wall cavity before emerging feet from the source. Misinterpreting the emergence point as the origin is a frequent diagnostic challenge.
Step 2: Isolating the Problem Zone – Narrowing the Search Field
With documented observations, shift from broad awareness to targeted isolation. Plumbing systems divide logically into zones. Your goal: determine which zone holds the relevant behavior. This prevents unnecessary exploration. Think of it as a structured “Hotter/Colder” process.
The Supply Line vs. Drain Line Triage:
This initial distinction is essential. Ask: “Is pressurized water escaping (potential leak), or is wastewater flowing abnormally (potential blockage or vent issue)?”
Supply-Side Indicators: Water appears without fixture use (dripping faucet handle, damp floor near water heater), stains originate above fixtures, hissing sounds near pipes under pressure, noticeable pressure changes at multiple fixtures, or meter movement during the audit without drain activity. Supply-side concerns often require prompt attention.
Drain-Side Indicators: Water backs up during or after fixture use, gurgling sounds from drains, slow drainage, sewer odors, or moisture appearing only when drains are active. A drain line concern (such as a cracked pipe) may show as persistent dampness, musty smells, or soft ground outside—but without active flow from fixtures.
Zone Isolation Technique: The Fixture Shutdown Test
This method systematically narrows possibilities. Access to individual fixture shutoff valves (common under sinks, behind toilets) is helpful.
1. Start Broad: If multiple fixtures behave unusually (e.g., kitchen sink and downstairs bathroom both drain slowly), the issue likely resides downstream in a shared branch or main line.
2. Isolate Upstream: Turn off the shutoff valve under the kitchen sink. Run the bathroom sink. If drainage normalizes, the kitchen behavior is isolated to its branch. If the bathroom still drains slowly, the concern lies further downstream.
3. Test System-Wide Flow: Flush all toilets. If every toilet bubbles or backs up when one is flushed, or if water rises in the lowest drain (like a floor drain) when upper-floor fixtures run, the main drain line warrants attention. This finding guides next steps thoughtfully.
4. For Suspected Hidden Movement: After confirming meter movement with all fixtures off, shut off the main water supply. Open the lowest faucet to release residual pressure. Close all faucets. Turn the main supply back on slowly. Listen carefully near the meter and where the main line enters the house. A consistent hissing sound here may indicate movement on the main supply line before branching. If silent, proceed to isolate sections sequentially if your system allows.
Visualizing Flow Paths: Sketch a Simple Diagram
Grab paper. Draw a rough floor plan. Mark every fixture (sink, toilet, shower, washing machine). Lightly sketch probable drain paths (generally sloping downward toward the main stack) and supply branches. When a symptom occurs, trace potential paths backward from the observation point. Example: Dampness on first-floor ceiling below second-floor bathroom. Possible paths:
Path A: Shower base seal issue → water travels down inside wall cavity → emerges on ceiling below.
Path B: Supply line connection leak inside wall near toilet → water travels down stud bay → emerges on ceiling.
* Path C: Drain line connection leak under vanity → water drips directly down → emerges on ceiling.
Your diagram helps formulate focused hypotheses for Step 3. Many find that even a simple sketch reduces diagnostic time significantly compared to unstructured searching.
Step 3: Selecting Appropriate Diagnostic Tools and Techniques – Matching Method to Observation
With a narrowed zone, select tools based on observed evidence—not just what’s available. Using a drain auger on a suspected supply line concern is ineffective; overlooking moisture detection for hidden dampness risks oversight. This step aligns tool capability with diagnostic need, prioritizing safety and appropriateness.
Essential Diagnostic Toolkit Overview:
| Tool Category | Primary Purpose | Best For | Critical Usage Notes | Accessible Alternative |
|---|---|---|---|---|
| Visual Inspection | Direct observation of accessible components | Faucet aerators, visible pipe joints, under-sink areas, toilet tanks | Use a bright LED flashlight at oblique angles to reveal moisture sheen or hairline irregularities. A small mirror aids visibility behind pipes. | Smartphone flashlight + compact mirror |
| Moisture Detection | Locating moisture within walls, floors, ceilings | Suspected concerns behind surfaces, under slabs, in crawlspaces | Pinless meters scan surfaces non-invasively; pin-type meters verify depth. Calibrate per instructions. Readings consistently above ambient levels warrant closer review. | Thermal camera app (less reliable; use only for initial screening) |
| Pressure Testing | Verifying supply line integrity, isolating zones | Confirmed meter movement with no visible source; verifying post-repair | Requires specialized equipment. Never exceed pipe pressure ratings. Test isolated sections only. | Professional assessment recommended |
| Drain Inspection | Visualizing blockages, pipe condition inside lines | Persistent slow drainage, suspected root intrusion or pipe damage | Flexible sewer camera with LED lights (20-50 ft range). Feed slowly; observe screen for obstructions or irregularities. Record video if possible. | Auger with short inspection camera attachment |
| Acoustic Detection | Pinpointing pressurized leaks inside walls, under slabs | Meter confirms movement, location unknown; slab concerns | Electronic listening device or ground microphone. Listen for consistent hissing near pipe paths. Best performed during quiet periods. | Stethoscope pressed against accessible pipe sections (limited use) |
| Smoke Testing | Finding leaks in drain-waste-vent (DWV) system | Sewer odors, suspected vent blockages, verifying trap seals | Introduces non-toxic smoke into drain system via cleanout. Smoke escapes at leak points. Requires main line access. | Professional service recommended |
| Dye Testing | Confirming toilet flapper seal, tracing flow paths | Silent toilet water movement, checking fixture connectivity | Food coloring in tank (toilet); fluorescent dye tablets in drain (observe downstream). | Food coloring (for toilets only) |
Tool Selection Scenarios in Practice:
Scenario A: “Damp spot on living room ceiling, no visible source above.”
* Zone: Likely second-floor bathroom drain or supply path.
* Approach: Begin with visual inspection under bathroom sinks/vanity. If dry, use a pinless moisture meter on the bathroom floor near the area above the stain. Elevated readings? Proceed cautiously—consider thermal imaging or minimal exploratory access. If readings are normal upstairs, evaluate roof or exterior sources.
Scenario B: “Kitchen sink drains slowly; plunger had limited effect.”
* Zone: Likely isolated to kitchen sink branch (confirmed via fixture shutdown test).
* Approach: First, remove and clean the P-trap (visual inspection). If slow drainage persists, use a hand-crank drain auger (15-ft). If resistance is met but not cleared, the obstruction may lie beyond the P-trap. A sewer camera inspection of the branch line provides clarity before further action.
Scenario C: “Water meter indicates movement, but no visible dampness.”
* Zone: Hidden concern—supply line within slab, wall, or before main shutoff.
* Approach: Acoustic detection is often the primary non-invasive tool. Start at the water meter, follow the main line path into the house. Listen at joints, valves, and entry points. A consistent sound pinpointed to one area warrants professional evaluation. Do not ignore this observation—unaddressed moisture movement can affect structural elements over time.*
Safety Considerations for Tool Use:
Electrical Awareness: Never operate powered tools near standing water or with wet hands. Use GFCI-protected outlets where available.
Chemical Drain Cleaners: Generally avoid for diagnosis. They rarely resolve significant blockages, can harden debris, damage pipes (especially older materials), and create hazardous fumes. They also leave residue that complicates visual inspection. If previously used, flush thoroughly with water before camera use.
Confined Spaces: Crawlspaces require respirators (for dust/mold), knee pads, and adequate lighting. Never enter flooded crawlspaces—electrocution risk from unseen wiring is significant.
Sewer Gas Awareness: If opening a cleanout or P-trap releases a strong rotten egg smell, step back. Sewer gas is hazardous. Ventilate the area thoroughly before proceeding. If odor is intense, close the opening and contact a professional.
Step 4: Executing Diagnosis Safely – A Protocol-Driven Approach
Diagnosis is a controlled process. Safety protocols reflect lessons from real-world scenarios. Follow this sequence for hands-on investigation:
-
Prepare the Area:
- Place absorbent towels around the work zone to contain minor spills.
- Lay a plastic drop cloth to protect flooring.
- Ensure bright, shadow-free lighting—critical details hide in darkness.
- Keep a multipurpose fire extinguisher nearby when working near water heaters or utility areas.
-
Personal Protective Equipment (PPE) is Essential:
- Cut-Resistant Gloves: Protect against sharp pipe edges or broken components.
- Safety Glasses: Mandatory when disassembling components (residual pressure exists even after shutoff) or using augers.
- Respirator (N95 minimum): Recommended for mold-prone areas, sewer access, or dusty crawlspaces.
- Knee Pads: Prevent discomfort during prolonged under-sink or crawlspace work.
-
Depressurize Before Disassembly:
- For supply lines: Shut off the fixture shutoff valve and the main water supply. Open the lowest faucet to drain residual water. Open the fixture being worked on to release trapped pressure.
- For drain lines: Place a bucket under the P-trap before loosening nuts. Have rags ready. Water remaining in the trap will spill out.
-
Methodical Disassembly and Documentation:
- Photograph connections before loosening anything. Note part orientation.
- Use appropriate tools: Channel-lock pliers with smooth jaws for nuts; avoid pipe wrenches on chrome fittings (they scratch).
- Place removed parts in order on a towel—reassembly is far easier.
- Inspect each component under bright light: worn washer? corroded seat? hair-clogged stopper? mineral buildup in aerator?
-
Controlled Verification Post-Inspection:
- After clearing a suspected obstruction in a P-trap, reassemble carefully. Turn water on slowly at the shutoff valve. Observe connections for 60 seconds before full pressure.
- For drain flow tests: Run water for 2-3 minutes. Observe drainage speed and listen for unusual sounds. Check under the sink for new moisture.
- Never test a reassembled supply connection at full pressure immediately. Start low, verify, then increase gradually.
Clear “Pause and Consult” Indicators – Knowing When to Step Back:
Diagnosis requires humility. Pause work and seek professional guidance if you encounter:
Gas Lines: Any suspicion of gas presence (distinct odor near water heater) – evacuate and contact the gas provider.
Electrical Proximity: Water near electrical panels, outlets, or appliance motors (dishwasher, disposal).
Visible Structural Impact: Significant moisture damage to floor joists, wall studs, or foundation observed during inspection.
Sewage Exposure: Raw sewage backup presents health hazards requiring specialized protocols.
Uncertainty with System Components: Inability to identify pipe material (lead, galvanized steel requiring specific handling) or locate shutoff points.
Personal Discomfort: Dizziness, headache, or strong odors in confined spaces. Your well-being is paramount.
Step 5: Interpreting Findings and Planning Thoughtfully – From Observation to Insight
You’ve gathered evidence, isolated the zone, applied tools, and observed outcomes. Now, synthesize. Diagnosis reaches completion when you can articulate: “The observed behavior relates to [specific component/condition] in [general location], likely influenced by [contributing factor], suggesting [appropriate next step].” Avoid vague conclusions like “the pipes are old.” Aim for precision.
Crafting a Clear Diagnostic Statement:
Combine findings into a cause-effect narrative:
Vague: “The sink is clogged.”
Clear: “A buildup of hair and soap residue appears lodged within the horizontal branch line downstream of the bathroom sink P-trap. This is suggested by the auger retrieving material at that depth, restored flow after clearing, and recurrence correlating with shower use.”
This specificity informs next steps: targeted cleaning efforts and preventive measures (drain strainer use). Addressing only the immediate blockage without considering contributing factors may lead to recurrence.
Root Cause Consideration: Look Beyond the Immediate
Ask “Why?” thoughtfully:
1. Observation: Kitchen sink drains slowly.
2. Why? Grease accumulation in the pipe.
3. Why? Grease was regularly introduced down the drain.
4. Why? No established grease disposal habit; no strainer used.
5. Why? Limited awareness of grease impact on drain lines.
Contributing Factor: Behavioral habit + lack of preventive tools.
Thoughtful Response: Install a sink strainer, establish a “cool grease in container, discard in trash” practice, consider periodic enzymatic drain maintenance. Fixing only the blockage addresses the symptom; addressing contributing factors supports longer-term function. Common contributing factors include:
Material Aging: Internal corrosion in older galvanized steel pipes (common in homes built pre-1980s) – may require section evaluation, not just clearing a blockage.
Installation Factors: Missing or blocked vent affecting drainage; shallow sewer line vulnerable to freezing.
Environmental Influences: Tree roots seeking moisture near clay sewer lines; soil movement stressing pipe joints.
Usage Patterns: Flushing non-flushable items; frequent chemical cleaner use affecting pipe integrity.
Thoughtful Pathway Consideration: Repair, Monitor, or Consult?
Not every observation demands immediate action. Use this framework for perspective:
| Observation | Suggested Pathway | Timing Consideration | Rationale |
|---|---|---|---|
| Minor drip from faucet cartridge | Address yourself if comfortable | Within days | Low complexity, prevents gradual water movement, simple parts replacement |
| Slow drain cleared by plunger/auger | Monitor; implement prevention | Ongoing | Likely temporary buildup; focus on habits and strainers |
| Confirmed toilet tank seal concern | Address yourself if comfortable | Within days | Prevents unnoticed water movement; inexpensive part, straightforward process |
| Moisture meter indicates hidden dampness behind wall | Consult licensed plumber | Promptly | Potential for progressive impact on structural elements or indoor air quality |
| Multiple fixtures affected (slow drainage, gurgling) | Consult professional drain service | Promptly | Likely involves main drain line; requires specialized equipment and expertise |
| Visible corrosion or moisture on water heater tank | Consult plumber; prepare for evaluation | Promptly | Indicates potential end-of-service life; safety consideration |
| Meter confirms movement, acoustic detection suggests slab area | Contact slab leak specialist | Promptly | Specialized repair approaches exist; early evaluation supports informed decisions |
| Minor drip from accessible supply line connection | Tighten gently; monitor closely | Monitor 24h | May be a loose fitting; overtightening risks damage to components |
Preparing for Professional Consultation:
If seeking professional support, your documented observations become valuable. Share:
Your symptom log (timing, triggers)
Photos/videos of the area and your inspection findings
Results of fixture shutdown tests or water meter audit
Any removed components (in a bag)
* Your diagnostic statement (“I observed X, which suggests Y…”)
This preparation helps professionals focus their expertise efficiently, demonstrates your engagement, and supports clear communication about the actual concern—not just surface symptoms. It positions you as an informed partner in the resolution process.
The Fundamental Principle: Plumbing diagnosis is not about finding a broken part; it is about understanding the story the water is telling. Every drip, gurgle, stain, and slowdown offers clues about pressure, flow, material, and time. Learning to read these clues thoughtfully empowers calm, informed responses.
Room-by-Room Observation Guide: From Visible Clues to Hidden Signals
While the Diagnostic Tree provides the overarching strategy, real-world application happens within specific home zones. Each area presents unique configurations, common observation points, and environmental factors. This section translates the framework into practical, room-specific guidance.
The Kitchen: High-Activity Zone
Kitchens experience frequent thermal changes, chemical exposure, and mechanical vibration. Concerns here often stem from connection points.
Faucet and Supply Line Observations:
Clue Nuance: A drip from the spout often relates to internal cartridge wear. Water pooling around the faucet base suggests failed mounting O-rings or loose supply connections underneath.
Diagnostic Approach: Shut off hot and cold shutoff valves under the sink. Disconnect supply lines from faucet tailpieces. Place ends in a bucket. Briefly turn shutoffs on. If water flows from the valve outlet, the shutoff valve itself may need attention (common in older homes). If dry, the concern lies within the faucet assembly. Check supply line nuts at valve and faucet—hand-tight plus one-quarter turn with pliers is typically sufficient; overtightening can damage compression fittings.
Often Overlooked: Dishwasher supply line (small braided hose connected to hot water shutoff). Vibration can loosen connections over time. Inspect both ends. Look for mineral deposits (white crust) indicating slow, evaporating moisture.
Helpful Practice: Wrap threaded connections with plumber’s tape (Teflon tape) clockwise (as viewed from pipe end) for 3-4 wraps before reassembly. This fills microscopic gaps without preventing proper tightening.
P-Trap and Drain Observations:
Clue Nuance: Water under the sink after disposal use? Don’t assume the disposal is the source. Fill the sink, plug it, then release. Watch P-trap joints. Water spraying from a slip nut indicates a loose connection. Slow seepage suggests a worn washer or cracked trap.
Diagnostic Approach: Place dry paper towels under all P-trap joints. Run water for 60 seconds. Lift towels—wet spots pinpoint the exact source. Check the dishwasher drain hose connection (clamped to disposal or air gap). A loose clamp causes leaks during cycles.
Material Note: PVC traps can crack with age or overtightening. Brass traps may corrode at threads. Replace cracked traps entirely; temporary repairs on drain components are unreliable.
Important Distinction: A homeowner replaced the P-trap assembly multiple times for a “persistent leak,” only to discover the source was a hairline crack in the sink basin itself, dripping onto the trap. Always verify the water origin isn’t the fixture.
Appliance Connection Observations (Dishwasher, Refrigerator):
Clue Nuance: Puddle appears only after dishwasher cycle. Water stains near fridge base.
Diagnostic Approach: For dishwasher: Disconnect power first. Carefully pull unit out. Inspect inlet hose at valve, drain hose at disposal/air gap, and pump housing. Run a short cycle while observing. For fridge: Trace the small supply line from wall valve to fridge inlet. Check the saddle valve (if present)—these are common failure points. Consider replacing saddle valves with a proper T-fitting and shutoff valve during future updates.
Preventive Step:* Install braided stainless steel supply lines (higher pressure rating) instead of rubber hoses. Proactively replace appliance hoses every few years—material fatigue is inevitable with age.
The Bathroom: Humidity and Hidden Clues
Bathrooms concentrate multiple water sources in a humid environment. Early detection is key due to proximity to wood framing and finishes.
Toilet Observations: The Silent Concern
Tank Seal Check (Internal): The dye test is reliable. Add food coloring to the tank. Wait 30 minutes without flushing. Color in the bowl suggests the flapper isn’t sealing fully. Jiggling the handle—if the leak pauses—may indicate chain tension or flapper alignment.
Tank Seal Check (External): Water pooling on the floor behind the toilet. Check tank bolts (where tank mounts to bowl). Tighten gently and evenly—overtightening can crack porcelain. Inspect the fill valve connection inside the tank.
Bowl Seal Check (Wax Ring): Water seeping from around the base, especially when flushed. This requires attention. A compromised seal allows moisture and gases into the subfloor. Confirm by drying the area thoroughly, then flushing while observing the base. Persistent seepage suggests the wax ring seal needs renewal. Do not ignore. This typically requires toilet removal and resealing—a task many attempt but often requires precision to avoid recurrence.
Illustrative Example: A household noticed a faint odor near the bathroom. No visible moisture. Assumed a vent issue. A professional discovered the wax ring seal had been compromised months prior; moisture had affected the subfloor. Early detection via the “dry base, flush, observe” test could have supported a simpler resolution.
Sink and Vanity Observations:
Clue Nuance: Damp cabinet floor under sink. Is it from the P-trap, supply lines, or condensation on cold water lines in humid conditions?
Diagnostic Approach: Dry the area thoroughly. Run only cold water for 2 minutes. Check for moisture. Dry again. Run only hot water for 2 minutes. Check. If moisture appears only with hot water, suspect the hot supply connection or faucet cartridge. If with both, suspect P-trap or drain. Wipe cold water lines with a dry cloth—if moisture reappears instantly, it’s likely condensation (foam pipe insulation helps). If moisture appears slowly at a joint, it’s a connection concern.
Hidden Factor: Pop-up drain stoppers accumulate hair and soap scum inside* the drain tailpiece, causing slow drainage and potential overflow past the stopper mechanism. Remove the pivot rod under the sink and extract the stopper for cleaning—a frequently overlooked source of “mystery” moisture under vanities.
Shower and Tub Observations: Beyond Surface Splash
Clue Nuance: Water on bathroom floor outside the tub after showering. Is it user splash, failed sealant, or a concern within the wall?
Diagnostic Approach: Tape a plastic sheet tightly over the entire shower/tub opening, sealing edges with painter’s tape. Run the shower for 10 minutes without entering. If water appears outside, the concern likely involves the showerhead, valve, or pipes within the wall. If dry, the issue is likely failed sealant or grout at the threshold.
Critical Check: If accessible from below (crawlspace), inspect the shower pan area. Look for standing water, rust, or soft spots in the subfloor. A compromised shower pan liner requires professional evaluation but can lead to significant damage if unaddressed.
Material Insight: Acrylic/fiberglass tubs flex; this stresses sealant lines over time. Re-seal annually with 100% silicone (flexible) rather than rigid caulk. For tile showers, check grout for cracks—moisture penetrating behind tiles can affect the substrate.
The Basement and Utility Areas: System Heartland
This zone houses core components: water heater, main shutoff, sewer cleanouts, and entry/exit points for lines. Concerns here can affect the entire system.
Water Heater Observations: Decoding Drip Locations
Top Connections (Cold Inlet/Hot Outlet): Loose fittings or corroded nipples. Tighten gently or consider replacement parts.
Temperature & Pressure (T&P) Relief Valve: Occasional dripping during heating cycles can be normal; continuous dripping suggests the valve may need replacement (it’s a critical safety component). Test by lifting the lever briefly—water should flow then stop cleanly.
Drain Valve (Bottom): Sediment can prevent full closure. Replacement may be needed.
Tank Itself (Rust Stains, Puddles Under Tank): Corrosion has likely compromised the tank lining. This indicates end-of-service life. Shut off water supply and power/gas immediately. The tank will likely fail completely. Replacement is necessary.
Proactive Practice:* Flush sediment from the tank annually (attach hose to drain valve, run to floor drain). Test T&P valve every 6 months. Install a drip pan with drain line under the heater—catches minor moisture and directs it safely away.
Main Water Shutoff Valve and Supply Entry Point:
Clue Nuance: Dampness on basement wall where main line enters. Is it a leak, or condensation from cool ground moisture on the pipe?
Diagnostic Approach: Dry the pipe and wall thoroughly. Wrap the pipe section with paper towel. Wait 2 hours. If the towel is wet and moisture is localized to a joint or valve, it’s likely a connection concern. If the entire wrapped section is damp, it’s likely condensation (insulate the pipe with foam sleeve).
Critical Check: Operate the main shutoff valve annually. Turn it off, then on. If it’s stiff or won’t turn smoothly, do not force it. Forcing can break the stem. Consider replacing older gate valves (round handle) with modern quarter-turn ball valves—they operate reliably for decades. Know the location of your street-side* shutoff (curb box) in case the house valve is inaccessible.
Sewer Cleanout and Main Line Observations:
Clue Nuance: Odor near a capped pipe stub in the basement floor or outside foundation. Moisture around the cleanout cap.
Diagnostic Approach: Ensure the cleanout cap is snug (use channel locks carefully). If odor persists, the cap gasket may be degraded. Replace the cap assembly. If moisture appears only when upper-floor fixtures are used, the main line may have a blockage or breach downstream of the cleanout. If moisture is constant, the cleanout itself may need attention.
Root Intrusion Clue:* If clearing a main line blockage reveals tree roots, the pipe likely has a crack or separated joint. Camera inspection helps locate the breach before roots cause further issues. Early evaluation allows for targeted repair options.
The Crawl Space: The Unseen Zone
Often overlooked, crawl spaces contain critical plumbing runs. Moisture here affects indoor air quality and structural elements. Preparation is essential.
Pre-Entry Protocol:
Wear full PPE: respirator, gloves, knee pads, headlamp.
Assess for standing water, animal activity, or structural hazards first.
Use a moisture meter on floor joists above plumbing runs. Readings consistently above ambient levels warrant investigation.
Look for “efflorescence”—white, chalky mineral deposits on pipes or foundation walls. This indicates past or present moisture evaporation, a valuable clue.
Diagnostic Technique:
Run water at fixtures above the crawlspace (showers, sinks). Have a helper observe pipes below while you operate fixtures. Listen for hissing. Feel pipes for unexpected warmth (hot water line concern) or persistent dampness. Trace supply lines from the main entry point; check every joint, valve, and where pipes pass through framing (friction can wear holes over decades). For drain lines, look for corrosion (green on copper, rust on cast iron), sagging pipes (indicating failed hangers), or pooled water under joints. A small, persistent drip may evaporate quickly but leaves mineral trails—a sign professionals note as “weeping.” Don’t dismiss it; consistent moisture movement affects insulation and wood over time.
Understanding Drain Behaviors: Beyond “Clogged”
Slow or blocked drains represent frequent concerns, yet misinterpretation is common. “Slow drain” is a symptom with multiple potential contributors. This section explores drain behaviors by location, mechanism, and evidence.
Understanding Drain Behavior Types: It’s Not Just “Gunk”
Effective response requires understanding the type of behavior:
- Accumulation Behaviors: Gradual buildup of compatible materials.
- Kitchen Sink: Grease solidifies on pipe walls, trapping food particles. Forms a sticky mass.
- Bathroom Sink/Shower: Hair binds with soap scum, forming a net that catches debris.
- Toilet: Excessive paper, non-flushable items, or foreign objects.
- Clue: Slow progression over weeks/months. Partial restriction initially.
- Obstruction Behaviors: A single item creates immediate blockage.
- Examples: Toy flushed down toilet, jewelry dropped in sink, large food chunk.
- Clue: Sudden, complete stoppage. Water stops draining instantly.
- Systemic Behaviors: Originates outside the immediate drain.
- Vent Blockage: Nest, leaves, or ice in roof vent stack. Prevents air entry, causing suction that slows drainage and creates gurgling.
- Main Line Concern: Tree roots, pipe shift, or significant buildup in the sewer line exiting the house. Affects multiple fixtures, especially lower ones.
- Clue: Multiple fixtures drain slowly; gurgling sounds; water rises in unexpected places (e.g., shower when toilet flushes).
The Plunger: Technique Matters
Most plunging fails due to poor seal or technique.
1. Create a Seal: For sinks, block the overflow opening with a wet rag—this directs force down the drain. For toilets, ensure the plunger cup fully covers the drain hole.
2. Lubricate: Apply petroleum jelly to the plunger rim for a better seal.
3. Technique: Submerge cup fully in water. Push down slowly to expel air, then pull up sharply to create suction. Repeat 10-15 times with firm, rhythmic motions. Goal: hydraulic pressure waves, not brute force.
4. Test: After plunging, run water slowly. If it drains, flush with a gallon of water to clear residual debris. If not, the concern is likely beyond the P-trap—consider an auger.
Why it may not work: Plungers are most effective on P-trap obstructions. They lack reach for branch line or main line concerns. Forcing a plunger on a systemic issue can push debris deeper.
Sink and Tub Drain Behaviors: Targeted Approaches
Bathroom Sink (Hair/Soap Scum):
First Step: Remove the pop-up stopper. Unscrew the pivot rod nut under the sink, pull out the stopper. Clean hair wrapped around it. Often resolves the issue.
Auger Technique: Use a hand-crank auger. Feed cable slowly into drain. When resistance is felt, crank clockwise while applying gentle forward pressure. Retrieve cable slowly; hair often wraps around the tip.
Prevention: Install a fine-mesh drain strainer. Clean it daily. Monthly maintenance: Pour baking soda followed by vinegar down drain. Let foam for 10 minutes, then flush with hot water. Breaks down minor buildup without harming pipes.
Important Note: Avoid chemical drain cleaners in sinks with garbage disposals—they can damage seals and blades. Avoid in older homes with corroded pipes; chemicals may accelerate deterioration.
Kitchen Sink (Grease/Food):
P-Trap Removal: Often the most direct solution. Place bucket under trap. Loosen slip nuts. Remove trap, clean debris. Reassemble with new washers if old ones are cracked.
Disposal Consideration: If disposal runs but water doesn’t drain, the concern is downstream of the disposal. If disposal hums but doesn’t turn, it’s jammed internally—use an Allen wrench in the bottom socket to free blades before checking drainage.
Grease Reality: Hot water does not dissolve grease—it carries it further where it cools and solidifies. Safe disposal: Pour cooled grease into a container, solidify, discard in trash.
Enzymatic Options: For maintenance, bacterial/enzymatic cleaners digest organic buildup over time without harming pipes. Apply per instructions. Avoid caustic chemicals—they generate heat that can warp PVC pipes.
Tub and Shower (Hair Dominant):
Specialized Tools: A “zip-it” tool (long plastic strip with barbs) works well for hair near the surface. Insert, twist, pull out—hair wraps around barbs.
Overflow Plate Access: Remove the overflow plate cover on the tub wall. Provides direct access to the drain mechanism and often the obstruction location. Feed auger cable down this opening for better angle.
Tile Shower Caution:* Avoid forcing augers through drains with pop-up mechanisms—they can damage the linkage. Remove the drain cover first if possible.
Toilet Drain Behaviors: Strategy Over Force
Toilets require specific tools to avoid damage and contamination.
Plunger Selection: Use a flange plunger (with extended rubber flap). The flange inserts into the toilet drain hole, creating a superior seal compared to a flat cup plunger.
Auger Selection: A closet auger (toilet auger) has a protective sleeve to prevent scratching porcelain and a curved tip designed for toilet traps. Never use a standard drain snake—it can chip the bowl.
Technique: Insert closet auger slowly. Crank handle clockwise while feeding cable. When resistance is felt, continue cranking—this hooks the obstruction. Pull back slowly; debris often comes out on the cable. Flush cautiously to test.
When Plunging Fails Immediately: If water level is high and plunging causes overflow risk, stop. Turn off water supply valve behind toilet. Flush to lower water level. Then proceed with auger. Forcing water higher risks backup onto the floor.
The “Flushable” Wipe Reality: Despite labeling, many wipes do not break down like toilet paper. They are a leading cause of severe toilet blockages and municipal sewer issues. Keep a small trash can in the bathroom for wipes, cotton balls, and dental floss. Educate all household members.
Main Drain Line Behaviors: Recognizing Systemic Signs
This typically requires professional equipment and expertise. Recognizing the signs supports timely, appropriate action.
- Multiple Fixture Impact: Flushing the toilet causes water to rise in the shower or bathtub.
- Gurgling Sounds: Drains gurgle loudly when any fixture is used, especially lower-level ones.
- Sewage Backup: Raw sewage emerges from the lowest drain point (floor drain, shower).
- Progressive Slowdown: All drains become progressively slower over days/weeks.
- Outdoor Clues: Damp, odorous patch in yard; unusually lush green area over sewer line path; ground depression forming.
Immediate Action Steps:
1. STOP USING ALL WATER FIXTURES. Every flush or use adds volume to a compromised system, increasing backup risk.
2. Locate and Open the Main Cleanout (If Safe). Usually a 3-4″ capped pipe in the basement floor, crawlspace, or outside near the foundation. Opening it may relieve pressure (place bucket underneath!). Wear full PPE—sewage is a biohazard.
3. Contact a Professional Drain Service Immediately. Specify “suspected main drain line concern.” They have cameras to locate the issue (roots, shift, offset) and hydro-jetters for severe blockages.
4. Document for Records: Take photos of backup, wet areas, and the cleanout. Review your homeowner’s insurance policy regarding sewer backup coverage—know your coverage before an emergency.
Prevention Focus:
Root Management: If trees are near the sewer line path, consider periodic camera inspection. Apply root growth inhibitor sparingly per instructions—excessive use harms pipes and environment.
Grease Management: Never pour fats/oils down any drain.
Flush Discipline: Toilet paper only. Educate children.
Regular Evaluation: Consider professional sewer line inspection every few years, especially in older homes or areas with mature trees.
Navigating Practical Considerations: Constraints, Choices, and Collaboration
Even with a robust diagnostic framework, real-world factors create friction: budget, time, skill, and uncertainty. This section addresses these thoughtfully, offering pragmatic pathways without compromising safety or long-term outcomes.
DIY vs. Professional: A Balanced Decision Framework
Cost is rarely the sole factor. Consider these dimensions:
| Factor | DIY May Be Appropriate | Professional Help is Recommended |
|---|---|---|
| Skill Level | Replacing faucet cartridge, clearing P-trap, installing strainer | Slab concerns, main line issues, gas proximity, soldering |
| Tool Access | Plunger, basic auger, wrenches available | Sewer camera, hydro-jetter, acoustic detector, pressure testing rig |
| Risk Exposure | Low consequence if error occurs (e.g., minor under-sink drip easily contained) | High consequence: structural impact, moisture proliferation, sewage exposure, electrical hazard |
| Time Sensitivity | Non-urgent concern (slow drip, minor slowdown) | Active water movement, sewage backup, no water access |
| Warranty/Code | Repair doesn’t affect warranty or violate local codes | Work requiring permit (water heater replacement, major repipe); insurance claims involved |
| Physical Access | Fixture easily accessible (under sink) | Confined crawlspace, pipes behind finished walls, slab foundation |
The “Confidence Threshold” Check: Before proceeding, ask: “If I make a mistake here, can I safely stop, contain the issue, and contact a professional without significantly increasing complexity or cost?” If the answer is no, pause. Contacting a professional before attempting a complex repair is strategic risk management. A plumber diagnosing a concern you’ve already opened may face added complexity. Preserving the scene aids professional evaluation.
Budget-Conscious Pathways: Smart Resource Allocation
Limited funds demand intelligent prioritization. Focus spending where it supports prevention.
- High-Value Preventive Investments ($10-$50):
- Water Leak Alarms: Place near water heater, under sinks, by washing machine. Audible alert at first sign of moisture. ($15-$30)
- Shut-Off Valve Upgrade: Replace stiff gate valves with quarter-turn ball valves at main and key fixtures. Ensures reliable operation in an emergency. ($20-$50 per valve + DIY labor)
- Appliance Hose Kits: Braided stainless steel supply lines for washing machine, dishwasher, ice maker. Replace rubber hoses proactively. ($15-$25 per kit)
- Drain Strainers: Fine mesh for every sink and tub. Prevents most hair/grease buildup. ($2-$5 each)
- Medium Investment for Risk Reduction ($100-$300):
- Sewer Line Camera Inspection: One-time baseline inspection of main line. Identifies root intrusion, cracks, or sags before they cause blockage. Peace of mind and targeted prevention. ($150-$300)
- Water Softener (if hard water): Reduces mineral scale buildup in pipes and fixtures, extending component life. ($400-$1,200 installed; prevents future repair costs)
- Tool Strategy:
- Rent: Sewer camera, hydro-jetter—only if you have confirmed skill to operate safely.
- Borrow: Ask a handy neighbor for a moisture meter or specialized wrench.
- Buy: Invest in quality core tools you’ll use repeatedly: adjustable wrench, channel-lock pliers, basin wrench, quality plunger, hand auger. Avoid cheap, flimsy tools—they break and cause damage.
- Phased Approach for Non-Emergencies (e.g., aging pipes):
- Phase 1 (Immediate): Address active concerns with temporary epoxy putty or pipe clamp as a short-term measure only.
- Phase 2 (Short-term): Budget for professional assessment and quote.
- Phase 3 (Long-term): Schedule section replacement during off-peak seasons or when saving allows. Documenting this approach demonstrates proactive maintenance.
Engaging Professional Services: Becoming an Informed Partner
Hiring support should feel collaborative. These steps foster competent, fairly priced service.
Pre-Call Preparation (Saves Time and Supports Clarity):
Have your observations ready: symptom log, photos, meter audit results, fixture shutdown test outcomes.
Know your home’s approximate age, visible pipe material (if seen in basement), and main shutoff location.
* Prepare specific questions: “What might be causing this?”, “What are my options with pros/cons?”, “Do you provide a written estimate?”, “Is there a diagnostic fee, and is it applied to repair cost?”
Vetting Process:
1. Licensing and Insurance: Verify state plumbing license number with your state licensing board website. Confirm general liability and workers’ compensation insurance—ask for certificate. Uninsured contractors leave you liable for injuries.
2. Diagnostic Fee Policy: Reputable companies charge a diagnostic fee ($75-$150) that is credited toward repair cost if you proceed. Avoid companies that waive diagnostics—they may inflate repair prices.
3. Estimate Format: Request a written estimate detailing:
* Scope of work
* Materials list with specs
* Labor cost (hourly or flat rate)
* Timeline
* Warranty on parts and labor
* Cleanup procedure
4. Red Flags:
* “No diagnosis needed—we know what it is.” (Unprofessional)
* High-pressure sales or demands for full payment upfront.
* Vague estimates (“around $500”).
* Unmarked vehicles, no business address.
* Cash-only discounts (often indicates unlicensed operation).
During the Service Call:
Share your findings. A good professional appreciates your diligence and uses it to focus their work.
Ask them to explain their process. “What are you checking for here?” builds trust and educates you.
Request to see the concern (e.g., camera footage, the removed part). Transparency matters.
Ask about options: “Is this a localized repair, section replacement, or broader evaluation? What are the longevity and cost differences?”
After Service:
Obtain a detailed invoice.
Test the repair thoroughly before the technician leaves. Run water at multiple fixtures, check for moisture.
Understand warranty terms in writing.
Leave an honest review—helps others and rewards good service.
During Unexpected Events: A Calm Response Protocol
Despite preparation, unexpected events occur. Calm, decisive action minimizes impact.
Immediate Actions (First Few Minutes):
1. ADDRESS THE SOURCE:
* Active Water Movement: Turn off the MAIN WATER SHUTOFF VALVE immediately. Know this location now, not during a crisis. Practice closing it.
* Sewage Backup: STOP USING ALL WATER FIXTURES. Do not flush toilets, run sinks, or use appliances.
* Water Heater Concern: Turn off water supply valve and power/gas to the heater.
2. CONTAIN AND MITIGATE:
* Place buckets under active movement.
* Use towels, mops, or wet/dry vacuum (if area is safe) to remove standing water.
* Move furniture, rugs, and valuables away from moisture.
* For sewage: Avoid contact. Ventilate area if odors are strong.
3. DOCUMENT:
* Take timestamped photos/videos of the situation, source, and affected areas before cleanup. Critical for insurance.
4. NOTIFY:
* Contact your insurance agent. Know your policy’s coverage for water damage and sewer backup.
* Contact a licensed emergency plumber. Specify “emergency water concern” or “sewer backup.”
* If visible structural impact (sagging floor, cracked foundation), contact a structural professional.
Critical Don’ts:
DO NOT use electrical appliances (vacuum, fans) in standing water—electrocution risk.
DO NOT attempt major repairs during active water movement—safety first.
DO NOT discard damaged items before insurance adjuster review (unless health hazard like sewage).
DO NOT ignore small, persistent moisture—document and address promptly.
After the Immediate Event:
Moisture Management: Within 24-48 hours, wet materials must be dried thoroughly. Use dehumidifiers, fans (once area is safe), and open windows. Hire professional water restoration if saturation is significant (carpet, drywall, insulation). Mold can begin developing within 48 hours.
Root Cause Reflection: After resolution, reflect: Why did this occur? Was it preventable? Update your home maintenance plan (e.g., “Schedule annual water heater inspection,” “Replace all appliance hoses”).
System Review:* Use the event as impetus for preventive upgrades: install leak detection sensors, replace aging shutoff valves, evaluate vulnerable pipe sections.
Your Questions, Answered
Q: My water bill suddenly increased, but I don’t see any leaks. Could it be a hidden plumbing issue?
A: Yes, an unexplained spike in water usage can indicate unseen water movement. First, perform the water meter audit (ensure no water is used for 2+ hours, check meter movement). Common sources include a toilet tank seal not closing fully (silent movement), a small leak in a supply line within a wall or under the slab, or an irrigation system valve malfunction. If the meter confirms movement but you cannot locate the source, a plumber specializing in leak detection can use acoustic or thermal tools to investigate non-invasively.
Q: Is it safe to use chemical drain cleaners like Drano if a plunger doesn’t work?
A: Chemical drain cleaners carry significant risks and are generally not recommended. They often fail to clear serious blockages (especially hair or grease), can harden debris, generate heat that damages PVC pipes, corrode older metal pipes, and create hazardous fumes. If misapplied after a partial blockage, they can cause dangerous splashback. For persistent concerns, mechanical methods (auger, P-trap removal) or enzymatic cleaners for maintenance are safer and more effective. If chemicals were previously used, flush the drain thoroughly with water before attempting mechanical clearing or camera inspection.
Q: How can I tell if a slow drain is a simple blockage or a sign of a broken sewer line?
A: Key differentiators:
Multiple Fixtures Affected: If all drains (especially lower-level ones) are slow, or flushing one toilet causes water to rise in another, it suggests a main line concern.
Gurgling Sounds: Loud gurgling from multiple drains when water runs indicates air struggling to move through a compromised vent or line.
Sewer Odor: Persistent foul smells near drains or in the yard suggest a breach allowing gases to escape.
Outdoor Signs: Unusually damp or lush ground, or a depression forming along the sewer line path.
Progression:* A simple blockage worsens gradually at one fixture. A line concern often causes sudden, multi-fixture issues. When uncertain, a sewer camera inspection provides definitive insight before major decisions.
Q: My faucet drips only when another fixture is running. What’s causing this?
A: This often relates to pressure fluctuations within the system. When water pressure drops elsewhere (e.g., shower running), residual pressure may seek equilibrium through the path of least resistance—the worn seal in the dripping faucet. It can also relate to the home’s pressure-balancing valve (common in shower systems) or a check valve concern. While not typically an emergency, it indicates the faucet mechanism may need servicing. Replacing the cartridge or seats often resolves it and prevents gradual water movement.
Q: Are “flushable” wipes really safe for my plumbing and the municipal sewer system?
A: Despite labeling, most “flushable” wipes do not break down quickly enough to be safe for residential plumbing or municipal systems. They maintain integrity far longer than toilet paper, easily snagging on pipe joints, roots, or pump impellers, causing severe blockages. Municipalities worldwide report wipes as a leading cause of major sewer blockages (“fatbergs”) and pump failures. The only truly safe items to flush are human waste and toilet paper. Dispose of wipes, paper towels, feminine products, and cotton balls in the trash. This small habit prevents costly issues and supports community infrastructure.
Q: How often should I have my main sewer line inspected or cleaned?
A: There’s no universal schedule—it depends on your home’s age, pipe material, tree proximity, and history. General considerations:
Homes with clay or Orangeburg pipes (pre-1970s): More frequent evaluation (every 1-2 years) due to higher root intrusion and collapse risk.
Homes with trees near the sewer line path: Consider evaluation every 2 years; discuss root management options.
Homes with PVC/ABS pipes and no history: A baseline camera inspection provides peace of mind; then every 3-5 years for monitoring.
After any major blockage: Always follow cleaning with a camera inspection to identify the underlying cause (crack, offset, root mass) and prevent recurrence. Proactive evaluation is typically more economical than emergency response.
Q: I found a small, damp spot on my ceiling under the bathroom. Should I cut a hole to find the leak?
A: Avoid cutting immediately. First, perform non-invasive steps:
1. Stop all water use in the bathroom above for 24 hours. If the spot stops growing, the concern is likely usage-related (supply line or drain).
2. Perform the toilet tank dye test.
3. Inspect under sinks and around the tub/shower base for moisture.
4. Use a moisture meter on the bathroom floor near the area above the stain.
If the spot continues growing with no water use, the concern may involve the supply line under constant pressure or an external source (roof). Only after narrowing the zone should you consider a small, strategic exploratory opening (e.g., in an inconspicuous closet ceiling below). Random cutting often misses the source and creates unnecessary repair work. When uncertain, consult a leak detection specialist.
Q: Can I fix a leaking pipe joint with epoxy putty or a pipe clamp as a permanent solution?
A: Epoxy putty and pipe clamps (repair sleeves) are designed for temporary emergency measures only—typically lasting days to a few weeks under ideal conditions. They are not permanent solutions. Epoxy can fail under constant pressure or temperature changes; clamps can loosen or corrode. These methods buy time to schedule a proper repair but should never be considered final. Permanent resolution requires replacing the damaged section or joint with appropriate materials (soldered copper, glued PVC, crimped PEX) by someone skilled in the technique. Relying on temporary fixes risks unexpected failure and greater impact.
Q: Why does my shower drain slowly only when it’s very cold outside?
A: This often relates to a partially blocked vent stack on the roof. Vents allow air into the drain system to maintain proper flow. When blocked by ice, snow, or debris, negative pressure builds during drainage, slowing water flow and causing gurgling. Cold weather exacerbates this because ice can physically block the vent opening, and condensation inside the vent pipe may freeze. Solution: Safely clear snow/ice from the roof vent pipe (use a roof rake from the ground if possible; avoid climbing icy roofs). If blockage persists, a professional can snake the vent stack or discuss vent cover options designed to reduce ice buildup.
Q: How do I know if my home has polybutylene (PB) pipes, and should I be concerned?
A: Polybutylene pipes (typically gray, sometimes stamped “PB2110”) were used primarily in US homes between the late 1970s and mid-1990s. They have shown susceptibility to failure due to interaction with chlorine in municipal water. Check near your water meter, where pipes enter the house, or under sinks (if accessible). If confirmed, consult a licensed plumber about evaluation and repiping options. While not all PB pipes fail immediately, the potential risk is significant enough that many insurers require disclosure or repiping. Repiping with PEX or copper eliminates this known concern and may be required for home sale or insurance renewal.
Q: Is it normal for my water pressure to drop when multiple fixtures are used?
A: Some pressure variation is normal in any system. However, a significant drop (e.g., shower spray weakens noticeably when a toilet flushes) suggests an underlying factor. Common considerations:
Undersized Main Supply Line: Common in older homes; limits total water volume.
Partially Closed Main Shutoff Valve: Ensure it’s fully open (turn counterclockwise until stop).
Pressure Regulator Concern: Homes with municipal water >80 PSI have a regulator; malfunction can cause low or fluctuating pressure.
Internal Pipe Buildup: Corrosion inside older galvanized steel pipes restricts flow.
Well System Factors:* Low well yield, pressure tank issues, or pump concerns.
If the drop is severe or new, have a plumber assess the system. Addressing it supports appliance longevity and overall system function.
Q: What’s the single most important plumbing maintenance task I can do annually?
A: Testing and exercising all water shutoff valves—especially the main shutoff valve. A valve that seizes during an emergency turns a manageable event into a significant incident. Annually:
1. Locate your main shutoff valve.
2. Turn it off completely, wait 10 seconds, then turn it back on fully. Note resistance or stiffness.
3. Test individual fixture shutoffs (under sinks, behind toilets).
4. If any valve is stiff, leaks after operation, or won’t turn, plan to replace it before you need it. Upgrading old gate valves to quarter-turn ball valves is a high-value, low-cost project that ensures you can stop water flow instantly when needed. This simple act supports emergency preparedness.
Conclusion and Your Next Step
Plumbing diagnosis is a learnable discipline built on observation, logic, and systematic process. You now have a framework that transforms uncertainty into actionable clarity—the Diagnostic Tree. You understand that a drip under the sink is not merely an annoyance but a data point; slow drainage is not a random failure but a symptom with context. This knowledge shifts your relationship with your home’s systems from reactive concern to proactive stewardship. The goal was never to make you a plumber, but to equip you with diagnostic literacy to navigate plumbing observations with confidence, make informed choices, and communicate effectively with professionals when needed. True competence lies not in never encountering a concern, but in responding with calm thoughtfulness.
Recap: Three Guiding Principles
- Observe Before You Act: Document symptoms precisely—location, timing, triggers, progression. Let evidence guide your next step. The water meter audit and fixture shutdown test are powerful initial tools.
- Isolate Relentlessly: Narrow the concern zone methodically. Distinguish supply-side behaviors from drain-side behaviors. Determine if the issue is isolated or systemic. Sketching a simple flow diagram prevents wasted effort.
- Match Tool to Task with Safety First: Select diagnostic tools based on evidence. Prioritize non-invasive methods first. Never compromise on PPE or safety protocols. Honor your “pause and consult” indicators without hesitation.
Your 24-Hour Action Step
Within the next 24 hours, complete this single, specific task:
Locate your home’s main water shutoff valve. Turn it off completely, wait 10 seconds, then turn it back on fully. Verify water flow returns at a faucet.
This takes less than two minutes. Yet this simple act:
1. Confirms the valve operates smoothly before an emergency.
2. Imprints its location and operation into your awareness.
3. Provides immediate peace of mind—you hold the primary control for your home’s water system.
If the valve is stiff, leaks, or won’t turn, note it to address within the coming weeks. This tiny action is foundational to emergency preparedness.
The Broader Perspective: Cultivating Home Awareness
Plumbing is one thread in the larger tapestry of home systems literacy. The diagnostic mindset you’ve explored—observe, isolate, verify—applies to electrical observations, HVAC behaviors, or structural considerations. Each time you approach a home concern with curiosity rather than anxiety, you build resilience. You reduce dependency on reactive fixes. You protect your home not through grand gestures, but through consistent, informed attention. Share this awareness with household members. Show them the shutoff valve. Explain the toilet dye test. Transform shared concern into shared competence.
Your home communicates through its systems. Today, you’ve taken a meaningful step toward listening thoughtfully.
Explore Our Complete Home Systems Mastery Series:
Mastering Your Water Heater: Maintenance, Troubleshooting & Upgrade Guide | The Homeowner’s Electrical Safety Handbook: From Outlet Checks to Panel Awareness | Decoding Drainage: A Visual Guide to Sewer Lines, Vents, and Cleanouts | Preventing Water Damage: A Room-by-Room Risk Assessment Checklist | Essential Tool Kit: Building Your Home Repair Arsenal Step by Step