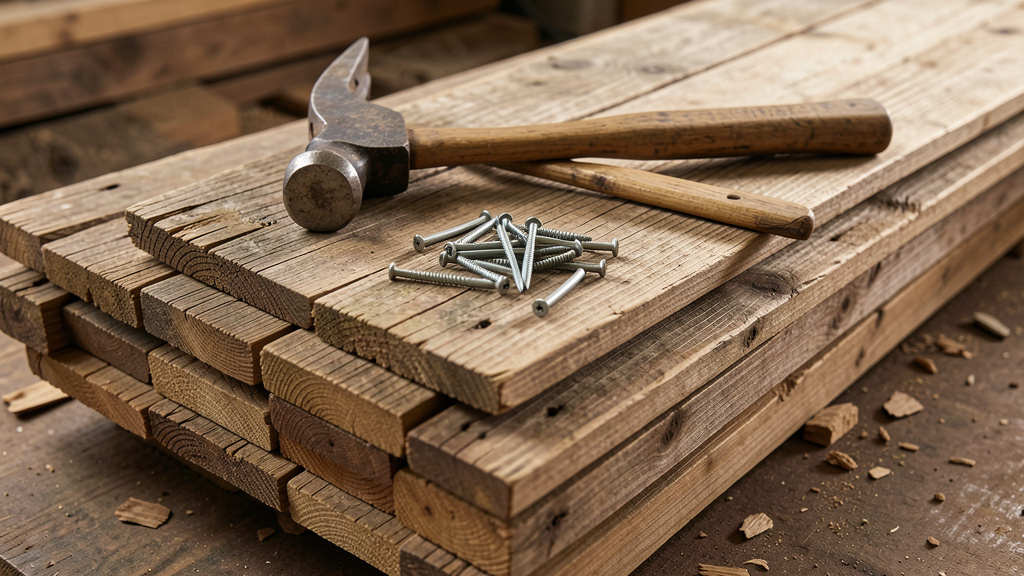
Transform Discarded Timber into Timeless Treasures—Safely, Ethically, and Without Draining Your Wallet
Reclaimed wood offers a unique blend of sustainability, character, and affordability that new lumber rarely matches. Each weathered plank carries whispers of history—a century-old barn beam, a shipping crate stamped with global ports of call, floorboards that witnessed generations of footsteps. Yet without systematic knowledge, diving into reclaimed wood projects risks frustration, tool damage, or safety hazards. This comprehensive guide dismantles every barrier through a proven, safety-first framework for ethically sourcing discarded materials, meticulously preparing them for reuse, and executing five progressively challenging builds that look professionally crafted. You’ll learn to identify hidden hazards before they damage your tools, transform warped or imperfect wood into intentional design features, and unlock profound value where others see only debris—all while honoring the material’s journey and protecting your well-being.
Introduction: The Quiet Revolution in Your Workshop
Walk into any home improvement store, and the scent of fresh-cut pine fills the air—a promise of new beginnings. But step into a salvage yard at dawn, running your fingers over the silver-gray grain of century-old Douglas fir salvaged from a decommissioned warehouse, and you encounter something deeper: potential wrapped in patina. Reclaimed wood isn’t merely a budget alternative; it’s a conscious choice that bridges environmental stewardship, historical preservation, and deeply personal craftsmanship. Unlike uniform dimensional lumber engineered for efficiency, reclaimed wood offers irreplaceable texture, color variation, and soul—qualities impossible to manufacture.
Choosing reclaimed materials supports circular economy principles by giving discarded wood renewed purpose. Many communities actively encourage material reuse through salvage programs and reuse centers, recognizing its role in reducing landfill burden and conserving resources. This mindful approach transforms everyday projects into acts of stewardship—without requiring perfection or professional expertise.
Yet the path from discarded beam to finished mantel demands respect. Hidden nails can damage saw blades. Pre-1978 paint may contain lead. Decades of moisture exposure can compromise structural integrity. These realities aren’t reasons to avoid reclaimed wood—they’re invitations to work smarter. Safety protocols aligned with industry deconstruction standards and ethical sourcing guidelines provide clear guardrails for responsible practice. This guide synthesizes widely accepted best practices from salvage professionals, restoration carpenters, and DIY communities into a single, actionable system. We move beyond superficial “project idea” lists to deliver foundational knowledge that empowers confident, safe, and creatively fulfilling work. Whether you’re building your first floating shelf or crafting a future heirloom, understanding the full lifecycle of reclaimed wood—from ethical acquisition to final finish—is the cornerstone of success. This journey transforms how you see materials, spaces, and your own capacity to create.
The Triple-Layer Framework: Source, Sanitize, Build
Mastering reclaimed wood DIY hinges on a repeatable, non-negotiable system that prioritizes safety, ethics, and project integrity. The Triple-Layer Framework organizes the entire process into three interdependent phases: Source (ethically acquiring suitable materials), Sanitize (thoroughly preparing wood for safe use), and Build (executing projects matched to your skill and resources). This structure eliminates guesswork and prevents the most common beginner errors—like rushing to build before verifying wood safety or selecting a project mismatched to material condition. Each layer builds deliberately upon the last. Skipping Layer One to “get to the fun part” inevitably leads to damaged tools, compromised projects, or safety incidents. Patience in sourcing and preparation isn’t delay; it’s investment. The framework scales seamlessly: the same principles guiding a simple wall art panel also inform structural considerations for larger builds. Internalize this system, and you gain the confidence to assess any reclaimed wood opportunity with clarity.
Layer 1: Ethical and Strategic Sourcing
Sourcing reclaimed wood is equal parts treasure hunt, community engagement, and due diligence. The goal transcends “free materials.” It’s about acquiring wood that is legally obtained, environmentally responsible, structurally appropriate for your project, and acquired with integrity. This layer addresses the critical questions: Where do I look? How do I ask? What red flags demand caution? Success here sets the tone for everything that follows.
Where to Find Reclaimed Wood: A Tiered Sourcing Strategy
Not all sources offer equal value, safety, or ethical standing. Prioritize locations based on wood quality, accessibility, legitimacy, and alignment with your project needs. Below is a detailed ranking of common sources, with actionable protocols for each:
-
Habitat for Humanity ReStores and Nonprofit Salvage Yards (Highest Recommendation for Beginners):
These outlets sell donated building materials at deeply discounted prices (typically 50–90% below retail). Wood is pre-sorted, cleaned of major hazards, and priced transparently. While not “free,” the time saved, guaranteed safety baseline, and support of community housing initiatives make this ideal for first-time reclaimers. Call ahead to inquire about current inventory—popular items like dimensional lumber or hardwood flooring move quickly. Many locations also offer “as-is” sections with deeply discounted bundles perfect for practice projects. Pro Insight: Visit mid-week when new donations are processed. Building rapport with staff can yield alerts about upcoming large donations. -
Construction and Demolition Sites (High Potential, Requires Protocol):
Active demolition sites, particularly of pre-1980s structures, often contain old-growth timber with exceptional density and character. However, never enter a site without explicit, documented permission from the property owner, general contractor, or site manager. Approach professionally: introduce yourself as a DIY enthusiast interested in diverting usable materials from landfill. Offer specific value: “I can help clear lumber from the south corner tomorrow morning.” Focus on sites in early demolition phases—once heavy machinery operates, wood is often crushed or contaminated. Critical Safety Note: Wear high-visibility clothing, steel-toed boots, and a hard hat during any site visit. Never work alone. Verify the site has proper safety protocols in place. Avoid sites with known asbestos abatement or hazardous material handling. -
Pallets and Shipping Crates (Widely Available, Variable Quality):
Businesses receiving frequent shipments—warehouses, manufacturing plants, garden centers, grocery distribution hubs—often discard pallets. Always ask permission before removal. Many have contracts with pallet recycling companies; taking without consent damages business relationships. Inspect stamps carefully: - HT (Heat Treated): Safe. Wood was kiln-dried to kill pests without chemicals.
- MB (Methyl Bromide): DO NOT USE. This toxic fumigant leaves hazardous residues. Avoid entirely.
-
DB (Debarked) or KD (Kiln Dried): Generally safe, but verify no chemical treatment followed.
Pro Technique: Bring a small pry bar and hammer during pickup. Disassemble one pallet on-site to assess wood quality (straightness, knot frequency, hidden damage) before committing to multiple units. Pallet wood is typically softwood (pine, spruce, fir) ideal for small projects like shelves, planters, or wall art. Avoid pallets with visible chemical stains, excessive mold, or structural damage. -
Online Marketplaces and Community Groups (Convenience with Vigilance):
Platforms like Facebook Marketplace, Craigslist, Freecycle, and Nextdoor frequently list “free wood” from individuals clearing property. Scrutinize photos meticulously: look for signs of rot (soft spots, discoloration), warping, embedded metal, or chemical residues. Ask specific questions: “Is this from a pre-1980 structure?” “Has it been stored indoors?” “Are there nails or staples throughout?” Arrange daytime pickup. Bring gloves, safety glasses, and basic tools for on-site assessment. Red Flag Protocol: If a listing lacks photos, uses urgent language (“must go today!”), or refuses questions, walk away. Verify the poster’s identity if possible. Never share personal address details prematurely. -
Agricultural and Rural Sources (Barns, Fences—Handle with Extreme Care):
Weathered barn wood is highly coveted for its rich patina and historical resonance. However, dismantling historic structures without expertise is dangerous and often unethical. Only pursue this route if: - The structure is already condemned and slated for demolition.
- You have explicit, written consent from the landowner.
-
You’ve confirmed no local historical preservation ordinances protect the structure.
Ethical Imperative: Never salvage from protected historical sites, active farms without permission, or structures of cultural significance. If granted access, work slowly and respectfully. Documenting the structure with photos before dismantling is a gesture of honor that landowners often appreciate deeply. -
Municipal Clean-Up Days and Curbside Discards (Opportunistic but Risky):
During community bulk-trash events, usable wood sometimes appears. Exercise extreme caution. Wood left curbside may be discarded for valid reasons: termite damage, chemical treatment, or hidden hazards. Perform a full 5-point inspection (detailed in Layer 2) before loading anything. Avoid wood with strong chemical odors, deep cracks, or visible contamination. When in doubt, leave it. The minor time saved isn’t worth the risk.
The Ethical Sourcing Checklist: Your Non-Negotiable Filter
Before accepting, removing, or purchasing any reclaimed wood, mentally verify each point. This checklist protects your safety, reputation, and the integrity of the reclaimed wood movement:
- ✅ Permission Verified? Do you have explicit verbal or written consent from the legal owner or authorized representative? (For sites: contractor/site manager; for businesses: manager; for private property: owner.)
- ✅ Environmental Impact Assessed? Does acquiring this material genuinely divert it from landfill? Or could your action incentivize premature demolition of a salvageable structure? Prioritize materials already destined for disposal.
- ✅ Community Respect Demonstrated? Are you leaving the source location cleaner than you found it? Did you express gratitude? For businesses/sites, did you offer assistance or compensation where appropriate?
- ✅ Legal Compliance Confirmed? Does local ordinance permit removal of materials from this location? (Check municipal codes regarding demolition salvage, trespassing, and waste disposal.) For structural elements from historic buildings, verify no preservation restrictions apply.
- ✅ Material History Considered? Do you have reasonable confidence about the wood’s origin and prior use? (e.g., Avoid railroad ties—creosote-treated; old playground equipment—CCA-treated; unknown painted wood pre-1978—potential lead.)
The Fundamental Principle: The true value of reclaimed wood is measured not in dollars saved, but in the integrity of its journey—from discard to design. Ethical sourcing transforms you from a scavenger into a steward.
Common Sourcing Mistakes and How to Avoid Them
- The “Take First, Ask Later” Trap: Removing materials without permission damages community trust, risks legal consequences (trespassing, theft), and harms the reputation of all reclaimers. Always lead with respect and communication. A polite “May I?” opens more doors than silent removal ever will.
- Overlooking Hidden Hazards During Acquisition: Wood stored outdoors may harbor nails, staples, wire, or even wildlife (insects, rodents). Perform a quick visual scan before handling. Wear cut-resistant gloves during initial assessment. If wood feels damp, smells strongly of mildew, or shows insect frass (fine powder near holes), proceed with extreme caution or decline.
- Ignoring Wood Species and Project Suitability: Not all reclaimed wood serves every purpose. Softwoods like pine are easier to cut and shape but less durable for high-wear surfaces like tabletops. Hardwoods like oak, maple, or heart pine offer density and longevity but require more effort to work. Learn basic visual identification cues (grain pattern, color, weight) to match material to project intent. When uncertain, prioritize the wood’s condition over assumed species.
- Underestimating Transport Logistics: That “free barn door” may be 8 feet tall and weigh over 100 pounds. Before committing, assess: Do you have a vehicle capable of safe transport? Do you have help for loading/unloading? Will the piece fit through your workshop door? Measure twice, commit once. Broken promises to sources (“I’ll pick it up tomorrow!”) erode goodwill.
Layer 2: Deconstruction, Assessment, and Preparation
Raw reclaimed wood is a raw material—not yet project-ready. This layer is where craftsmanship begins. Rushing preparation leads to damaged tools, compromised projects, or health hazards. Invest time here; it is the non-negotiable foundation of quality, safety, and tool longevity. We break this phase into three critical sub-steps: deconstruction (if needed), systematic assessment, and sanitization/preparation. Each step includes why it matters, how to execute it correctly, common pitfalls, and budget-conscious alternatives.
Step 1: Safe Deconstruction Techniques (When You Bring Home Raw Structures)
Whether disassembling a pallet, carefully prying boards from a salvaged fence panel, or dismantling a crate, technique determines material yield and personal safety. The goal is to preserve usable wood while minimizing injury risk and tool damage.
Essential Deconstruction Toolkit (Budget-Focused):
– Cat’s Paw Pry Bar: Superior to standard claw hammers for gripping nail heads flush with wood. Its narrow tip slides under boards with minimal leverage damage.
– Ball Peen Hammer (16–20 oz): Heavier than a standard claw hammer, providing controlled force for prying without mushrooming nail heads.
– Reciprocating Saw with Metal-Cutting Blade: For nails stubbornly embedded deep in wood or twisted beyond prying. Critical: Use only when absolutely necessary—cutting nails creates metal fragments.
– Work Gloves: Cut-resistant (ANSI Level A3 or higher) to protect against splinters and sharp edges.
– ANSI-Approved Safety Glasses: Non-negotiable. Flying wood chips or nail fragments cause permanent eye damage.
– Ear Protection: Required when using power tools like reciprocating saws.
– Sturdy Work Surface: Sawhorses or a stable table prevent rolling and provide leverage.
Pallet Deconstruction: A Step-by-Step Protocol
1. Position Securely: Lay the pallet flat on sawhorses. Identify the “lead board”—the top plank covering nail heads on the stringers (support beams underneath).
2. Insert Pry Tool: Slide the cat’s paw tip under the lead board near a nail head. Tap gently with the hammer to seat the claw firmly under the nail head.
3. Leverage Slowly: Apply steady upward pressure on the pry bar handle. Use the stringer as a fulcrum. Avoid violent yanking, which splits wood fibers. If resistance is high, tap the board along the nail shaft with the hammer to loosen it first.
4. Extract Stubborn Nails: For nails that won’t release, position the reciprocating saw blade vertically against the nail shaft on the underside of the stringer. Cut the nail flush. Extract the remaining stub with the cat’s paw. Never cut nails from the top surface—this leaves dangerous protrusions.
5. Stack for Drying: Place salvaged planks flat on stickers (small wood spacers like paint stirrers) to allow air circulation. Stack in a dry, ventilated area. Weight the top with heavy objects to minimize warping during acclimation.
Why Technique Matters: Rough, hurried deconstruction shatters wood fibers along the grain, creating weak points and reducing usable length. Patient, methodical prying yields longer, straighter planks with intact edges—critical for clean project assembly. A single pallet, carefully dismantled, can yield multiple usable planks. Rushed deconstruction may yield half that.
Deconstructing Larger Assemblies (Doors, Crates, Fence Panels):
– Work from the outside inward. Remove hardware (hinges, latches) first with a screwdriver.
– For nailed assemblies, start at corners where leverage is greatest.
– For glued joints (common in older furniture), apply gentle heat with a hairdryer to soften adhesive before prying.
– Label pieces with pencil (e.g., “Top,” “Left Side”) during disassembly to simplify reassembly later.
Step 2: The 5-Point Inspection Protocol—Your Safety Gatekeeper
Before any sanding, cutting, or finishing, every single piece of reclaimed wood must undergo systematic evaluation. This protocol identifies hazards that compromise safety, tool integrity, or project longevity. Reject or repurpose wood failing critical checks. Never assume “it looks okay.”
| Inspection Point | What to Check | Pass Criteria | Fail Criteria (Discard or Repurpose) | Action if Marginal |
|---|---|---|---|---|
| 1. Structural Integrity | Flex board gently; inspect ends, edges, and surfaces for cracks, splits, soft spots, or sponginess. Tap with knuckle—listen for hollow sounds. | Solid feel throughout; minor surface checks acceptable; no deep cracks along grain. | Deep longitudinal cracks; soft/spongy areas (rot); severe warping (bow/cup > 1/4″ over 24″); hollow sounds indicating internal decay. | Repurpose for non-structural art, mosaic pieces, or garden markers. Never use for load-bearing elements. |
| 2. Embedded Metal | Run a strong rare-earth magnet slowly over entire surface, edges, and ends. Visually scan for nail heads, staples, wire, or screw remnants. | No magnetic attraction; clean surfaces. | Magnet sticks firmly; visible metal fragments. Note: Small, superficial staples may be removable; deeply embedded metal is hazardous. | For removable metal: Extract carefully with cat’s paw. For deep fragments: Mark location clearly with pencil. Plan cuts to avoid this zone. Never feed metal-contaminated wood through power tools. |
| 3. Biological Hazards | Examine for insect holes (small, round exit holes with fine powder “frass”), mold/mildew (fuzzy patches, discoloration), fungus, or rodent nests. Smell for mustiness. | Clean, dry wood; no active infestation signs; neutral odor. | Active insect trails (fresh frass); extensive mold growth; strong mildew/musty odor; evidence of rodent activity. | For surface mold: Clean with vinegar solution (see Sanitization). For suspected active infestation: Isolate wood. Freeze small pieces in sealed bag for 72 hours to kill insects. Consult pest control for large items. Discard heavily infested wood. |
| 4. Chemical Contamination | Check for paint (especially pre-1978 structures), stains, chemical residues, or unusual odors. Note wood type: Railroad ties? Utility poles? Old playground equipment? | Bare, untreated wood; modern non-toxic finishes; HT-stamped pallets. | Lead-based paint (assume pre-1978 painted wood contains lead); creosote (railroad ties—strong tar smell, oily residue); CCA-treated wood (old greenish tint, used in playgrounds/decks pre-2004); pesticide residues. | DO NOT SAND, BURN, OR USE INDOORS. For lead-painted wood intended for decorative outdoor use only: Seal thoroughly with lead-encapsulating primer. For creosote/CCA: Discard responsibly at hazardous waste facility. Never use for planters, children’s items, or indoor projects. |
| 5. Moisture Content | Feel wood—does it feel damp or cool? Use moisture meter if available (ideal: 6–12% for indoor projects; <19% for outdoor). Check for water stains, warping patterns. | Dry to touch; meter reads <15% (indoor) or <19% (outdoor); stable dimensions. | Damp/moist feel; meter >20%; active mold; severe cupping/warping indicating recent moisture exposure. | Air-dry in well-ventilated, shaded area with stickers between layers. Allow 1–4 weeks depending on thickness and humidity. Re-test before use. Never force-dry with heaters—causes cracking. |
Real-World Application: During routine inspection, hidden staples embedded beneath surface fibers are frequently discovered using the magnet sweep technique. Catching these before milling prevents costly tool damage and project delays. This protocol isn’t bureaucracy; it’s practical project insurance that builds consistent success.
Step 3: Sanitization, Cleaning, and Surface Preparation
Clean, stable wood is safe wood. Tailor your approach to the wood’s condition, intended use, and identified hazards. Never skip this step—residual dirt, mold, or contaminants compromise finishes and health.
Dry Brushing (First Step for All Wood):
Using a stiff-bristle brush (natural bristle, not wire which can scratch), vigorously brush all surfaces with the grain. Remove cobwebs, surface dirt, and loose debris. Work outdoors or in a well-ventilated area. Wear a dust mask (N95) to avoid inhaling particles. This simple step reveals the wood’s true surface and prepares it for deeper cleaning.
Addressing Mold and Mildew:
– Vinegar Solution: Mix equal parts white vinegar and water in a spray bottle. Lightly mist affected areas (do not soak). Let sit 10–15 minutes. Scrub gently with a soft brush. Rinse with clean water using a damp cloth. Dry thoroughly in sunlight or with fans.
– Why Vinegar? It’s acidic enough to kill mold spores without weakening wood fibers like bleach (which leaves toxic residues and raises grain).
– Critical: For extensive mold or musty odors persisting after cleaning, isolate the wood. Sunlight is a powerful deodorizer—place boards in direct sun for 3–5 days, flipping daily. UV rays neutralize odors and kill residual spores. Seasonal Note: In humid climates or during rainy seasons, extend drying time and ensure excellent airflow to prevent recontamination.
Lead Paint Protocol (Non-Negotiable Safety):
If wood has paint and originates from a pre-1978 structure (US) or pre-1992 (UK/EU), assume it contains lead.
– DO NOT SAND, SCRAPE, OR BURN. These actions create inhalable lead dust—a severe health hazard.
– For Decorative Outdoor Use Only: If the painted surface is intact and the project is non-food-contact (e.g., garden bench back), seal thoroughly with an EPA-recognized lead-encapsulating primer. Apply two coats per manufacturer instructions. This seals lead particles permanently.
– For Indoor Projects or When Paint Must Be Removed: Consult local environmental health guidelines for lead-safe work practices. When in doubt, do not use the wood. Test kits offer preliminary screening but are not 100% reliable. Safety outweighs sentimentality.
Deodorizing Persistent Smells:
– Sun Curing: As above, 3–5 days of direct sunlight works wonders for mustiness.
– Activated Charcoal: Place wood in a sealed plastic tub with several charcoal odor absorber bags. Leave for 1–2 weeks. Charcoal passively absorbs volatile compounds.
– Baking Soda Paste: For localized odors, make a paste of baking soda and water. Apply to affected area, let dry 24 hours, then brush off thoroughly.
– Avoid: Commercial air fresheners or strong perfumes—they mask odors temporarily but don’t eliminate the source and can interfere with finishes.
Stabilizing and Acclimating Wood:
Reclaimed wood has lived through decades of humidity swings. Before building, acclimate it to your workshop environment:
1. Stack boards horizontally with stickers (1×1″ wood strips) between layers for airflow.
2. Place in the room where the finished project will reside (or your climate-controlled workshop).
3. Allow 2–4 weeks for moisture content to stabilize. This prevents post-build warping, cracking, or joint failure. Seasonal Adaptation: In very dry winter months, acclimate near a humidifier; in humid summers, ensure strong airflow.
4. For severely warped boards, see the “Troubleshooting” section later in this guide.
Budget Milling and Dimensioning Strategies:
Reclaimed wood is rarely uniform. Achieving consistent thickness or straight edges requires adaptable solutions:
– Hand Plane Method (Most Budget-Friendly): A #4 smoothing plane (available used for $20–$50) removes minor warps and smooths surfaces. Work with the grain in long, even strokes. Wax the plane sole with paraffin wax to reduce friction. Ideal for small projects or final smoothing.
– Belt Sander Technique: For localized high spots, use a belt sander with 80-grit paper. Move constantly to avoid gouging. Less precise than a planer but accessible.
– Makerspace/Tool Library Partnership: Many communities have shared workshops offering hourly access to planers, jointers, and wide-belt sanders. A modest session fee can transform rough wood. Search “[Your City] tool library” or “makerspace.”
– Embrace the “As-Is” Aesthetic: For rustic projects (accent walls, headboards), slight variations in width, texture, or edge profile add authentic character. Sort planks by similar thickness to minimize milling needs. Celebrate nail holes as “history marks”—fill with contrasting epoxy or leave open for texture.
The Fundamental Principle: Preparation is not a barrier to creativity—it is the canvas upon which creativity safely unfolds. A splinter-free, metal-free, stable board is the non-negotiable foundation of every masterpiece.
Layer 3: Project Execution with Confidence
With ethically sourced, thoroughly assessed, and properly prepared wood, you’re ready to build. This layer focuses on strategic project selection—matching your skill level, tool access, material condition, and time commitment to achievable, rewarding outcomes. We introduce the Project Selection Matrix, a decision tool to eliminate guesswork and set you up for success. Followed by an essential budget tool kit and adaptable joinery techniques tailored to reclaimed wood’s unique characteristics.
The Project Selection Matrix: Find Your Perfect Starting Point
Answer these three questions honestly. Your answers pinpoint the ideal project tier to build confidence and avoid frustration.
| Your Situation | Beginner Project Tier | Intermediate Project Tier | Advanced Project Tier |
|---|---|---|---|
| Tool Access | Hand tools only (saw, hammer, sandpaper) | Basic power tools (drill, circular saw, orbital sander) | Advanced shop (table saw, planer, router, clamps) |
| Wood Condition | Low-grade (short pieces, heavy character, nail holes) | Medium-grade (some warping, minor defects, mixed widths) | High-grade (straight, minimal defects, consistent thickness) |
| Skill Level & Time | <10 hours; minimal cuts/joinery; forgiving assembly | 10–20 hours; multiple components; simple joinery | 20+ hours; complex joinery; precision required |
| Recommended Projects | Wall art panel, small planters, coasters | Floating shelves, planter boxes, picture frames | Accent walls, furniture (tables, benches), built-ins |
How to Use the Matrix:
– Example 1: You have pallet wood (low-grade), only a drill and hand saw (basic tools), and are new to woodworking. → Beginner Tier: Rustic wall art panel. Embraces imperfections, requires minimal cutting, builds foundational skills.
– Example 2: You sourced straight barn boards (medium-grade), own a circular saw and drill, and have built simple shelves before. → Intermediate Tier: Floating shelf with hidden bracket. Teaches precise measuring, leveling, and hardware integration.
– Example 3: You acquired a solid beam slab (high-grade), have access to a table saw and sander, and understand joinery basics. → Advanced Tier: Live-edge shelf or small table. Focuses on finishing techniques and structural considerations.
Critical Insight: Starting with a project mismatched to your resources is the #1 cause of abandoned builds. There is profound wisdom in beginning small. A beautifully executed wall panel builds more confidence—and teaches more transferable skills—than a half-finished table buried in the garage. Mastery compounds. Each successful project expands your capability for the next.
The Essential Budget Tool Kit for Reclaimed Wood
You do not need a professional workshop. Prioritize versatile, affordable tools that maximize safety and capability. Focus on quality for safety items; budget options suffice for others.
- Safety Non-Negotiables:
- ANSI Z87.1-approved safety glasses (wrap-around style)
- N95 respirator mask (for dust, mold, or lead-contaminated wood handling)
- Cut-resistant work gloves (ANSI Level A3+)
-
Hearing protection (for power tools)
-
Measuring and Marking:
- 25-foot tape measure (Stanley FatMax or equivalent)
- Combination square (for checking 90° angles, marking cuts)
-
Sharp pencil and carpenter’s chalk line
-
Cutting:
- Hand Tool Option: Japanese pull saw (Dozuki style, ~$25). Cuts on pull stroke for precision, minimal tear-out. Ideal for straight cuts in reclaimed wood.
- Power Tool Option: Circular saw with carbide-tipped blade (24-tooth minimum). Carbide withstands incidental contact with hidden metal better than standard blades. Budget Hack: Buy a dedicated “reclaimed wood blade” and reserve your fine-cut blade for clean lumber.
-
Critical Accessory: Speed square ($10). Guides circular saw for perfectly straight cuts.
-
Fastening and Assembly:
- Cordless drill/driver (18V platform; borrow, rent, or buy refurbished)
- Drill bit set (including countersink bits)
- Driver bit set (Phillips #2, square #2)
- 1.5″ and 2.5″ exterior-grade screws (for most projects)
- Clamps are Crucial: 2–4 bar clamps (12″–24″). Essential for glue-ups, holding assemblies square. Borrow from friends, buy used, or use heavy books/weights as temporary substitutes.
Tool Acquisition Strategy:
– Facebook Marketplace / OfferUp: Search “tool lot” or “woodworking tools.” Hobbyists upgrading kits often sell quality used tools cheaply.
– Estate Sales: Early Saturday mornings yield hidden gems. Look for older hand tools (planes, chisels)—often superior to modern budget versions.
– Library of Things: Growing in many cities—borrow tools for free or low cost. Search online.
– Borrow Strategically: Ask neighbors or family for specific tools (e.g., “Can I borrow your clamps for Saturday?”). Offer to return the favor with coffee or help on their project.
Joinery and Assembly Techniques for Imperfect Wood
Reclaimed wood’s irregularities demand adaptable joinery. Forget perfect 90° joints; embrace techniques that accommodate character while ensuring strength.
- Pocket Hole Joinery (Beginner-Friendly Champion):
A pocket hole jig (Kreg Jr. ~$30) creates angled holes for screws that pull pieces tightly together. Why it excels for reclaimed wood: - Forgives slight thickness variations between boards.
- Hidden screws create clean aesthetics.
- Strong enough for shelves, frames, boxes.
-
Pro Tip: Use coarse-thread pocket screws for softwoods (pine), fine-thread for hardwoods. Pre-drill pilot holes in brittle reclaimed wood to prevent splitting near edges.
-
Butt Joints with Reinforcement (Simple & Effective):
Butting two boards end-to-end is weak alone. Strengthen with: - Metal Brackets: L-brackets or corner braces (paint to match finish).
- Dowel Joinery: Drill matching holes in both pieces, insert glued dowels. Requires precision but creates strong, hidden joints. Use a doweling jig for alignment.
-
Biscuit Joiner Alternative: Without a biscuit joiner, cut shallow slots with a chisel and insert wooden “biscuits” (small oval wood pieces) with glue.
-
Adhesive Strategy:
- Interior Projects: Titebond III Ultimate Wood Glue (waterproof, sands well).
- Outdoor/High-Moisture Projects: Epoxy-based adhesive (e.g., Gorilla Wood Glue) for superior moisture resistance.
-
Critical Rule: Glue only bonds to clean, dry, bare wood. Wipe surfaces with mineral spirits before gluing if oily or dusty. Clamp firmly for full cure time (check label—usually 30 mins initial, 24 hrs full strength).
-
Working with Warped or Twisted Boards:
- Clamping Trick: For mild bowing, apply glue to mating surfaces, then clamp the assembly tightly between two flat surfaces (like concrete patio stones or thick MDF sheets). The clamps force the wood flat as the glue cures.
- Strategic Placement: Use slightly warped boards for non-structural elements (e.g., back panel of a shelf) where flatness isn’t critical.
-
Never Force It: If a board resists clamping into position, it will spring back or stress joints. Repurpose it.
-
Pre-Drilling is Mandatory:
Reclaimed wood is often drier and more brittle than new lumber. Skipping pre-drilling guarantees splitting, especially near edges or ends. Use a drill bit slightly smaller than your screw’s shaft diameter. Countersink screw heads slightly below the surface for a clean finish (fill later with wood putty if desired).
Five Tiered Reclaimed Wood Projects: From First Build to Statement Piece
Apply the Triple-Layer Framework directly with these progressively challenging projects. Each includes material estimates based on typical reclaimed wood yields, detailed step-by-step instructions, safety notes, “Pro Tips” drawn from common pitfalls, and explicit connections to the Framework layers. Projects are designed to build skills sequentially—master Project 1 before advancing.
Project 1: Beginner — Rustic Character Wall Art Panel (Under $15, 3–4 Hours)
Why Start Here? This project requires minimal cutting, celebrates wood imperfections (knots, nail holes, color variation), and delivers immediate visual impact. It teaches board selection, basic assembly, and finishing—without pressure for perfection. Ideal for testing your preparation skills and building confidence. Perfect for apartments (rental-friendly with removable hooks) or filling awkward wall spaces.
Materials Needed:
– 5–7 reclaimed planks (approx. 1×6″ nominal width, 24″ long; pallet wood ideal)
– One 2×2″ furring strip (8′ length; new or reclaimed for backing frame)
– Wood glue (Titebond III)
– 1.25″ pocket hole screws or 1.25″ finish nails + hammer
– Sandpaper (120-grit sheet or orbital sander pad)
– Optional: Natural beeswax finish, matte clear spray sealant, or leave raw
Step-by-Step Instructions:
1. Prepare Planks (Layer 2 Application): Lightly sand all surfaces and edges with 120-grit paper to remove splinters. Wipe clean with tack cloth. Arrange planks face-down on a flat surface (garage floor, large table) in your desired pattern. Vary widths and grain directions for organic interest. Ensure top edges align neatly where they will meet the backing frame. Pro Tip: Place planks in sunlight for 30 minutes before assembly—warmed wood accepts glue better.
2. Build Backing Frame (Critical Stability Step): Cut the 2×2″ furring strip into two pieces matching the height of your plank arrangement (e.g., 22″ for 24″ planks). Position these strips parallel across the back of the planks, spaced approximately 6″ from each end. These provide rigidity, prevent warping, and create a mounting surface. Why This Matters: Skipping the frame results in a flimsy panel that sags or warps over time. The frame is non-negotiable for longevity.
3. Attach Planks to Frame: Apply a continuous bead of wood glue along the top edge of each backing strip. Press planks firmly into place. Secure immediately:
– Pocket Hole Method: Drive two 1.25″ pocket screws up through each backing strip into every plank.
– Nail Method: Use finish nails every 6″ along each strip. Place painter’s tape on the plank surface where nails enter to prevent blowout (wood splintering).
Wipe away excess glue with a damp cloth before it dries.
4. Finishing Touches: Lightly sand any glue squeeze-out or rough edges. Apply finish if desired—many prefer the raw, weathered look. For subtle protection, rub with natural beeswax block. Attach two D-ring hangers to the back frame, positioned 1/3 from each end for balanced hanging.
Common Mistake Alert:
– Mistake: Skipping the backing frame to “keep it simple.”
Consequence: Panel warps within weeks, planks separate at seams.
Fix: Always include the frame. It adds 10 minutes but ensures decades of stability.
– Mistake: Sanding too aggressively, removing all character.
Consequence: Wood looks artificially “new,” losing reclaimed appeal.
Fix: Sand only enough to remove splinters. Preserve saw marks, nail holes, and patina.
Framework Connection: This project reinforces Layer 2 (assessment—selecting planks with complementary character) and Layer 3 (simple joinery). Success here builds confidence for more complex assemblies.
Project 2: Beginner+ — Floating Shelf with Hidden Steel Bracket (Under $25, 4–5 Hours)
Why This Project? Teaches precise measuring, leveling, hardware integration, and the satisfying “magic” of hidden support. Ideal for displaying small plants, books, or decor. Builds directly on Project 1 skills while introducing critical concepts: wall stud location, load capacity awareness, and clean finishing. The hidden bracket method avoids visible brackets that detract from reclaimed wood’s beauty.
Materials Needed:
– One reclaimed wood board (1×8″ nominal, 24″ long; straight-grained preferred—barn wood or sanded pallet plank)
– One 1/4″ thick x 1.5″ wide x 24″ long steel flat bar (available at hardware stores; ~$8)
– Wood screws (1″ length, #8)
– Wall anchors (toggle bolts or heavy-duty drywall anchors if no studs)
– Wood filler (optional, tinted to match wood)
– Sandpaper (120, 220-grit)
– Level (4′ carpenter’s level ideal)
– Stud finder (borrow or buy basic model ~$10)
Step-by-Step Instructions:
1. Prepare the Shelf Board (Layer 2 Deep Dive): Sand thoroughly through 120 then 220-grit for a smooth feel. Fill visible nail holes or cracks with wood filler if a uniform surface is desired. Let filler dry completely, then sand flush. Wipe clean. Critical Check: Sight down the board’s length against a straight edge (level). Reject boards with severe bowing—floating shelves require rigidity.
2. Create the Recess Channel (Precision Step):
– Measure and mark a line 1.5″ from the back edge along the entire underside of the board.
– Router Method (Ideal): Using a straight-cutting router bit, carefully cut a channel the exact width and thickness of the steel bar. Depth should allow the bar to sit perfectly flush with the board’s underside. Work slowly; reclaimed wood can be brittle.
– No Router? Chisel Method: Score the channel outline deeply with a utility knife. Use a sharp chisel and mallet to carefully remove wood to the required depth. Work across the grain first to avoid splitting. Sand the channel smooth.
– Budget Alternative: Skip the recess. Attach the steel bar directly to the underside with screws. Less hidden, but fully functional. Sand bar edges smooth to prevent snagging.
3. Mount the Bracket to Wall (Safety Critical):
– Use stud finder to locate wall studs. Mark centers clearly.
– Position the steel bar level on the wall at desired height. Pre-drill pilot holes through the bar into the studs. Secure with 2″ wood screws driven deep into studs.
– No Studs Aligned? Use heavy-duty toggle bolts rated for at least 50 lbs per anchor. Follow anchor instructions precisely—drywall alone cannot support shelf weight.
– Double-check level in both directions before final tightening.
4. Slide and Secure Shelf: Slide the prepared shelf board onto the mounted bracket. It should fit snugly. For extra security (especially for longer shelves), drive one small finish nail through the top of the board into the bracket at each end. Countersink the nail head and fill with matching wood putty. Load Test: Place books gradually over 24 hours. Start light; reclaimed wood strength varies.
Pro Insight:
– Bracket Sizing: For shelves longer than 30″, use a thicker (3/8″) or wider (2″) steel bar, or add a center support bracket.
– Wood Movement: Reclaimed wood expands/contracts with humidity. Ensure the recess channel is slightly wider than the bar (1/16″ clearance) to prevent binding.
– Finish Last: Apply final finish (oil, wax) after mounting the bracket but before sliding onto wall. Easier access.
Framework Connection: Direct application of Layer 3 (project selection—matching wood straightness to project need) and Layer 1 ethics (using a small amount of new steel responsibly for safety).
Project 3: Intermediate — Pallet Wood Planter Box with Drainage (Under $35, 6–8 Hours)
Why This Project? Combines outdoor durability concerns, box construction techniques, and functional design. Teaches corner assembly, drainage integration, and plant-safe finishing. Perfect for herbs, flowers, or small vegetables. Addresses critical reclaimed wood considerations: pallet stamp verification, chemical safety, and moisture management. Builds confidence for larger outdoor builds.
Materials Needed:
– 3–4 disassembled HT-stamped pallets (yielding ~20 usable 36″ planks)
– Four 2×2″ corner posts (24″ length; new pressure-treated or reclaimed straight wood)
– Exterior-grade wood screws (2.5″ length, #10)
– Landscape fabric (1 sq. yard)
– Staple gun with 3/8″ staples
– Waterproofing sealant (plant-safe: linseed oil, beeswax, or non-toxic exterior sealant)
– Drill with countersink bit
– Saw (circular or hand saw)
Step-by-Step Instructions:
1. Sort and Cut Planks (Layer 1 & 2 Integration): Select straightest pallet planks. Cut to desired planter dimensions (e.g., 24″ wide x 12″ deep x 12″ high sides). Cut four corner posts to 14″ length (12″ above soil + 2″ for ground insertion if placing directly on soil). Critical Safety Check: Re-verify all pallets are HT-stamped. Discard any with MB stamp or unknown origin. Never use for planters—chemical residues can leach into soil.
2. Assemble Sides:
– Lay two side planks parallel on a flat surface. Position a corner post vertically at each end, flush with the bottom and outer edges.
– Pre-drill two holes through each plank into the post (prevents splitting).
– Secure with 2.5″ exterior screws. Repeat for opposite side assembly.
– Attach front and back planks between the two side assemblies, screwing through planks into the posts. Ensure corners are square (use combination square to check 90° angles). Clamp assemblies while screwing if possible.
3. Add Bottom with Drainage:
– Cut planks for the base to fit inside the bottom of the side assemblies.
– Space planks 1/4″ apart using a nickel as a spacer—this allows essential drainage.
– Attach base planks to the bottom of the side assemblies with screws.
– Alternative: Cut a single piece of exterior plywood for the bottom, then drill 1/2″ drainage holes every 6″.
4. Line and Seal (Plant Safety Step):
– Staple landscape fabric tightly to the entire interior surface. This retains soil while allowing water to drain through gaps. Overlap seams by 2″.
– Apply 2–3 coats of plant-safe sealant to all exterior surfaces, including bottom edges. Let cure fully (follow product instructions—usually 48–72 hours) before adding soil. Why Seal? Protects wood from moisture rot, extending planter life significantly. Never use creosote, tar, or toxic sealants near plants.
Critical Safety & Ethics Notes:
– Pallet Origin is Non-Negotiable: Only use HT-stamped pallets from known, clean sources (e.g., furniture stores, non-chemical warehouses). When in doubt, do not use.
– Soil Contact: If placing directly on soil, the extra 2″ on corner posts helps anchor the box. For patios/balconies, omit the extra length.
– Edible Plants: For growing herbs/vegetables, use only sealants explicitly labeled food-safe or non-toxic. Linseed oil (boiled) is a traditional, safe choice. Avoid pressure-treated new wood for corner posts if growing edibles—use reclaimed cedar or redwood if available.
Pro Tip: Add “feet” by screwing small scrap wood blocks to the bottom corners. Elevates planter slightly for better airflow and drainage, preventing bottom rot on paved surfaces.
Framework Connection: Embodies Layer 1 ethics (verifying pallet safety), Layer 2 assessment (selecting straight planks), and Layer 3 technique (drainage design, plant-safe finishing).
Project 4: Intermediate+ — Reclaimed Wood Accent Wall (Variable Cost, Weekend Project)
Why This Project? Transforms an entire room with texture, history, and warmth. Requires patience in plank sorting, layout planning, and installation technique—but the visual payoff is extraordinary. Teaches large-scale project management, working with material variation, and integrating with existing architecture. Ideal for feature walls behind beds, sofas, or fireplaces. Builds directly on skills from Projects 1–3.
Materials Needed:
– 50–100 sq. ft. of reclaimed wood (barn wood, mixed-width planks; quantity depends on wall size)
– 1×3″ furring strips (enough to cover wall horizontally every 16″)
– Construction adhesive (PL Premium or equivalent)
– Finish nails (1.5″ or 2″) + nail gun or hammer
– Level (4′ carpenter’s level) + laser level (highly recommended)
– Stud finder
– Circular saw or handsaw
– Spacers (nickel-sized wood scraps or plastic wedges)
– Safety glasses, dust mask
Step-by-Step Instructions:
1. Wall Preparation (Foundation for Success):
– Locate and mark all wall studs with a stud finder.
– Install horizontal furring strips across the studs using 2.5″ screws. Space strips every 16″ vertically. Why Furring Strips? They create a flat mounting surface over uneven drywall, provide solid nailing points into studs, and allow space for wiring if adding sconces later. This step is critical for a professional result—skipping it leads to uneven surfaces and weak attachment.
2. Sort and Dry-Fit Planks (Layer 2 Mastery):
– Lay all planks on the floor in the room. Sort by width, color, and grain pattern.
– Arrange a “dry run” layout: Mix widths and orientations for organic flow. Avoid placing boards with similar knots or defects adjacent. Stagger end joints like brickwork—never align vertical seams.
– Number each plank lightly in pencil on the back (e.g., “Row 3, Plank 2”). Take a photo of the layout for reference. This prevents confusion during installation.
3. Install Starting at Bottom Corner:
– Apply a continuous bead of construction adhesive to the back of the first plank. Press firmly against the bottom furring strip.
– Secure with two finish nails at each stud location (use nail gun for speed/safety; hammer carefully to avoid splitting). Wipe away excess adhesive immediately with a damp cloth.
– Place a spacer (nickel-sized wood scrap) between planks for consistent gaps. Check level frequently—both horizontally and vertically.
– Continue row by row, referencing your numbered layout. Cut planks to fit ends using circular saw. Save shorter pieces for filling gaps in upper rows.
4. Final Touches:
– Fill visible nail holes with matching wood putty if desired (many prefer exposed nails for rustic charm).
– Lightly sand any rough edges with 120-grit paper.
– Apply a matte clear sealant to protect from dust and enhance grain. Use a brush for control in gaps.
– Install trim molding at top/bottom if desired to conceal edges.
Pro Tips for Success:
– Work in Small Sections: Install 3–4 rows at a time. Reclaimed wood expands/contracts; forcing planks causes buckling. Let the material guide placement—gentle pressure only.
– Embrace Imperfections: A slightly warped board? Install it where the curve follows the wall contour. Nail holes? Leave them open—they tell a story. Perfection is not the goal; character is.
– Lighting Matters: Install wall sconces before adding wood if possible. If adding later, use a stud finder with depth gauge to avoid drilling into furring strips or wires.
– Time Saver: Rent an air compressor and brad nailer for a modest daily fee. Dramatically speeds installation and reduces splitting risk vs. hammering.
Framework Connection: Ultimate application of Layer 1 (sourcing sufficient quantity), Layer 2 (sorting/assessing dozens of planks), and Layer 3 (large-scale project execution). Requires patience but delivers profound satisfaction.
Project 5: Advanced — Live-Edge Reclaimed Slab Shelf or Small Table (Investment Project, 15–25 Hours)
Why This Project? The pinnacle of reclaimed wood craftsmanship for the dedicated DIYer. Focuses on honoring the wood’s natural form, advanced finishing techniques, and structural considerations. Requires careful wood selection, patience with sanding, and thoughtful hardware integration. Creates a functional art piece that becomes a cherished focal point. Note: This project assumes access to sanding tools (orbital sander minimum; belt sander ideal) and comfort with precision work.
Materials Needed:
– One solid reclaimed slab (barn beam slice, thick door panel, or salvaged countertop; min. 1.5″ thick, 24″–48″ long)
– Hairpin legs (3 or 4, size matched to slab weight) or custom trestle base plans
– Epoxy resin kit (clear or tinted with wood dust) optional for cracks
– Random orbital sander + sanding pads (80, 120, 180, 220, 400-grit)
– Tung oil, Danish oil, or food-safe finish (for shelves)
– Painter’s tape, mixing cups, stir sticks (for epoxy)
– Clamps, safety glasses, respirator (for sanding/epoxy)
Step-by-Step Instructions:
1. Slab Assessment and Stabilization (Layer 2 Critical):
– Inspect meticulously for deep cracks, insect damage, or severe warping. Minor surface checks are acceptable; structural compromises are not.
– For Stabilizing Cracks: Clean crack thoroughly. Mask edges with painter’s tape. Mix epoxy resin with fine wood dust (from sanding) to match wood color. Pour slowly into crack. Let cure per instructions. Sand flush. Why Epoxy? It stabilizes the crack permanently while adding artistic detail.
– For Mild Warping: If slab is slightly cupped, focus sanding efforts on the convex (high) side. Do not attempt to flatten severely warped slabs—repurpose or consult a professional.
2. Edge Treatment Philosophy:
– Live Edge Preservation: Gently sand the natural edge with 80-grit wrapped around a sanding block. Remove splinters but preserve the organic shape. Avoid power sanders here—they remove character too quickly.
– Shaped Edge Option: If a smoother profile is desired, use a spokeshave or rasp to gently round sharp edges, then sand progressively.
– Decision Point: Does the edge tell a story? (e.g., saw marks from original milling). Preserve it intentionally.
3. Sanding Progression (The Heart of the Project):
– Start with 80-grit to remove major imperfections, old finish, or deep scratches. Sand with the grain direction.
– Progress sequentially: 120 → 180 → 220 → 400-grit. Wipe slab thoroughly with tack cloth between each grit.
– Critical Check: After 220-grit, wet the surface lightly with mineral spirits (“wet sanding test”). This reveals scratches invisible when dry. Sand any remaining marks before moving to 400-grit.
– Final sanding with 400-grit creates a silky-smooth feel essential for surfaces touched frequently.
4. Finishing for Beauty and Protection:
– Apply finish in a dust-free area. For tung oil: Flood surface, let soak 15 mins, wipe excess. Repeat 3–5 times, sanding lightly with 400-grit between coats after first coat dries.
– For Danish oil: Similar process, builds slight sheen.
– Food-Safe Note: If used for a dining surface, ensure finish is explicitly labeled food-safe when fully cured (tung oil qualifies; verify others).
– Let cure fully (7+ days) before use—rushing causes stickiness or poor durability.
5. Leg Attachment (Precision Required):
– Position slab upside down on padded surface. Place legs according to manufacturer template.
– Pre-drill all mounting holes. Attach legs with provided hardware.
– Level Check: Place shelf/table on a known-flat surface. Use feeler gauges under legs if needed to achieve perfect levelness. Shim discreetly if necessary.
When to Seek Professional Help:
– If the slab is very large (>60″) or heavy (>100 lbs), enlist help for sanding and finishing.
– For deep structural cracks or significant warping, consult a woodworking professional before proceeding. Safety and integrity come first.
– If unsure about finish compatibility or food safety, contact the manufacturer directly.
Framework Connection: Synthesizes all layers: ethical sourcing of a significant piece (Layer 1), meticulous assessment/stabilization (Layer 2), and advanced execution honoring the material (Layer 3). Represents the culmination of reclaimed wood mastery.
Navigating Common Challenges: Friction Points and Practical Solutions
Even with meticulous preparation, reclaimed wood presents unique hurdles. This section addresses real-world friction points encountered by DIYers at all levels—with actionable, tested solutions. These aren’t theoretical concerns; they’re barriers that stop projects cold. Equip yourself with these strategies to maintain momentum and confidence.
Challenge 1: “My Wood Is Warped—Can I Still Use It?”
Understanding Warp Types:
– Bow: Curvature along the board’s length (like a banana).
– Cup: Curvature across the width (like a shallow trough).
– Twist: Spiral distortion along the length.
– Crook: Curvature along the edge (like a hockey stick).
Solutions by Severity:
– Mild Warp (Bow/Cup < 1/4″ over 24″):
– Clamping Method: During assembly, clamp the warped board tightly between two flat, rigid surfaces (thick MDF, concrete patio stones) with the warp facing outward. Apply glue to mating surfaces. The clamps force the board flat as the glue cures, locking it in position. Works well for shelf backs, cabinet sides, or frame components.
– Strategic Placement: Use in non-structural areas where flatness isn’t critical (e.g., back panel of a floating shelf, interior of a planter box).
– Moderate Warp (1/4″–1/2″):
– Moisture Relaxation: Dampen the concave (inner curve) side lightly with a wet cloth. Place board concave-side down on a flat surface. Weight the ends heavily. Let sit 24–48 hours. The moisture relaxes wood fibers, allowing the board to flatten. Re-check; repeat if needed. Caution: Do not soak—excess moisture causes swelling or mold.
– Cut and Repurpose: Cross-cut the board into shorter sections. Warp is often concentrated in one area; the ends may be straight enough for small projects (coasters, shelf brackets).
– Severe Warp (>1/2″) or Twist:
– Embrace the Curve: Design intentionally around it. A bowed board becomes a graceful garden arch. A twisted piece becomes sculptural wall art. Search “curved wood projects” for inspiration.
– Accept and Repurpose: Use for firewood (if untreated), garden edging (bury warped edge underground), or mosaic fragments. Forcing severely warped wood leads to project failure.
Prevention Insight: Always acclimate wood properly (Layer 2). Store stacked flat with stickers in your workshop environment for 2–4 weeks before building. Sudden humidity changes cause warping. Seasonal Note: In regions with dramatic seasonal humidity shifts, allow extra acclimation time during transition months (spring/fall).
Challenge 2: “I Found Metal After Sanding—Now What?”
Immediate Response Protocol:
1. Stop Sanding Immediately. Turn off tool.
2. Inspect Tool: Check sanding pad/disc for embedded metal fragments. Clean thoroughly or replace pad. Metal fragments will scratch subsequent workpieces.
3. Assess Wood Damage:
– Superficial Gouge: If metal caused a shallow scratch, sand progressively through grits (start 2 grits coarser than current) to remove it.
– Deep Gouge or Hole: Evaluate project impact. For visible surfaces, consider:
– Filling with tinted epoxy (mix resin with wood dust).
– Inlaying a contrasting wood “butterfly” key (requires chisel/router skills).
– Repurposing the piece for a less visible area (e.g., back of shelf).
4. Prevent Recurrence:
– Magnet Sweep: Before any sanding or milling, run a strong rare-earth magnet over the entire board surface, edges, and ends. Do this twice.
– Metal Detector Wand: For critical projects (tabletops, fine furniture), consider a handheld metal detector wand. Sweep slowly 1″ above the wood surface.
– Visual Scan Under Light: Hold board at an angle under bright light. Shadows reveal embedded metal edges.
Tool Protection Strategy:
– Dedicate a carbide-tipped blade specifically for reclaimed wood projects. Carbide withstands incidental metal contact better than standard steel blades.
– Keep a spare blade on hand. Hidden nails happen—even to experienced reclaimers. Having a replacement minimizes project downtime.
– For hand planes: Inspect the sole frequently for nicks. A nicked blade creates ridges in your workpiece. Hone or replace the blade promptly.
Challenge 3: “The Wood Smells Musty Even After Cleaning”
Odor Elimination Protocol (Progressive Steps):
1. Sun Curing (Most Effective): Place boards in direct sunlight for 3–5 days. Flip daily. UV radiation breaks down odor-causing compounds. Works for mustiness, smoke smell, and mild chemical residues. Caution: Prolonged direct sun can fade wood color—acceptable for most reclaimed projects where patina is valued. Seasonal Adaptation: In winter or cloudy climates, extend time or use supplemental UV lamps designed for crafts.
2. Activated Charcoal Method:
– Place wood in a large plastic storage tub with tight-sealing lid.
– Add 3–4 activated charcoal odor absorber bags (available at pet stores or online).
– Seal tub. Wait 7–14 days. Charcoal passively absorbs volatile organic compounds.
– Pro Tip: Poke small holes in charcoal bags to increase surface area exposure.
3. Baking Soda Paste (Localized Odors):
– Make paste of baking soda and water.
– Apply thickly to affected area. Let dry completely (24+ hours).
– Brush off thoroughly. Repeat if needed.
4. Vinegar Steam (For Stubborn Cases):
– Place wood in a bathroom. Run hot shower for 10 minutes to create steam.
– Wipe wood surfaces with cloth dampened in white vinegar.
– Leave in steamy room for 1 hour. Ventilate thoroughly afterward.
– Why it works: Steam opens wood pores; vinegar neutralizes odors.
What NOT to Do:
– ❌ Mask with air fresheners or perfumes—they linger and interfere with finishes.
– ❌ Use bleach—it weakens wood fibers and leaves toxic residues.
– ❌ Seal without eliminating odor—trapped smells intensify over time.
Prevention: Store reclaimed wood in dry, ventilated areas off concrete floors (use pallets as bases). Moisture is the primary cause of mustiness. In humid climates, include silica gel packs in storage containers.
Challenge 4: “How Do I Match New Wood to Reclaimed Pieces?”
When Supplemental New Wood Is Necessary:
Sometimes a project requires new wood for structural elements (e.g., hidden frame, corner braces) where reclaimed isn’t available or suitable. Matching aesthetics requires strategy.
Stain and Color Blending:
– Test First: Always test stains on scrap pieces of both reclaimed and new wood. Reclaimed wood absorbs stain differently due to age, prior finishes, and density.
– Custom Mix: Blend stains to mimic reclaimed wood’s hue. Start with a base color (e.g., walnut), then add small amounts of darker (ebony) or lighter (golden oak) stains. Keep notes.
– Instant Aging Solution: Soak fine steel wool (#0000) in white vinegar for 24 hours. Strain liquid. Apply to new wood with cloth. Reacts with tannins to create gray patina. Works best on oak; test on pine first. Dilute with water for lighter effect.
– Tea + Vinegar Method: Brew strong black tea. Apply to new wood. Once dry, apply vinegar/steel wool solution. Creates deeper, aged gray.
Distressing Techniques (Mimic Wear Patterns):
– Chain Dragging: Gently drag a metal chain across new wood surface. Focus on edges and high-contact areas.
– Hammer Dimpling: Tap surface randomly with ball peen hammer head. Creates authentic dents.
– Wire Brushing: Brush aggressively across the grain with a wire brush. Raises wood fibers for weathered texture. Sand lightly afterward.
– Nail Hole Simulation: Tap nail heads randomly into surface, then remove. Fill with dark wood putty for “history marks.”
Strategic Placement Philosophy:
– Use new wood exclusively in hidden areas: frame backs, interior supports, underside of shelves.
– For visible joints, use reclaimed wood scraps as “patches” or inlays to bridge new and old sections.
– Embrace contrast intentionally: A new black steel bracket against weathered wood can be a design feature, not a flaw.
Key Mindset Shift: Perfect matching is often impossible—and unnecessary. The contrast between old and new can tell a richer story: “This piece honors history while embracing modern function.”
Challenge 5: “Is Reclaimed Wood Safe for Indoor Use?”
Safety Assessment by Hazard Type:
– Lead Paint (Pre-1978 Painted Wood):
– Risk: Lead dust from sanding/scraping is a severe neurotoxin. Intact paint poses lower risk but can chip.
– Safe Use Protocol:
– For decorative items not handled frequently (e.g., high shelf back): Seal thoroughly with EPA-recognized lead-encapsulating primer. Apply two coats.
– For items handled often (tables, shelves): Do not use if paint is present and cannot be professionally removed.
– Testing: Use EPA-recognized lead test kit available at hardware stores—follow instructions precisely. When in doubt, assume lead is present.
– Critical: Never sand, scrape, or burn painted reclaimed wood indoors. If abatement is needed, consult local environmental health resources.
– Mold and Mildew:
– Risk: Spores can trigger allergies or respiratory issues.
– Safe Use Protocol: Clean thoroughly with vinegar solution (Layer 2). Sun-cure for 3–5 days. Verify no residual odor or visible growth. For peace of mind, freeze small pieces in sealed bag for 48 hours to kill any lingering spores.
– Chemical Treatments (Creosote, CCA, Penta):
– Risk: Carcinogenic residues. Common in railroad ties, utility poles, old playground equipment.
– Safe Use Protocol: Never use indoors. Discard responsibly at hazardous waste facility. Do not burn.
– Insect Infestation (Powderpost Beetles, Termites):
– Risk: Active infestation can spread to other wood in your home.
– Safe Use Protocol: Isolate wood immediately. For small items: Freeze in sealed plastic bag for 72 hours. For large items: Consult pest control professional. Discard heavily infested wood.
Building Code Context:
International Residential Code (IRC) does not prohibit reclaimed wood for non-structural decorative elements (accent walls, furniture, shelving). For structural applications (beams, load-bearing walls), consult a licensed structural engineer to assess integrity and compliance. This isn’t fear-mongering—it’s responsible stewardship. When in doubt about structural use, choose new, graded lumber for critical supports and use reclaimed wood for cladding or non-load-bearing elements.
Expert Insight: Safety is not about avoiding reclaimed wood—it’s about informed, respectful handling. The vast majority of reclaimed wood projects (wall art, shelves, planters) pose no inherent risk when prepared using the protocols in this guide. Knowledge replaces fear with confidence.
Your Questions, Answered
Q: Where is the absolute safest place for a complete beginner to find reclaimed wood?
A: Habitat for Humanity ReStores are the top recommendation. Materials are pre-screened for major hazards, priced affordably ($1–$10 per board), and support community housing. Staff can often advise on wood condition. For free options, businesses discarding HT-stamped pallets (with explicit permission) offer low-risk material ideal for practice projects like wall art. Avoid demolition sites or unknown online listings until you’ve built assessment skills.
Q: How can I confirm if reclaimed wood has lead paint without expensive testing?
A: You cannot confirm lead content visually with 100% certainty. However, wood painted before 1978 in the US (or before 1992 in the UK/EU) has a very high probability of containing lead. Assume it does and handle accordingly: avoid sanding, seal with an encapsulant for decorative outdoor use only, or use solely for projects where paint remains completely undisturbed (e.g., back of a shelf not visible). For certainty, use an EPA-recognized lead test kit available at hardware stores—follow instructions precisely. When in doubt, choose unpainted wood.
Q: Is it ever safe to use reclaimed wood for cutting boards, butcher blocks, or kitchen surfaces?
A: Not recommended. Reclaimed wood’s history is unknown—it may have absorbed chemicals, oils, pesticides, or biological contaminants unsuitable for direct food contact. Additionally, porous wood harbors bacteria even after cleaning. For food-safe projects, use new, certified hardwoods like maple, walnut, or cherry finished with food-grade mineral oil or beeswax. The risk outweighs the aesthetic appeal. Reclaimed wood shines in non-food-contact applications.
Q: What’s the single most common tool damaged by reclaimed wood, and how do I protect it?
A: Table saw and planer blades suffer most frequently from hidden nails. Prevention is 100% effective: magnet sweep every single board before it nears a power tool. Use carbide-tipped blades designated solely for reclaimed wood projects—they withstand incidental metal contact better than standard blades. Keep a spare blade on hand; hidden nails happen even to experienced reclaimers. For hand tools (planes, chisels), inspect the sole/edge frequently for nicks caused by embedded grit or metal.
Q: How do I prevent reclaimed wood projects from cracking or warping after I’ve finished them?
A: Prevention starts long before finishing:
1. Acclimate Thoroughly: Store wood in your workshop (or the room where the project will live) for 2–4 weeks before building. This allows moisture content to stabilize with your environment.
2. Seal All Surfaces: Apply finish to every surface—including edges, ends, and the backside. Unsealed edges absorb/release moisture faster than sealed faces, causing stress cracks.
3. Avoid Environmental Extremes: Keep finished projects away from direct heat sources (radiators, vents), air conditioning vents, and direct sunlight through windows. Maintain consistent indoor humidity (40–50% ideal).
4. Design for Movement: For wide panels (like tabletops), use breadboard ends or allow slight expansion gaps in frames. Wood moves—design with that in mind.
Q: Is reclaimed wood actually stronger than new wood?
A: Often, reclaimed old-growth timber has tighter growth rings and greater density than modern plantation-grown lumber. However, decades of exposure, improper storage, or prior damage can degrade fibers. Never assume strength. Always assess each piece individually using the 5-Point Inspection Protocol (Layer 2). Test flexibility gently; check for soft spots or cracks. When structural integrity is uncertain—especially for load-bearing projects—choose new, graded lumber for critical supports and use reclaimed wood for non-structural elements. Safety trumps nostalgia.
Q: Can I safely use reclaimed wood in a bathroom, kitchen backsplash, or other high-moisture area?
A: Proceed with extreme caution and specific protocols:
– Wood Selection: Choose dense, rot-resistant hardwoods if possible (oak, teak, cedar). Avoid softwoods like pine in wet areas.
– Sealing is Non-Negotiable: Apply 3–4 coats of marine-grade spar urethane or epoxy resin to all surfaces. Pay special attention to end grains and edges. Reapply sealant annually.
– Installation: Ensure the room has excellent ventilation (exhaust fan used during/after showers). Never install reclaimed wood where it will have direct, prolonged water contact (e.g., shower walls, sink surrounds).
– Better Alternatives: For high-moisture zones, consider using reclaimed wood for adjacent dry areas (e.g., vanity cabinet doors, mirror frame) rather than the wet zone itself. When in doubt, consult a professional about moisture barriers.
Q: How should I price my reclaimed wood projects if I want to sell them at craft fairs or online?
A: Ethical pricing reflects true value:
1. Material Cost: Even “free” wood has value. Assign a modest cost per board foot ($1–$3) to account for your time sourcing, transporting, and preparing it.
2. Labor Hours: Track time spent. Multiply by your desired hourly rate ($15–$35 for beginners; higher for complex work).
3. Tool/Supply Costs: Amortize tool purchases (e.g., $50 sander ÷ 20 projects = $2.50/project). Include finish, hardware, etc.
4. Market Research: Check Etsy, local craft fairs, and Instagram for similar handmade reclaimed items. Price competitively but don’t undervalue your skill.
5. Story Value: Highlight the wood’s origin respectfully: “Salvaged from a decommissioned warehouse with permission,” or “Rescued pallet wood transformed.” Authentic storytelling connects buyers to the piece’s journey without overclaiming. Always prioritize transparency about materials and processes.
Conclusion and Next Step
Reclaimed wood DIY is more than a hobby—it’s a mindful practice that cultivates patience, resourcefulness, and connection to material history. By embracing the Triple-Layer Framework, you transform potential obstacles into opportunities for creative problem-solving. Each project, no matter how small, builds tangible skills and deepens your appreciation for sustainable making.
Recap: The 3 Key Foundations
1. Ethical Sourcing is Non-Negotiable: Permission, safety, and community respect form the bedrock of every successful project.
2. Preparation Prevents Problems: The 5-Point Inspection and thorough sanitization protect you, your tools, and your project’s longevity.
3. Match Project to Capability: Starting small builds confidence and creates a foundation for increasingly ambitious work.
The 24-Hour Rule: Before your next project begins, spend just 20