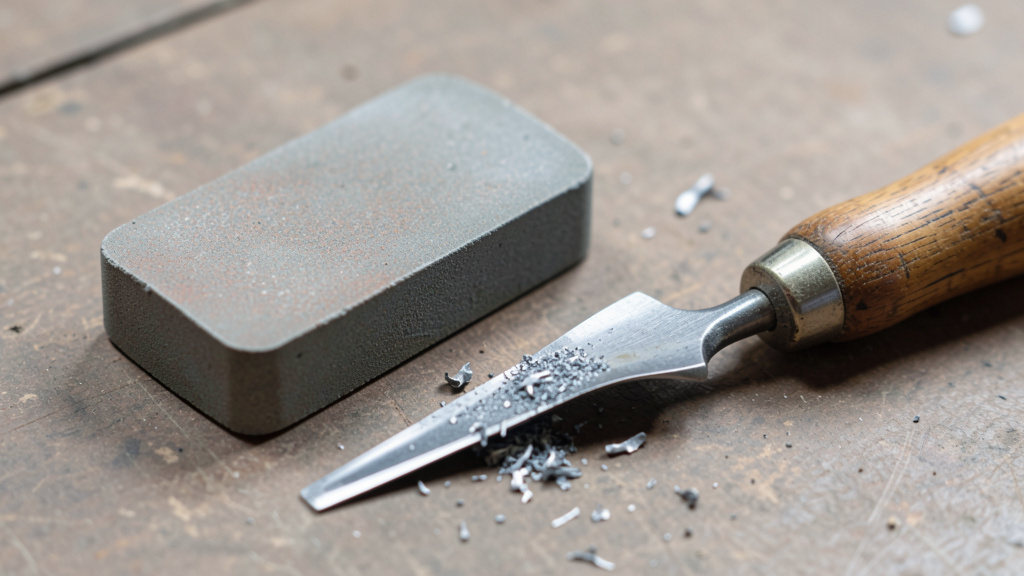
Transform dull, frustrating tools into precision instruments with this step-by-step system—covering everything from daily care rituals to adaptable sharpening techniques for chisels, planes, knives, garden shears, and every cutting tool in your workshop or kitchen.
A sharp tool doesn’t just work better—it works safely. When a chisel glides through hardwood with whisper-quiet precision, when pruning shears make clean cuts that heal quickly on your rose bushes, when your chef’s knife slices a tomato without crushing its delicate flesh—these aren’t accidents of luck. They’re the direct result of intentional care. This guide synthesizes established bladesmithing principles with material science insights to provide a practical, adaptable system for maintaining and restoring edges on any cutting tool. Whether you’re a weekend woodworker, avid gardener, home cook, or professional craftsman, you’ll discover why edge maintenance centers on intelligent preservation—and how to build sustainable habits that support tool longevity and performance.
Introduction: Why Your Tools Deserve This Attention
Walk into any well-maintained workshop or kitchen, and you’ll notice tools stored with purpose: blades protected, handles clean, mechanisms free of debris. This isn’t mere aesthetics—it reflects functional stewardship. Tools treated with consistent care become reliable extensions of the user’s hands, responding with predictable precision. Neglected tools, conversely, increase frustration, elevate injury risk, and diminish results.
Consider the physics: a sharp edge concentrates force along a refined line. A dull edge distributes force across a rounded or deformed surface, requiring greater pressure to cut. That extra force leads to hand fatigue, loss of control, and dangerous slips. In woodworking, a dull chisel may skid off hardwood; in gardening, dull pruners crush plant stems instead of slicing cleanly, potentially inviting disease; in the kitchen, a dull knife demands sawing motions that heighten slip risk on moist surfaces. Safety guidelines consistently emphasize that properly maintained cutting tools significantly reduce injury potential—a principle equally relevant in home settings.
This guide draws from documented craftsmanship traditions, material science resources, and cross-disciplinary field practices across woodworking, culinary arts, horticulture, and metalworking. We present universal principles applicable across tool types, regions, and experience levels. Imperial and metric measurements appear where relevant; safety considerations align with widely accepted protocols; techniques include adaptable options for varying budgets, spaces, and constraints. The goal is not to catalog every possible method, but to equip you with a clear thinking framework—so you can assess any edge, diagnose its condition, and apply the most appropriate solution with confidence. Before touching a single stone, let’s build that foundation.
The Three Pillars of Edge Longevity Framework
Exceptional edge retention isn’t achieved through occasional heroic sharpening sessions. It emerges from a continuous, adaptable cycle of three interlocking practices: Prevention, Assessment, and Restoration. Mastering these pillars reduces time spent at the sharpening bench while yielding more consistent results. This framework applies broadly—from a Japanese chef’s knife to a garden trowel—because it addresses the core mechanisms of edge degradation: abrasion, deformation, and corrosion.
Pillar 1: Prevention – The Daily Rituals That Preserve Your Edge
Prevention is the most impactful yet often overlooked pillar. Consistent micro-habits compound significantly over time. Prevention isn’t passive storage; it’s active stewardship woven into your workflow.
Why Prevention Matters
Edges degrade through contact with abrasive particles (silica in wood, soil grit), lateral pressure causing microscopic bending, and exposure to moisture or acids triggering corrosion. Prevention targets these mechanisms before damage occurs. Wiping sawdust from a chisel after each cut prevents embedded grit from acting like sandpaper during storage. Rinsing soil from pruners immediately halts acidic organic matter from etching steel. These small actions preserve geometry and extend time between sharpening sessions.
The Adaptable Post-Use Protocol
Develop this flexible routine. Total time: under two minutes.
- Clean Thoughtfully: Remove debris using a soft brass brush (avoid steel on fine edges) or microfiber cloth. For sticky resins (pine sap on pruning tools), lightly dampen a cloth with denatured alcohol—never soak the entire tool, especially with wooden handles. For kitchen knives, hand-wash promptly with mild soap and warm water; avoid prolonged contact with acidic foods (tomatoes, citrus). Key insight: Cleaning targets invisible residues too. Microscopic fibers or particles trapped near the edge accelerate wear during subsequent use.
- Dry Completely: Air drying risks water spots and rust initiation. Use a clean, lint-free cloth to dry all surfaces, especially the edge geometry and handle-blade junction (heel/tang). For tools with pivots (bypass pruners), open fully and dry the interior mechanism. A hairdryer on cool setting aids crevice drying—keep moving to avoid heat exposure to sensitive materials like glued handles or certain plastics.
- Apply Protective Coating: Essential for carbon steel or tools stored longer than a few days. Use purpose-formulated products: Boeshield T-9, Renaissance Wax, or food-grade mineral oil for kitchen tools. Apply a microscopic film—excess attracts dust. For chisels or plane blades, lay flat on paper towel, place 2–3 oil drops along the spine, and wipe toward the edge with a cloth (never wipe across the edge). For folding tools, apply a tiny drop to the pivot. Practical tip: Keep a dedicated “oil rag” (cotton cloth lightly saturated with oil, stored sealed) in your toolkit for quick, consistent application.
- Store Intentionally: Avoid loose storage where edges contact other tools or surfaces. Use blade guards (soft plastic for knives, leather for chisels), magnetic strips (mounted vertically), custom-fit toolbox slots, or wall hooks (blades facing up for garden tools). Store in a dry environment—add silica gel desiccant packs to toolboxes in humid or coastal climates. Seasonal note: Before off-season storage (e.g., garden tools before winter), perform a thorough cleaning, oiling, and inspection. In high-humidity regions, check stored tools every few months for moisture signs.
Common Prevention Considerations
– “I’ll clean it later” habit: Sap hardens, soil cements, moisture initiates corrosion. Adaptation: Link cleaning to task completion—like powering down equipment.
– Using inappropriate protectants: WD-40 is a water displacer, not a long-term corrosion inhibitor; it evaporates and may leave residue. Cooking oils can turn rancid. Adaptation: Use purpose-made tool oils, waxes, or mineral oil.
– Storage friction: Knives stored edge-down in wooden blocks contact fibers with each insertion/removal. Adaptation: Use horizontal slots, magnetic strips, or in-drawer trays with individual sheaths.
– Environmental exposure: Direct sunlight degrades wooden handles; temperature swings accelerate oil evaporation. Adaptation: Store in shaded, stable environments.
Prevention transforms tool care from a periodic chore into a mindful transition—a moment of respect that sustains performance and safety. When prevention becomes habitual, severely degraded edges become rare, making restoration efficient and satisfying.
Pillar 2: Assessment – Diagnosing Edge Condition Confidently
Sharpening without diagnosis wastes effort, removes unnecessary metal, and may worsen performance. Assessment answers: Is intervention needed? If so, what type? True expertise lies in accurate, methodical evaluation.
The Five-Sense Diagnostic Sequence
Perform checks in order. Adapt based on tool type and your comfort level.
- Sight (Visual Scan): Hold under bright, direct light (LED task light ideal). Tilt slowly. Observe:
- Reflections: A sharp edge appears as a thin, dark line with minimal light reflection. Glints indicate rounding or damage.
- Nicks/Chips: Gaps or irregularities along the edge line. Note location and scale.
- Corrosion: Discoloration, pitting, or rough texture near the edge.
- Bevel Symmetry: For double-bevel tools (most Western knives), check evenness. For single-bevel (Japanese knives, chisels), verify the flat back’s integrity.
Enhancement: Place dark cloth behind the edge for contrast. A 10x loupe reveals subtle flaws affordably.
- Touch (Safe Nail Test): Never run fingers perpendicular across the edge. Instead:
- Lightly drag a fingernail parallel along the edge (heel to tip). A sharp edge catches smoothly; a dull edge feels slippery.
- For chisels/plane blades: Place edge vertically on soft pine. A sharp edge bites and holds with light pressure; a dull edge slides.
Safety note: Skip touch tests for severely damaged tools or if uncertain. Rely on sight and paper test.
- Sound (Paper Test): Hold standard printer paper vertically. Draw the edge downward through the paper.
- Sharp: Clean cut, zero resistance, smooth edge.
- Moderately dull: Cuts with slight pressure; faint fuzz on cut edge.
- Very dull: Slides, crumples, or tears raggedly.
Why it works: Paper fibers provide consistent, objective feedback without risk.
- Function (Controlled Material Test – Use Sparingly): Only if other tests are inconclusive and scrap material is available.
- Woodworking: Pare softwood (basswood, pine). Sharp tools yield translucent, continuous shavings.
- Gardening: Snip a green twig. Sharp pruners produce a clean “snap.”
- Kitchen: Slice a ripe tomato. Sharp knives glide through skin effortlessly.
Critical: Never test sharpness on hard materials (metal, stone, frozen items)—this damages edges.
- Context (Usage History): Reflect:
- Last material cut? (Cardboard embeds grit; rose thorns chip edges.)
- Time since last maintenance?
- Any impacts or unusual use?
This prevents misdiagnosis. A knife that contacted a hidden staple needs chip repair, not routine honing.
Assessment Decision Path
Use this flow to determine next steps:
– “Catches nail, cuts paper cleanly, no visual flaws” → Edge is sharp. Return to Prevention. No sharpening needed.
– “Slips on nail test, slight paper resistance, no visible damage” → Edge is likely rolled (microscopically bent). Requires honing (realignment), not material removal.
– “Visible nicks/chips, fails paper test significantly” → Edge is damaged. Requires grinding (material removal) to reshape before sharpening.
– “Corrosion near edge, uneven bevels” → Requires cleaning, surface flattening, then sharpening.
– “Cuts paper but feels rough or tears material” → Likely a wire edge (burr not fully removed). Needs light stropping or fine refinement.
Why Assessment Prevents Errors
A documented case: A woodworker believed a high-quality chisel “wouldn’t hold an edge.” Assessment revealed the bevel was sharp, but the back (flat side) was convex and corroded near the edge. The high spot prevented true edge contact with wood. Repeated bevel sharpening wasted metal. Flattening the back restored function in minutes. Systematic assessment preserves tools, time, and confidence.
Pillar 3: Restoration – The Sharpening Spectrum (From Honing to Grinding)
Restoration is precise and intentional—applied only after Assessment confirms need. Think of sharpening as a spectrum of techniques, each matched to a specific diagnosis. Using the wrong method wastes effort and metal.
Core Principle: Sharpening creates two refined planes meeting at a consistent apex. All tools and methods serve this geometric goal.
Understanding the Sharpening Spectrum
| Technique | Purpose | When to Use | Metal Removed | Typical Tools | Typical Time Investment |
|---|---|---|---|---|---|
| Stropping | Remove wire edge, refine apex | After sharpening; light maintenance | None (polishes) | Leather strop, compound | 30–60 seconds |
| Honing | Realign rolled edge | Between sharpenings; after light use | None (repositions metal) | Honing rod (ceramic, steel, diamond) | 1–2 minutes |
| Sharpening | Re-establish sharp apex | When honing fails; routine maintenance | Minimal (microns) | Medium/fine stones, guide | 3–10 minutes |
| Grinding | Remove chips, reshape bevel | After damage; major restoration | Significant | Coarse stone, grinder, file | 10–30+ minutes |
| Flattening | Create true reference surface | Before sharpening damaged tools; chisel/plane backs | Moderate | Coarse stone, lapping plate | 5–15 minutes |
Key Insight: Most routine maintenance should be honing or stropping. True sharpening (material removal) is needed far less often than commonly assumed. Over-sharpening accelerates tool wear.
Step-by-Step: Universal Sharpening Workflow (Apply After Assessment Confirms Need)
Follow this sequence deliberately. Skipping steps causes frustration.
Step 1: Flatten Reference Surfaces (Critical Foundation)
Why: Sharpening against an uneven surface yields inconsistent edges. For double-bevel tools, ensure stones are flat. For single-bevel tools (chisels, Japanese knives), flatten the back first.
How:
– Stones: Use a diamond flattening plate or wet/dry sandpaper (120–220 grit) adhered to float glass/granite tile. Rub stone in figure-8 pattern until scratches cover surface evenly. Verify with pencil grid test.
– Tool backs: Place flat on coarsest needed stone. Apply even pressure. Work until uniform scratches cover the area near the edge (~1/2 inch). Japanese tools note: Focus pressure only on the rim surrounding the hollow (ura); avoid grinding into the hollow.
Common pitfall: Skipping flattening. Result: wasted effort, uneven edges. Investing 2 minutes here prevents 20 minutes of correction later.
Step 2: Establish or Repair the Bevel
Why: Bevel angle balances sharpness and durability. Match the tool’s original geometry unless intentionally modifying for specific tasks.
How:
– Find existing angle: Color bevel with marker. Make light passes on medium stone. Observe wear pattern to identify current angle. Adjust hand position for even contact.
– Repairing damage: Use coarsest stone needed. Focus pressure only on damaged area until chip is gone and scratch pattern is continuous. Avoid unnecessary grinding of the entire bevel.
– Angle aids: Beginners benefit from adjustable guides (e.g., Veritas Mk.II). Set target angle (e.g., 25° for chisels, 15–20° per side for Western knives), lock tool, and follow guide. Budget option: Craft a wooden angle block clamped to the stone.
Common pitfall: Rocking the tool, creating a convex bevel. Maintain consistent, flat contact.
Step 3: Progress Through Grits Methodically
Why: Each grit removes scratches from the prior one. Skipping grits leaves deep scratches that weaken the edge.
How:
– Start with coarsest grit necessary for the damage (e.g., 220 grit for chips, 800 grit for routine work).
– Work until a continuous, uniform scratch pattern covers the bevel and edge. No shiny patches.
– Advance to next finer grit (e.g., 1000 → 3000 → 8000). Reduce pressure with each step.
– Stone types: Water stones (keep flooded), oil stones (light oil, wipe slurry), diamond plates (water lubricant, brush clean after).
Pro technique: After each grit change, flip the tool and make 2–3 light passes on the opposite side (or back for single-bevel) to weaken the forming burr.
Step 4: Remove the Wire Edge (Burr)
Why: The wire edge is a fragile metal flap folded over the apex. If unaddressed, it breaks off during first use, leaving a dull edge. Many stop sharpening too soon, mistaking the burr for sharpness.
How (Choose One Reliable Method):
– Light alternating passes: After finest stone, make 3–5 very light passes per side (pressure less than tool weight). Test with parallel nail drag.
– Edge-trailing strokes: On final stone, make 5–10 strokes pulling the edge away from the stone.
– Stropping: Draw edge away from a leather strop charged with compound. 10–15 passes per side. Never push edge into strop.
Common pitfall: Aggressively scraping edge on wood or stone. This damages the apex. Gentle, controlled removal is essential.
Step 5: Final Refinement and Verification
Why: A refined edge reduces friction, cuts cleaner, and resists corrosion better.
How:
– Use ultra-fine stone (8000+ grit), ceramic rod, or strop for final polish.
– Immediately perform the paper test. If clean, stop. Avoid over-polishing.
– Wipe clean with oil cloth. Return to Prevention protocols.
Technique Adaptations: Tailoring the Workflow
Adjust the universal workflow for specific tool geometries and use cases.
Chisels and Plane Blades (Woodworking)
– Critical focus: The back (flat side) must be flatter than the bevel. Allocate significant flattening effort here. For Western tools, aim for a refined finish near the edge. For Japanese laminated blades, work only the steel rim around the hollow (ura).
– Angle guidance: General purpose: 25°. Hardwoods/paring: 30°. Softwoods: 20°. Hollow grinding (slow-speed grinder) reduces friction for plane blades but requires skill.
– Verification: Test on end grain of softwood. Clean, glassy shavings indicate sharpness; tear-out suggests residual dullness or wire edge.
– Budget path: “Scary Sharp” method—adhere sandpaper (220 to 2000+ grit) to float glass. Effective and perfectly flat.
– Field adaptation: If a chisel chips mid-task with no stones available, carefully strop on smooth leather or the sole of a plane for temporary function.
Kitchen Knives (Western & Japanese)
– Geometry awareness: Western knives typically have symmetric double bevels. Japanese knives may be single-bevel (sharpen one side only) or asymmetric (e.g., 70/30). Research your knife type. For single-bevel, sharpen only the beveled side; lightly deburr the flat side with edge-leading strokes. For asymmetric, allocate more time to the primary bevel side.
– Angle considerations: Western chef’s knife: 15–20° per side. Japanese Gyuto: 10–15° per side (often asymmetric). Paring knife: 12–15°. Generally match factory angles unless adapting for specific needs.
– Honing role: Use a ceramic honing rod weekly to realign the edge. True sharpening needed less frequently with proper care. Caution: Avoid grooved steel rods on hard Japanese steel—they risk chipping.
– Stone preparation: Japanese knives often use hard steel. Soak natural water stones fully per manufacturer instructions; synthetic stones may need only surface wetting. Rushing causes cracks.
– Safety practice: Place damp towel under stone to prevent slipping. Keep fingers curled away from edge path. Work deliberately.
Pruners, Loppers, and Garden Shears
– Mechanism awareness: Bypass pruners function like scissors; sharpen only the beveled cutting blade. The counter-blade (anvil or opposing blade) should remain smooth and flat.
– Disassembly advantage: Quality pruners (Felco, ARS) often allow partial disassembly. Remove spring, clean pivot thoroughly, sharpen blade off the tool for safety and access. Reassemble with pivot oil.
– Angle: Typically 20–25°. Follow the existing bevel—prioritize durability over extreme sharpness for garden tasks.
– Corrosion management: For light rust, use 0000 steel wool with oil before sharpening. For heavy rust, research electrolysis methods thoroughly first; never use vinegar on tools with wooden handles (moisture damage risk).
– Verification: Test on appropriate green wood. Clean cut = success. Crushing indicates dullness or misalignment; adjust tension screw if applicable.
– Budget path: A mill bastard file works in a pinch. Clamp securely. File only on push stroke, following the bevel. Finish with fine stone or honing rod to remove file marks.
Saws (Hand Saws: Rip, Crosscut, Dovetail)
– Critical sequence: Check and adjust tooth set (lateral bend) before sharpening. Never sharpen without verifying set.
– Two-step process:
1. Setting: Use a saw set tool. Adjust to match existing set (typically minimal). Squeeze one tooth at a time, alternating sides. Test by pulling saw through a kerf in scrap—it should move freely without binding.
2. Filing: Secure saw in vise with teeth just above jaws. Use triangular saw file matching tooth count (e.g., 6–8″ file for 10–12 tpi). File only on push stroke. Maintain consistent angle (rip saws: ~90° to blade; crosscut: ~15° forward rake). File every other tooth from one side, then flip and file the rest.
– Learning curve: Saw sharpening requires practice. Start on an inexpensive saw. For valuable vintage saws, consider professional service initially.
– Modern note: Many Japanese pull-saws and some Western saws have impulse-hardened teeth not designed for user sharpening. Check manufacturer specifications. Focus Prevention efforts on blade cleaning and rust prevention to maximize lifespan.
– Field note: For slightly dull non-hardened saws, very light stroking along the teeth (not across) with a fine diamond rod may offer temporary improvement—but this is not a substitute for proper sharpening.
Axes, Hatchets, and Machetes
– Geometry note: These tools benefit from a convex edge (curved bevel), not a flat bevel. Convex edges withstand impact better and cut deeper with less sticking.
– Grinding phase: If using a bench grinder, apply light, intermittent pressure. Dip frequently in water to prevent overheating (blueing indicates temper loss). Stop when a consistent curve is visible.
– Hand finishing: Refine convex shape with coarse file or stone. Progress to medium/fine stones. Maintain the curve by subtly rocking the edge during strokes.
– Angle range: Typically 25–35° at the very edge, curving to a thicker shoulder. Avoid razor-sharp angles—they chip on knots.
– Safety imperative: Secure tool in vise. Wear eye protection. Grinders remove metal rapidly—proceed slowly.
– Field adaptation: Carry a pocket diamond rod (e.g., Fallkniven DC4). In the field, use controlled strokes along the existing convex curve to restore function.
Beyond the Stone: Navigating Real-World Maintenance Scenarios
Even with diligent Prevention, tools encounter challenges. This section addresses nuanced situations with adaptable solutions—focusing on safety, practicality, and informed decision-making.
Addressing Corrosion: A Tiered Response Approach
Corrosion isn’t always catastrophic. Response depends on severity and tool value.
Surface Discoloration (Light Haze)
– Tools: 0000 steel wool, mineral oil, soft cloth.
– Process: Apply oil to affected area. Gently rub along the steel grain (not across the edge) with steel wool. Wipe clean. Repeat until discoloration lifts. Immediately apply protective oil. Rationale: Oil suspends particles; fine wool minimizes metal removal.
– Critical caution: Avoid liquid rust removers on tools with wooden handles, glued components, or non-ferrous parts—moisture penetration risks swelling, cracking, or adhesive failure.
Pitting (Localized Craters Near Edge)
– Assessment first: Is the pit on the functional cutting edge? If yes, sharpening will remove it but shorten the tool. If behind the edge, it may not affect cutting—clean and monitor.
– Process: For edge pits: Aggressively flatten the back (if applicable) on coarse stone to remove pitting. Re-establish bevel. Accept minor length reduction. For tools where metal loss is unacceptable (e.g., heirlooms), professional conservation may be considered—but often isn’t cost-effective for standard tools.
– Prevention insight: Pitting usually stems from moisture exposure during storage. Review drying and storage protocols from Pillar 1.
Vintage Tool Rehabilitation (Heavy Corrosion, Unknown History)
– Step 1: Document and disassemble. Photograph assembly. Remove handles, screws, springs. Label parts.
– Step 2: Electrolysis (For severe rust on ferrous metal only):
– Setup: Non-conductive tub, washing soda (1 tbsp per gallon of water), battery charger (2–10A), sacrificial steel anode (rebar), insulated wires.
– Process: Submerge tool (cathode) and anode. Connect negative (-) to tool, positive (+) to anode. Bubbles indicate reaction—rust transfers to anode. Run 12–48 hours. Never use salt—it produces hazardous chlorine gas.
– Aftercare: Scrub gently with brass brush under water. Dry immediately and thoroughly. Apply heavy oil coating.
– Safety imperative: Perform outdoors or in ventilated area. Wear gloves and eye protection. Disconnect power before handling. If unfamiliar with electrical setups, seek guidance or choose mechanical cleaning.
– Step 3: Steel assessment: After cleaning, test file resistance. If file bites easily, steel is softer—sharpen carefully with coarse stones. If file skates, steel is harder—use diamond plates or fine stones to avoid chipping.
– Ethical consideration: For historically significant tools, consult a professional conservator. Over-cleaning can diminish historical value.
Resolving the Wire Edge Challenge
You sharpen carefully. The paper test passes. One cut later—the edge feels dull. This commonly indicates an unremoved wire edge (burr).
- Diagnosis: After sharpening, inspect edge under magnification. A wire edge appears as a faint, shiny thread. Or, make a light cut in soft wood—if the first cut is clean but the second is rough, the burr likely broke off.
- Prevention during sharpening:
- After each grit change, flip the tool and make 2–3 light passes on the opposite side to weaken the burr.
- On the final stone, incorporate edge-trailing strokes for the last few passes.
- Removal techniques:
- Stropping: Most reliable method. 10–15 light passes per side on a clean leather strop.
- Cork method: Gently rub the edge along the side of a natural wine cork. The soft wood fractures the burr without damaging the apex.
- Refined nail test: After sharpening, lightly drag the edge parallel across your thumbnail. Smooth catch = burr removed. Chattering or roughness = burr remains.
- Root cause: Often stems from excessive pressure on fine stones or stopping sharpening prematurely. Patience during the final refinement stages is essential.
Correcting Common Geometry Challenges
Even experienced maintainers encounter these. Recognition enables correction.
Unintended Convex Bevel
– Cause: Rocking the tool during sharpening strokes. Common in freehand knife work.
– Diagnosis: Edge feels sharp initially but dulls rapidly. Visual inspection shows a curved bevel instead of flat planes.
– Correction: Return to coarse stone. Focus pressure to re-establish a flat bevel. Use an angle guide jig for consistency. Minor convexity may be corrected with extended time on medium stone using strict flat contact.
– Prevention: Practice stroke consistency on scrap metal. Use marker on bevel to visualize contact points.
Hollow Behind Edge (Chisels/Plane Blades)
– Cause: Over-flattening the back without maintaining the very edge area, especially with aggressive coarse stone use.
– Diagnosis: Tool fails to cut cleanly despite a sharp-looking bevel. Paper test inconsistent. Visual inspection shows a dip just behind the edge on the back.
– Correction: On a fine stone (1000+ grit), apply pressure only to the very edge of the back (last 1/16″). Use light, short strokes. Verify frequently with a straightedge.
– Prevention: When flattening backs, progress through grits deliberately. Minimize time on coarse stones—just enough to address damage.
Bevel Asymmetry (Double-Bevel Tools)
– Cause: Uneven pressure or angle between sides during sharpening.
– Diagnosis: Tool cuts off-line (e.g., plane blade drifts). Paper test shows one side cuts better.
– Correction: Spend additional time on the weaker side. Use marker to confirm even scratch patterns. For significant asymmetry, use a guided jig to reset symmetry.
– Prevention: Count strokes per side (e.g., 10 left, 10 right). Use a jig for critical tools requiring precision.
Tool-Specific Challenge Quick Reference
| Symptom | Likely Cause | Immediate Action | Sustainable Practice |
|---|---|---|---|
| Chisel crushes wood fibers | Wire edge present; back not flat | Strop edge; verify back flatness | Flatten back thoroughly before sharpening |
| Knife pulls to one side when slicing | Asymmetric bevel; uneven edge | Sharpen weaker side more deliberately | Use angle guide; count strokes per side |
| Pruners crush stems | Dull edge; misaligned blades | Sharpen cutting blade; check tension screw | Disassemble periodically, clean pivot, sharpen properly |
| Plane blade leaves ridges | Nicks; uneven sharpening | Inspect edge under light; resharpen | Use marker to verify even bevel contact during sharpening |
| Axe sticks in wood | Edge profile too flat; convex shape lost | Re-establish convex edge on coarse stone | Maintain convex geometry during sharpening |
| Saw binds in cut | Teeth set too narrow; dull teeth | Check set with feeler gauge; sharpen teeth | Reset teeth before sharpening; keep blade clean |
Knowing When to Adapt, Replace, or Seek Help
Not every tool warrants extensive restoration. Apply thoughtful judgment:
- Prioritize restoration for: Tools with sentimental value, known high-quality steel (e.g., vintage Stanley, Japanese laminated steel), or high replacement cost.
- Consider replacement for: Tools made with very soft steel (fails to hold edge), severe structural damage (cracked handle, broken tang), or non-sharpenable designs (impulse-hardened teeth where manufacturer states replacement is intended).
- Seek professional assistance for:
- Complex mechanisms (scissors with precise tension screws, high-end pruning shears)
- Historically significant items (risk of devaluing through improper handling)
- Carbide-tipped tools (require specialized diamond equipment)
- Situations where you lack confidence or proper tools—forcing a repair often causes greater damage.
Thoughtful stewardship includes recognizing when expertise, replacement, or retirement is the most responsible choice. This reflects wisdom, not limitation.
Your Questions, Answered
Q: How often should I sharpen my tools?
A: There is no universal calendar schedule. Frequency depends on usage intensity, materials cut, steel quality, and your Prevention habits. A chef’s knife used daily may need honing weekly and sharpening every few months. A chisel used occasionally on softwood might need sharpening annually. Rely on Pillar 2 Assessment—the paper test and visual inspection—not time elapsed. Strong Prevention practices significantly extend intervals between sharpening sessions.
Q: Are expensive sharpening stones necessary to start?
A: No. A dual-sided synthetic water stone (e.g., 1000/6000 grit) under $30 handles most home sharpening needs effectively. Diamond plates ($40–$80) excel at flattening and coarse work—they maintain flatness well. Avoid very cheap “combination stones” with inconsistent grit bonding. Skill development matters more than premium gear initially. Invest in higher-end tools later, after confirming your commitment and technique.
Q: What’s the most common sharpening challenge for beginners?
A: Inconsistent angle maintenance. Rocking the tool or varying pressure creates uneven edges that perform poorly. Solution: Use an angle guide jig for your first several sharpening sessions to build muscle memory. Additionally, beginners often stop before fully removing the wire edge (burr), mistaking its presence for sharpness. Master burr detection and removal techniques described in Pillar 3, Step 4.
Q: Can serrated knives or bread knives be sharpened at home?
A: Yes, but it requires specialized tools and patience. Standard flat stones cannot access serrations. You need a tapered diamond or ceramic rod that fits each scallop. Work each serration individually with light, consistent strokes matching the original angle. It is time-intensive—many prefer professional service for valuable serrated knives. For inexpensive serrated knives, replacement is often practical. Never attempt to flatten serrations—that destroys the knife’s intended function.
Q: Will sharpening remove the black oxide or “blued” finish on my tool?
A: Sharpening removes metal, so the polished area near the edge will lose the original finish. This is normal and expected for working tools. Functionality outweighs cosmetic appearance at the cutting edge. For tools where aesthetics are paramount (e.g., display pieces), emphasize Prevention to minimize sharpening needs. Some choose to reapply finishes after sharpening, but this is advanced and generally unnecessary for tools used regularly.
Q: Does freezing a knife improve sharpness?
A: No. This is a persistent myth without metallurgical basis. Temperature changes do not alter edge geometry at a microscopic level relevant to sharpness. Freezing may temporarily increase brittleness but creates no functional edge improvement. Focus on proven geometry and technique. Save freezer space for food.
Q: How do I sharpen curved tools like gouges or scythes?
A: Match the abrasive to the curve. For shallow curves (gouges):
– Use a slip stone (narrow stone fitting the curve) or wrap sandpaper around a dowel of matching diameter.
– Maintain consistent pressure along the entire curve during strokes.
– For deeper curves (scythes): Specialized curved stones or files are used. Many scythe users employ freehand technique with a whetstone held at the correct angle while drawing the blade across it. Practice on scrap first. When uncertain, seek guidance from experienced practitioners—these skills benefit from hands-on demonstration.
Q: What’s the practical difference between honing and sharpening?
A: Honing realigns a microscopically rolled edge without removing metal. Sharpening removes metal to create a new edge. High-quality steel knives often develop rolled edges frequently because the hard steel resists deformation but can bend slightly. Honing with a ceramic rod corrects this quickly. When honing no longer restores performance, the edge is truly dull or damaged—time for sharpening. Think of honing as “tuning” and sharpening as “rebuilding.”
Q: Is motor oil or cooking oil acceptable for tool protection?
A: Not recommended. Motor oil contains additives that may gum up or attract grit. Cooking oils (vegetable, olive) can oxidize, become sticky, or turn rancid over time. Prefer purpose-formulated options: food-grade mineral oil (kitchen tools), Boeshield T-9, or Renaissance Wax. A dedicated oil rag (as described in Pillar 1) remains the simplest, most reliable solution for routine protection.
Q: My sharpening stone has a concave dip. Is it unusable?
A: No—dishing is normal wear, especially on softer water stones. However, a dished stone prevents flat sharpening. Flatten it immediately using the method in Pillar 3, Step 1 (diamond plate or sandpaper on glass). Regular flattening (every 5–10 sharpening sessions) maintains stone performance and extends its usable life. Prevention is far easier than correcting deep dishing.
Q: Are electric sharpeners inherently damaging to knives?
A: Not inherently, but quality and usage matter greatly. Inexpensive pull-through electric sharpeners often remove excessive metal, create inconsistent angles, and risk overheating blades (potentially affecting temper). However, higher-end electric sharpeners with adjustable angle guides, cool-running abrasives (e.g., certain Work Sharp models), and user control can be effective—particularly for those with limited dexterity or time constraints. For valuable knives or precision work, manual sharpening typically offers superior control and edge quality. If using electric, select models with ceramic or fine diamond abrasives and follow instructions precisely.
Q: How can I assess if a tool’s steel quality supports good edge retention?
A: Practical observation is key: After proper sharpening, how long does the edge perform well under normal use? High-carbon steels (e.g., O1, A2) and quality stainless alloys (e.g., VG-10, S30V) generally hold edges longer than very soft steels. Manufacturer specifications may include Rockwell Hardness (HRC); values around 58+ often indicate better edge retention potential for tools, though heat treatment is equally critical. Vintage tools frequently used superior steel formulations; modern budget tools sometimes prioritize cost over steel quality. When purchasing new tools, research steel type and heat treatment reputation—this often matters more than brand alone. Remember: A well-maintained tool with decent steel consistently outperforms a neglected “premium” tool.
Conclusion and Your Path Forward
We’ve explored the philosophy of tool stewardship, the mechanics of edge geometry, and practical responses to real-world challenges. Let’s distill the enduring principles.
Three Foundational Practices
1. Prevention is proactive sharpening. The consistent post-use ritual (clean, dry, protect, store) prevents the majority of edge degradation. This isn’t optional upkeep—it’s integral to efficient, safe work.
2. Assess before acting. The five-sense diagnostic sequence ensures you apply the right technique to the actual condition. This preserves tool life, saves time, and builds diagnostic confidence.
3. Geometry defines performance. A consistently formed edge at a moderate grit outperforms an inconsistent edge at an ultra-fine grit. Master angle control and burr management before pursuing extreme refinement.
The 24-Hour Practice: One Small Step
Within the next day, select one frequently used tool—a kitchen knife, favorite chisel, or trusted pruners. Perform the complete Pillar 1 ritual: clean meticulously, dry every surface, apply a microscopic protective film, and store intentionally. Then, conduct the full Pillar 2 assessment (sight, safe touch test, paper test). If needed, apply only the minimal Pillar 3 technique required (likely light honing or stropping). This single, mindful act breaks cycles of neglect. It builds tangible competence. It transforms theory into personal experience. Starting here creates momentum.
The Deeper Connection: Tools as Partners
Tools embody centuries of human ingenuity—from early stone blades to modern metallurgy. Caring for them connects us to a continuum of craftsmanship. A sharp chisel doesn’t merely cut wood; it reveals grain with minimal effort and respect for the material. Sharp pruners don’t just trim branches; they support plant health through clean, healing cuts. A sharp knife doesn’t just slice food; it honors ingredients and the cook’s intent. Shifting perspective—from viewing tools as disposable items to valuing them as capable partners—cultivates patience, observation, and respect. These qualities enrich not only workshop, garden, or kitchen work but extend into broader life practices.
Your tools are ready. Not as burdens requiring maintenance, but as capable allies awaiting your care. Begin small. Stay consistent. Notice the difference a truly refined edge makes—the whisper of clean cuts, the efficiency of precise work, the quiet satisfaction of stewardship. These rewards are accessible through mindful practice, starting today.
Explore Our Complete System:
The Woodworker’s Sanctuary: Building a Dust-Free, Efficient Workshop | Garden Tool Longevity: Seasonal Care Calendar for Shovels, Hoes & Shears | Kitchen Knife Mastery: From Selection to Daily Honing Rituals | The Art of the Hand Plane: Tuning, Setup, and Perfect Shavings | Vintage Tool Rescue: Ethical Restoration for Heirloom Pieces | Sustainable Workshop: Non-Toxic Cleaners, Oils, and Finishes | The 10-Minute Daily Workshop Reset: Habits for Lifelong Organization