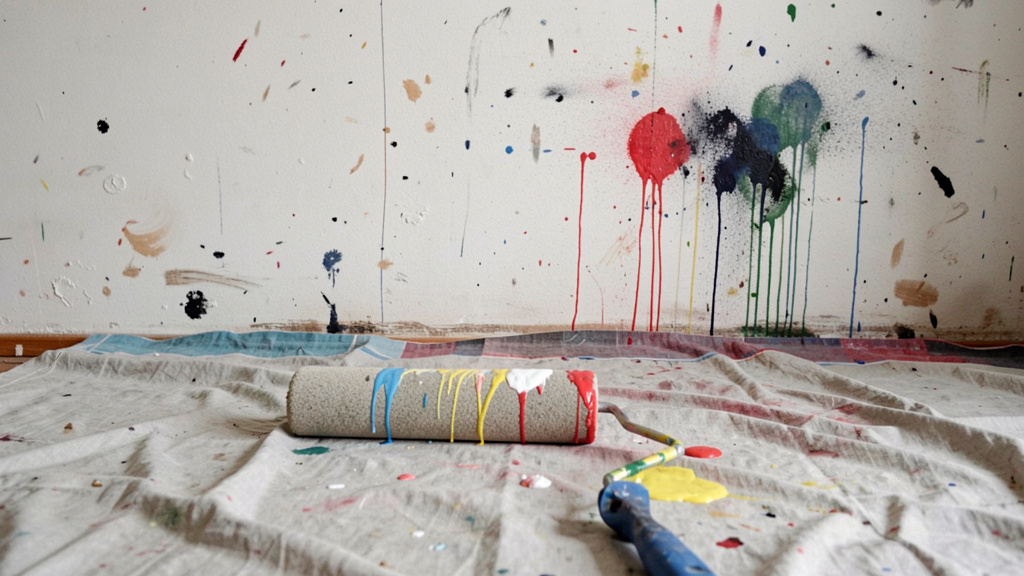
Preventable missteps—not lack of skill—often determine painting outcomes. This guide identifies common pitfalls that compromise finishes and offers adaptable, principle-based strategies to support confident, lasting results in any space.
A single overlooked detail can transform careful effort into frustration: peeling edges, uneven sheen, or stains resurfacing through fresh coats. These aren’t random failures—they signal gaps in preparation, environmental awareness, or material selection. This resource moves beyond generic checklists to explore the why behind finish-compromising errors, offering clear reasoning, adaptable protocols, and context-aware solutions. Whether refreshing a single accent wall or preparing multiple rooms, the insights here foster informed decisions grounded in painting fundamentals. Precision isn’t perfectionism; it’s thoughtful execution. And thoughtful execution is a learnable practice.
Introduction: The Interconnected Nature of a Successful Paint Job
Painting appears straightforward—apply color, admire results. Yet beneath this simplicity lies a dynamic relationship between surface, product, environment, technique, and timing. A resilient finish emerges not from isolated steps but from harmonizing these elements intentionally. Many experienced painters observe that the majority of finish issues trace back to decisions made before the brush touches the wall: unaddressed surface conditions, mismatched products, or overlooked environmental factors. This guide reframes painting as an integrated process where awareness at each stage builds cumulative confidence.
Consider a wall painted without addressing prior nicotine residue. Initial coverage may seem adequate, but adhesion fails as contaminants repel the paint film. Stories like this recur not from carelessness, but from incomplete preparation knowledge. This resource closes those gaps systematically. You’ll learn to assess surfaces critically, anticipate environmental influences, and select methods aligned with your space’s unique demands. This isn’t about rigid rules—it’s about cultivating judgment. By understanding root causes, you gain flexibility to adapt across projects, seasons, and constraints. Remember this thread as we explore each common challenge: Lasting results are cultivated in the thoughtful moments before application begins.
The Paint Integrity Framework: A Balanced Approach to Execution
Adopt this foundational perspective: Paint Integrity = Surface Readiness × Product Compatibility × Environmental Awareness × Technique Adaptation. All elements influence the outcome. Neglecting one may not cause immediate failure, but it increases vulnerability over time. This framework draws from widely recognized surface preparation principles and emphasizes proactive assessment over reactive fixes. Imagine building on unstable ground—the structure may stand initially, but stress reveals weaknesses. Similarly, paint on an unprepared surface may appear sound temporarily before adhesion weakens, stains emerge, or texture inconsistencies become visible.
The framework unfolds in three fluid phases:
1. Pre-Application Assessment: Evaluate surface condition, existing coatings, environmental factors (temperature, humidity, airflow), and functional needs (moisture exposure, traffic level, lighting).
2. Process Adaptation: Apply preparation steps, product choices, and techniques calibrated to your assessment—not a universal script. Adjust for constraints like time, budget, or skill level.
3. Post-Application Awareness: Monitor drying conditions, allow appropriate cure time before use, and store materials properly for future touch-ups.
This mindset shifts focus from “Did I finish painting?” to “Did I create conditions for this finish to endure in this space?” You move from hoping for success to engineering resilience. Internalize this lens as we examine each common challenge. It transforms isolated tips into a cohesive strategy.
Mistake #1: Skipping Surface Preparation – The Foundation Compromise
Surface preparation is frequently minimized as tedious groundwork. Yet it establishes the physical and chemical foundation for adhesion. Rushing or omitting it doesn’t merely risk minor flaws—it significantly increases the likelihood of premature failure. Professionals emphasize preparation not as busywork, but as the most influential phase for long-term results.
Recognizing Preparation Gaps
- Peeling or Flaking: Paint lifts at edges or high-contact zones, indicating poor substrate bonding.
- Blistering or Bubbling: Raised pockets form where moisture or air was trapped beneath the film, often over uncleaned grease or in humid conditions on unsealed surfaces.
- Uneven Sheen or Coverage: Patches appear matte while others shine, or color looks thin in spots—common over porous repairs or contaminant residues.
- Amplified Imperfections: Every dent, scratch, or texture variation becomes more visible under new paint. Paint reveals; it rarely conceals.
- Stain Re-emergence: Water marks, nicotine, or wood tannins seep through fresh coats days or weeks later.
Why Preparation Matters Chemically
Paint adheres through molecular attraction between the film and substrate. Contaminants disrupt this bond:
* Dust/Oils: Create microscopic barriers. Even invisible fingerprints can cause localized adhesion loss.
* Grease/Wax: Repel water-based paints. Paint may bead initially or fail later as contaminants migrate.
* Loose Paint: New layers bond to the unstable surface beneath, not the wall itself.
* Moisture: Trapped dampness expands during drying, pushing paint away from the substrate. In persistent cases, it encourages mold growth behind the film.
* Porous Patches: Unsealed spackle or bare wood absorbs binder unevenly, concentrating pigment and causing dark spots (“flashing”).
Think of adhesion like tape on glass: dust prevents a secure hold. Similarly, paint requires intimate contact with a stable surface. Preparation isn’t about achieving laboratory perfection—it’s about removing barriers to reliable bonding.
Addressing Issues Mid-Project
- Paint Still Wet: Stop. Gently wipe affected areas with a damp cloth (water-based) or appropriate solvent (oil-based, with ventilation). Return to preparation steps.
- Paint Dry with Visible Failure: There is no reliable shortcut. Carefully:
- Scrape loose paint to a sound edge using a putty knife. Feather edges smoothly.
- Sand the area and several inches beyond with 120-grit paper.
- Clean thoroughly: Wipe with a tack cloth, then wash with a TSP substitute or mild degreaser per label instructions. Rinse and allow complete drying (24+ hours in humid conditions).
- Repair substrate: Fill holes/cracks with appropriate compound. Sand smooth when dry.
- Prime: Apply a bonding or stain-blocking primer suited to the issue. Allow full dry time per product guidelines.
- Repaint: Only after primer is fully dry.
Painting over failing areas compounds the problem. Address the root cause first.
Adaptive Preparation Protocol
Tailor this sequence to your project’s scale and constraints:
1. Clear and Protect: Move furniture. Cover floors with canvas over plastic (canvas absorbs spills; plastic reduces slip risk). Mask trim/windows with quality painter’s tape. Budget Tip: Use cardboard strips tucked under trim edges if tape budget is limited—remove carefully before paint dries.
2. Clean Methodically: Wash surfaces with warm water and mild detergent. Focus on kitchens (grease), bathrooms (soap scum), and high-touch zones. For stubborn grease, use a dedicated degreaser. Rinse well. Time-Saver: Prioritize cleaning visible problem areas first; assess if full-wall cleaning is needed.
3. Repair Thoughtfully: Inspect under angled light (a work lamp held sideways reveals hidden flaws). Fill imperfections with spackle or joint compound. Sand repairs smooth (start 120-grit, finish 220-grit). Wipe with a tack cloth. Critical Check: Run your hand over the surface. If you feel grit or bumps, sand and clean again. Your touch is a reliable sensor.
4. Create Adhesion Profile: For glossy surfaces (trim, cabinets), lightly sand with 150–220 grit paper to create “tooth.” Wipe dust. Alternative: Use a liquid deglosser where sanding is impractical (follow product instructions). Note: Some bonding primers reduce—but rarely eliminate—the need for deglossing on very smooth surfaces.
5. Prime Purposefully: Primer seals, blocks, and promotes adhesion. Choose based on need:
* Stain-Blocking: For water stains, nicotine, knots (shellac- or oil-based formulas).
* Bonding: For glossy surfaces, metal, tile (check label compatibility).
* Drywall/Sealing: For new drywall or extensive repairs to prevent flashing.
* Universal: For sound, previously painted surfaces with minimal color change.
Insight: The “Good Enough” Trap
“It looked fine, so I skipped priming” is a common regret. Older paint may appear sound but harbor invisible chalkiness or contamination. A simple adhesion check helps: Press strong tape firmly onto the surface, then rip it off sharply. If paint lifts, full preparation is needed. In high-visibility or high-value areas, thorough preparation pays lasting dividends. Remember: Preparation work remains visible through the paint. There are no hidden shortcuts in painting.
Mistake #2: Ignoring Primer When Needed – The False Economy
Primer is often misunderstood as “cheap paint” or an optional step to save time. In reality, primer and topcoat serve distinct chemical roles. Skipping primer where needed rarely saves effort—it typically leads to more coats, uneven appearance, or earlier repainting. Viewing primer as targeted preparation—not expense—shifts perspective.
Signs Primer Was Needed
- Stains Reappear: Water marks, rust, or wood knots bleed through one or two topcoats.
- Flashing: Patches over repairs or porous areas look darker or have different sheen.
- Poor Coverage: Light paint over dark requires excessive coats; color appears washed out.
- Premature Peeling: On glossy surfaces, metal, or stained wood where adhesion was compromised.
- Mildew Return: In damp areas painted without mildew-resistant primers or topcoats.
Primer’s Distinct Role
Topcoats prioritize color, durability, and aesthetics. Primers prioritize adhesion, sealing, and uniformity:
* Higher Resin Content: Creates a stronger film that bonds aggressively to substrates and seals pores.
* Specialized Formulations: Bonding primers grip difficult surfaces; stain-blockers form barriers against tannins or nicotine; sealing primers equalize absorption on porous patches.
* pH Management: On new plaster or masonry, primers neutralize alkalinity that can degrade topcoats over time.
Painting latex directly over an oil-based stain without a blocking primer is unlikely to succeed. Water-based topcoats can reactivate soluble compounds in stains. Only a dedicated barrier primer addresses this chemically. Similarly, latex over unprepared glossy oil paint risks adhesion failure due to incompatible surface energy. Chemistry matters.
Adaptive Response Strategies
- Stain Bleed-Through: Stop. Let topcoat dry fully. Lightly sand the area. Apply a spot coat of appropriate stain-blocking primer (e.g., shellac-based for severe stains), feathering slightly onto surrounding paint. Once dry per label, repaint the entire wall section to avoid sheen mismatches. Never spot-paint stains with topcoat alone.
- Flashing on Repairs: Lightly sand the whole wall with 220-grit paper to unify texture. Clean thoroughly. Apply a full coat of drywall or universal primer to the entire wall—not just patches—to seal uniformly. Then apply topcoats.
- Poor Coverage (Light over Dark): If two topcoats still show the base color, applying a third topcoat is inefficient. Instead, use a gray-tinted universal primer. It creates a neutral mid-tone base, improving topcoat opacity and often reducing total coats needed. Many paint retailers offer this service.
Primer Decision Guide (Adapt to Your Context)
Use this flow to guide choices—don’t guess:
1. New, Bare, or Highly Porous Surface? (Drywall, bare wood, large repairs)
→ Use a sealing primer. Why: Prevents uneven absorption and reduces topcoat consumption.
2. Visible Stain Present? (Water, rust, nicotine, knots)
→ Identify stain type. Use a dedicated stain-blocking primer. Shellac-based formulas work fastest for severe stains; oil-based offer strong blocking. Note: Water-based “stain-blocking” primers vary in effectiveness—check labels for specific stain types.
3. Glossy, Smooth, or Non-Absorbent Surface? (Semi-gloss walls, cabinets, metal)
→ Use a bonding primer after light sanding or deglossing. Why: Creates mechanical and chemical adhesion where topcoat alone may slide.
4. Dramatic Color Change? (Dark to light, bold to neutral)
→ Consider a tinted primer (gray for light colors over dark). Why: Improves coverage efficiency. Not always mandatory, but often time-saving.
5. High-Moisture Area? (Bathroom, kitchen backsplash)
→ Use primer with mildewcides or ensure topcoat is formulated for humidity. Priming seals the surface, reducing moisture penetration.
Important Note: “Paint and primer in one” products can suffice for minor repaints on clean, sound, previously painted surfaces with minimal color change. They are not substitutes for purpose-specific primers in the scenarios above. Always read product labels for limitations. When uncertain, priming is a low-cost safeguard against high-effort corrections later.
Insight: Primer as Process Insurance
Think of primer as investing in process reliability. The modest time and cost upfront prevent disproportionate rework later. In many cases, using the right primer actually reduces total project time—blocking a stain in one primer coat is faster than applying three ineffective topcoats. For DIYers, this mindset shift—from “extra step” to “strategic step”—builds confidence and conserves effort long-term.
Mistake #3: Mismatched Paint or Sheen Selection – Ignoring Context
Choosing paint involves more than color preference. Formulation (latex, acrylic, specialty) and sheen (flat to gloss) must align with the surface, room function, lighting, and usage patterns. A mismatch doesn’t just affect appearance—it impacts cleanability, durability, and longevity. This is less about “right vs. wrong” and more about fit for purpose.
Symptoms of Mismatch
- Poor Washability: Flat paint in a hallway shows permanent scuffs; satin in a low-light bedroom feels unexpectedly shiny.
- Premature Wear: Trim painted with wall-grade paint chips easily at contact points.
- Mildew Growth: Standard paint in a bathroom develops spots despite cleaning.
- Chalking/Fading: Interior paint used outside degrades rapidly under UV exposure.
- Yellowing: Oil-based topcoats on light cabinets yellow over time, especially in low light.
- Sheen Inconsistency: Mixing sheens of the same color on one wall creates visible “lines” where light reflects differently.
Understanding Formulations and Sheens
Base Types:
* Latex (Water-Based): Low odor, easy water cleanup, flexible. Ideal for most interior walls. Less durable on high-wear surfaces unless premium acrylic.
* Acrylic Latex (Premium): Higher resin content = better durability, color retention, adhesion. Worth considering for high-traffic zones, exteriors, or trim.
* Oil-Based (Alkyd): Hard film, excellent leveling. Best for bare metal (rust prevention) or high-wear trim where local regulations allow. Downsides: Strong odor, slow dry, mineral spirits cleanup, yellowing risk. Modern Alternative: Water-based alkyd hybrids (e.g., cabinet/trim enamels) offer similar durability with easier cleanup and reduced yellowing.
* Specialty Formulas: Mildew-resistant (bathrooms), scrubbable (kids’ rooms), low-VOC (sensitive spaces). Match to room challenges.
Sheen Guide (Reflectivity & Function):
* Flat/Matte (0–5%): Zero shine. Hides imperfections well. Low washability. Best for: Ceilings, low-traffic adult bedrooms. Avoid: High-touch areas.
* Eggshell (10–25%): Subtle luster. Moderate washability. Hides minor flaws. Best for: Living rooms, dining rooms, hallways (light use).
* Satin (25–45%): Soft pearl sheen. Good durability and cleanability. Shows more texture. Best for: Family rooms, kids’ rooms, kitchens, bathrooms (walls), doors.
* Semi-Gloss (45–75%): Noticeable shine. Highly washable, moisture-resistant. Highlights flaws. Best for: Trim, doors, cabinets, bathroom/kitchen accents. Avoid: Large imperfect walls.
* Gloss (75%+): Mirror-like. Maximum durability. Shows every flaw. Best for: Furniture, accent pieces. Rarely used on walls.
Critical Insight: Sheen choice interacts with lighting and wall condition. Semi-gloss on a textured ceiling creates distracting reflections. Flat paint in a child’s playroom guarantees frustration with marks. Match sheen to how the space is used, not just aesthetics.
Adaptive Correction & Selection
- Wrong Sheen Applied: If newly painted and purely functional (e.g., flat in high-traffic area), a clear, water-based polyurethane designed for painted surfaces may add durability—but test first for color/sheen shift. Reliable fix: Lightly sand, clean, and repaint with appropriate sheen.
- Mildew Due to Product Choice: Do not paint over mildew. Clean first: Mix 1 part bleach with 3 parts water (or use commercial mildew remover). Apply, wait 10–15 minutes (don’t let dry), gently scrub, rinse thoroughly, and dry completely. Then repaint with mildew-resistant formula.
- Room-by-Room Guidance:
- Ceilings: Flat/matte. Use ceiling-specific paint (thicker, reduces drips).
- Living/Dining/Adult Bedrooms: Eggshell balances flaw-hiding and cleanability.
- Hallways/Family Rooms/Kids’ Rooms: Satin withstands scuffs and cleaning.
- Kitchens (Walls): Satin resists grease. Backsplashes: Semi-gloss or non-paint surfaces.
- Bathrooms (Walls): Satin or semi-gloss with mildew resistance. Ensure ventilation.
- Trim/Doors: Semi-gloss for definition and durability. Use premium acrylic or water-based alkyd hybrid.
- Cabinets: Semi-gloss/gloss with cabinet-specific formula. Prep (clean, degloss, prime) is essential.
- Exteriors: 100% acrylic latex in satin/semi-gloss. Never use interior paint outside.
Practical Tip: Buy all paint for a room in one batch. Note the lot number for future touch-ups. Ask the store to shake cans thoroughly before leaving—improper mixing causes color variation. Store leftovers properly: seal tightly (plastic wrap under lid helps), label with room/sheen/date, store upside down in a cool, dry place.
Insight: Sheen Consistency on Continuous Surfaces
Using different sheens of the same color on adjacent surfaces (eggshell walls, semi-gloss trim) is standard. But using different sheens on the same continuous wall surface creates visible “sheen lines.” Always calculate paint needs accurately (online calculators help) and buy 10–15% extra for errors and touch-ups. Consistency within a surface matters more than matching every room identically.
Mistake #4: Overlooking Environmental Conditions – The Unseen Variable
Paint cures through chemical processes sensitive to temperature, humidity, and airflow. Ignoring these factors is like baking without checking oven temperature—results become unpredictable. Many finish issues (blistering, slow dry, poor adhesion) stem from environmental mismatch, not product failure.
Environmental Impact Signs
- Blistering/Bubbling: Surface too hot (direct sun), high humidity trapping moisture, or painting over damp substrate.
- Poor Flow/Leveling: Paint dries too fast (heat, low humidity, direct fan), leaving brush marks or lap lines.
- Extended Tackiness: Paint stays sticky for days due to cold temps, high humidity, or poor ventilation.
- Mildew Development: Appears in corners/shaded areas after painting in high humidity without ventilation or mildew-resistant paint.
- Adhesion Failure: Condensation on surface (painting below dew point), extreme cold inhibiting cure.
- Cracking (“Alligatoring”): Rigid topcoat over flexible undercoat in temperature swings, or painting in extreme cold.
How Environment Affects Cure
Paint doesn’t just “dry”—it cures:
1. Evaporation: Solvents (water or mineral spirits) leave the film.
2. Film Formation: Polymer particles fuse (latex) or resins oxidize (oil) into a continuous layer.
Temperature Matters:
* Too Cold (<50°F/10°C for most latex): Solvents evaporate slowly; particles can’t fuse properly. Result: Weak film, poor adhesion. Oil paints cure extremely slowly.
* Too Hot (>85°F/29°C): Solvents evaporate too fast. Surface skins over, trapping moisture/solvents underneath → blisters. Brush marks don’t level.
* Surface vs. Air Temp: Walls in direct sun can be 20–30°F hotter than air. Always check surface temperature with an inexpensive infrared thermometer. Paint fails if the surface is outside the product’s range.
Humidity’s Role:
* High Humidity (>70%): Saturates air, slowing evaporation. Paint stays wet longer, attracting dust/insects. Trapped moisture causes blisters or mildew. Critical risk: Painting when surface temp is at or below the dew point (condensation forms) = painting on water = adhesion failure.
* Low Humidity (<30%): Causes rapid drying, especially in arid climates or heated winter homes. Leads to poor flow, lap marks, reduced “open time” for blending.
Airflow Balance:
* Too Little: Traps fumes, slows drying, increases local humidity.
* Too Much (Direct Drafts): Causes uneven drying, lap marks, dust embedding. Fans blowing directly on wet paint are problematic.
Adaptive Environmental Protocol
Treat conditions like a pilot checks weather:
1. Forecast First: Schedule painting for stable, moderate days. Avoid rain within 24–48 hours (exteriors), humidity spikes, or temperature extremes.
2. Measure Surface Temp: Use an infrared thermometer. Confirm it’s within the paint’s specified range (check label; typically 50–85°F/10–29°C for latex). Exterior Tip: Paint east walls in morning, west walls in afternoon—avoid direct sun on the surface being painted.
3. Check Humidity & Dew Point: Use a hygrometer (often in thermostats). Ideal: 40–60% humidity. Critical Rule: Surface temperature must be at least 5°F (3°C) above the dew point. (e.g., Dew point 55°F → surface must be ≥60°F). Weather apps show dew point.
4. Manage Airflow: Close windows/doors during application to prevent drafts. After painting, increase ventilation: open windows on opposite sides for cross-breeze, use exhaust fans venting outside, position fans to blow out windows—not directly on wet surfaces.
5. Seasonal Adjustments:
* Summer: Paint early morning or evening. Work in shade first. Keep paint cans cool.
* Winter (Interiors): Maintain room temp ≥60°F (15°C) for 24+ hours before/during/after. Use humidifier if indoor air is very dry (<30%).
* Humid Seasons: Prioritize interiors. For exteriors, wait for sustained dry period. Use moisture meter on wood (<15% moisture content ideal).
Insight: Dew Point Awareness Prevents Failure
This is frequently overlooked. Condensation can form on cool surfaces (basement walls, exterior walls on humid mornings) even if the air feels dry. Painting under these conditions guarantees adhesion issues. A $10 hygrometer/thermometer combo is as valuable as a quality brush. Checking dew point isn’t technical overkill—it’s fundamental respect for the material’s needs.
Mistake #5: Rushing Between Coats – Disrupting the Cure Process
Impatience between coats is understandable—the room is unusable, progress feels slow. But recoating too soon (or too late) disrupts the chemical bonding between layers, risking wrinkles, poor adhesion, or extended project time. Cure timing isn’t arbitrary; it’s chemistry in action.
Signs of Poor Recoat Timing
- Pulling/Wrinkling: Roller or brush lifts the previous coat. Caused by recoating too soon—underlying layer is still soft.
- Intercoat Peeling: Layers separate later, revealing the coat beneath. Can stem from recoating too soon (trapped solvents) or too late (fully cured surface won’t bond well).
- Mottled Coverage: Second coat applies unevenly over tacky first coat.
- “Blocking”: Painted door sticks to frame when closed because paint hasn’t fully cured.
Understanding Cure Stages
Paint progresses through phases:
1. Dry to Touch: Surface isn’t wet (30 mins–2 hrs for latex). Not ready for recoat.
2. Recoat Window: Surface is firm; solvents have evaporated sufficiently for next coat to bond. This is specified on the can (e.g., “Recoat in 2–4 hours”). Crucially: This time varies with temperature, humidity, and film thickness. Cool/humid conditions or thick coats can double required time.
3. Full Cure: Paint reaches maximum hardness/durability (latex: 7–14 days; oil: weeks). Wait for full cure before washing walls or heavy use.
Recoating Too Soon: Traps solvents/moisture. As they escape later, blisters form or adhesion weakens. Wet topcoat can also re-dissolve the soft underlayer, causing wrinkles.
Recoating Too Late: Most paints bond best within 24–72 hours. Waiting weeks allows the first coat to fully cure into a hard, non-porous film. The next coat bonds weakly to the surface but not into it. Stress (temperature shifts, impact) may cause delamination. Exception: Some primers (e.g., shellac-based) require topcoating within 24–48 hours—check label.
Adaptive Timing Strategy
- Read Label, Then Adjust: Note manufacturer’s recoat time. Then assess conditions:
- Cool (<65°F/18°C) or Humid (>60%)? Add 50–100% to stated time.
- Thick application or textured wall? Add 25–50%.
- Poor ventilation? Add time.
- The Touch Test (Use Cautiously): Lightly press a clean, dry fingertip on an inconspicuous spot (inside closet). If cool, tacky, or leaves a mark—wait. If dry and firm with no residue, it may be ready. When uncertain, wait longer. Patience prevents rework.
- Workflow Integration: Don’t start coat two until coat one is ready. Use waiting time productively: clean tools, remove tape (see Mistake #7 timing), prep next area. Schedule sessions with recoat windows in mind (e.g., prime morning, topcoat afternoon).
- Respect Full Cure: Before moving furniture against walls or frequent door use, wait per label (often 7 days light use, 14+ days heavy use). Place gentle reminders on doors.
Insight: Tape Removal Timing is Part of Cure Awareness
Painter’s tape should be removed after final coat is dry to touch but before full cure—typically 1–2 hours after painting, or when slightly tacky. Too early (wet paint) = bleeding. Too late (fully cured) = paint peels with tape. Ideal window is narrow. Test on a small area first. When removing, pull tape back on itself at a 45-degree angle slowly. If paint lifts, gently score the tape edge along the painted line with a sharp blade before continuing. Integrating this into your timing awareness protects crisp edges.
Mistake #6: Tool Selection and Care – The Application Interface
Tools translate intention to surface. Worn, dirty, or mismatched brushes, rollers, or tape directly impact texture, coverage, and efficiency. This isn’t about expensive gear—it’s about choosing and maintaining tools suited to the task and surface.
Tool-Related Finish Issues
- Visible Marks/Stippling: Wrong roller nap for surface smoothness, worn roller, or low-quality brush.
- Track Marks/Holidays: Thin unpainted lines from dry roller, bent frame, or poor technique.
- Lint/Debris in Film: Shedding roller cover, dirty tools, or dusty workspace.
- Fuzzy Edges/Bleeding: Low-quality tape, unsealed tape edges, or oversized brush for cutting in.
- Excessive Splatter: Overloaded roller, incorrect nap, or aggressive rolling.
Tool Science Made Practical
Brushes:
* Bristle Type: Synthetic (nylon/polyester) for latex/acrylic. Natural bristles swell in water—use only with oil-based paints (less common today).
* Quality Clues: “Flagged” bristles (split ends) hold more paint and smooth application. Dense bristles prevent streaking. A 2–2.5″ angled sash brush offers control for edges.
* Size Matters: Smaller brushes (1.5–2.5″) provide precision for trim and cutting in. Larger brushes are harder to control for detail.
Rollers:
* Nap Length is Critical:
* Smooth walls (drywall, plaster): 3/8″ or 1/2″ nap.
* Light texture (orange peel): 1/2″ nap.
* Medium texture (knockdown): 3/4″ nap.
* Heavy texture (popcorn, stucco): 1″ nap.
* Using 3/4″ nap on smooth walls guarantees unwanted texture.
* Cover Material: Synthetic (polyester/nylon) for latex. Avoid cheap covers that shed lint.
* Frame Quality: Sturdy metal frame with smooth roller core prevents wobble and uneven pressure.
Supporting Tools:
* Painter’s Tape: Standard masking tape often bleeds. Blue painter’s tape (e.g., ScotchBlue™) is baseline. For delicate surfaces (fresh paint, wallpaper) or critical edges, “paint line technology” tapes (e.g., FrogTape® Delicate Surface) create a micro-barrier. For textured walls, use tape designed for texture.
* Tray & Pole: Sturdy metal tray with non-slip base. Telescoping extension pole (4–12 ft) reduces strain and improves coverage on high walls.
Adaptive Tool Protocol
- Cutting In (Edges/Trim): 2″ angled synthetic brush or small (4″) high-density foam roller for long straight edges (test first). Foam rollers can yield smoother edges than brushes on flat surfaces.
- Rolling Walls: 9″ quality frame, correct nap cover (buy 2–3 per room; swap when matted), extension pole. Use quality disposable liners for easy cleanup.
- Taping: Seal tape edges firmly with a putty knife or dedicated tool. Press along the entire length.
- Cleaning & Storage:
- Latex Paint: Clean immediately with warm soapy water. Rinse until clear. Reshape brush bristles. For overnight use (recoating next day), wrap roller/brush tightly in plastic wrap to retain moisture. For storage, dry completely first.
- Oil-Based: Clean with mineral spirits (ventilation, gloves). Dispose of rags safely (lay flat to dry outdoors or seal in metal container with water—spontaneous combustion risk).
Insight: The Pre-Wet Technique for Cleaner Rolling
A simple step reduces lint and improves flow:
1. For latex paint: Dip dry roller cover in clean water. Spin out excess on tray ramp until damp (not dripping).
2. Load with paint as usual.
The damp fibers swell slightly, reducing initial lint shedding. Moisture also helps paint release evenly onto the wall, promoting better leveling and reducing “dry roll” track marks. Always test roll on cardboard first to check texture and shedding. Combined with correct nap selection, this elevates results significantly with minimal effort.
Mistake #7: Cutting In and Blending – The Lap Mark Challenge
Cutting in (painting edges with a brush) must blend seamlessly with rolled areas. Visible lap lines—darker stripes where brushed edges meet rolled fields—occur when the cut-in section dries before the roller overlaps it. This is highly visible under angled light and stems from workflow sequencing, not skill deficiency.
Why Lap Marks Form
Paint requires a “wet edge”—fresh paint overlapping still-wet previous paint—to blend and level. Lap marks happen when:
1. Entire room edges are cut in first.
2. Cut-in paint begins drying (losing “open time”).
3. Rolling starts, and the roller overlaps the partially dry edge.
The roller deposits wet paint onto the drying edge, re-wetting it and causing thicker accumulation. As it dries, this area appears darker or has different sheen. Heat, low humidity, or airflow accelerates drying, worsening the issue.
Adaptive Blending Workflow
Follow this sequence per wall section:
1. Cut In a Manageable Section: Paint edges (ceiling line, corners, trim) for only the area you can roll within 15–30 minutes (adjust for conditions—hot/dry = smaller sections).
2. Immediately Roll the Adjacent Field: While cut-in edge is still wet, roll the main wall area. Start rolling 1–2 inches away from the edge. On the final pass toward the edge, overlap the cut-in area lightly (1–2 inches) with even pressure. Wet-on-wet blending is seamless.
3. Maintain the Wet Edge: Continue: Cut in next section → Roll it immediately → Blend into previous rolled edge while still wet. Work systematically around the room.
4. Brush Technique for Edges:
* Load brush adequately (bottom third in paint), tap gently inside can to remove excess—don’t wipe hard on rim.
* Hold like a pencil. Start 1 inch away from the edge you’re painting toward (e.g., 1 inch below ceiling line). Paint toward the edge, letting the brush tip “kiss” the line cleanly. Prevents overloading at the edge.
* For corners: Paint one wall into the corner. Wait 10–15 minutes for slight set, then paint the adjacent wall. Painting both wet into the corner often causes buildup.
Insight: Feather Sanding for Minor Edge Touch-Ups
After full cure (7+ days), tiny edge imperfections can be gently addressed:
1. Use ultra-fine sanding sponge (320+ grit) or fine paper on a small block.
2. Very lightly sand only high spots or fuzzy edges—do not sand through paint.
3. Wipe meticulously with tack cloth.
4. For micro-touch-ups: Dip tip only of small artist’s brush (1/4″) into stored original paint. Dab excess on paper towel. Gently dot the spot, feathering outward minimally. Less is more. For larger issues, repainting the section is more reliable. Prevention through workflow sequencing remains the most effective strategy.
Mistake #8: Overloading Tools – The Drip and Drag Cycle
Loading brushes or rollers with excessive paint seems efficient (“fewer dips!”) but causes drips, runs, splatter, and uneven film thickness. It wastes paint, creates mess, and compromises finish quality. The goal is consistent, thin film application—not maximum paint per dip.
Overloading Consequences
- Drips/Runs: Excess paint flows downward before setting, especially near edges or on vertical surfaces.
- Sagging on Trim: Thick accumulation on horizontal trim edges forms droplets.
- Splatter: Paint sprays off overloaded roller during motion.
- Inconsistent Coverage: Roller dumps paint unevenly—thick patches alternate with thin spots.
- Brush Dragging: Heavy brush drags roughly, leaving unblended marks.
Fluid Dynamics Simplified
Paint performs best at manufacturer-specified film thickness. Overloading:
* Lets gravity overcome paint viscosity → drips.
* Saturates roller core → paint pools and dumps unpredictably.
* Reduces tool control, especially for detail work.
* Creates thick wet films that dry slower, increasing dust attraction and risk of solvent entrapment.
Adaptive Loading Technique (“Goldilocks Zone”)
Adequate loading—not too little, not too much—is key.
* Brushes:
1. Dip only bottom third of bristles.
2. Tap gently 2–3 times inside can to remove excess. Do not wipe hard on rim (removes needed paint, bends bristles).
3. Test on cardboard: Should leave smooth stroke without dripping.
* Rollers:
1. Pour paint into tray reservoir (1/3 full).
2. Roll cover slowly through paint.
3. Roll up tray ramp 5–7 times to distribute paint evenly and remove excess. Stop when roller feels evenly weighted with no drips when held horizontal.
4. Test roll on cardboard: Even coat, minimal splatter.
* General Rule: Reload tools more frequently with correct amount rather than overloading once. A properly loaded roller makes a soft “shushing” sound; overloaded makes a wet “squelch.” Listen to your tools.
Insight: The Two-Pass Rolling Method
Professionals often use this for uniform film thickness:
1. First Pass (Distribute): Apply paint using a “W” or “M” pattern across the section. Focus on even coverage—don’t worry about perfect smoothness.
2. Second Pass (Level): Without reloading, immediately go over the entire section with light, even vertical (or horizontal) strokes. This redistributes paint, levels the film, minimizes stipple, and ensures consistency. The roller acts like a squeegee. Practice on cardboard to learn when residual paint is sufficient for the second pass. Combined with the wet-edge cutting-in sequence, this dramatically reduces lap marks and improves finish quality.
Mistake #9: Skipping Real-World Color and Sheen Testing – The Lighting Illusion
Choosing color/sheen from a small chip or screen is unreliable. Lighting (natural and artificial), surrounding colors, room size, and surface texture dramatically alter perception. A serene sample can feel overwhelming on four walls; a subtle sheen can create glare under room lights. Testing in context prevents costly repaints and disappointment.
Testing Failure Signs
- Color Shock: Room feels darker, brighter, warmer, or more intense than expected (“It looks like a cave!”).
- Sheen Surprise: Chosen sheen creates distracting reflections or highlights wall flaws unexpectedly.
- Undertone Clash: Hidden pink/green undertones in “neutral” paint clash with flooring or furniture at scale.
- Wall-to-Wall Variation: Color shifts between north-facing (cool light) and south-facing (warm light) walls.
Why Context Changes Everything
- Lighting is Dynamic: North light = cool/blue; South light = warm/yellow; East = warm morning; West = intense afternoon. Artificial light varies: Incandescent = warm; Fluorescent = cool; LED = variable (check Kelvin rating: 2700K = warm, 5000K = daylight). Store lighting ≠ your home lighting.
- Sheen Reflectivity: Higher sheens reflect more light. In rooms with multiple windows or bright fixtures, semi-gloss can create hot spots. On imperfect walls, satin may reveal flaws that flat hides.
- Color Interaction: Colors shift beside other hues (a gray may look purple next to beige sofa). Large surfaces intensify perception—pale on a chip can feel saturated on walls.
- Surface Texture: Rough textures absorb light, muting color and sheen. Smooth surfaces reflect more, amplifying both.
Adaptive Testing Protocol
Eliminate guesswork with this staged approach:
1. Buy Sample Pots: Get 8 oz containers of top 2–3 contenders. Do not rely on chips.
2. Paint Large Patches: On actual walls (not poster board), paint patches at least 2 ft x 2 ft. Paint over existing color. Include patches on walls with different light exposure (north, south).
3. Observe Over Time: Live with patches for 3+ full days. View at:
* Different times (morning, noon, evening)
* All lighting conditions (overhead on/off, lamps)
* Various distances and angles
* Beside key furnishings, flooring samples, or fabric swatches
4. Test Sheen Separately: Paint adjacent patches of the same color in different sheens (e.g., eggshell vs. satin). Observe reflectivity and flaw visibility under room lighting.
5. Involve Household Members: Perception varies. Get input from others who use the space.
6. Consider Room Function: Does the hue support the room’s purpose? Calming for bedrooms? Energizing for offices? Neutral backdrop for art?
Insight: Color as Part of a System
Paint doesn’t exist in isolation—it interacts with floors, furniture, art, and light. Evaluate it within your room’s ecosystem. When uncertain, lean toward versatile, adaptable neutrals that harmonize with existing elements. Testing thoroughly is a small investment of time that prevents significant rework and fosters long-term satisfaction. Trust your eyes in your space, not a showroom display.
Mistake #10: Using Compromised or Improperly Prepared Paint – The Hidden Variable
Paint quality and condition directly impact coverage, adhesion, and longevity. Using expired paint, improperly stored paint, or failing to mix thoroughly introduces avoidable risks. This mistake is subtle but consequential—problems may not appear until days or weeks later.
Signs of Paint Compromise
- Poor Coverage/Color Shift: Paint looks thin, uneven, or different from the sample—even with proper application.
- Lumps, Grit, or Skin: Visible particles, hardened film on surface, or stringy texture when stirred.
- Unusual Odor: Sour, rancid, or “off” smell (beyond typical paint odor) may indicate spoilage.
- Failure to Adhere: Paint peels or chips prematurely despite good surface prep.
- Inconsistent Sheen: Patches appear glossier or flatter than others on the same wall.
Why Paint Condition Matters
- Expiration & Storage: Paint degrades over time. Latex can separate, lose binding strength, or grow mold if stored improperly (extreme heat/cold, unsealed cans). Oil-based paints thicken or skin over. Always check the manufacture date (often on bottom of can) and storage history. Most unopened latex lasts 2–5 years if stored above freezing; opened cans degrade faster.
- Inadequate Mixing: Pigments settle heavily. Skipping thorough mixing causes color variation between coats or within a single wall. “Shake at store” isn’t always sufficient—stir manually before and during use.
- Contamination: Introducing dirt, water (into oil-based), or old paint scraps compromises integrity.
Adaptive Assessment and Use Protocol
- Before Opening:
- Check can for rust, bulging, or deep dents.
- Note manufacture date if visible. When in doubt, contact the manufacturer with the batch number.
- After Opening:
- Smell: Fresh paint has a chemical odor. Sour, cheesy, or foul smells suggest spoilage—discard.
- Visual Check: Stir gently first. If lumps remain after vigorous stirring, or if a hardened skin doesn’t fully reincorporate, discard. Do not strain and use—binders are compromised.
- Consistency: Should be smooth and creamy. Stringy, gritty, or watery texture indicates separation beyond recovery.
- Mixing Thoroughly:
- Stir manually for 3–5 minutes after store shaking, especially for deep colors. Scrape sides and bottom of can.
- Stir periodically during use (every 15–20 minutes) to maintain pigment suspension.
- For large projects, pour into a clean bucket and mix multiple cans together (“boxing”) to ensure uniform color across the entire job.
- Storage for Future Use:
- Wipe rim clean. Place plastic wrap directly on paint surface before sealing lid tightly.
- Store upside down in a cool, dry place (50–80°F / 10–27°C), away from freezing or heat sources.
- Label can with room, date, sheen, and color name for future touch-ups.
Insight: When to Use Leftovers vs. Buy New
Leftover paint stored properly can be reliable for touch-ups. But for repainting an entire wall or room, assess critically:
* Use leftovers for: Small touch-ups on the same surface, if paint passes smell/texture checks and matches current wall color (test first).
* Buy new paint for: Repainting entire walls/rooms, if paint is >2 years old, stored poorly, or fails assessment checks. Color formulas change over time—new paint may not match old batches exactly. When repainting large areas, buying fresh paint ensures consistency and performance. The modest cost outweighs the risk of mismatched color or premature failure.
Your Questions, Answered
Q: How long should I realistically wait between coats?
A: Always start with the manufacturer’s recoat time on the label. Then adjust: Add 50–100% more time if it’s cool (<65°F/18°C), humid (>60%), or you applied a thick coat. When in doubt, do the fingertip test on an inconspicuous spot—wait until dry and firm with no tackiness. Rushing causes more delays than waiting.
Q: Can I use interior paint for a small exterior project like a shed?
A: Not recommended. Interior paint lacks UV resistance, flexibility for temperature swings, and mildewcides needed outdoors. It will chalk, fade, or peel much faster. Exterior-grade paint is formulated for these stresses. Using the correct product saves repainting effort within a year or two.
Q: What’s the most reliable way to fix a dried paint drip?
A: Wait until fully cured (24+ hours). Lightly sand the drip smooth with 220-grit paper wrapped around a small block, feathering edges gently into surrounding paint. Wipe away all dust with a tack cloth. Apply a minimal amount of matching paint with a small artist’s brush, feathering outward. For large drips, repainting the entire section may be needed for invisibility.
Q: How do I choose between eggshell and satin sheen for a living room?
A: Consider usage and lighting. Eggshell (10–25% sheen) hides minor wall flaws better and offers subtle elegance—ideal for lower-traffic living rooms with controlled lighting. Satin (25–45% sheen) provides better washability for homes with kids/pets or higher traffic. Test large patches of both sheens on your wall under your room’s lighting to see which feels right.
Q: Is primer always necessary when repainting walls the same color?
A: Not always, but assess first. If the existing paint is clean, sound (passes tape test), and the new color is very similar, a quality “paint and primer in one” may suffice. However, if there are stains, repairs, glossy surfaces, or significant color change, dedicated primer prevents flashing, bleed-through, or adhesion issues. When uncertain, priming is a low-cost safeguard.
Q: Why does my paint smell sour or “off” even though it’s not expired?
A: Sour, rancid, or foul odors (beyond typical chemical smell) often indicate bacterial growth or spoilage, especially if the can was stored in heat, left partially open, or contaminated. Do not use it—discard properly per local regulations. Fresh paint should have a consistent chemical odor without sour notes.
Q: Can I paint over wallpaper?
A: Proceed with caution. First, test a small area: Apply water to a corner. If it bubbles or peels easily, removal is safer. If wallpaper is firmly adhered, non-vinyl, and smooth: Clean thoroughly, lightly sand to degloss, apply an oil-based or shellac-based primer to seal (prevents moisture from loosening adhesive), then use a quality topcoat. However, removal is often more reliable long-term to avoid future bubbling or seam visibility.
Q: How do I store brushes and rollers between coats if I’m continuing tomorrow?
A: For latex paint: Wrap tools tightly in plastic wrap or place in a sealed plastic bag, squeezing out air. Store in a cool place (not freezing). This keeps paint workable for 24–48 hours. For longer breaks or oil-based paint, clean thoroughly per guidelines. Never leave tools soaking in water overnight—bristles degrade.
Q: What temperature is too cold to paint indoors during winter?
A: Most latex paints require surface and air temperatures above 50°F (10°C) during application and for 24–48 hours after. Cold slows cure, risking poor adhesion and film formation. Maintain room temperature ≥60°F (15°C) using heating (safely, away from fumes). Use a thermometer to verify—don’t guess. If unable to maintain temperature, postpone painting.
Q: How can I minimize brush marks on trim without buying expensive tools?
A: Technique matters most: Use a quality 2″ angled synthetic brush (replace worn brushes), load correctly (bottom third, tap excess), and maintain a wet edge. Apply paint in the direction of the wood grain. For the final pass, lightly “tip off” by dragging the very tip of the brush lightly along the surface with minimal pressure. Ensure paint isn’t drying too fast (avoid direct heat/fans). Light sanding after full cure with ultra-fine paper (320+ grit) can soften remaining marks.
Q: Why do my walls look patchy even after two coats?
A: Common causes: Inadequate surface prep (unsealed repairs causing flashing), insufficient mixing of paint, rolling over partially dry sections (lap marks), or using too-narrow roller sections. Solution: Ensure surface is uniformly primed/sealed, mix paint thoroughly before and during use, maintain wet edges using the section-by-section workflow, and use the two-pass rolling method. If patchiness persists after drying, a third coat applied correctly often resolves it.
Conclusion and Next Step
Painting is a learnable craft built on awareness, not innate talent. By understanding how surface, product, environment, and technique interact, you shift from reacting to problems to preventing them. This guide’s framework—viewing paint integrity as an interconnected system—empowers adaptable decisions across any project.
Recap the Core Principles:
1. Foundation First: Surface preparation isn’t optional—it’s the bedrock of adhesion and appearance.
2. Context is King: Match products, sheens, and timing to your specific space, season, and constraints.
3. Patience Pays: Respect cure times, environmental conditions, and testing phases. Rushing creates rework.
Your 24-Hour Action: Within the next day, select one wall in your home. Spend five minutes observing it under different lighting (morning sun, evening lamp). Note one preparation step you’d prioritize differently for your next project—whether cleaning a specific area, testing a color patch, or checking surface temperature. Small, intentional observations build lasting skill.
The Bigger Perspective: A thoughtfully painted space does more than look beautiful—it supports well-being, reflects care, and becomes part of your home’s story. Each project deepens your understanding of materials and space. Embrace the process: mistakes become lessons, preparation becomes confidence, and every brushstroke contributes to a home that feels authentically yours. You’ve now equipped yourself not just to avoid common pitfalls, but to approach painting with clarity and calm.
Explore Our Complete System:
Mastering Wall Repair: From Cracks to Flawless Surfaces | Seasonal Painting Guide: Adapting to Temperature and Humidity | Trim and Cabinet Painting: Precision Techniques for High-Impact Results | Color Confidence: A Practical Guide to Choosing Hues That Last | Sustainable Painting: Low-Impact Choices for Healthier Homes | Tool Care Deep Dive: Extending the Life of Brushes and Rollers | The Patient Painter’s Handbook: Timing, Cure, and Long-Term Care