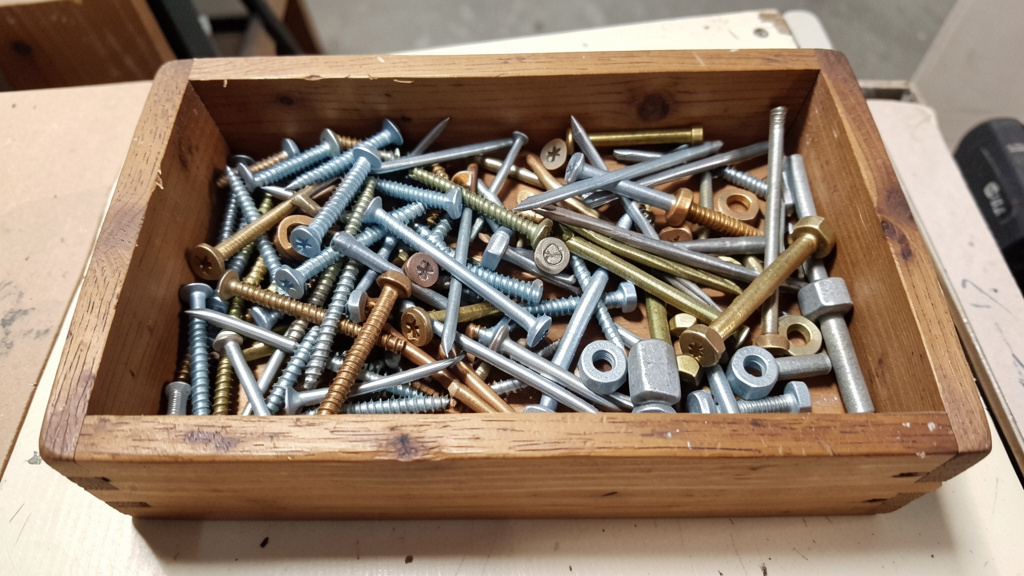
Your Practical Guide to Selecting, Using, and Troubleshooting the Right Fastener for Any Material, Load, or Environment—With Field-Tested Techniques to Build Confidently
Stop staring at the overwhelming wall of fasteners at the hardware store, wondering whether a #8 wood screw or a 10d common nail will hold your shelf securely. This comprehensive reference transforms fastener confusion into informed decision-making. We clarify every major screw, nail, bolt, anchor, and specialty fastener with clear technical distinctions, material-specific application guidance, failure-prevention techniques, and real-world troubleshooting—grounded in widely recognized engineering principles and practical building experience. Whether you’re hanging a picture frame or assembling outdoor furniture, you’ll understand which fastener suits your situation, why it works, and how to install it effectively.
Introduction
Walk into any hardware store, and you’ll encounter rows of small metal components labeled with codes like “10-24 x 1¼” Pan Head,” “8d Box Nail,” or “¼-20 Hex Bolt.” For many DIYers and tradespeople alike, fastener selection has often relied on habit, fragmented advice, or trial and error. Field observations across residential projects consistently show that mismatched fastener choices—rather than installation errors—are a frequent contributor to joint failure. A deck ledger pulling away? Often tied to corrosion or inadequate withdrawal resistance. A cabinet door sagging? Likely insufficient thread engagement. Drywall cracking around a mount? Possibly nails used where anchors were needed. This isn’t about skill—it’s about fragmented information. Many resources offer isolated tips (“use deck screws for decks”) without explaining why that choice aligns with wood type, moisture exposure, load direction, or local conditions. This guide bridges that gap. Drawing on widely referenced standards from ASTM International, the International Code Council (ICC), and SAE International, we provide a clear, adaptable framework: define the forces acting on your joint, assess the materials and environment, and the appropriate fastener choice becomes logical. This is more than a catalog—it’s a practical toolkit for building thoughtfully and durably in any project.
The FAST Framework: Your 4-Step System for Confident Fastener Selection
Before exploring specific fasteners, adopt this universal decision-making process. The FAST Framework (Function, Assembly, Stress, Surroundings) transforms complex choices into a clear, repeatable sequence. Variations of this approach are used by experienced builders to streamline decisions. Apply these four filters in order for any project to significantly reduce common selection errors.
Step 1: Function – What Is This Joint Actually Doing?
Move beyond “What am I fastening?” Ask: What mechanical role must this fastener perform? Misidentifying function is a frequent root of joint issues. Consider these scenarios:
-
Shear Load: Forces push materials parallel to the fastener shaft (e.g., deck ledger against rim joist, shelf brackets supporting weight). The fastener resists sliding. Insight: Nails often perform well in pure shear due to slight flexibility that accommodates wood movement. In high-movement zones (like seismic areas), rigid fasteners without engineering validation may pose risks.
-
Tensile (Withdrawal) Load: Forces pull materials apart perpendicular to the fastener (e.g., hanging a mirror on drywall, securing a handrail post). Thread design and engagement depth become critical. A nail in drywall under tension will gradually loosen. A coarse-thread drywall screw grips gypsum but may strip under heavy loads. Solution: Toggle bolts or molly anchors that distribute load behind the wall surface.
-
Clamping Force: The fastener squeezes materials together (e.g., tabletop boards joined with biscuits, machinery baseplate to concrete). Bolt torque matters. Under-torqued? Vibration may loosen the joint. Over-torqued? Threads strip or material cracks. Nuance: Softwoods like pine compress over time; re-checking bolt tightness after 24–48 hours can maintain clamping force.
-
Alignment/Precision: Holding parts in exact position during assembly (e.g., cabinet face frames, jig components). Dowel pins or shoulder bolts excel here. Screws alone may allow slight rotation before tightening—problematic for precision woodworking.
Why this step matters: Choosing a shear-optimized fastener (like a nail) for a tensile application (like hanging a shelf) invites failure. Sketch a simple arrow showing force direction on your project plan—it takes seconds and prevents rework.
Common pitfall: Assuming “stronger” (higher tensile strength) always means “better.” A high-strength bolt in softwood may crush fibers before achieving proper grip, while a moderate-strength bolt allows controlled deformation for optimal hold. Match strength to material properties.
Step 2: Assembly – What Materials Are Joining, and How?
Material compatibility influences fastener chemistry, geometry, and method. Overlooking this invites corrosion, splitting, or poor grip. Break it down:
Material Pairing Guidance:
| Material Being Joined | Key Consideration | Recommended Fastener Approach | Why It Works |
|————————|——————-|——————————-|————-|
| Softwood (Pine, Fir) | Prone to splitting near edges | Trim-head screws with self-tapping tips; pre-drill within 1″ of ends | Sharp point parts fibers cleanly; narrow shank reduces wedging force |
| Hardwood (Oak, Maple) | Dense grain resists penetration | Coarse-thread wood screws; pilot holes essential | Threads bite aggressively; pilot hole prevents screw breakage |
| Pressure-Treated Wood (ACQ) | Contains corrosive preservatives | Hot-dipped galvanized (ASTM A153) or stainless steel (304/316) | Zinc coating thickness resists chemical interaction; stainless offers immunity |
| Drywall to Wood Stud | Gypsum crumbles easily | Fine-thread drywall screws (Type S) | Threads grip wood stud firmly while head dimples drywall without tearing paper |
| Drywall to Metal Stud | Thin steel bends under pressure | Coarse-thread drywall screws (Type W) | Aggressive threads bite metal flange; self-tapping tip |
| Concrete/Masonry | Brittle substrate; no inherent “grip” | Wedge anchors, sleeve anchors, or concrete screws | Mechanical expansion or deep threads create holding power in solid mass |
| Metal to Metal (Thin Gauge) | Threads strip easily | Self-drilling screws (Tek screws) with drill-point tip | Combines drilling and fastening; threads designed for metal thickness |
| Plastic/Composite Decking | Expands/contracts significantly | Hidden fastener clips or composite-specific screws | Allows thermal movement; prevents “mushrooming” around screw heads |
Real-world example: Mounting a shelf bracket into plaster-and-lath wall (common in older homes). Standard plastic anchors often fail due to voids between lath strips. Toggle bolts that span multiple laths, or molly bolts that flare behind plaster, typically perform better. Test first with a small drill bit—if wood is consistently encountered, long wood screws into studs are ideal.
Counter-example: Using standard zinc-plated screws on cedar fencing. Cedar’s natural oils can accelerate corrosion of thin zinc coatings. Within a few years, rust stains may appear, and grip weakens. Better choices: Stainless steel (304 minimum) or polymer-coated screws rated for cedar.
Important nuance: Dissimilar Metal Contact. Joining aluminum siding directly to steel framing with carbon steel screws can create a galvanic reaction in moist conditions, accelerating corrosion of the aluminum. Mitigation: Use stainless steel fasteners with non-conductive nylon washers, or isolate metals with butyl tape.
Step 3: Stress – Understanding Realistic Load Demands
You don’t need engineering calculations—but realistic load awareness prevents under- or over-engineering.
Load Context Guide:
– Light Duty (<10 lbs): Picture frames, curtain rods, lightweight shelves. Fastener cue: Small nails, #4–#6 screws, plastic anchors.
– Medium Duty (10–50 lbs): Kitchen cabinets, bookshelves, handrails, deck railings. Fastener cue: #8–#10 screws, 16d nails, toggle bolts, lag screws.
– Heavy Duty (50–200+ lbs): Deck ledgers, structural beams, TV mounts on drywall, machinery bases. Fastener cue: Lag screws (¼”+), through-bolts with washers, wedge anchors, structural screws with evaluation reports (e.g., GRK RSS, Simpson Strong-Tie SDWS).
– Dynamic/Impact Loads: Swing sets, garage door tracks, areas with vibration. Fastener cue: Bolts with lock washers or thread-locking compound; nails may fatigue under repeated stress.
Practical technique: The “Hand Test” for existing structures. Gently push/pull the component. Significant flex suggests current fasteners are undersized or failing. For new projects: Add a safety margin to your estimated load. Hanging a 30-lb mirror? Design for 40–45 lbs. Why? Margins account for material variations, installation factors, and potential future load increases.
Critical nuance: Withdrawal Strength in Wood. A #10 x 2″ wood screw in Southern Yellow Pine may hold well in side grain but significantly less in end grain. Avoid relying solely on end-grain screwing for critical loads—supplement with dowels, biscuits, or metal connectors. This understanding helps prevent common shelf and cabinet failures.
Step 4: Surroundings – The Environmental Factor
Environment directly impacts longevity. A suitable indoor fastener may fail quickly outdoors. Evaluate:
- Moisture Exposure: Occasional rain (decks) vs. constant immersion (dock pilings). For decks: Hot-dipped galvanized (min. 1.0 oz/ft² zinc coating per ASTM A153) or stainless steel 304. For saltwater exposure: Stainless steel 316 (molybdenum enhances chloride resistance).
- Temperature Extremes: Attics (>140°F) or unheated spaces (<0°F). Standard zinc coatings may become brittle in cold; some polymers degrade in heat. Stainless steel or specialized coatings offer broader tolerance.
- Chemical Exposure: Pool enclosures (chlorine), workshops (solvents), coastal salt spray. Stainless steel 316 is generally preferred near pools or oceans.
- UV Exposure: Direct sun degrades some polymer coatings faster. Ceramic-coated or stainless steel options provide longer service life.
- Fire-Rated Assemblies: In fire-rated walls (e.g., garage separations), fastener type, length, and spacing must follow the certified assembly details (e.g., UL Design). Substitutions can compromise the rating.
Field tip: When uncertain about coating durability, a simple field check: Rub a copper coin firmly on the fastener coating for 20–30 seconds. If the base metal shows readily, the coating may be too thin for harsh conditions. Hot-dipped galvanized typically resists this test better than electro-galvanized. Note: This is a field-expedient check; for critical applications, rely on manufacturer specifications and certified products.
The Guiding Principle: The most suitable fastener harmonizes with the specific demands of your joint—its function, materials, load, and environment. Mastery lies in matching the fastener’s inherent properties to your project’s unique context.
Screw Deep Dive: Anatomy, Types, and Practical Applications
Screws offer strong holding power in tension, removability, and versatility. But “screw” encompasses many specialized tools. Understanding anatomy helps decode any screw.
Screw Anatomy Simplified
- Head: Top portion driven by tool. Affects visibility, driving torque, and clamping.
- Drive Type: Slot, Phillips, Square (Robertson), Torx, etc. Critical for preventing cam-out (tool slipping).
- Shank: Smooth section below head. Provides shear strength and alignment.
- Thread: Helical ridge. Pitch, depth, and angle determine grip and material compatibility.
- Point: Tip geometry. Self-tapping? Sharp for wood? Drill-bit style for metal?
- Thread Length: Full-thread vs. partial-thread (shank section). Partial-thread screws create a “shoulder” for clamping two materials tightly.
Wood Screw Applications
Standard Wood Screw (Flat/Countersunk Head)
Best for: General woodworking, cabinetry, furniture where head sits flush.
Why it works: Coarse threads grip wood; tapered shank pulls materials together.
Key detail: Threads typically run full length. Can cause splitting in hardwoods near edges.
Technique: For hardwoods or end-grain joints, drill a two-part pilot hole: narrow for threads (prevents splitting), wider for shank (allows pull-down without binding).
Note: Not ideal for metal studs—threads may strip thin steel. Switch to fine-thread drywall screws for metal.
Trim-Head Screw (Bugle Head)
Best for: Finish carpentry—crown molding, baseboards, door casings.
Why it works: Low-profile head minimizes visible damage; bugle shape compresses wood fibers, often eliminating pre-drilling in softwoods.
Material note: Polymer-coated versions resist rust bleeding through paint. Stainless steel is preferable for exterior trim in humid climates.
Installation tip: Drive until head is just below surface. Over-driving cracks delicate moldings. A depth stop on your drill helps consistency.
Deck Screw (Washer-Head)
Best for: Outdoor wood structures—decks, fences, pergolas.
Why it works: Wide washer-head distributes load; corrosion-resistant coating; self-tapping tip.
Critical detail: Must be rated for ACQ pressure-treated wood. Look for “ACQ-Compatible” or references to ICC-ES reports (e.g., ESR-1667). Standard galvanized screws may corrode prematurely in ACQ.
Advanced option: Structural screws (e.g., GRK RSS, Simpson SDWS). These often feature:
– Hardened steel for higher strength
– Optimized thread design (e.g., CEE threads) to reduce splitting
– Partial threading (unthreaded shank section for clamping)
– ICC-ES evaluation reports supporting specific structural uses
Practical impact: In some ledger board applications, structural screws can reduce installation time versus lag screws (less pre-drilling) while meeting code requirements when installed per the manufacturer’s published guidelines.
Drywall Screw (Fine vs. Coarse Thread)
Type S (Fine Thread): For drywall-to-wood-stud attachment. Threads grip wood firmly; bugle head prevents tearing paper.
Type W (Coarse Thread): For drywall-to-metal-stud attachment. Aggressive threads bite thin steel; self-tapping tip.
Common error: Using Type S on metal studs. Threads may strip under vibration. Match thread type to stud material.
Technique: Set drill clutch low (1–2). Drive until head dimples paper without breaking it. Broken paper weakens mud adhesion, leading to visible seams.
Lag Screw (Often Called Lag Bolt)
Best for: Heavy connections—deck posts to beams, swing sets, heavy brackets.
Why it works: Large thread diameter (¼” to ½”) provides strong withdrawal resistance; hex head allows high torque.
Installation steps:
1. Drill pilot hole through both materials (size per manufacturer guidance—e.g., 7/32″ for ¼” lag in hardwood).
2. Drill clearance hole in top material (same size as lag shank) so materials clamp tightly.
3. Use a socket wrench for control—avoid over-torquing with a drill.
Note: Carriage bolts are not a direct substitute for lag screws in withdrawal-critical applications, as they lack continuous threading along the shank.
Machine Screws: Precision in Metal and Plastic
Machine screws have uniform threads and require a pre-tapped hole or nut. Essential for machinery, electronics, automotive, and metal fabrication.
Head Styles:
– Pan Head: Slightly rounded top, flat underside. General purpose; sits above surface.
– Flat (Countersunk) Head: Angled underside for flush mounting. Requires countersink bit.
– Round Head: Dome-shaped. Decorative uses; provides bearing surface.
– Truss Head: Low profile, wide bearing surface. Helps prevent pull-through in thin materials.
– Hex Head: Wrench-driven. High-torque applications.
Drive Types by Practical Performance:
1. Torx (Star): High torque transfer; minimal cam-out. Common in automotive and appliances. Tip: Keep bits organized—T10, T15, T20, T25, T30 cover most DIY needs.
2. Square (Robertson): Good grip; self-centering. Popular in Canada; growing in the U.S. Less cam-out than Phillips.
3. Phillips: Designed to cam-out at high torque (a feature in assembly lines). For DIY: Use quality #2 bits with hardened tips. Cheap bits increase cam-out risk.
4. Slotted: Prone to slipping; requires precise alignment. Best reserved for antique restoration or where aesthetics require it.
Thread Systems:
– Imperial (SAE): “Diameter-Threads Per Inch” (e.g., 10-32 = #10 diameter, 32 threads per inch). Common: 4-40, 6-32, 8-32, 10-24, 10-32, ¼-20.
– Metric: “M Diameter x Pitch” (e.g., M5 x 0.8 = 5mm diameter, 0.8mm pitch). Common: M3, M4, M5, M6, M8.
Important: Forcing metric into imperial holes (or vice versa) can gall threads. Store separately.
Self-Tapping vs. Self-Drilling:
– Self-Tapping: Cuts threads in a pre-drilled hole (e.g., sheet metal screws). Requires pilot hole.
– Self-Drilling (Tek Screws): Integrated drill tip + self-tapping threads. Drills and fastens in one step. Point size (e.g., #3) correlates to material thickness. Application: Metal roofing, HVAC, attaching brackets to steel studs. Match point size to material—too small bends; too large creates a loose hole.
Specialty Screws for Specific Challenges
Concrete Screw (e.g., Tapcon®)
How it works: Hardened steel threads cut into pre-drilled concrete. Blue coating indicates corrosion resistance.
Installation essentials:
– Drill hole with carbide-tipped masonry bit (exact diameter per screw size—e.g., 3/16″ bit for ¼” screw).
– Hole depth = screw length + ¼” (for dust clearance).
– Clean hole thoroughly with brush and air blower (dust compromises grip).
– Drive slowly with a standard drill; stop when head contacts surface. Over-driving strips threads.
Limitation: Not ideal for dynamic loads, cracked concrete, or frequent disassembly. Wedge anchors may be preferable in these cases.
Sheet Metal Screw
Types:
– Type A: Sharp point, coarse threads. Thin, soft materials (aluminum, plastic).
– Type AB: Universal point/thread. Most common general-purpose.
– Type B: Blunt point, spaced threads. Heavier gauge metal or plastics where stripping is a concern.
Tip: For repeated assembly/disassembly (e.g., access panels), consider PEM® nuts pressed into metal—screws thread into a captive nut, reducing stripped holes.
Security Screws
When considered: Public installations, child safety gates, tamper-prone locations.
Types: Torx Security (pin-in-star), Spanner (Snake-Eye), Tri-Wing.
Reality: Most deter casual tampering only. For higher security, consider hidden fasteners or permanent methods. Always verify local regulations for public installations.
Nail Intelligence: Understanding When Simplicity Serves Best
Nails remain valuable for their flexibility, speed, and ability to accommodate wood movement. Misunderstanding types leads to issues like squeaky floors or failed shear walls.
Nail Anatomy Basics
- Head: Clenched (temporary), oval (finish work), or standard flat.
- Shank: Smooth, ring (annular), spiral (helical), or cement-coated.
- Point: Diamond (standard), blunt (reduces splitting in hardwoods).
Common Nail Types and Uses
Common Nail (Smooth Shank)
Use case: Temporary bracing, non-structural assembly.
Note: Smooth shank offers less withdrawal resistance. Modern building codes often require ring-shank or spiral nails for critical shear applications like roof sheathing.
Box Nail
Design: Thinner shank than a common nail of the same length.
Purpose: Reduces splitting in narrow members (e.g., door/window jambs, thin siding). Lower holding power—do not substitute for common nails in structural framing.
Sinkers (Standard Framing Nail)
Features:
– Cement-coated shank (lubricant burns off on driving, then hardens to lock nail)
– Slightly tapered shank
– Checkered head for hammer grip
Sizes: “16d” = 3½” long (historical “penny” weight reference). Common: 8d (2½”), 10d (3″), 16d (3½”).
Code note: In high-wind or seismic zones, building codes (e.g., IRC R602.3) often require ring-shank nails for roof sheathing and other critical applications due to higher withdrawal resistance. Always verify local amendments.
Ring Shank Nail
How it works: Rings act like barbs, increasing withdrawal resistance.
Applications: Roofing underlayment (wind uplift resistance), subflooring (reduces squeaks), decking boards (minimizes cupping).
Trade-off: Harder to remove if misplaced. Best for permanent attachment.
Spiral Shank Nail
Advantage: Helical threads provide strong grip in end grain or hardwoods. Rotates slightly on driving for tighter hold.
Best for: Hardwood flooring, attaching ledger boards to solid timber, marine construction.
Finish Nail vs. Brad Nail
| Feature | Finish Nail | Brad Nail |
|———|————-|———–|
| Gauge | 15–16 gauge | 18 gauge |
| Head | Slightly larger | Very small |
| Holding Power | Moderate | Light |
| Best For | Baseboards, crown molding, door casings | Thin veneers, delicate trim, temporary glue clamping |
| Tip | Set head below surface with nail set; fill hole | Often leaves minimal visible hole; ideal for pre-finished trim |
Installation notes:
– Nail gun selection: Framing nailers (20°–34° clipped-head) for structure; finish nailers (15°–23°) for trim; brad nailers (straight 18-gauge) for delicate work.
– Angle: Driving nails at a 10°–15° angle (“toenailing”) creates a mechanical lock when end-nailing isn’t possible.
– Splitting prevention: Use blunt-point nails for hardwoods; pre-drill near ends; avoid nailing within ½” of board edge.
When Nails May Be Preferred Over Screws
- Shear Walls in Seismic Zones: Ring-shank nails in plywood shear walls can absorb energy through controlled deformation. Screws may be too rigid in unengineered applications. Always follow engineered drawings and local code requirements.
- Subflooring: Ring-shank nails accommodate slight joist movement, potentially reducing squeaks. Screws driven too deeply can create noise.
- Temporary Work: Formwork, scaffolding—nails are faster to install and remove. Duplex (double-headed) nails ease extraction.
- Large-Scale Sheathing: For roofing or siding over large areas, nails installed with pneumatic guns offer speed and cost efficiency.
Important considerations: Nails are generally not recommended for:
– Tensile loads (hanging objects where pull-out is a risk)
– Hard substrates like concrete or metal (without appropriate anchors)
– Projects requiring future disassembly
– Drywall attachment in modern practice (screws resist “popping” better as studs move)
Bolt, Nut, and Washer Systems: Creating Robust Connections
Bolts deliver reliable strength for heavy loads, machinery, and structural applications. Success depends on understanding the system—bolt, nut, washer—not just the bolt.
Bolt Anatomy and Strength Indicators
Head Types:
– Hex Head: Standard for high-torque applications. Requires wrench/socket.
– Carriage Bolt: Domed head with square shoulder under head. Shoulder grips wood, preventing rotation when tightening the nut. Common use: Attaching metal brackets to wood (e.g., deck post bases).
– Lag Screw: Threads directly into wood; hex head for torque. (Technically a screw, often grouped with bolts.)
– Eye Bolt: For lifting points. Safety note: Use “shouldered” eye bolts for angular loads; non-shouldered types are for straight-pull applications only.
Bolt Grades (Imperial SAE):
| Grade | Markings | Typical Use Context |
|——-|———-|———————|
| Grade 2 | None | General hardware, non-critical applications |
| Grade 5 | 3 radial lines | Automotive suspensions, machinery |
| Grade 8 | 6 radial lines | Critical automotive (axles), heavy equipment |
| Note: Grade 2 is not recommended for structural or safety-critical connections. |
Metric Property Classes:
– Class 4.6: Low carbon steel (similar context to Grade 2)
– Class 8.8: Medium carbon (similar context to Grade 5)
– Class 10.9: Alloy steel (similar context to Grade 8)
Key insight: Metric classes aren’t directly equivalent to SAE grades—consult engineering references when substituting. Match the original specification when replacing bolts.
Nut and Washer Roles
Nut Types:
– Hex Nut: Standard. Often paired with a lock washer for vibration resistance.
– Nylon Insert Lock Nut (Nyloc): Nylon collar deforms to lock threads. Reusable a few times. Ideal for machinery.
– Flange Nut: Built-in washer distributes load. Protects soft materials.
– Wing Nut: Hand-tightenable. For frequent adjustments (clamps, jigs).
Washer Functions:
– Flat Washer: Distributes load, protects surface, provides smooth bearing surface. Recommended under both bolt head and nut.
– Fender Washer: Extra-large diameter. Prevents pull-through in thin materials (sheet metal) or soft woods.
– Split Lock Washer: Spring action maintains tension under vibration. Note: Effectiveness after initial tightening is debated by some engineers. For critical vibration applications, thread-locking compound or mechanical locking methods may be preferred.
– Toothed Lock Washer: Bites into surface and nut for positive lock. Useful on painted or plated surfaces.
Bolted Joint Best Practices
- Hole Sizing: Clearance hole in top material should be slightly larger than bolt diameter (e.g., 17/64″ hole for ¼” bolt). Prevents binding and ensures proper clamping force.
- Thread Engagement: Minimum thread engagement in nut ≈ bolt diameter (e.g., ¼” bolt needs ~¼” of threads engaged). For tapped holes in metal, engagement should be greater (e.g., 1.5x diameter).
- Torque Sequence: For multiple bolts (e.g., engine mounts), tighten in a criss-cross pattern to 50% torque first, then final torque. Prevents warping.
- Torque Guidance: Consult manufacturer charts. Example approximate values for SAE Grade 5 bolts in clean, dry conditions:
- ¼” bolt: ~10 ft-lbs
- ⅜” bolt: ~30 ft-lbs
- ½” bolt: ~70 ft-lbs
Note: Torque values are highly dependent on lubrication, material, and application. Always verify with the fastener or assembly manufacturer for critical joints. - Thread Locking: For vibration-prone joints:
- Blue threadlocker (medium strength): Removable with tools
- Red threadlocker (high strength): Requires heat for removal
- Caution: Threadlockers are generally not recommended for bolts primarily under shear load in structural connections—mechanical locking methods are often preferred per engineering guidelines.
Through-Bolting vs. Lag Screws: Context Matters
Through-Bolting Advantages:
– Full shank in shear (strongest configuration for many applications)
– Load distributed across entire joint thickness
– Installation is verifiable (you see the nut)
– Preferred for connections subject to cyclic or dynamic loads (swings, bridges)
When Lag Screws May Be Chosen:
– One-sided access (e.g., attaching ledger board to house rim joist from outside)
– Thick solid timber where through-bolting is impractical
– Important: Lag screws rely on thread engagement in wood. Withdrawal strength is reduced in end grain or low-density woods. Use structural screws with published evaluation reports (e.g., ICC-ES) when specified for the application.
Practical example: Deck post connection. Through-bolting the post base plate to the beam with ½” galvanized bolts and washers is often preferred over lag screws alone for posts supporting significant loads. This approach, while adding installation time, enhances connection reliability. Local building codes increasingly specify connection methods for decks—always verify requirements.
Anchors and Specialty Fasteners: Solutions for Challenging Substrates
When screws and nails lack grip, anchors create holding power in hollow or brittle materials. Correct selection is essential—anchor failure is a frequent DIY frustration.
Drywall Anchor Options
| Anchor Type | Typical Best Use | Installation Key |
|---|---|---|
| Plastic Expansion | Light duty (<10 lbs): Towel bars, small shelves | Drill hole slightly smaller than anchor; screw expands plastic against drywall |
| Self-Drilling (Zip) | Medium duty (10–30 lbs): Curtain rods, mirrors | Sharp tip drills own hole; threads grip drywall paper |
| Molly Bolt | Medium-heavy (30–75 lbs): Shelving, cabinets | Metal sleeve expands behind drywall; requires precise hole size |
| Toggle Bolt | Heavy duty (50–100+ lbs): TVs, heavy shelves | Wings flip behind drywall; distributes load over large area |
| Strap Toggle (e.g., SnapToggle®) | Very heavy duty (100+ lbs): Large TVs, projectors | Straps allow installation in deep cavities; wings stay engaged after removal |
Toggle bolt technique:
1. Drill hole per anchor size chart (critical for function).
2. Fold wings, insert bolt through object.
3. Push anchor through hole until wings spring open.
4. Tighten bolt until object is snug—avoid overtightening, which can pull wings through drywall.
Tip: For heavy objects between studs, using two anchors spaced appropriately can significantly improve load distribution versus a single anchor.
Masonry and Concrete Anchors
Wedge Anchor
How it works: Bolt expands sleeve against concrete wall when tightened.
Best for: Heavy static loads—structural steel, machinery bases, handrails.
Installation:
– Drill hole deeper than anchor length (for dust clearance)
– Clean hole meticulously (wire brush + air)
– Insert anchor, tighten nut to set
Critical detail: Minimum embedment depth is essential (e.g., 1½” for ¼” anchor). Shallow embedment drastically reduces capacity.
Sleeve Anchor
Advantage: Works in brick, block, and concrete. Tolerates minor hole imperfections better than wedge anchors.
Trade-off: Slightly lower load capacity than wedge anchors. Suitable for medium-duty applications (shelving brackets, signs).
Drop-In Anchor
Feature: Female-threaded sleeve set flush with concrete surface. Bolt screws into anchor.
Best for: Applications requiring frequent bolt removal (machinery bases, temporary barriers).
Installation: Set with a special setting tool that expands the sleeve internally.
Chemical Anchor (Epoxy)
When considered: Cracked concrete, seismic zones, maximum load capacity needs.
How it works: Inject epoxy resin into hole, insert threaded rod. Cures to form a strong bond.
Advantage: Highest load capacity among common anchor types; distributes stress evenly.
Caution: Curing is temperature-sensitive; follow manufacturer timing precisely. Requires careful mixing and installation. Best suited for experienced installers or critical applications.
Other Specialty Fasteners
Rivets (Pop Rivets)
How they work: Mandrel pulls through rivet body, expanding it against the backside. Mandrel snaps off.
Types: Aluminum (general), stainless steel (corrosion resistance), Monel (marine), large flange (soft materials).
Best applications: Attaching nameplates, thin metal brackets, automotive trim where rear access is impossible.
Tool tip: A quality rivet gun reduces hand fatigue and ensures consistent setting.
Staples
Beyond upholstery:
– Insulation Staples: Wide crown holds batts without compressing insulation value.
– Roofing Staples: Galvanized, 1″ legs for felt paper. Code note: Many jurisdictions now require roofing nails for asphalt shingles—verify local code.
– Pneumatic Staples: For subflooring underlayment, housewrap. Faster than nails but with less holding power.
Important: Staples are not suitable for structural framing or shear walls due to inadequate withdrawal strength.
Adhesive Anchors
Emerging option: Hybrid fasteners with integrated construction adhesive.
Best for: Non-structural items on challenging surfaces (tile, glass), temporary fixes.
Reality check: Not a replacement for mechanical anchors in load-bearing applications. Adhesives can degrade with UV exposure, temperature swings, or moisture. Always follow manufacturer limitations.
The Driving Zone: Tools, Techniques, and Installation Insight
Even the perfect fastener underperforms with poor installation. This section shares practical techniques to elevate your results.
Drill/Driver Selection Considerations
Cordless Drill/Driver Features:
– Clutch Settings: 1–10 for screws (lower = less torque). Protocol: Start low (e.g., setting 3 for drywall screws); increase only if needed. Prevents stripped heads and material damage.
– Brushless Motor: Offers longer runtime and tool life. A worthwhile investment for frequent users.
– LED Work Light: Illuminates dark work areas (under sinks, inside cabinets).
– Keyless Chuck: For quick switching between driving bits and drill bits.
– Battery Platform: Sticking with one brand (DeWalt, Milwaukee, Makita) allows battery sharing across tools.
Impact Driver vs. Drill/Driver:
| Feature | Impact Driver | Drill/Driver |
|———|—————|————–|
| Torque Delivery | Rotational impacts (hammer-like pulses) | Continuous rotation |
| Best For | Driving long screws, lag bolts, stubborn fasteners | Precision screw driving, drilling holes |
| Bit Retention | ¼” hex chuck (bits snap in/out) | Keyless chuck (holds round shank bits) |
| Control | Less precise depth control | High precision with clutch |
| Tip | Use impact driver for deck screws, structural screws, lag bolts. Use drill/driver for drywall, trim, delicate work. |
Safety note: Avoid impact drivers for:
– Very small screws (<#6)
– Soft materials (drywall, plastic)
– Applications requiring precise depth control
The sudden torque spikes can strip heads or damage materials.
Bit Selection and Care
Bit Materials:
– Standard Steel: Wears quickly. Not recommended for frequent use.
– Hardened Steel (S2): Good for occasional projects.
– Cobalt Steel: Best for impact drivers; resists cam-out and wear. Worth the modest premium.
Bit Fit Matters:
– Phillips bit should fill the screw head recess completely. Gaps cause cam-out.
– Square (Robertson) bits: Match exact size (e.g., #1 for small screws, #2 for deck screws).
– Torx bits: Verify size (T20 vs T25) before driving.
Longevity tip: Store bits in labeled magnetic strips—not loose in a drawer. Bent or chipped bits cause most cam-out issues. Replace bits at the first sign of rounding.
Material-Specific Driving Techniques
Wood Screws (Preventing Splitting):
1. Drill pilot hole: Diameter ≈ screw root diameter (unthreaded part). Depth = screw length minus head height.
2. For hardwoods or end grain: Add a clearance hole in the top piece (diameter = screw shank).
3. Drive slowly with steady pressure. Stop when head seats.
Tip: Rubbing screw threads lightly on beeswax or paraffin before driving reduces friction, prevents stripping, and eases future removal if needed.
Drywall Screws:
– Set drill clutch to 1 or 2.
– Drive until head dimples paper without breaking it.
– Angle screw slightly toward the center of the stud for better grip.
– Never use a hammer to set the screw head—this cracks the gypsum core.
Concrete Screws (e.g., Tapcons):
1. Drill hole with carbide bit (exact size per manufacturer chart).
2. Clean hole thoroughly: brush out dust, then blow with air (bulb syringe works without a compressor).
3. Drive slowly with a standard drill (not impact driver). Stop when head contacts surface.
4. Avoid over-tightening—threads can strip in concrete. If the screw spins, remove and use the next size up.
Nails (Hammer Technique):
– Grip hammer near the end of the handle for leverage.
– Start nail with light taps; once stable, use full swings.
– For finish nails: Use a nail set to sink the head below the surface.
– Splitting prevention: Place the nail set against the nail head and tap the set with the hammer—avoids marring the wood surface.
Understanding Torque and Thread Locking
Under-torqued bolts may loosen; over-torqued bolts can strip threads or crack materials. Precision supports longevity.
Torque Context for Common Applications:
| Application | Bolt Size | Torque Consideration | Tool Guidance |
|————-|———–|———————-|—————|
| Deck ledger connection | ½” lag screw | Follow manufacturer/engineering specs | Torque wrench recommended |
| Cabinet hinge screw | #6 x ¾” | Hand-tight plus a slight turn | Screwdriver |
| Machinery baseplate | ⅜” Grade 5 | Consult equipment manual | Torque wrench |
| Drywall screw | #6 x 1¼” | Very low torque (clutch 1–2) | Drill/driver |
Protocol for critical joints:
1. Tighten to ~50% torque in a criss-cross pattern.
2. Wait a few minutes (allows materials to settle).
3. Tighten to final torque in the same pattern.
4. For soft materials like wood, re-check after 24 hours as compression may occur.
Thread-Locking Compounds:
– Blue (Medium Strength): Removable with standard tools. Ideal for machinery, automotive non-critical parts.
– Red (High Strength): Requires heat (~500°F) for removal. For permanent installations where disassembly isn’t anticipated.
– Green (Wicking): Applied after assembly; wicks into threads. For pre-assembled parts.
– Avoid on aluminum threads (risk of galling) or fasteners primarily under shear load in structural connections unless specified by engineering guidelines.
Troubleshooting Common Fastener Challenges
Even careful installations can face issues. This guide helps diagnose and address frequent scenarios.
Symptom: Screw Head Stripped During Driving
Likely Causes:
– Incorrect bit size/type
– Drill clutch set too high
– Worn or low-quality bit
– Driving too fast, especially in dense materials
Immediate Response:
1. If partially driven: Place a rubber band over the screw head, insert bit. Friction may allow removal.
2. If flush or below surface: Use a screw extractor kit:
– Drill a small pilot hole into the screw center
– Insert left-hand threaded extractor
– Turn counterclockwise to remove
3. Last resort: Drill out the screw with a bit slightly larger than the screw diameter, then use an easy-out tool.
Prevention:
– Use impact-rated Torx or Square bits
– Set drill clutch appropriately for the material
– Apply steady downward pressure while driving
– Pre-drill pilot holes in dense materials
Symptom: Nail “Popping” Out of Drywall
Why It Happens:
– Wood studs expand/contract with humidity changes
– Nails have lower withdrawal resistance in gypsum compared to screws
– Building movement over time
Repair Approach:
1. Drive the popped nail slightly below the surface with a nail set.
2. Install a drywall screw 1–2″ above or below the popped nail (screws resist withdrawal better).
3. Remove the popped nail completely.
4. Mud and sand the repair.
Long-term practice: When installing new drywall, screws are generally preferred over nails for attachment to studs, as modern building practices and codes increasingly specify screws for their superior holding power in this application.
Symptom: Rust Stains on Wood or Concrete
Diagnosis:
– Fastener coating inadequate for the environment (e.g., electro-galvanized used outdoors)
– Dissimilar metal contact (e.g., steel screw in copper flashing)
– Moisture trapped behind the fastener head
Remediation:
1. Remove the fastener.
2. Clean rust with a wire brush and a mild oxalic acid solution (e.g., diluted Bar Keepers Friend).
3. Replace with an appropriate fastener:
– Decks: Hot-dipped galvanized or stainless steel
– Coastal areas: Stainless steel 316
– Copper applications: Stainless steel fasteners only
4. Seal the area with a clear penetrating epoxy before reinstalling if moisture is a concern.
Prevention:
– Match fastener corrosion resistance to the environment
– Use polymer-coated fasteners for visible exterior applications
– Apply a small bead of clear silicone sealant under screw heads on exterior projects to shed water
Symptom: Bolt Loosening Over Time
Causes:
– Vibration (machinery, vehicles)
– Thermal cycling (expansion/contraction)
– Insufficient initial torque
– Missing lock washer or thread locker
Solutions by Context:
– Light vibration: Add a split lock washer or nylon lock nut
– Moderate vibration: Apply blue threadlocker to threads
– Heavy vibration: Use a castellated nut with cotter pin, or a deformed thread lock nut
– Critical safety: Double-nut locking technique (jam nut tightened against primary nut)
Verification: Mark the bolt head and material with a paint pen after tightening. If the marks separate, the bolt has loosened and requires re-torquing.
Symptom: Fastener Pulling Out of Concrete
Failure Analysis:
– Hole too large (bit worn or incorrect size)
– Hole not cleaned properly (dust prevents grip)
– Anchor too short for the load
– Concrete condition (cracked, weak)
Corrective Action:
1. Remove the failed anchor.
2. Clean the hole thoroughly.
3. Fill the hole with hydraulic cement.
4. After 24–48 hours, drill a new hole at least 2″ away from the original location (concrete integrity is compromised near the failed hole).
5. Install a larger or more appropriate anchor type (e.g., switch from plastic anchor to wedge anchor).
Insight: For critical loads in questionable concrete, chemical anchors may provide more reliable performance as they bond to the entire hole surface.
Symptom: Wood Splitting Around Fastener
Prevention Focus:
– Always pre-drill near edges, ends, or in hardwoods
– Use blunt-point nails for hardwoods
– Choose trim-head screws for finish work
– Avoid over-driving screws
Repairing Split Wood:
1. Inject wood glue into the crack.
2. Clamp tightly until dry (follow glue manufacturer’s time).
3. Reinforce with a wood spline or dowel across the split if structural.
4. Re-drill a pilot hole slightly larger than the original.
5. Use a slightly longer screw to engage undamaged wood.
For structural splits (e.g., deck post): Sister a new piece of lumber alongside the damaged section using structural screws or bolts, following engineering guidance if load-bearing.
Your Questions, Answered
Q: What’s a frequent fastener oversight in DIY projects?
A: Using interior-grade fasteners in exterior or corrosive environments. Standard zinc-plated screws can corrode prematurely when used with pressure-treated wood or in humid conditions. Always verify corrosion resistance markings (“Hot-Dipped Galvanized,” “Stainless Steel 304/316,” or “ACQ-Compatible”) for outdoor or moisture-prone projects. This attention to detail significantly improves longevity.
Q: Can deck screws be used for interior wall framing?
A: Generally not recommended for structural shear applications. Building codes (e.g., IRC R602.3) typically specify ring-shank nails for shear walls because their slight flexibility helps absorb movement. Deck screws lack this ductility and may contribute to brittle failure in unengineered applications. Structural screws with specific ICC-ES evaluation reports approving them for framing may be used where the report and local code permit—always verify.
Q: How can I estimate if a fastener is adequate for my load?
A: For non-structural items (shelves, pictures), consult manufacturer load charts for anchors (e.g., toggle bolts rated for X lbs in drywall). For structural applications (decks, ledgers, beams), rely on engineered drawings, building code tables, or consultation with a qualified professional. Remember: Fastener performance depends heavily on correct installation and substrate condition. A wedge anchor rated for high loads will underperform if installed in cracked concrete or with an incorrect hole size. When safety is involved, seek expert guidance.
Q: Why do my drywall screws keep breaking during installation?
A: Common causes include: (1) Drill clutch set too high—drywall screws require very low torque (settings 1–2); (2) Using fine-thread (Type S) screws on metal studs—switch to coarse-thread (Type W); (3) Low-quality screws with brittle steel. Solution: Use reputable brand screws, match thread type to stud material, and set the clutch correctly. Test on a scrap piece first.
Q: Are stainless steel fasteners always the best choice?
A: Not universally. Stainless steel (304 grade) offers excellent corrosion resistance but may have lower tensile strength than high-grade carbon steel bolts (Grade 5/8). For high-shear structural connections indoors (e.g., deck ledger bolts), hot-dipped galvanized carbon steel often provides an optimal strength-to-cost ratio. Use stainless steel 316 for saltwater exposure, pools, or harsh chemical environments. For dry interior applications, standard coated fasteners are typically sufficient and cost-effective.
Q: What distinguishes a lag screw from a structural screw?
A: Lag screws are thick, coarse-threaded fasteners requiring pre-drilling and high torque. Structural screws are engineered with hardened steel, optimized thread geometry (e.g., CEE threads), and often partial threading to function similarly to lag screws with less pre-drilling in many applications. Crucially, quality structural screws include ICC-ES evaluation reports that specify approved uses (e.g., “replaces ½” lag screw per IRC section X”). Always verify the report matches your specific application and follow installation instructions precisely.
Q: Is it advisable to reuse a hole where a fastener failed?
A: Generally not for critical or heavy-load applications. In wood: Fill the hole with a glued wooden dowel, let cure fully, then re-drill a pilot hole. In drywall: Relocate the anchor at least 2″ away. In concrete: Fill with hydraulic cement, wait 48 hours, then drill a new hole 2″ away. Reusing the exact hole significantly compromises holding power, especially in brittle materials. When in doubt, choose a new location or upgrade the anchor type.
Q: How do I remove a broken screw with no head exposed?
A: Step-by-step approach: (1) Center-punch the screw stub to prevent drill bit wandering; (2) Drill a small pilot hole (1/16″) into the center; (3) Gradually increase bit size to ~⅛”; (4) Insert a screw extractor (left-hand thread) and turn counterclockwise; (5) If the extractor fails, drill out completely with a bit matching the screw diameter, then use an easy-out tool or helicoil insert. Prevention through quality bits and proper technique is always preferable.
Q: Are plastic anchors ever suitable for heavier loads?
A: Only within their published capacity limits. A standard plastic anchor typically supports 10–25 lbs in ½” drywall. For loads over 30 lbs, molly bolts or toggle bolts are more appropriate. Critical note: Anchor capacity depends on drywall thickness, condition, and installation quality. Test anchors in scrap drywall first. For heavy items (TVs, shelves), locating and mounting directly into wall studs provides the most reliable support—no anchor matches the holding power of screws driven into framing.
Q: Why do some screws arrive with wax or oil on them?
A: This lubrication reduces driving torque, prevents galling (thread seizing), and can ease future removal. It’s common on deck screws and structural screws. Do not wipe it off—it’s intentional. For extra protection in harsh environments, a light application of paste wax to threads before driving can be beneficial.
Q: What fastener is recommended for attaching wood to concrete?
A: Two reliable methods: (1) Concrete screws (e.g., Tapcons): Drill precise hole, clean thoroughly, drive slowly. Suitable for light to medium duty (ledger boards, sill plates). (2) Wedge anchors: For heavy structural connections (post bases, machinery). Requires precise hole depth and cleaning. Avoid masonry nails or standard screws—they lack reliable holding power. Always follow the manufacturer’s installation specifications exactly for safety and performance.
Conclusion and Next Step
You now have a practical framework for fastener selection—not just a catalog of types, but a clear process to match fasteners to your project’s specific needs. Remember the FAST Framework: Clarify the Function (shear, tension, clamping), assess the Assembly (materials joining), consider the Stress (realistic load demands), and evaluate the Surroundings (environmental factors). This sequence replaces guesswork with informed decisions. Three enduring principles to carry forward:
1. Corrosion compatibility matters—select fastener coatings suited to the environment (ACQ wood, coastal air, chemical exposure).
2. Installation quality is inseparable from performance—a well-chosen fastener underperforms with poor technique (unclean concrete holes, incorrect pilot holes, overtightening).
3. Verify for critical applications—consult evaluation reports, building codes, or qualified professionals for structural, overhead, or safety-related connections. Never assume.
The 24-Hour Rule
Within the next day, take one small, intentional action: Walk through your home and observe one existing fastener in a project you’ve completed or live with. Examine it closely. Ask: What materials is it joining? What kind of load does it carry? Does the fastener type seem appropriate for its location and purpose? If you notice rust on an exterior screw, note the coating. If a cabinet hinge feels loose, consider thread engagement. This mindful observation builds intuitive awareness—the foundation of lasting craftsmanship.
The Bigger Perspective
Fasteners are the quiet connective tissue of our built world. They reflect a fundamental principle: Enduring strength arises from intelligent connection, not just material strength alone. A thoughtfully chosen and installed fastener enables structures to withstand environmental stresses, machinery to operate reliably, and homes to feel secure. By deepening your understanding of this foundational element, you contribute to building practices that reduce waste, prevent avoidable failures, and create work that stands the test of time. Every project completed with this awareness becomes a quiet testament to care and competence. Carry this knowledge forward, share insights with fellow makers, and build with growing confidence and respect for the craft.
Explore Our Complete System:
The Ultimate Guide to Power Tool Safety and Maintenance | Woodworking Joinery Decoded: From Butt Joints to Dovetails | Building Code Essentials Every DIYer Must Know | The Complete Guide to Deck Construction and Longevity | Mastering Concrete: From Footings to Finishes | Home Repair Emergency Kit: Tools and Techniques for Critical Fixes | Sustainable Building Practices: Reducing Waste Through Thoughtful Material Choices