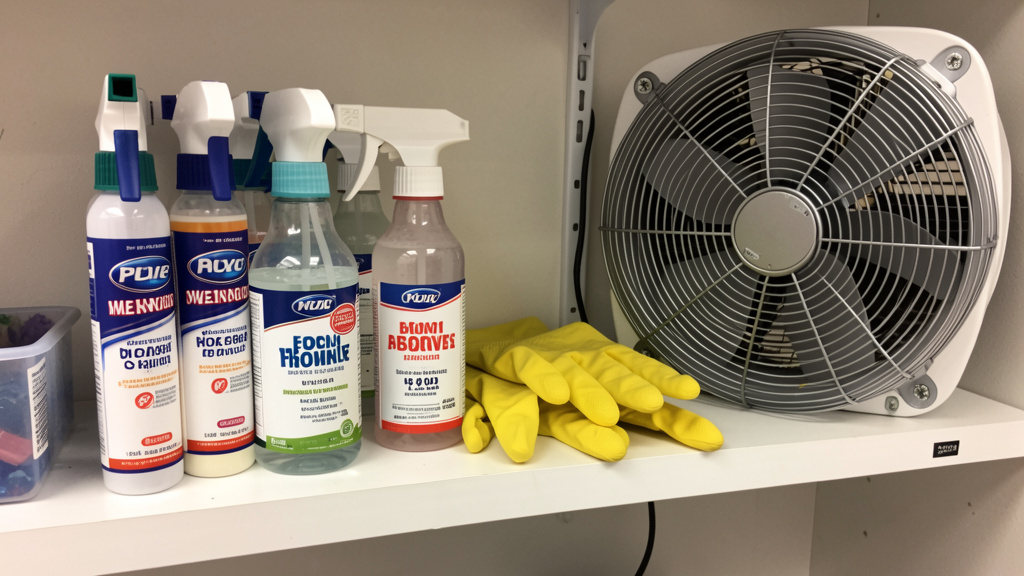
Transform Your DIY Projects with Confidence—Learn the Practical Framework for Safe Chemical Use, Storage, and Disposal That Protects You, Your Family, and Your Home
Handling chemical finishes and cleaners doesn’t have to be dangerous. This definitive guide breaks down exactly how to work safely with common household chemicals—from decoding labels and selecting appropriate personal protective equipment to emergency response protocols—using a step-by-step framework informed by established safety practices. Stop guessing and start protecting what matters most with actionable strategies designed specifically for home environments.
Introduction
Household chemical incidents remain a frequent concern reported to poison control centers, underscoring why informed handling matters. A splash of deck brightener in the eye while refinishing patio furniture. Fumes from a bathroom cleaner triggering respiratory discomfort in a poorly ventilated space. A curious toddler accessing an unsecured container of wood stain stored under the sink. These scenarios represent preventable moments where knowledge gaps intersect with everyday tasks. Yet chemical safety isn’t about fear or avoidance; it’s about empowerment through understanding. It’s the quiet confidence that comes from knowing how to read a label, select appropriate gear, ventilate a space, and respond if something goes wrong. This guide synthesizes widely recognized safety principles—from OSHA protocols and EPA guidelines to the Globally Harmonized System (GHS) frameworks—into a practical, accessible system tailored for homeowners, DIY enthusiasts, and gardeners. Whether you’re applying a water-based polyurethane to hardwood floors, stripping old paint from a vintage chair, or tackling mold in the basement, the principles within these pages will become your indispensable reference for working intelligently and safely with chemicals. Safety isn’t an obstacle to creativity; it’s the foundation that allows your projects to flourish without compromise.
The SAFE Framework: Your Step-by-Step System for Chemical Safety
Safety in chemical handling isn’t a single action—it’s a continuous, intentional process. To make it memorable, actionable, and adaptable to any project, this guide introduces the SAFE Framework: a four-phase cyclical system designed to embed safety into every stage of your work. SAFE stands for Safety Assessment, Preparation, Execution, and Follow-up. Unlike fragmented checklists found elsewhere, this framework creates cognitive anchors at each decision point, transforming abstract caution into concrete action. Think of it as your mental operating system—reliable whether you’re using a citrus-based cleaner or a solvent-based wood stripper. Each phase builds deliberately on the last, closing gaps that lead to accidents. Let’s walk through it thoroughly, with precise instructions, real-world examples, and critical nuances often overlooked.
Phase 1: Safety Assessment (The “Before You Buy” Intelligence Phase)
This phase begins long before you open a container—often before you even purchase the product. It’s where you gather critical intelligence to make informed decisions. Skipping assessment is like navigating without a compass: possible, but unnecessarily risky.
Step 1.1: Decode the Product Label with Precision
Every legally sold chemical product carries a label rich with standardized information. Train yourself to look beyond marketing claims (“Eco-Friendly!” “Powerful!”) and focus on these non-negotiable elements:
- Signal Words: These indicate hazard severity. “DANGER” signifies severe risks (corrosive, highly flammable, fatal if swallowed). “WARNING” denotes moderate hazards (skin/eye irritation, moderate flammability). “CAUTION” indicates minor risks. Never dismiss a “CAUTION” label—cumulative exposure to mild irritants can cause significant issues over time.
- Hazard Statements: Standardized phrases mandated globally (e.g., “Causes serious eye damage,” “Highly flammable liquid and vapor,” “May cause respiratory irritation”). These are factual declarations, not suggestions.
- Precautionary Statements: Action-oriented instructions: “Wear protective gloves/eye protection,” “Use only outdoors or in a well-ventilated area,” “IF ON SKIN: Wash with plenty of soap and water.”
- Pictograms: Red-diamond symbols from the Globally Harmonized System (GHS). Key ones for home use:
- Flame: Flammable (paints, solvents, aerosols)
- Corrosion (test tube dripping on hand/surface): Acids, alkalis (oven cleaners, drain openers)
- Skull and Crossbones: Acute toxicity (some paint strippers, pesticides)
- Exclamation Mark: Irritant (many all-purpose cleaners, wood finishes)
- Health Hazard: Carcinogenicity, respiratory sensitization (some older strippers, epoxy hardeners)
Why this step is crucial: Understanding label elements is critical, as overlooking or misinterpreting warnings is a common factor in preventable chemical incidents. Labels aren’t legalese—they’re your first and most accessible safety resource.
Common mistake to avoid: Assuming “natural” or “plant-based” equals non-hazardous. Citrus-based solvents (d-limonene) can cause skin sensitization with repeated exposure. Vinegar-based cleaners are acidic and can damage surfaces or irritate eyes. Always verify hazard statements.
Real-life application: You’re choosing between two deck cleaners. Product A says “Biodegradable Formula” prominently but lists “Causes skin irritation” and “Harmful if inhaled” in small print. Product B has a “WARNING” signal word and a corrosion pictogram. Product B requires stricter precautions (gloves, goggles, ventilation), but Product A still demands respect. Assessment prevents complacency.
Step 1.2: Locate and Interpret the Safety Data Sheet (SDS)
For any chemical beyond basic vinegar or baking soda solutions—especially paints, strippers, epoxies, deck brighteners, or industrial-strength cleaners—the Safety Data Sheet (SDS) provides essential details. Manufacturers must provide these (typically downloadable from their website). Don’t be intimidated by the 16-section format; focus on these critical areas:
- Section 2: Hazard Identification: Summarizes all hazards, GHS pictograms, and signal words. Confirms label accuracy.
- Section 4: First Aid Measures: Exact steps for eye contact, skin contact, inhalation, ingestion. Print this section and keep it visible during your project.
- Section 7: Handling and Storage: Specific instructions: “Keep away from heat/sparks/open flames,” “Store in a cool, well-ventilated place,” “Ground/bond container during transfer.”
- Section 8: Exposure Controls/Personal Protection: Precise PPE requirements: “Wear nitrile gloves (minimum 8 mil thickness),” “Use NIOSH-approved respirator with organic vapor cartridges,” “Ensure local exhaust ventilation.”
- Section 10: Stability and Reactivity: Critical warnings: “Incompatible with strong oxidizers (e.g., bleach),” “May polymerize if contaminated.”
How to do it correctly: Search “[Exact Product Name + Manufacturer] SDS PDF.” If unavailable online, contact the manufacturer—reputable companies provide them readily. Save to your phone or print key sections. For recurring products (e.g., your go-to wood stain), keep a dedicated SDS folder.
Why this step is crucial: Labels provide snapshots; SDS delivers the full context. An SDS might reveal that a “low-odor” paint stripper still requires organic vapor cartridges for respiratory protection—a detail easily missed on the label. This step transforms uncertainty into informed decision-making.
Exception handling: For simple mixtures you make yourself (e.g., 1:1 vinegar and water), research each component’s hazards. Vinegar is acidic (can irritate eyes); essential oils added for scent may be skin sensitizers. Apply the same rigor.
Step 1.3: Conduct a Workspace and Household Vulnerability Audit
Safety extends beyond the chemical itself to your environment and household members. Ask these specific questions before bringing the product home:
- Ventilation Reality Check: Is the space naturally ventilated (multiple windows)? Can you create cross-breeze? Is mechanical exhaust possible (box fan in window blowing out)? For basements or interior rooms with no windows, is the project feasible safely? Be honest.
- Household Members: Are there infants, elderly individuals, pregnant persons, or those with asthma/respiratory conditions nearby? Are pets (especially birds, which are highly sensitive to fumes) in adjacent rooms? Chemical vapors travel through HVAC systems.
- Ignition Sources: Are pilot lights (water heater, furnace), electrical outlets, or tools that spark present? Critical for flammables.
- Surface Compatibility: Will the chemical damage adjacent surfaces? (e.g., acid-based cleaners on natural stone, solvent spills on finished wood floors).
- Emergency Access: Can you quickly exit the area? Is a water source (sink, hose) immediately accessible for rinsing?
Method A (Ideal): Dedicated workshop/garage with two exterior doors open, exhaust fan venting outdoors, chemical storage in locked, ventilated cabinet away from living areas.
Method B (Adaptable): For indoor projects: choose room with windows on two walls. Place one fan blowing out a window, open door to create airflow path. Cover adjacent surfaces with plastic sheeting. Remove pets/children from home during work and drying time.
Method C (Non-Negotiable Stop): If ventilation is impossible (e.g., small closet bathroom with no window), the chemical is highly hazardous, or vulnerable individuals cannot be relocated—postpone or hire a professional. No DIY project justifies severe health risk.
Real-life scenario: A homeowner planned to refinish a bathroom vanity using an oil-based polyurethane. During the audit, they noted: single small window, gas water heater in adjacent closet (ignition risk), toddler napping down the hall. They switched to a water-based finish (lower VOCs, non-flammable), scheduled work for when a partner could supervise the child elsewhere, opened the window fully with a fan exhausting outward, and placed a towel under the bathroom door to contain fumes. Assessment enabled safe adaptation.
The Fundamental Principle: Safety is not an add-on; it is the foundational layer upon which every successful, satisfying project is built. Assessment transforms uncertainty into informed control.
Phase 2: Preparation (Assembling Your Safety Arsenal)
Preparation converts assessment insights into tangible readiness. This phase ensures that when you begin work, safety is seamless, not stressful. Rushing preparation is a common precursor to incidents.
Step 2.1: Select, Verify, and Fit Personal Protective Equipment (PPE)
PPE is your personal barrier. “Close enough” gear fails. Precision matters.
- Eye Protection:
- Safety Glasses (ANSI Z87.1+): For tasks with minimal splash risk (dusting, light sanding). Must have side shields.
- Chemical Splash Goggles: Essential for liquids (cleaners, stains, strippers). Creates a sealed barrier. Look for indirect vents to prevent vapor ingress. Critical nuance: Regular safety glasses won’t stop splashes from entering around the sides or top. If the SDS indicates eye hazards, goggles are mandatory.
-
Fit Check: Goggles should seal comfortably without excessive pressure. Test by splashing water lightly around the seal—no leakage.
-
Respiratory Protection:
- Dust Masks (N95): ONLY for particulates (sanding dust, drywall dust). Useless against vapors or gases. Do not use for painting, stripping, or cleaning chemicals.
- Half-Face Respirator: Required for solvent vapors, paint fumes, stripper chemicals. Must be paired with correct cartridges:
- Organic Vapor (OV) Cartridges: For paints, stains, varnishes, solvents, paint strippers. Often black or labeled “OV.”
- Acid Gas Cartridges: For bleach-based cleaners, toilet bowl cleaners, pool chemicals. Often white.
- Multi-Gas Cartridges: Combine OV + Acid Gas + P100 particulate filter. Ideal for unknown mixtures or multi-step projects.
- Fit is Everything: Perform a user seal check every time: Block cartridges, inhale gently—mask should collapse slightly with no air leakage around edges. Exhale gently—no air should escape. Facial hair (even stubble) breaks the seal. If you can’t achieve a seal, reconsider the project or seek professional assistance.
-
Cartridge Lifespan: Cartridges saturate. Replace if you smell/taste chemicals, breathing feels difficult, or per manufacturer guidance. Store in airtight bag when not in use.
-
Hand Protection (Gloves):
- Nitrile (4-8 mil): Best all-around for DIY. Resists oils, solvents, acids, bases. Ideal for paints, stains, most cleaners. Check SDS for compatibility notes.
- Neoprene: Superior for strong acids (oven cleaners, rust removers) and caustics. More durable than nitrile for abrasive tasks.
- Butyl Rubber: For highly aggressive chemicals (epoxy resins). Less common for typical home use.
- AVOID: Latex (degrades rapidly with chemicals, allergy risk), vinyl (poor chemical resistance), dishwashing gloves (designed for hot water, not chemical resistance).
-
Fit & Length: Gloves should extend over wrist/cuff of sleeves. Too tight = tears easily; too loose = catches on tools. Change immediately if contaminated or torn.
-
Body Protection:
- Clothing: Long sleeves, long pants, closed-toe shoes (leather preferred). For high-risk tasks (deck staining, large stripper jobs), wear a disposable Tyvek coverall (Type 3 or 4 for liquid splash protection).
- Aprons: Chemical-resistant rubber or PVC aprons add torso protection for pouring or mixing.
Common mistake: Using the same gloves for multiple chemicals without checking compatibility. Nitrile resists many solvents but degrades rapidly with ketones (acetone) or strong acids. Consult an SDS or glove compatibility chart. When in doubt, use thicker nitrile (8 mil) or neoprene.
Pro Tip: Create a dedicated “Chemical Safety Kit” stored near your workspace:
– ANSI Z87.1 goggles
– Half-face respirator with OV cartridges (and spare cartridges in sealed bag)
– Box of 8-mil nitrile gloves
– Tyvek coverall
– Duct tape (to seal glove cuffs to sleeves if needed)
– Printed SDS sections for common products
Keep it stocked and accessible—no hunting mid-project.
Step 2.2: Engineer Effective Ventilation
Ventilation isn’t “opening a window.” It’s actively managing air exchange to dilute and remove hazardous vapors below concerning levels.
- Natural Ventilation (Cross-Flow):
- Open windows/doors on opposite sides of the room.
- Place one or more box fans in a window blowing OUT to exhaust contaminated air.
- Open an interior door to allow fresh air to enter from another part of the house (create an airflow path).
-
Critical: Fans must blow out, not in. Blowing in pushes fumes deeper into living spaces.
-
Mechanical Ventilation:
- Window Exhaust Fan: Rated for chemical vapors (explosion-proof if flammables are used). Place in window, venting directly outside.
- Air Scrubber: Portable unit with HEPA filter (for particles) + activated carbon filter (for vapors). Place near work area, exhausting filtered air back into room or vented outside. Ideal for basements or rooms without windows.
-
Local Exhaust: For sanding or spraying, use a vacuum with HEPA filter attached directly to the tool.
-
Ventilation Verification:
- The Smell Test is Dangerous: Many hazardous vapors are odorless or deaden your sense of smell. Never rely on odor alone.
- Practical Check: Hold a lightweight tissue near potential leak points (door cracks, window edges). It should be drawn toward the exhaust fan, indicating airflow out of the space.
- Duration: Ventilate during work and for at least 2-4 hours after, or until vapors are undetectable and surfaces are dry. For oil-based products, extend ventilation time. Follow product label guidance.
Real-life correction: A DIYer applied floor finish in a basement with one window cracked open. Within 20 minutes, they felt lightheaded. They stopped, evacuated, and later returned with two box fans: one exhausting air out the window, another pulling fresh air from the upstairs hallway through an open door. Symptoms resolved. Proper airflow made the difference.
Special Case – Confined Spaces: Closets, crawl spaces, or small bathrooms require extreme caution. If ventilation cannot be engineered effectively (e.g., no window, single door), do not proceed. Hire a professional equipped with appropriate ventilation and monitoring equipment.
Step 2.3: Stage Emergency Response Equipment
Hope for the best, prepare for the worst. Have these items within immediate reach before opening any container:
- Eye Wash: ANSI-compliant single-use eyewash bottle (16 oz minimum). Must deliver tepid water for full 15 minutes. Not a spray bottle or sink faucet (water pressure too high, hard to hold eyes open). Mount visibly near work area.
- Skin Flush Station: Garden hose with spray nozzle (for garages/workshops) or handheld showerhead accessible in bathroom projects. For indoor rooms without plumbing access, keep several large bottles of water (1-gallon jugs) dedicated solely for emergency rinsing.
- Spill Kit: Absorbent pads/socks (clay-based or polypropylene), plastic scoop, sealable plastic bags, extra nitrile gloves. Size: enough to contain a typical project spill.
- First Aid Kit: Beyond basics: burn gel (for chemical burns), sterile saline solution (for eye irrigation after initial flush), non-adherent dressings. Check expiration dates quarterly.
- Emergency Information: Laminated card with:
- Poison Control: US 1-800-222-1222 / Canada 1-844-764-7669 / EU 112
- Local emergency number
- Nearest hospital address
- Product name and SDS section for first aid
Post visibly and save in phone contacts as “CHEMICAL EMERGENCY.”
Why this step is non-negotiable: In chemical exposure, time is tissue. Safety standards, such as ANSI Z358.1, emphasize the importance of immediate and thorough flushing for eye and skin contact. Having equipment staged ensures a rapid response, which can significantly reduce injury severity. Immediate action is consistently highlighted in safety literature as critical for minimizing harm.
Phase 3: Execution (Working Safely in Real Time)
Execution is where preparation meets practice. Vigilance, not speed, defines success here. Maintain your safety barriers and listen to your body’s signals.
Step 3.1: Master Safe Handling Techniques
- Opening Containers: Point lid away from your body and face. Use a screwdriver or bottle opener—not teeth or excessive force. For stubborn lids, tap gently on edge with rubber mallet. Work over a spill tray.
- Pouring and Mixing:
- Use a funnel (chemical-resistant plastic or metal) to prevent spills. Keep funnels dedicated to specific chemical types.
- Pour slowly and deliberately. Fill containers only ¾ full to prevent sloshing.
- Critical Mixing Rule: ALWAYS add chemical to water, NOT water to chemical—especially for acids (muriatic acid for concrete) or concentrated cleaners. Adding water to concentrated acid causes violent heat release and splattering. Add acid slowly to water while stirring.
- Mix in well-ventilated area, wearing full PPE. Never mix chemicals unless explicitly instructed (e.g., two-part epoxy). Never mix bleach with ammonia, vinegar, or acids—creates toxic gases (chloramine, chlorine gas).
- Application:
- Use tools designed for the chemical: synthetic brushes for water-based finishes, natural bristle for oil-based (check label). Plastic scrapers for strippers (non-sparking).
- Work in small sections. Avoid splashing or aggressive brushing that aerosolizes chemicals.
- Keep container closed when not actively dipping/applying.
- Container Management: Never leave open containers unattended. Place on stable surface away from edges. Use secondary containment (plastic tub) to catch spills.
Common mistake: “Topping off” the main container from a secondary cup mid-project. This risks contamination of the entire product and increases spill probability. Pour only the amount needed for the immediate task into a disposable cup or dedicated applicator container.
Step 3.2: Practice Continuous Environmental and Bodily Monitoring
Safety isn’t set-and-forget. Monitor actively:
– Your Body: Dizziness, headache, nausea, eye watering, throat irritation, or unusual fatigue are RED FLAGS. Stop work immediately. Move to fresh air. Do not “push through.” These are early signs of overexposure. Reassess ventilation, PPE fit, or chemical choice.
– Environment: Watch for visible vapor clouds (haziness), strong persistent odors (even with respirator—indicates cartridge saturation), unexpected heat from container (chemical reaction), or bubbling/fuming.
– Time Management: Limit continuous exposure. Take a 10-15 minute break in fresh air every 45-60 minutes. Hydrate. This reduces cumulative exposure and mental fatigue (a major incident contributor).
– Buddy System (Highly Recommended): For high-risk projects (large stripper jobs, confined spaces), have another adult present who knows the hazards and emergency steps. They can assist if you become incapacitated.
Analogy: Like a scuba diver monitoring air supply and depth, you must monitor your chemical environment. Ignoring subtle warnings leads to critical incidents. Your body’s signals are data—not weakness.
Step 3.3: Enforce a Strict No-Contamination Zone
Establish and communicate clear boundaries:
– No Eating, Drinking, or Smoking: In or near the work area. Chemicals can transfer from gloves to food/drink. Designate a “clean zone” outside the workspace for breaks.
– Hand Hygiene Protocol: Wash hands and forearms thoroughly with mild soap and lukewarm water after removing gloves, even if no contact occurred. Avoid harsh scrubbing. Use barrier creams before work (not as PPE replacement) and moisturizers after to maintain skin integrity.
– Pet and Child Exclusion: Use physical barriers (baby gates, closed doors) with clear signage (“Chemical Work in Progress – Do Not Enter”). Communicate schedule to household members. For pets, confine to a separate area of the house with closed doors.
– Clothing Protocol: Remove contaminated clothing carefully (peel gloves first, then coveralls/shoes) to avoid skin contact. Wash work clothes separately from family laundry. For highly hazardous chemicals, dispose of coveralls properly.
Critical nuance: Secondary exposure is real. A pet walking through a freshly stained deck can track residue indoors. Allow adequate drying/curing time (per label) before permitting access. Test surfaces for tackiness with a gloved finger.
Phase 4: Follow-up (Closing the Loop Safely)
Safety responsibilities extend far beyond the final brushstroke. Proper follow-up prevents residual risks to health, home, and environment.
Step 4.1: Methodical Cleanup and Decontamination
- Tools: Clean brushes, rollers, sprayers per product instructions. For oil-based products: use mineral spirits or dedicated brush cleaner in a sealed container. Strain and reuse solvent if possible. For water-based: soap and water. Never pour solvents down drains.
- PPE Decontamination:
- Reusable: Goggles, respirator facepiece: Wipe with damp cloth, then mild soap solution. Rinse thoroughly. Air dry completely before storing. Inspect for cracks/damage.
- Disposable: Gloves, coveralls: Remove carefully (roll gloves inside out; peel coverall from ankles up). Place in sealed plastic bag. Label bag “Chemical Waste” if contaminated with hazardous substance.
- Skin Care: Wash all exposed skin with pH-balanced cleanser. Apply moisturizer to prevent dermatitis. Note any redness, itching, or rash—could indicate sensitization. Document for future reference.
- Workspace: Wipe down surfaces with appropriate cleaner. Remove plastic sheeting carefully to avoid stirring dust.
Why thorough cleanup matters: Some chemicals cause sensitization—meaning repeated low-level exposure can trigger severe allergic reactions later. Meticulous cleanup is a long-term health investment. Additionally, residual chemicals on tools can react unexpectedly during future use.
Step 4.2: Secure, Informed Storage
Improper storage causes many household chemical incidents.
– Original Containers Only: Never transfer chemicals to food/drink containers. This is a leading cause of accidental poisoning. Keep manufacturer’s label intact. If label fades, replace container or relabel clearly with contents and hazards.
– Ideal Storage Location: Cool, dry, well-ventilated area away from direct sunlight, heat sources, and ignition sources. Locked cabinet is essential if children or vulnerable adults are present. Garages are acceptable only if temperature-stable and secured.
– Critical Segregation:
– Flammables (paints, solvents, aerosols): Store in approved metal safety cabinet away from oxidizers.
– Oxidizers (bleach, pool chemicals): Store separately from flammables and acids. Can cause fire/explosion on contact.
– Acids (toilet bowl cleaners, rust removers): Store away from bases (oven cleaners, drain openers) and metals.
– Pesticides/Herbicides: Store in separate, locked compartment. Never store near food, pet food, or garden tools used for edible plants.
– Container Integrity: Check regularly for rust, leaks, swelling, or crystallization. Dispose of compromised containers immediately via hazardous waste channels.
– Inventory Management: Practice “first-in, first-out.” Label containers with purchase/opening date. Discard old chemicals per manufacturer guidance or local regulations. Less clutter = less risk.
Real-life consequence: Storing incompatible chemicals (e.g., acid-based cleaner next to ammonia-based cleaner) in an unventilated space can lead to dangerous reactions if leaks occur. Proper segregation prevents hazardous interactions.
Step 4.3: Responsible Disposal Pathways
“Down the drain” or “in the trash” is rarely correct—and often illegal.
– Never:
– Pour chemicals down sinks, toilets, or storm drains (contaminates waterways).
– Burn containers (releases toxic fumes).
– Place liquid chemicals in regular trash (leak risk).
– Latex (Water-Based) Paint:
– Small amounts: Mix with cat litter, sawdust, or commercial paint hardener until solidified. Dispose of solidified paint per local rules.
– Large amounts: Donate usable paint to community organizations. Use PaintCare.org (US) or similar programs to find drop-off locations.
– Oil-Based Paint, Solvents, Strippers, Stains:
– Take to Household Hazardous Waste (HHW) collection facility or event. Find locations via Earth911.com, municipal website, or retailer collection days.
– Never dry out oil-based products—they remain hazardous.
– Aerosol Cans: Empty cans (no product hissing) can often be recycled with metal. Full or partially full cans = HHW. Do not puncture.
– Rags and Wipes:
– Oil-based products: Lay rags flat individually outdoors on non-flammable surface (concrete) to dry completely. Once dry and stiff, dispose in metal container. Never pile oily rags—risk of spontaneous combustion.
– Water-based: Can often go in regular trash once dry, but check local rules.
– Empty Containers: Rinse thoroughly three times (if label permits). Recycle plastic/metal per local guidelines. Remove or deface labels to prevent misuse.
Environmental impact: Responsible disposal protects community water sources, wildlife, and waste management workers. It’s a tangible act of environmental stewardship.
Deep Dive: Navigating Common Chemical Categories with Precision
Broad principles provide the foundation, but specific chemicals demand tailored strategies. Let’s dissect the most frequent categories encountered in home projects, highlighting unique hazards and precise safety protocols.
Wood Finishes and Stains: Beyond “Just Paint”
Chemical Spectrum:
– Water-Based (Acrylic, Latex): Lower VOCs, minimal odor, non-flammable. Hazards: Mild skin/eye irritants, potential sensitizers.
– Oil-Based (Alkyd, Polyurethane): Higher VOCs, strong odor, flammable. Hazards: Solvent vapors (dizziness, headache), skin irritation, fire risk.
– “Natural” Oils (Tung, Linseed, Danish Oil): Often perceived as “safe.” Hazards: Spontaneous combustion risk with rags; skin sensitization; slow drying = prolonged exposure window.
Category-Specific Safety Protocol:
1. Ventilation Priority: Oil-based requires aggressive ventilation (two exhaust fans minimum). Water-based still needs cross-ventilation.
2. PPE Precision:
– Water-Based: Nitrile gloves (4 mil), safety glasses, N95 mask if sanding between coats.
– Oil-Based: Nitrile gloves (8 mil), chemical goggles, half-face respirator with OV cartridges. Tyvek coverall recommended for large jobs.
– “Natural” Oils: Same as oil-based for application. Critical addition: Rag management protocol (see below).
3. Rag Management Protocol (Non-Negotiable for Drying Oils):
– During Work: Keep rags submerged in a metal container filled with water.
– After Work: Lay rags flat and separate on concrete driveway (not grass—fire risk). Weight corners with stones. Allow 48+ hours to dry completely.
– Disposal: Once dry and brittle, place in metal container with lid. Dispose per local rules. Never place in plastic bag, trash can, or pile in corner.
– Why: Oils undergo exothermic oxidation. Piled rags trap heat, reaching ignition temperature. Fire departments report incidents annually from this cause.
4. Curing Time Awareness: “Dry to touch” ≠ safe. Oil-based polyurethane can off-gas VOCs for weeks. Restrict foot traffic, keep pets/children away, and maintain ventilation during cure. Check label for full cure time.
Case Study: A woodworker finished a table with tung oil, tossed rags in a plastic bag in the garage. Hours later, the bag smoldered. The fire was contained, but the lesson was stark: spontaneous combustion is silent, fast, and preventable with disciplined rag handling.
Paint Strippers: Navigating a High-Risk Category
Chemical Evolution & Hazards:
– Methylene Chloride (Dichloromethane): Banned for consumer sale in US (2019) and EU due to acute toxicity. Old stock may still exist—avoid entirely. SDS will list extreme hazards.
– N-Methyl-2-pyrrolidone (NMP): Common replacement. Still hazardous: reproductive concerns, skin penetrator. Requires full PPE and ventilation.
– “Safer” Alternatives (Benzyl Alcohol, Soy, Citrus): Lower acute toxicity but not risk-free. Can cause skin irritation, require longer dwell times, and some are flammable.
Stripping Safety Protocol:
1. Product Selection: Choose methylene chloride-free. Look for EPA Safer Choice label or explicit “NMP-Free” claim. Soy/citrus-based are generally lowest hazard for DIYers.
2. PPE Minimum: Chemical splash goggles, nitrile gloves (8+ mil), half-face respirator with OV cartridges, long sleeves/pants. For higher-hazard strippers: add face shield over goggles and Tyvek suit.
3. Ventilation Imperative: Work outdoors whenever possible. If indoors, use two exhaust fans + air scrubber. Monitor for dizziness—stop immediately if felt.
4. Application Technique:
– Apply thick, even coat with cheap disposable brush.
– Cover with plastic wrap to prevent evaporation, increase dwell time, reduce fumes. Peel back section by section to scrape.
– Use plastic or wood scrapers (non-sparking). Metal scrapers can spark on nails.
– Never use heat guns with chemical strippers—can vaporize chemicals or create toxic fumes (especially on lead paint).
5. Lead Paint Warning: If stripping pre-1978 wood, assume lead paint is present. Chemical strippers can create lead-contaminated sludge. Requires EPA Renovation, Repair and Painting (RRP) protocol: plastic sheeting containment, HEPA vacuum cleanup, professional disposal. Strongly consider hiring a certified lead abatement professional.
Myth Busting: “If it doesn’t smell strong, it’s safe.” False. NMP has a mild odor but significant health considerations. Always rely on SDS, not sensory perception.
Cleaners: From Mild to Mighty—Decoding the Spectrum
Category Breakdown & Protocols:
| Cleaner Type | Common Examples | Primary Hazards | Essential Safety Actions |
|---|---|---|---|
| All-Purpose | Formula 409, Simple Green | Mild irritants; some contain ammonia | Gloves if prolonged use; never mix with bleach; ventilate small spaces |
| Bleach-Based | Clorox Regular, Tilex | Corrosive; releases chlorine gas if mixed | Goggles + gloves; NEVER mix with ammonia, vinegar, acids; use in well-ventilated area |
| Acid-Based | Lime-A-Way, CLR | Corrosive to skin/eyes; etches surfaces | Goggles, neoprene gloves, ventilation; test on hidden area first; never use on stone |
| Oven Cleaners | Easy-Off Heavy Duty | Caustic (sodium hydroxide); severe burns | Full face shield OVER goggles, neoprene gloves, respirator; apply cold oven; ventilate |
| Drain Openers | Drano, Liquid-Plumr | Caustic or acidic; heat generation | Goggles, gloves; never use after mechanical attempt (pressure risk); follow label time |
| Mold/Mildew | Concrobium, RMR-86 | Biocides; some contain bleach | Goggles, gloves, respirator; never mix types; address moisture source to prevent return |
| “Green” Cleaners | Branch Basics, Force of Nature | Plant oils (skin sensitizers); acids | Still require gloves/ventilation; verify EPA Safer Choice certification |
Critical Universal Rules:
– NEVER MIX CLEANERS: Bleach + Ammonia = Chloramine gas. Bleach + Vinegar/Acid = Chlorine gas. Bleach + Rubbing Alcohol = Chloroform. Even “natural” mixes can be hazardous.
– Dilution is Not Always Safety: Using full-strength cleaner “for better results” increases hazard without improving efficacy. Follow label dilution ratios precisely.
– Surface Compatibility: Acid cleaners destroy natural stone (marble, granite). Alkaline cleaners damage aluminum. Always test in inconspicuous area first.
– Start Mild: For most jobs, begin with least hazardous option: microfiber cloth + water, baking soda paste, or diluted vinegar. Escalate only if needed.
Pro Insight: For mold remediation, killing mold ≠ solving the problem. Cleaners remove surface growth, but without fixing the moisture source (leak, condensation), mold returns. Safety includes addressing root causes.
Adhesives and Sealants: Hidden Hazards in Bonding
Chemical Realities:
– Solvent-Based (Contact Cement, Rubber Cement): High VOCs, flammable, strong vapors. Hazards: Dizziness, fire risk, skin irritation.
– Water-Based (White Glue, Some Construction Adhesives): Lower hazard, but may contain sensitizers.
– Two-Part Epoxies/Polyurethanes: Isocyanates (in hardeners) are potent respiratory sensitizers. Once sensitized, future exposure—even tiny amounts—triggers severe reactions.
– Silicone Sealants: Acetic acid cure (vinegar smell) irritates eyes/respiratory tract. Neutral-cure are lower odor but still require ventilation.
Adhesive Safety Protocol:
1. Ventilation First: Even “low-odor” adhesives emit vapors. Use exhaust fan + open windows. For epoxies/isocyanates: respirator with OV cartridges is mandatory.
2. PPE Specifics:
– Solvent-Based: Nitrile gloves (8 mil), goggles, respirator.
– Epoxies: Nitrile gloves (change frequently), goggles, respirator. Consider nitrile sleeves for forearm protection.
– Silicones: Nitrile gloves, safety glasses, ventilation.
3. Mixing Caution: For two-part products, mix slowly in well-ventilated area to minimize aerosolization. Use dedicated mixing sticks. Never reuse containers.
4. Cure Time Respect: “Tack-free” ≠ safe. Isocyanates off-gas during cure. Restrict access to area for full cure time (check SDS—often 24-72 hours).
5. Tool Cleanup: Clean applicator tips immediately with appropriate solvent to prevent clogging and future contamination.
Common Oversight: Applying excessive adhesive “to make it stronger.” This increases fume exposure, cleanup difficulty, and waste. Follow manufacturer’s recommended bead size—more isn’t better.
Special Scenarios: Adapting Safety to Real-Life Complexities
Real homes aren’t sterile labs. These scenarios require nuanced adaptation of core principles.
Working Around Children and Pets: Layered Defense Strategy
- Pre-Project Planning:
- Choose products with EPA Safer Choice or Green Seal certification—verified lower hazard profiles.
- Schedule work during school/daycare hours or when a partner can supervise children/pets elsewhere.
- Communicate clearly: “Chemical work happening in garage today. Door stays closed.”
- Physical Barriers:
- Use baby gates with signage (“Danger: Chemicals in Use”) at workspace entrances.
- For garages: Close door, place visible barrier at threshold.
- For indoor rooms: Close door, use door alarm if child is mobile.
- Post-Project Protocol:
- Wait beyond “dry to touch.” Check label for “recoat time” or “full cure.” For floors: wait until no tackiness remains. For surfaces children touch: 24-48 hours minimum.
- Wipe down adjacent surfaces (doorknobs, light switches) that may have vapor residue.
- Store all chemicals, rags, and tools before allowing re-entry.
- Pet-Specific Considerations:
- Birds: Extremely sensitive to fumes. Remove from home entirely during project and for 24+ hours after.
- Reptiles/Amphibians: Cover enclosures with damp towel; relocate if possible. Vapors concentrate near floor.
- Dogs/Cats: Keep away until surfaces are fully cured. Paws track residues; licking paws transfers chemicals. Watch for unusual behavior post-exposure.
Critical Insight: Children’s metabolic rates are higher, and they breathe closer to the ground where vapors and residues concentrate. Their smaller body mass means lower exposure doses can have greater effects. Extra caution aligns with physiological reality.
Limited Ventilation Spaces: Bathrooms, Closets, Basements
- Product Selection Strategy: Choose lowest-VOC options explicitly labeled for indoor/confined space use. Water-based > low-VOC oil-based. Avoid aerosols.
- Ventilation Engineering:
- Bathroom: Run exhaust fan continuously during and after. Place box fan in doorway blowing out into hallway. Open window if available.
- Closet: Not recommended for chemical use. If unavoidable: remove all contents, place exhaust fan in doorway blowing out, work quickly with minimal product, exit immediately after application.
- Basement: Use window exhaust fan + air scrubber with carbon filter. Place scrubber near work area, exhaust fan in window. Monitor for musty odors.
- Time-Limited Exposure: Apply product, exit immediately, allow dwell time, return briefly to wipe, exit again. Minimize time spent in space.
- Air Quality Verification: After project, use a VOC meter (affordable consumer models available) to confirm levels have returned to baseline before reoccupying. When in doubt, extend ventilation time.
- The Hard Stop: If you feel any irritation (eye watering, throat tickle), stop immediately. Evacuate. Reassess. If ventilation cannot be improved, abandon the chemical method. Use mechanical alternatives or hire a professional.
Sensitive Individuals: Asthma, Chemical Sensitivities, Pregnancy
- Pre-Project Consultation: Discuss planned project with healthcare provider. Provide SDS for review. They may advise specific precautions or recommend avoidance.
- Enhanced PPE: Use P100 filters for particulates; multi-gas cartridges for vapors. Consider powered air-purifying respirator (PAPR) for superior protection during longer tasks.
- Extreme Ventilation: Double exhaust fans + air scrubber. Seal HVAC vents in work area with plastic sheeting to prevent circulation.
- Delegate or Outsource: For high-sensitivity individuals, the safest protocol is often to have another household member perform the chemical-handling steps, or hire a professional.
- Post-Project Air Purification: After work is complete and area ventilated, run HEPA air purifier with carbon filter in adjacent living spaces for 24-48 hours.
- Pregnancy Specifics: Avoid solvent-based products, paint strippers, epoxy resins where possible. Opt for water-based finishes applied by others. Consult healthcare provider for project-specific guidance.
Emergency Response: Calm, Confident Action When Seconds Count
Even with perfect preparation, accidents happen. Panic worsens outcomes. This protocol provides clear, step-by-step actions. Print the relevant sections and post near your workspace.
Chemical Splash in Eyes: The 15-Minute Imperative
- IMMEDIATE ACTION: Shout for help. Do not rub eyes. Hold eyelids open.
- FLUSH CONTINUOUSLY: Use eyewash station or gentle stream of lukewarm water for minimum 15 minutes. Tilt head so contaminated eye is lower to avoid cross-contamination. Roll eyes to ensure all surfaces flushed.
- REMOVE CONTACT LENSES: Only if easy to do during flushing. Do not delay flushing to remove.
- SEEK MEDICAL ATTENTION: Always, even if pain subsides. Corneal damage can be delayed. Bring product container or SDS to medical team. Call ahead so facility is prepared.
- DO NOT: Apply ointments, chemicals, or home remedies. Do not bandage tightly.
Skin Contact: Rapid Decontamination
- REMOVE CONTAMINATED CLOTHING: Cut away if necessary to avoid spreading chemical. Wear gloves if assisting someone else.
- FLUSH SKIN: Under lukewarm running water for 15-20 minutes. Use mild soap after initial flush if chemical is oily. Do not scrub harshly.
- COVER LOOSELY: With sterile non-adherent dressing if available. For burns, use burn gel after flushing.
- SEEK MEDICAL HELP IF: Irritation persists after flushing, chemical was highly corrosive, or large area affected. Bring SDS.
Inhalation of Fumes: Restore Oxygen Safely
- MOVE TO FRESH AIR IMMEDIATELY: Upwind and uphill if vapors are heavy. Loosen tight clothing.
- ASSESS BREATHING: If not breathing, begin CPR only if trained. Call emergency services first.
- REST IN UPRIGHT POSITION: If breathing is difficult. Do not lie flat. Administer oxygen if available and trained.
- MONITOR: If dizziness/nausea persists in fresh air, seek medical attention. Note symptoms for medical team.
- DO NOT: Give anything by mouth if drowsy or unconscious.
Ingestion (Swallowing): Precision Over Panic
- CALL POISON CONTROL OR EMERGENCY SERVICES IMMEDIATELY: US: 1-800-222-1222. Have product container ready.
- RINSE MOUTH: With water. Spit out. Do not swallow rinse water.
- DO NOT INDUCE VOMITING unless explicitly instructed by Poison Control or medical professional. Vomiting can cause further damage with corrosives.
- DO NOT give milk, water, or activated charcoal unless directed.
- SAVE CONTAINER: For medical team identification.
Spills: Contain, Control, Communicate
- Small Spill (<1 cup):
- Alert others. Evacuate non-essential personnel.
- Don PPE (gloves, goggles).
- Contain with absorbent pads/socks. Scoop material into sealable plastic bag.
- Wipe area with appropriate cleaner. Place all contaminated materials in bag.
- Label bag “Chemical Waste” and dispose via HHW.
- Large Spill or High-Hazard Chemical:
- EVACUATE IMMEDIATELY. Alert others. Close doors to contain vapors.
- VENTILATE IF SAFE: Open windows/doors from outside only if you can do so without exposure.
- CALL EMERGENCY SERVICES if spill is large, involves fire risk, or causes injury. Provide exact location and chemical name.
- DO NOT attempt cleanup. Wait for professionals.
- DECONTAMINATE if exposed: flush skin/eyes per protocols above.
Critical Reminder: In any life-threatening emergency (unconsciousness, seizures, severe breathing difficulty), CALL 911 (or local emergency number) FIRST. Provide clear location and nature of emergency. Safety of the responder is paramount.
Your Questions, Answered
Q: Are “green,” “eco-friendly,” or “non-toxic” labeled cleaners always safe to use without gloves or ventilation?
A: No. These terms are largely unregulated marketing language. “Plant-based” citrus solvents (d-limonene) are potent skin sensitizers and flammable. Vinegar-based cleaners are acidic and can irritate eyes. Always read the full label for hazard statements and precautionary measures. Look for third-party certifications like EPA Safer Choice, Green Seal, or Ecologo—these verify reduced hazard profiles through rigorous testing. When in doubt, treat all chemicals with baseline respect: gloves and ventilation for anything beyond plain water.
Q: How often should I replace respirator cartridges, and how can I tell they’re saturated?
A: Cartridge lifespan depends on chemical concentration, humidity, and usage time. Manufacturer guidelines typically suggest replacement after 40 hours of use or 30 days once opened. Critical saturation signs: you smell or taste the chemical through the respirator, breathing feels noticeably harder, or the cartridge feels damp. For occasional home use, note the date you first opened the cartridge package. Store unused cartridges in an airtight container to prevent ambient vapor absorption. When working with highly hazardous chemicals, replace cartridges after each project session as a precaution.
Q: Can I reuse nitrile gloves for multiple projects if they look intact?
A: It depends on the chemical and exposure. Nitrile degrades invisibly—microscopic pores develop, allowing chemical penetration. For low-hazard tasks (water-based paint), gloves can be reused if washed, dried, and stored properly. For solvents, strippers, acids, or epoxies: always use new gloves per project session. If gloves feel tacky, swollen, discolored, or develop pinholes (test by filling with water), discard immediately. When handling multiple chemicals in one session, change gloves between chemicals to prevent cross-contamination reactions. When in doubt, replace them—gloves are inexpensive insurance.
Q: Is it ever safe to mix two different cleaning products to increase effectiveness?
A: Never intentionally mix cleaning products. Chemical reactions can produce toxic gases, heat, fire, or explosions. Critical dangerous combinations:
– Bleach + Ammonia = Chloramine gas (causes coughing, chest pain)
– Bleach + Vinegar/Acids = Chlorine gas (burning eyes, respiratory distress)
– Bleach + Rubbing Alcohol = Chloroform (drowsiness, dizziness)
– Hydrogen Peroxide + Vinegar = Peracetic acid (severe skin/eye burns)
Even seemingly benign mixes (baking soda + vinegar) create pressure in closed containers. Always use one product at a time, rinse surfaces thoroughly with water between products, and follow label instructions precisely. Effectiveness comes from correct product selection and technique—not mixing.
Q: What specific steps should I take if my child or pet is exposed to a chemical?
A: Prioritize your own safety first—don’t become a victim. Then:
1. Remove from Source: Carry child/pet to fresh air. Remove contaminated clothing carefully (cut if needed).
2. Flush Immediately: For skin/eye contact, flush with lukewarm water for 15+ minutes. For pets, use handheld shower or hose.
3. Call for Help:
– Child: Call Poison Control (US: 1-800-222-1222) or emergency services. Have product container ready.
– Pet: Call veterinarian or ASPCA Animal Poison Control Center (US: 888-426-4435).
4. Do Not Induce Vomiting unless instructed by professionals.
5. Transport Safely: If going to ER/vet, bring the product container and SDS. Note time of exposure and symptoms.
Prevention is paramount: store all chemicals in locked cabinets, use child-resistant caps, and never leave containers unattended during use.
Q: How long do chemical fumes remain hazardous after a project is complete?
A: There’s no universal timeline—it depends on:
– Chemical Type: Water-based paints: 24-72 hours for noticeable off-gassing; oil-based: weeks for full cure.
– Ventilation: Continuous airflow drastically reduces duration.
– Temperature/Humidity: Warm, dry conditions speed curing; cold, damp slows it.
– Surface Area: Large projects emit longer than small ones.
Follow the product label’s “recoat time” and “full cure time” as minimums. Use practical checks: no detectable odor (though odorless hazards exist), surface no longer tacky. For sensitive individuals or infants, extend wait time. Consider a consumer-grade VOC meter to verify air quality has returned to baseline before reoccupying. When in doubt, ventilate longer—err on the side of caution.
Q: Is it safe to store paint cans or solvents in a garage that experiences freezing temperatures or extreme heat?
A: Temperature extremes compromise both safety and product integrity.
– Heat (>90°F/32°C): Increases vapor pressure inside containers, risking leaks or bulging lids. Accelerates chemical degradation.
– Freezing (<32°F/0°C): Water-based paints can separate or lose adhesion properties.
Ideal storage: 50-80°F (10-27°C), stable temperature, low humidity. If garage storage is unavoidable:
– Use a locked, insulated cabinet away from direct sun, water heater, or car exhaust.
– Place containers on shelves (not concrete floor—moisture causes rust).
– Check containers monthly for swelling, leaks, or rust.
– For seasonal climates, bring critical chemicals indoors during temperature extremes.
When product integrity is questionable (separated paint, crystallized solvent), dispose of properly via HHW—do not risk using degraded chemicals.
Q: What are truly effective, accessible alternatives to harsh chemical paint strippers?
A: Yes—choose based on project scale and substrate:
– Soy-Based or Citrus-Based Strippers (e.g., Dumond Smart Strip, CitriStrip): Biodegradable, lower toxicity. Require longer dwell time (hours) and plastic wrap covering. Still require gloves and ventilation. Test on hidden area first.
– Heat Guns (with caution): Use low-temp setting (<700°F/370°C) to avoid lead fume risk on pre-1978 paint. Requires respirator with P100 filters for dust, heat-resistant gloves. Keep moving to avoid scorching wood. Never use open-flame torches.
– Abrasive Methods: Sanding (with HEPA vacuum attachment), scraping, or sandblasting (for metal—requires full PPE and containment). Generates dust—requires N95/P100 respirator and eye protection.
– Soda Blasting: Baking soda media is less aggressive than sand. Requires professional equipment but is effective for intricate surfaces.
Always prioritize mechanical methods first. For large or complex projects involving lead paint, hire a certified professional—safety outweighs cost savings.
Q: How should I dispose of rags used with oil-based finishes to prevent fire?
A: Spontaneous combustion is a serious, preventable risk. Follow this protocol precisely:
1. During Work: Submerge used rags in a metal container filled with water. Seal lid tightly.
2. After Work: Lay rags flat and individually on a non-flammable surface (concrete driveway, asphalt). Weight corners with stones to prevent blowing. Space rags at least 12 inches apart.
3. Drying Time: Allow 48-72 hours until completely dry and stiff. Do not stack, fold, or pile at any stage.
4. Disposal: Once dry and brittle, place in a metal container with lid. Dispose per local regulations.
Never: Place in plastic bags, cardboard boxes, trash cans, or piles. Never leave in direct sun on flammable surfaces. This protocol applies to rags with linseed oil, tung oil, mineral spirits, or any “drying oil.”
Q: What’s the definitive difference between a dust mask (N95) and a chemical respirator, and when is each appropriate?
A: This is a critical distinction:
– Dust Mask (N95): Filters particles only—dust, pollen, mold spores, sanding debris. Made of non-woven fabric. Does NOT protect against chemical vapors, gases, or fumes. Use for sanding, drywall work, gardening.
– Chemical Respirator (Half-Face with Cartridges): Uses replaceable cartridges containing activated carbon or chemical media to adsorb vapors and gases. Requires correct cartridge type (Organic Vapor for paints/solvents; Acid Gas for bleach). Must form airtight seal on face. Use for painting, staining, stripping, cleaning with chemicals.
Using an N95 mask for chemical work provides false security—it filters nothing hazardous in vapors. Always match respiratory protection to the specific hazard identified in the SDS. When in doubt about vapor presence, use a respirator with appropriate cartridges.
Q: How can I verify if an old container of paint stripper or cleaner is still safe to use?
A: Safety degrades over time. Inspect rigorously before any use:
1. Container Integrity: Rust, dents, bulging lid, or leaks = discard immediately via HHW.
2. Contents: Crystallization, separation that won’t remix, unusual color, or foul odor = discard.
3. Label Legibility: If hazard information is unreadable, treat as highly hazardous and dispose of properly.
4. Age: Discard solvents, strippers, or cleaners older than manufacturer guidance suggests. Paints: latex >5 years, oil-based >10 years (if stored properly).
5. SDS Check: Search online for current SDS of the product. If hazards have been updated, discard old stock.
When uncertain, dispose of responsibly. Using degraded chemicals risks ineffective results, unexpected reactions, or increased hazard exposure. HHW facilities handle old chemicals safely—this is their purpose.
Conclusion and Next Step
Chemical safety is not a constraint on your creativity—it is the very framework that allows your DIY passion to thrive sustainably, confidently, and responsibly. By internalizing the SAFE Framework—assessing with intention, preparing with precision, executing with vigilance, and following up with care—you transform from someone who hopes for safety to someone who engineers it. This mindset shift is profound: it protects your health today, preserves your ability to enjoy projects tomorrow, and models thoughtful stewardship for everyone in your household. Let’s crystallize the journey with three enduring pillars:
- Knowledge Over Assumption: Labels and SDS sheets are not bureaucratic hurdles—they are your project’s blueprint for safety. Read them. Understand them. Let them guide your choices without shame or haste.
- Preparation as Respect: Gathering the right PPE, engineering ventilation, staging emergency gear—these acts are not signs of fear. They are demonstrations of respect: for the materials you use, the space you inhabit, and the people you love.
- Vigilance as Compassion: Monitoring your body’s signals, securing storage, disposing responsibly—these ongoing practices extend safety beyond the project’s end. They are quiet acts of compassion for your future self, your family, your community, and our shared environment.
The 24-Hour Rule: One Small Step, Lifelong Impact
Within the next 24 hours, choose one concrete action to elevate your chemical safety practice. Momentum begins with motion:
– If chemicals are stored under your sink: Relocate them today to a locked cabinet in the garage or basement. Take 10 minutes. This single act prevents the majority of childhood poisoning incidents.
– If you have a project planned this week: Download the SDS for one product you’ll use. Read Sections 2 (Hazards), 4 (First Aid), 7 (Handling), and 8 (PPE). Print Section 4 and tape it to your workspace.
– If your safety gear is incomplete: Order a pair of ANSI Z87.1 chemical splash goggles and a box of 8-mil nitrile gloves. Keep them with your tools. This minimal investment creates maximum readiness.
– If you feel overwhelmed: Share this guide with a DIY-minded friend. Commit to being each other’s safety accountability partner for your next project. Safety grows in community.
This tiny action is not about perfection—it’s about progress. Each deliberate choice reinforces a culture of safety that becomes second nature. You’ve already taken the most important step: seeking knowledge. Honor that intention with action.
The Big Picture: Safety as Creative Liberation
Imagine the confidence of refinishing that heirloom table without anxiety. The peace of mind while cleaning your child’s bathroom, knowing every choice was intentional. The pride in teaching your teenager to handle workshop chemicals with the same respect as power tools. This is the true finish on any project—not just the visible result, but the invisible assurance that you did it right. Chemical safety doesn’t shrink your world; it expands your capacity to create within it. It liberates you from worry, allowing focus to return where it belongs: on the craft, the care, and the joy of making something your own. Carry this framework forward. Share it generously. And know that every time you choose safety, you’re not just completing a task—you’re building a legacy of mindful creation that protects what matters most.
Explore Our Complete System:
[The DIYer’s Guide to Workshop Ventilation: From Cross-Breeze to Air Scrubbers] | [Decoding Product Labels: A Visual Handbook to GHS Pictograms and Hazard Statements] | [Eco-Conscious Cleaning: Verified Safer Alternatives for Every Household Task] | [First Aid Kits for Home Workshops: Building a Response-Ready Station] | [Storing Chemicals Safely: A Room-by-Room Checklist for Every Home] | [Understanding VOCs: What They Are, Why They Matter, and How to Reduce Exposure] | [Childproofing Your Home Workshop: A Step-by-Step Safety Audit]