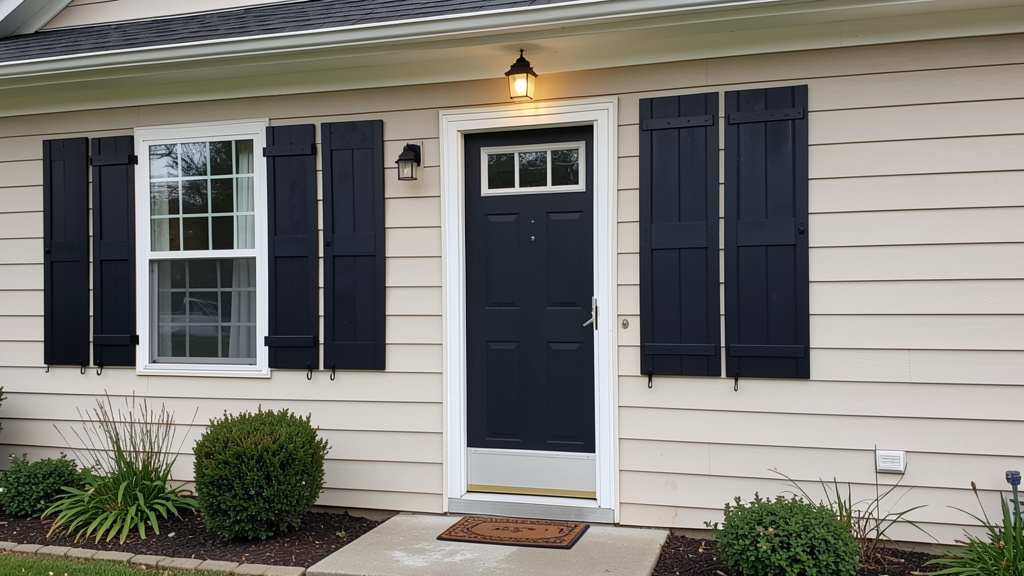
Build Lasting Comfort and Safety Through Thoughtful, Tiered Strategies That Adapt to Your Climate, Budget, and Home’s Unique Needs
Extreme weather events increasingly challenge homes across diverse regions—from prolonged heatwaves stressing cooling systems to deep freezes testing structural integrity, and powerful winds demanding robust defenses. Yet much available advice remains fragmented: seasonal checklists overlook interconnected vulnerabilities, while emergency-focused guides neglect foundational preparedness. This guide offers a unified, adaptable approach grounded in building science principles and real-world resilience patterns. You’ll discover how to strengthen your home against heat, cold, and wind not as isolated threats, but as interrelated challenges requiring layered, context-aware solutions. Every recommendation includes clear implementation pathways—prioritizing safety, accessibility, and practicality—while respecting budget constraints and skill levels. Whether you face desert summers, northern winters, coastal storms, or rapidly shifting continental conditions, this resource empowers you to build enduring comfort and confidence, season after season.
Introduction
Climate data consistently reflects an upward trend in weather volatility worldwide. Reports from agencies like NOAA and the World Meteorological Organization note rising frequencies of high-impact events—from intense heat episodes to powerful wind systems—affecting communities across varied geographies. These shifts manifest concretely: warped window frames after sustained heat, ice accumulation stressing roof structures, or wind-driven debris testing exterior integrity. Many homeowners recognize that reactive measures—temporary window seals during cold snaps or last-minute storm preparations—often address symptoms while overlooking deeper vulnerabilities.
True resilience emerges from understanding how weather interacts with your home’s specific structure. Heat accelerates material fatigue in roofing and siding while straining mechanical systems. Cold exploits air leaks and thermal bridges, allowing conditioned air to escape and moisture to infiltrate wall cavities. Wind generates complex pressures that challenge connections between roof, walls, and openings. Recognizing these pathways allows for targeted, effective action.
This guide synthesizes insights from post-event engineering reviews, energy efficiency research, and evolving building practices into a cohesive methodology. You’ll learn why comprehensive air sealing often delivers greater comfort gains than adding insulation alone, why exterior shading significantly outperforms interior treatments for heat management, and why garage doors frequently represent critical wind-resistance points. Each strategy includes context-aware implementation steps, clear warnings about common pitfalls, and adaptable options for renters, DIYers, and those seeking professional support. This is not theoretical speculation—it’s a practical framework designed to protect your home, support occupant well-being, and foster peace of mind through every season.
The Triple-Layer Defense Framework: Building Resilience Step by Step
Imagine your home protected by three complementary layers—each addressing distinct vulnerabilities while reinforcing the others. Adapted from established resilience engineering concepts, this framework eliminates reliance on single solutions. Unlike fragmented seasonal tips, it creates cumulative strength: foundational upgrades amplify adaptive actions, and emergency protocols leverage both. The result is a home better equipped to maintain safety, function, and comfort when weather intensifies.
Layer 1: Foundational Protections (The Permanent Shield)
These are structural or systemic modifications installed once with multi-year benefits. They address core vulnerabilities that temporary measures cannot resolve. Post-event assessments consistently show that homes with reinforced roof-wall connections experience significantly less structural compromise during high-wind events. Similarly, field studies indicate that comprehensive air sealing helps maintain safer indoor temperatures longer during extended power disruptions in cold conditions. These are not marginal improvements—they represent pivotal differences in performance.
Roof Integrity Enhancement:
Beyond replacing worn roofing materials lies critical structural reinforcement. Hurricane straps (metal connectors fastening roof rafters to top wall plates) provide crucial resistance against uplift forces. Installation typically requires attic access: position straps over rafter tails and secure to the wall plate using corrosion-resistant fasteners. In regions prone to high winds, consult local building resources for connector specifications appropriate to your area. Simultaneously, sealing roof decking seams with construction adhesive before underlayment installation creates a more unified surface. In snow-prone zones, extending ice and water shield membrane beyond the interior wall line helps prevent moisture intrusion from ice dams. Proper attic ventilation remains essential: balanced intake (soffit) and exhaust (ridge) vents support moisture management regardless of insulation levels. Aim for ventilation pathways that remain unobstructed by insulation—rafter baffles can help maintain these channels.
Window and Door Hardening:
Impact-resistant windows use laminated glass designed to hold together upon impact, offering protection beyond hurricane zones—such as hail or wind-borne debris. Look for products certified to recognized standards like ASTM E1886/E1996. For existing windows, permanent storm shutter systems provide robust defense: accordion shutters allow quick deployment; roll-down systems store neatly; fabric panels made from reinforced polymers offer lighter-weight alternatives. Critically, address the garage door—often a vulnerability point. Standard doors may not withstand moderate wind pressures. Solutions include retrofit bracing kits installed on the interior face or replacement with doors specifically rated for wind resistance, featuring reinforced tracks and hardware. For entry doors, solid-core units (minimum 1¾ inches thick) paired with multi-point locking systems that engage the frame at multiple points enhance security and weather resistance.
Continuous Insulation Strategy:
Traditional cavity insulation (like fiberglass batts between studs) leaves thermal bridges—paths where heat transfers more readily through framing materials. Continuous insulation wraps key sections of the building envelope: rigid foam board applied beneath siding on walls, under roofing membranes, or against foundation walls. This approach, reflected in modern energy codes for many climate zones, can significantly reduce conductive heat loss. For retrofit projects, prioritize accessible areas first: insulating rim joists (where foundation meets wood framing) with rigid foam sealed at edges often yields noticeable comfort improvements. In attics, ensure insulation extends to cover the top plate of exterior walls—a frequent oversight. When selecting materials, consider R-value per inch alongside practical factors like moisture resistance and installation requirements. Closed-cell spray foam offers high performance but typically requires professional installation; rigid board products may suit DIY applications in specific contexts.
The Fundamental Principle: Resilience depends on addressing the entire system, not just individual components. A home with high-performance windows but unsealed attic bypasses will struggle with thermal efficiency. A house with reinforced roof connections but an unsecured garage door remains vulnerable to pressurization effects. Approach your home as an integrated whole—from foundation to roof—with consistent attention.
Layer 2: Adaptive Protections (The Seasonal Choreography)
This layer includes reversible, lower-cost actions deployed strategically as seasons shift. They maximize the effectiveness of foundational upgrades while responding to dynamic weather patterns. Think of them as “weather-responsive routines”—timely steps that enhance performance without permanent alteration.
Spring Transition Protocol (Late March–Early May):
– Gutter and Drainage Check: Clear debris; verify downspouts direct water minimum 6 feet from the foundation; consider gutter guards in high-debris areas. Clogged drainage during spring rains can lead to moisture intrusion at critical junctions.
– Window and Door Optimization: Replace compressed weatherstripping; install insect screens with solar-reflective mesh to reduce heat gain while allowing airflow; apply removable static-cling window film to south/west-facing glass.
– Landscaping Adjustments: Prune branches within 10 feet of the structure; plant deciduous saplings on south/west sides for future summer shade; install drip irrigation to support soil stability during heavy rainfall.
– System Checks: Test sump pumps; clean HVAC condenser coils; verify generator fuel levels and run under load briefly.
Fall Transition Protocol (Late September–Early November):
– Thermal Barrier Deployment: Install interior storm window kits (shrink film creating an insulating air gap); add thermal-lined curtains to north-facing windows; reverse ceiling fans to clockwise rotation at low speed to gently redistribute warm air.
– Envelope Sealing: Apply rope caulk (reusable putty sealant) around historic window frames where permanent modification isn’t feasible; install door sweeps and threshold seals; place draft stoppers at exterior door bases.
– Utility Winterization: Drain and winterize irrigation systems; wrap exposed pipes in unheated spaces with foam sleeves; disconnect and store garden hoses.
– Emergency Prep: Refresh emergency supplies; verify shutter hardware accessibility; test battery backups on safety devices.
Pre-Storm Activation Sequence (When Forecasts Indicate Significant Events):
– Wind Threats: Deploy shutters or install pre-cut plywood panels secured into structural framing (not trim); secure loose outdoor items with ratchet straps; trim dead branches near the structure.
– Heat Threats: Close blackout curtains on sun-facing windows early in the day; pre-cool living spaces during cooler evening hours; prepare reusable cooling aids like damp cloths or chilled water bottles.
– Cold Threats: Maintain thermostat at a consistent minimum (e.g., 68°F / 20°C); open cabinet doors under sinks on exterior walls; allow a slow drip from faucets served by exposed pipes during extreme cold.
– Universal Actions: Charge communication devices; fill vehicle fuel tanks; gather important documents; confirm family communication plans.
Layer 3: Emergency Protocols (The Crisis Response System)
When warnings escalate, clear protocols reduce uncertainty. This layer transforms preparation into calm, decisive action focused on human safety, critical system protection, and efficient deployment.
The Enhanced Preparedness Kit (Weather-Contextual Additions):
– Extreme Heat: Battery-powered personal fan, electrolyte replacement options, evaporative cooling towels, portable power bank.
– Extreme Cold: Pipe heat tape (self-regulating type), emergency thermal blankets, safe hand/foot warmers, battery-powered LED lighting.
– High Wind: Pre-labeled plywood panels with mounting hardware, heavy-duty straps for securing structures, work gloves and eye protection for post-event assessment.
– Universal Essentials: Water (1 gallon per person per day), non-perishable food requiring no cooking, N95 masks, waterproof document pouch with insurance details and identification.
Identify Shelter Zones in Advance:
– Wind Events: Interior room on the lowest level without windows (closet, bathroom, hallway). Avoid rooms with exterior walls. If possible, position under sturdy furniture.
– Extreme Heat: Basement or room with minimal sun exposure and electronics. Close curtains; use damp cloths on pulse points if cooling systems are compromised.
– Extreme Cold: Smallest well-insulated room (often a bedroom with closet). Gather household members to share body heat; use sleeping bags rated below expected temperatures.
– Critical Note: Mobile homes are not safe shelters during high-wind events. Identify a community shelter or neighbor’s reinforced structure ahead of time.
Utility Awareness and Response:
– Water: Locate your main shutoff valve (typically near the water meter or where supply enters the house). Practice turning it off. Label clearly for low-light conditions.
– Gas: Only shut off if you detect gas odor, hear hissing, or observe damage. Use a wrench to turn the valve perpendicular to the pipe. Important: Do not attempt to restore gas service yourself—contact your utility provider.
– Electricity: Know the location of your main electrical panel. Flip the main breaker to “OFF” if evacuating or if flooding is imminent. Unplug sensitive electronics to guard against surges during restoration.
– Documentation: Photograph shutoff locations; share instructions with all household members. Practice drills periodically to build familiarity.
Deep Dive: Mastering Heat Protection—Working With, Not Against, the Sun
Extreme heat affects homes through multiple pathways: solar radiation entering windows and roofs, conductive heat moving through walls and foundations, and convective heat buildup in trapped air spaces. Effective strategies disrupt these pathways thoughtfully. Field observations show that homes combining exterior shading with strategic ventilation maintain notably more comfortable indoor temperatures during intense heat—often reducing reliance on mechanical cooling. This section details practical, layered approaches.
Step 1: Block Solar Radiation at the Source (Exterior First)
Windows are a primary source of unwanted solar heat gain. Interior solutions address symptoms; exterior interventions prevent heat from reaching the glass. Prioritize actions in this order of impact:
Permanent Exterior Shading:
– Awnings and Pergolas: Fixed or retractable awnings significantly reduce solar heat gain on south and west-facing windows. Aluminum frames with solution-dyed acrylic fabric resist fading. For pergolas, train deciduous vines like wisteria—they provide dense summer shade while allowing winter sun after leaf drop.
– Exterior Roller Shades: Motorized or manual shades mounted above windows deploy only when needed. Choose fabrics with low openness factors for maximum heat rejection. Install with side channels to minimize wind movement and light leakage.
– Solar Screens: Mesh screens installed in exterior frames block substantial solar radiation while preserving outward visibility. Darker colors absorb more heat (preventing it from reaching glass); lighter colors reflect more. Measure windows precisely for custom-fit screens.
Budget-Friendly Exterior Solutions:
– Shade Sails: Tensioned fabric structures anchored securely to posts or the house. Use UV-resistant, wind-rated fabric. Position to block high summer sun angles (apps like Sun Surveyor can help visualize sun paths). Ensure adequate slope for rain runoff.
– Bamboo Blinds: Mount exterior-grade bamboo roller blinds outside windows using corrosion-resistant brackets. Lower during peak sun hours (10 AM–4 PM); raise in evening for ventilation.
– DIY Trellis Systems: Build simple wooden frames against south/west walls; plant fast-growing annual vines like morning glory. Provides immediate seasonal shade.
Window Film Considerations:
If exterior shading isn’t feasible (rentals, HOA restrictions), interior window film becomes valuable—but select carefully:
– Dyed Films: Absorb heat (reducing glare) but may increase glass temperature; use cautiously on south/west windows in hot climates.
– Metalized Films: Reflect heat effectively but may interfere with wireless signals and create reflective appearance at night.
– Ceramic/Spectrally Selective Films: Premium option blocking significant solar heat while maintaining clarity and signal transparency. Look for low Solar Heat Gain Coefficient (SHGC) and adequate Visible Light Transmittance (VLT).
Installation Tip: Clean glass thoroughly with ammonia-free solution; use a squeegee in overlapping strokes. For large windows, professional installation often ensures longevity.
Step 2: Optimize Ventilation and Airflow Dynamics
Trapped hot air elevates temperatures in attics and upper levels. Strategic ventilation leverages natural physics—hot air rises, cool air sinks—to encourage passive cooling currents.
Attic Ventilation Principles:
– Passive Systems: Aim for balanced airflow: soffit vents (intake at eaves) should complement ridge vents (exhaust at peak). Calculate required net free vent area per local guidelines. If insulation blocks soffit vents, install rafter baffles to maintain airflow channels.
– Powered Systems: Solar attic fans activate automatically at preset temperatures, exhausting hot air without grid dependence. In humid climates, pairing with a humidistat helps avoid drawing moist air inward. Position fans near the ridge peak for efficiency.
– Radiant Barriers: Install reflective foil (shiny side down) stapled to underside of rafters. Reflects radiant heat away from living space. Most beneficial in hot climates with ductwork in the attic. Critical: Must face an air gap—do not lay directly on insulation. Combine with adequate ventilation to manage moisture.
Whole-House Ventilation Strategies:
– Night Flushing: In climates with cooler evenings, open windows on opposite sides after sunset. Place box fans in downstairs windows exhausting outward, upstairs windows intaking inward. Creates cross-breeze to flush heat. Close windows and curtains by morning.
– Ceiling Fan Use: Set blades to rotate counterclockwise (summer mode) for a cooling downdraft. Raising the thermostat by a few degrees with fan use can support comfort while reducing energy demand. Keep blades clean for optimal airflow.
– Window Fan Tactics: Use two fans per room: one exhausting hot air near the ceiling, one intaking cooler air near the floor. In dry climates, placing a damp cloth over the intake fan grille adds evaporative cooling (avoid in high humidity).
– Attic Access Points: Seal pull-down stairs with rigid foam insulation board framed securely and covered with a reflective barrier. Unsealed attic stairs can leak air equivalent to a large window.
Step 3: Leverage Thermal Mass and Microclimate Engineering
Thermal mass materials (concrete, brick, tile) absorb heat during peak sun and release it slowly as temperatures drop—helping stabilize indoor conditions. Used intentionally, they can reduce cooling demands.
Interior Thermal Mass Applications:
– Floors: Tile, stone, or polished concrete in sunlit rooms absorb heat. During daytime, close curtains to prevent direct sun on mass; open curtains in evening to absorb residual warmth. At night, open windows to cool the mass.
– Walls: Interior brick accent walls or clay-plaster finishes provide thermal buffering. Avoid covering the interior surface with insulation or drywall.
– Water Features: Decorative containers filled with water placed in sun paths absorb heat effectively. Use secure, non-toxic containers.
Exterior Microclimate Modifications:
– Ground Cover Strategy: Replace dark mulch or bare soil near foundations with light-colored gravel, decomposed granite, or low-growing ground cover (creeping thyme, sedum). These surfaces reflect rather than absorb heat, reducing radiant transfer to walls.
– Strategic Windbreaks: Install lattice panels 3–4 feet from south/west walls with climbing vines. Creates a shaded air pocket that cools before contacting the wall. Ensure panels allow some airflow to prevent heat trapping.
– Water Elements: Small recirculating fountains on the windward side can provide evaporative cooling in dry climates. Note: Avoid in consistently humid regions where added moisture may increase discomfort.
Heat Protection Room-by-Room Action Plan
- Attic: Verify balanced ventilation; consider radiant barrier if ducts are present; seal attic hatch thoroughly with weatherstripping and rigid insulation; install rafter baffles if insulation blocks soffits.
- Windows: Prioritize exterior shading on south/west exposures; apply spectrally selective film to remaining windows; install thermal-lined blackout curtains as backup.
- Walls: Seal air leaks around outlets (foam gaskets), baseboards (acrylic latex caulk), and wall intersections; consider continuous insulation during future siding projects.
- Roof: If replacing, explore “cool roof” options (light-colored membranes, reflective shingles); ensure adequate ventilation regardless of color.
- HVAC System: Clean/replace filters regularly; schedule annual professional maintenance; install a programmable thermostat; seal accessible duct joints with mastic.
- Landscaping: Plant deciduous trees 15–20 feet from south/west walls; maintain soil moisture with efficient irrigation; avoid dense shrubbery directly against walls.
Deep Dive: Conquering Cold Weather Threats—Preserving Warmth and Preventing Damage
Extreme cold exploits two primary vulnerabilities: air leakage allowing conditioned air to escape, and insufficient insulation permitting conductive heat loss. Field observations indicate that homes with thorough air sealing maintain safer indoor temperatures significantly longer during power disruptions. This section details systematic approaches to strengthen your home’s thermal envelope.
Step 1: Seal the Building Envelope Against Air Infiltration
Air sealing consistently delivers strong returns—reducing heating demands while eliminating drafts and moisture pathways. Focus on high-impact zones commonly identified in energy assessments: attic bypasses, rim joists, and window/door perimeters.
Finding Leaks—Practical Methods:
– Incense Test: On a breezy day, slowly pass a lit incense stick near potential leak sites (windows, doors, outlets, baseboards). Smoke movement indicates airflow. Highly effective for pinpointing exact locations.
– Hand Test: Run fingers along window/door frames, electrical outlets on exterior walls, and wall-floor junctions. Feel for consistent drafts. Simple but requires attention.
– Professional Assessment: A certified energy auditor can perform a blower door test, quantifying total air leakage and using infrared imaging to visualize thermal patterns. Many utilities offer rebates for this service.
Sealing Techniques by Location:
– Windows and Doors: Remove deteriorated weatherstripping. For double-hung windows, install V-strip (tension seal) on sides and top channels. For casement windows, use EPDM rubber compression seals. For doors, combine an adjustable threshold sweep, kerf-style weatherstripping on sides/top, and a door shoe for uneven thresholds. Tip: Rope caulk (reusable putty) works well for temporary sealing on historic windows.
– Electrical Outlets and Switches: Install foam gaskets behind cover plates on exterior walls. For larger gaps around boxes, use fire-rated expanding foam injected carefully.
– Rim Joist Area (Critical Zone): In crawlspaces or basements, seal gaps between rim joist and foundation wall with fire-rated spray foam. Fit rigid foam board between floor joists against the rim joist; seal edges. This step alone can noticeably reduce basement heat loss.
– Attic Bypasses: Seal hidden pathways: around chimneys (use metal flashing and high-temperature sealant), recessed lights (install IC-rated airtight cans or build insulated boxes around non-IC fixtures), plumbing vents, and attic hatches (apply adhesive-backed weatherstripping and add rigid foam to the hatch underside).
– Foundation Cracks: Seal hairline cracks in concrete foundations with hydraulic cement; larger cracks may require professional evaluation.
Material Selection Guidance:
– Caulks: For exterior applications, polyurethane or hybrid polymer sealants offer flexibility, UV resistance, and adhesion to multiple surfaces. Avoid standard silicone where painting is needed.
– Weatherstripping: EPDM rubber generally outlasts vinyl; V-strip suits sliding windows; magnetic seals provide strong compression for doors.
– Foams: Use fire-rated expanding foam around electrical boxes and penetrations; standard foam for non-fire zones. Avoid overfilling—foam expands significantly.
Step 2: Upgrade Insulation Strategically—Prioritizing Impact Zones
Insulation effectiveness is measured by R-value (thermal resistance). Required levels vary by climate—consult resources like the DOE ZIP Code Insulation Calculator for guidance. However, installation quality critically affects real-world performance: gaps, compression, and thermal bridging diminish effectiveness.
Priority Zones Ranked by Impact:
1. Attic: Heat rises—significant heat loss occurs here. Target recommended R-values for your zone (often R-49 to R-60). If existing insulation is compressed or contaminated, address before adding new material. For limited headroom, higher R-value per inch materials may help. Critical: Maintain ventilation channels with rafter baffles; never block soffit vents.
2. Basement/Crawlspace Walls: Insulate foundation walls with rigid foam board to recommended levels. Attach securely; seal seams. In crawlspaces, insulating perimeter walls (rather than the floor above) keeps ducts and pipes within conditioned space. Install a ground vapor barrier with overlapped, taped seams.
3. Exterior Walls: Retrofitting walls is complex. If walls are open during renovation, dense-pack cellulose fills cavities thoroughly. For finished walls, injection foam (professional) or adding continuous insulation during siding replacement are options. Budget Focus: Prioritize air sealing—it often yields greater comfort gains than partial wall insulation.
4. Floors Above Unheated Spaces: Add insulation between joists to target R-values. Use unfaced batts or mineral wool; secure with wire mesh or netting. Seal the rim joist area first for maximum impact.
Insulation Material Overview:
| Material | R-Value per Inch | Best Application | Key Considerations |
|———-|——————|——————|———————|
| Fiberglass Batts | R-2.9 to R-3.8 | Attics, wall cavities (new construction) | Must fit snugly without compression; loses effectiveness if wet |
| Cellulose (Blown) | R-3.2 to R-3.8 | Attics, dense-pack walls | Made from recycled content; treated for fire resistance; may settle slightly |
| Mineral Wool | R-3.0 to R-3.3 | Firewalls, sound control, damp areas | Non-combustible; moisture resistant; excellent sound absorption |
| Closed-Cell Spray Foam | R-6.0 to R-7.0 | Rim joists, complex areas, air sealing | Highest R-value; seals air leaks; requires professional installation |
| Rigid Foam Board | R-4.0 to R-6.5 | Continuous insulation, foundation walls | Moisture resistant; provides structural rigidity; seal seams carefully |
Critical Installation Considerations:
– Vapor Management: In colder climates, vapor retarders typically belong on the interior (warm-in-winter) side. In mixed climates, avoid interior vapor barriers that could trap moisture. Consult local building guidelines.
– Ventilation Balance: Adding insulation without adequate ventilation can trap moisture. Ensure soffit vents remain clear; consider powered attic ventilators with humidistats in high-humidity regions.
– Recessed Lights: Standard fixtures create significant heat leaks. Replace with IC-rated airtight models, or build insulated boxes around existing cans using rigid foam board (maintain manufacturer-specified clearance for heat dissipation).
Step 3: Protect Plumbing and Critical Systems From Freeze Damage
Frozen pipes cause substantial damage annually. Prevention requires identifying vulnerable locations and implementing layered safeguards.
Pipe Vulnerability Assessment:
– High Risk: Pipes in exterior walls (especially north-facing), unheated crawlspaces, garages, attics, and under sinks on outside walls.
– Medium Risk: Pipes in interior walls with minimal insulation, infrequently used lines.
– Low Risk: Pipes surrounded by consistently conditioned space.
Protection Strategies by Risk Level:
– High-Risk Pipes:
– Insulation: Wrap with foam pipe sleeves. Choose thickness appropriate for your climate. Seal seams with foil tape.
– Heat Tape: Install self-regulating heat tape following manufacturer instructions. Wrap in a spiral pattern; cover with foam insulation sleeve. Plug into a GFCI outlet. Test annually before cold season.
– Relocation: During renovations, reroute pipes away from exterior walls into conditioned space—a permanent solution.
– Medium-Risk Pipes:
– Airflow: Open cabinet doors under sinks on exterior walls during cold snaps to allow warm room air circulation.
– Drip Protocol: When temperatures drop significantly, allow a slow drip from faucets served by exposed pipes. Moving water is less likely to freeze.
– All Pipes:
– Shutoff Knowledge: Locate your main water shutoff valve; ensure all household members know how to operate it. Label clearly. Practice quarterly.
– Emergency Response: If a pipe freezes, shut off water immediately. Thaw slowly with a hairdryer (start at the faucet end) or heat lamp—never use open flame. If a pipe bursts, shut off water, drain the system by opening faucets, and contact a plumber.
Heating System Winterization:
– Furnace/Boiler: Schedule annual professional maintenance (clean burners, check heat exchanger). Replace air filters regularly during heating season.
– Chimneys: Have a certified chimney sweep inspect and clean annually before first use. Prevents creosote buildup and blockages.
– Thermostats: Install a programmable thermostat; set a minimum temperature (e.g., 55°F / 13°C) when away. Smart thermostats can send alerts if temperatures drop unexpectedly.
– Backup Heat: For extended outages, have a battery-powered ceramic space heater (with tip-over protection) stored safely. Critical Safety: Never use propane heaters, charcoal grills, or gasoline generators indoors—carbon monoxide is odorless and lethal. Install battery-powered CO detectors on every level and near sleeping areas.
Cold Weather Protection Pre-Frost Checklist
- Exterior (Complete Before First Frost): Clean gutters thoroughly; inspect roof for damaged shingles; seal foundation cracks; drain and winterize irrigation systems; store hoses.
- Windows: Install storm windows or interior plastic film kits; add thermal-lined curtains; check weatherstripping.
- Doors: Install door sweeps and threshold seals; add draft stoppers; verify locks function smoothly.
- Attic/Crawlspace: Seal bypasses; verify insulation depth and ventilation; ensure vapor barriers are intact.
- Plumbing: Insulate exposed pipes; test heat tape; confirm shutoff valve accessibility.
- Heating System: Service furnace; replace filters; test thermostat; clean chimneys.
- Emergency Prep: Refresh blankets, batteries, non-perishable food; verify generator operation; charge power banks.
Deep Dive: Wind Defense Strategies—Understanding Forces and Fortifying Openings
Wind damage occurs through interconnected mechanisms: uplift forces challenging roof connections, lateral pressure on walls, and impact from wind-borne debris. Engineering reviews consistently identify roof-to-wall connections and garage doors as frequent failure points—not necessarily windows. This section details physics-informed strategies to strengthen critical areas.
Step 1: Strengthen the Roof-Deck Connection (The Critical Junction)
The junction between roof framing and wall structure is a primary focus for wind resistance. Hurricane straps (metal connectors) create a continuous load path, significantly improving performance.
Hurricane Strap Considerations:
– Types: Holdowns anchor bottom of wall studs to foundation; rafter ties connect roof rafters to top wall plates; continuous rod systems run vertically through multiple stories (typically new construction).
– Specifications: Use corrosion-resistant connectors rated for conditions in your area. Consult local building resources or a qualified professional for guidance.
– Installation Protocol:
1. Access attic safely during daylight; wear appropriate safety gear.
2. Position strap over rafter tail and against top wall plate.
3. Secure with specified fasteners per manufacturer instructions.
4. Install straps on rafters/trusses near gable ends and along eaves per engineering guidance.
5. For complex roofs, prioritize corners where wind loads concentrate.
– Professional Guidance: If roof framing shows signs of prior modification or damage, consult a structural engineer. Many insurers offer premium discounts for verified wind-resistant features—request details before proceeding.
– Roof Decking: If re-roofing, specify ring-shank nails (not staples) for decking attachment. Applying construction adhesive along decking seams before underlayment can enhance cohesion. In high-wind areas, discuss upgraded underlayment options with your roofer.
Step 2: Harden Openings Against Impact and Pressurization
Windows and doors represent critical vulnerabilities—not just from direct impact, but from wind entering broken openings causing internal pressurization.
Impact-Resistant Window Strategy:
– How They Work: Laminated glass (two panes bonded with an interlayer) holds together upon impact. Frames must be robust with multi-point locking.
– Certification Standards: Look for products certified to standards like ASTM E1886/E1996. These undergo impact and cyclic pressure testing.
– Value Beyond Hurricanes: Impact windows also block UV rays (reducing fading), decrease outside noise, and enhance security. Many insurers offer discounts regardless of location—request written confirmation.
– Prioritization: If budget-limited, prioritize large picture windows, sliding glass doors, and windows near roof overhangs.
Storm Shutter Systems Compared:
| Type | Relative Cost | Deployment Speed | Durability | Best For |
|——|—————|——————|————|———-|
| Accordion Shutters | Moderate | Very Fast | Long-lasting | Frequent threats; ease of use |
| Roll-Down Shutters | Higher | Very Fast | Very Long-lasting | Security focus; modern aesthetics |
| Fabric Panels | Lower | Moderate | Good | Budget-conscious; easy storage |
| Plywood Panels | Lowest | Slower | Single-use | Emergency backup; infrequent threats |
Plywood Panel Guidance (If Using):
– Material: Use exterior-grade plywood (e.g., CDX). Avoid particleboard or OSB—they degrade when wet.
– Preparation: Measure each opening precisely; cut panels slightly larger than the frame. Label panels clearly (e.g., “LIV RM W”).
– Mounting: Pre-drill holes every 12 inches along panel edges. Use corrosion-resistant screws anchored into structural framing (studs/header)—not just window trim. Store panels with hardware in labeled containers.
– Critical Safety: Install panels before winds intensify. Never attempt deployment during active severe weather. Practice annually.
Garage Door—A Critical Consideration:
– Why It Matters: Standard single-layer steel doors may not withstand moderate wind pressures, potentially allowing wind entry that pressurizes the interior.
– Retrofit Solutions: Bracing kits installed on the interior face can enhance resistance. Must match door dimensions and track configuration.
– Replacement Solution: Wind-rated doors feature reinforced construction, tracks, and hardware. Consult a qualified door installer for options appropriate to your location.
– Emergency Measure: For non-rated doors during imminent threat: place sandbags along the bottom track; disconnect the automatic opener; secure the door manually closed. Note: This is not a reliable solution—prioritize permanent upgrades if in a wind-prone area.
Step 3: Secure the Exterior Environment—Debris Mitigation
Loose objects become projectiles in high winds. Proactive management reduces risks significantly.
Landscaping Hardening Protocol:
– Tree Assessment: Consult a certified arborist to evaluate trees within 50 feet of the house. Consider removal for trees with significant decay, pronounced lean, root damage, or species known for weak wood.
– Pruning Standards: Remove dead or diseased branches annually. Thin canopies moderately to reduce wind resistance (“wind sailing”). Avoid “topping” trees—it encourages weak regrowth.
– Fencing Strategy: Ensure posts are set in concrete footings. For solid fences, consider designs with gaps (board-on-board, lattice) to allow wind passage, reducing structural load.
Debris Mitigation Action Plan:
– Days Before Forecast: Bring in all loose items: trash cans, patio furniture, potted plants, garden tools.
– Closer to Event: Secure larger items:
– Trampolines: Remove safety nets; anchor frames securely.
– Propane Tanks: Strap to an immovable structure; close valves.
– Sheds/Outbuildings: Verify anchor straps are tight; add temporary straps if needed.
– Final Preparations: Trim vines growing on walls/fences; clear gutters of debris; close and lock all windows/doors.
Understanding Your Wind Context:
1. Consult free online resources like the ICC wind speed map for your address.
2. Review FEMA’s Flood Map Service Center (includes wind hazard layers).
3. Contact your local building department—they maintain jurisdiction-specific requirements and historical insight.
4. Observe neighborhood patterns: if moderate storms have caused damage nearby, treat your property as higher risk.
Wind Protection Pre-Storm Deployment Checklist (When Advised)
- Windows/Doors: Deploy shutters or install pre-cut panels; verify locks function.
- Roof: Inspect for loose shingles; clear gutters/downspouts; secure loose flashing.
- Exterior: Secure or store loose items per debris plan; anchor fuel tanks; trim hazardous branches.
- Utilities: Confirm branches are clear of power lines (contact utility if needed); charge generator.
- Family Plan: Confirm shelter location; charge devices; fill vehicle gas tanks; review communication protocol.
- Documentation: Photograph property exterior; update insurance inventory; store documents securely.
Integrated Strategies: Navigating Combined Weather Threats
Real-world scenarios often involve overlapping challenges. A polar vortex may bring extreme cold, high winds, and heavy snow. A heatwave may coincide with drought and wildfire risk (wind-driven embers). Your approach must be adaptive and layered.
Case Study 1: Severe Winter Storm with High Winds (Midwest/Northeast Scenario)
- Compounding Threats: Wind chill accelerates heat loss through leaks; wind-driven snow infiltrates gaps; power outages likely; travel hazardous.
- Integrated Response:
- Pre-Event: Verify air sealing is complete; deploy thermal curtains and storm windows; ensure emergency supplies are accessible; fill vehicle gas tank.
- During Event: Close all curtains/blinds; use draft stoppers; avoid opening exterior doors. If power fails, move to a pre-identified interior room. Use battery-powered LED lighting.
- Critical Nuances:
- Never use gas ovens, charcoal grills, or propane heaters for indoor heat—carbon monoxide risk is severe, especially in tighter homes.
- If pipes freeze, shut off water main; thaw slowly starting at the faucet end.
- Monitor CO detector battery levels; replace proactively.
- Post-Event: Before restoring heat, check for gas leaks; inspect roof for snow load; document any damage for insurance before clearing snow.
Case Study 2: Extreme Heat with Dry, Gusty Winds (Wildfire-Prone Region Scenario)
- Compounding Threats: Intense heat strains cooling systems; dry winds spread embers; poor air quality; potential evacuation orders.
- Integrated Response:
- Pre-Event (Defensible Space): Clear flammable vegetation within 30 feet of the house; create fuel breaks with non-combustible materials or irrigated zones in the next 70 feet; clean gutters/roof of debris; install ember-resistant vents (1/8-inch mesh).
- During Event: Keep windows/doors closed to prevent ember entry; set AC to recirculate mode; monitor air quality via reliable apps; use HEPA air purifiers indoors.
- Critical Nuances:
- If evacuating: Shut off gas supply at the meter; fill sinks/tubs with water (aids firefighters); place lawn sprinklers on roof/gutters only if safe and water pressure is adequate; take your emergency kit and documents.
- Never leave sprinklers running unattended during evacuation—this depletes water pressure needed by firefighters.
- If trapped: Stay inside; move to a room with fewest windows; wet towels to seal door gaps; call emergency services with your location.
- Post-Event: Wait for official clearance before re-entering; wear an N95 mask during initial assessment; document damage thoroughly for insurance.
The Annual Resilience Review: Your Customized Action Plan
Perform this systematic assessment each spring to prioritize upgrades based on your home’s condition, local risks, and budget.
Step 1: Context Mapping
– Review FEMA Flood Map Service Center (flood, wind, seismic layers)
– Note neighborhood-specific patterns (e.g., frequent outages, drainage issues)
– Consult local emergency management resources for area-specific guidance
Step 2: Perimeter Inspection (Walk Clockwise Around Property)
– Roof: Missing/damaged shingles, loose flashing, clogged gutters
– Walls: Cracks in siding, peeling paint, vegetation contact
– Windows/Doors: Failed seals, cracked glass, deteriorated weatherstripping
– Foundation: Cracks, moisture signs, soil grading toward house
– Landscaping: Overhanging branches, dead trees, drainage paths
Step 3: Interior Inspection (Room-by-Room)
– Attic: Insulation depth and condition, ventilation clarity, signs of moisture
– Basement/Crawlspace: Dampness, cracks, pipe insulation status
– Windows/Doors: Drafts (use incense test), operation smoothness
– HVAC: Filter condition, thermostat accuracy
– Utilities: Shutoff valve accessibility, emergency equipment condition
Step 4: Budget-Aligned Prioritization
| Category | Timeframe | Examples |
|———-|———–|———-|
| Critical (Address This Year) | 0–12 months | Seal top attic bypasses, insulate pipes in unheated spaces, secure most vulnerable window |
| High-Impact (Next 1–3 Years) | 1–3 years | Attic insulation upgrade, garage door reinforcement, replace one critical window |
| Long-Term (3–5+ Years) | 3–5+ years | Roof reinforcement during replacement, continuous insulation during siding project, HVAC system upgrade |
Step 5: Documentation and Scheduling
– Photograph vulnerabilities with dates
– Create a digital folder for quotes, product details, permit info
– Schedule high-priority tasks in your calendar
– Share the plan with household members; assign responsibilities
Budget-Conscious Protection: Tiered Solutions for Every Situation
Weather resilience should be accessible regardless of budget. Strategic prioritization delivers meaningful protection at every level. These tiered pathways ensure progress is possible for all homeowners and renters.
The Essential Starter Kit (Immediate Action—Under 2 Hours)
Addresses critical vulnerabilities with reversible, low-skill solutions. All items widely available.
– Heat Defense: Blackout curtains, static-cling solar window film kit, battery-powered neck fan
– Cold Defense: Foam pipe insulation sleeves, door draft stopper, thermal emergency blanket
– Wind Defense: Pre-cut plywood panel for largest window, corrosion-resistant screws
– Universal: Weatherstripping kit (V-strip, foam tape, door sweep), acrylic latex caulk and small caulk gun
Implementation Tip: Start with an air leak audit (incense test); use kit materials to seal your top three identified leaks. Immediate comfort improvements build momentum.
The Seasonal Upgrade Package (DIY Projects—Weekend Commitments)
Focus on high-impact, moderate-skill projects with lasting benefits. Tool rentals can reduce costs.
– Comprehensive Air Sealing: Seal attic bypasses (chimney, lights, vents) with fire-rated foam and rigid board; install foam gaskets behind outlet plates on exterior walls; weatherstrip all windows/doors.
– Attic Enhancement: Add radiant barrier stapled to rafters (if ducts present); install rafter baffles; add blown-in cellulose insulation (rent blower machine).
– Window Optimization: Install exterior solar screens on south/west windows; apply spectrally selective film; add thermal-lined curtains.
– Landscaping: Plant two deciduous saplings on south/west side; install drip irrigation kit.
Pro Tip: Check the DSIRE database (dsireusa.org) or your utility website for current rebates—many offer significant reimbursement for air sealing and insulation.
The Strategic Investment Tier (Professional Assistance Recommended)
These upgrades deliver transformative resilience and may qualify for insurance discounts or incentives. Obtain multiple quotes; verify contractor licenses and insurance.
– Roof Reinforcement: Install hurricane straps during routine roof work.
– Critical Window Replacement: Replace most vulnerable window with impact-resistant unit.
– HVAC Optimization: Install smart thermostat with remote alerts; schedule professional duct sealing.
– Entry Door Upgrade: Replace hollow-core door with insulated steel door, multi-point lock, and proper weatherstripping.
– Plumbing Protection: Install self-regulating heat tape on exposed pipes with professional electrical connection.
Financing Options: Explore PACE (Property Assessed Clean Energy) financing for eligible upgrades; many utilities offer on-bill financing programs.
Budget Wisdom:
– Quality Over False Economy: Invest in materials rated for your climate (e.g., UV-resistant weatherstripping, exterior-grade plywood). Cheap alternatives often fail prematurely.
– Phased Implementation: Complete one area per season. Seal the entire attic this spring; address basement rim joists next fall.
– Skill Honesty: Honestly assess DIY capabilities. Incorrect shutter installation creates hazards. When uncertain, hire a certified professional—check references and licenses.
– Rebate Maximization: Contact your utility before purchasing to confirm current incentive programs and any pre-approval requirements.
Common Pitfalls and How to Avoid Them
Well-intentioned efforts can sometimes reduce effectiveness or create new issues. These insights—drawn from field reports and professional experience—highlight critical nuances.
Pitfall 1: Adding Insulation Without Ensuring Ventilation (Especially Attics)
- What Happens: Adding insulation without maintaining soffit ventilation can trap moisture, potentially leading to mold growth or wood deterioration over time.
- The Science: Warm, moist indoor air rises. Without balanced intake (soffit) and exhaust (ridge) ventilation, humidity accumulates in the attic space.
- The Solution: Before adding insulation, install rafter baffles to maintain a clear airflow path from soffit to ridge. Verify soffit vents are unobstructed. In humid climates, discuss powered ventilators with humidistat controls with a professional.
- Verification: After installation, check on a sunny day—cool air should be detectable entering at the soffits.
Pitfall 2: Using Inappropriate Sealant for the Application
- What Happens: Interior-grade caulk used outdoors cracks quickly from UV exposure and temperature shifts, allowing water intrusion.
- Material Guidance:
- Exterior Windows/Doors: Use polyurethane or hybrid polymer sealants—they offer flexibility, UV resistance, and adhesion.
- Interior, Low-Movement Joints: Acrylic latex caulk is paintable and sufficient.
- Masonry Cracks: Use sanded acrylic caulk designed for concrete.
- The Fix: Select sealant based on location and movement. Cut nozzle at 45 degrees for a clean bead; tool smoothly with a damp finger.
- Pro Tip: When in doubt, consult the product label or a hardware store specialist for your specific application.
Pitfall 3: Addressing Only Upper or Lower Air Leaks (Ignoring the Stack Effect)
- What Happens: Sealing only attic leaks while neglecting basement gaps may yield minimal improvement—warm air escaping top draws cold air in through bottom leaks.
- The Science: The “stack effect” describes how rising warm air creates pressure differences, pulling unconditioned air through lower openings.
- The Solution: Seal air leaks comprehensively—from foundation to roof. Prioritize attic (largest leaks) but dedicate equal attention to rim joists, sill plates, and foundation penetrations.
- Verification: After sealing, conduct the incense test at multiple levels during breezy conditions. Smoke should remain steady at all tested locations.
Pitfall 4: Incorrect Storm Shutter Installation
- What Happens: Screwing plywood panels into window trim (not structural framing) risks panel failure during high winds, allowing wind entry.
- Engineering Insight: Wind loads concentrate at panel edges. Fasteners must anchor into structural framing (studs, header) capable of resisting pull-out forces.
- The Fix: Pre-drill holes every 12 inches along panel edges. Use corrosion-resistant screws long enough to penetrate structural framing. Verify stud locations with a magnetic stud finder. Label each panel clearly.
- Critical Safety: Practice installation annually before storm season. If deployment feels difficult or unsafe, consider accordion shutters requiring no tools.
Pitfall 5: Misapplying Radiant Barriers in Cooler Climates
- What Happens: Installing radiant barrier foil directly on attic insulation in cold climates provides minimal benefit and may impede moisture drying.
- Climate Context: Radiant barriers reflect radiant heat. In hot climates, they reflect solar heat away. In cold climates, their benefit is limited; higher R-value insulation is typically more impactful.
- The Solution: In hot climates, install radiant barrier stapled to underside of rafters (shiny side down) with an air gap below. In mixed or cold climates, prioritize adequate insulation depth and ventilation. Consult local energy experts for climate-specific advice.
- Verification: Review DOE resources or consult a certified energy auditor before purchasing.
Your Questions, Answered
Q: How do I determine my home’s specific wind risk?
A: Begin with the International Code Council’s free wind speed map tool—enter your address for design wind speed references. Cross-reference with FEMA’s Flood Map Service Center (select “Wind Hazard” layer). For localized insights, contact your municipal building department—they often have records of neighborhood-specific wind damage patterns. If moderate storms have caused structural issues nearby, consider your property higher risk regardless of official maps.
Q: Can space heaters be used safely during power outages in extreme cold?
A: Only battery-powered ceramic heaters with tip-over and overheat protection are safe for indoor use during outages. Never use propane heaters, kerosene heaters, charcoal grills, or gasoline-powered generators indoors—even with windows open. These produce carbon monoxide (CO), an odorless, potentially fatal gas. If using a battery-powered heater: place on a non-flammable surface; maintain 3-foot clearance from combustibles; never leave unattended; ensure battery-powered CO detectors are installed and functional. For extended outages, shelter in a small interior room with emergency blankets.
Q: Do shade trees genuinely reduce cooling needs, and how long until benefits appear?
A: Yes—research confirms mature deciduous trees significantly reduce surface temperatures and decrease cooling demands. The key is strategic placement: plant on south and west sides to block high summer sun while allowing lower winter sun penetration after leaf drop. Fast-growing species like red maple provide noticeable shade in 5–7 years; slower species like oak deliver maximum benefit in 10–15 years. Allow 15–20 feet from the foundation to prevent root issues. Even young trees contribute through evapotranspiration.
Q: What’s the single most cost-effective upgrade for reducing heat gain?
A: Exterior shading solutions—such as awnings, shade sails, or exterior roller shades. These block heat before it strikes the glass, reducing solar heat gain far more effectively than interior solutions alone. Awnings typically pay back through reduced cooling needs within a few seasons. For renters or HOA-restricted properties, removable bamboo blinds mounted outside windows offer significant benefit at low cost. Prioritize south and west-facing windows.
Q: How frequently should roof inspections occur for wind resilience?
A: Conduct visual inspections twice yearly—after spring storm season and before winter. Additionally, inspect within 48 hours after any severe weather event (hail, high winds, heavy snow). From ground level, use binoculars to check for missing, cracked, or curled shingles; damaged flashing; granules in gutters (sign of wear). For close inspection, hire a certified roofer every 3–5 years—they identify subtle issues like nail pops invisible from ground level. Document findings with dated photos.
Q: Are impact-resistant windows worthwhile outside coastal hurricane zones?
A: Yes—for multiple reasons beyond hurricane protection. Impact windows block nearly all UV rays (preventing furniture/flooring fading), reduce outside noise significantly, and enhance security against forced entry. In hail-prone regions, they prevent costly glass replacement. Many insurers offer premium discounts (5–15%) for impact-resistant features regardless of location—request written confirmation before purchasing. Prioritize large picture windows and sliding glass doors if budget-limited.
Q: What distinguishes a radiant barrier from traditional insulation?
A: Traditional insulation (fiberglass, cellulose) resists conductive heat flow—slowing heat transfer through materials. Radiant barriers (typically aluminum foil) reflect radiant heat—bouncing infrared energy away. In hot climates, installing radiant barrier stapled to rafters (shiny side down) with an air gap below can reduce attic temperatures noticeably, supporting cooling efficiency. It works with traditional insulation but is not a replacement. In cold climates, focus resources on adequate insulation depth instead. Always ensure proper attic ventilation when installing radiant barriers.
Q: How can renters effectively protect against extreme weather?
A: Focus on reversible, non-structural modifications (get landlord approval in writing where required):
– Heat: Removable static-cling window film; blackout curtains with tension rods; portable AC unit (if permitted).
– Cold: Thermal-lined curtains; door draft stoppers; removable window insulation kits.
– Wind: Secure loose balcony/patio items; discuss storm shutter options with landlord (some jurisdictions require landlords to provide them in high-risk zones).
Document property condition thoroughly before moving in with dated photos. Share utility rebate information with your landlord—many programs cover weatherization costs for rental properties.
Q: Do smart thermostats provide meaningful benefits during extreme weather?
A: Yes—with important considerations. During heatwaves, they enable pre-cooling during off-peak hours (if utility offers time-of-use rates) and send alerts if indoor temperatures rise abnormally (indicating AC issues). In cold snaps, they maintain minimum temperatures remotely to help prevent pipe freezing. However, they rely on Wi-Fi and grid power—have a backup plan: document manual thermostat settings clearly, keep a battery-powered thermometer in vulnerable areas. Choose models with battery backup for critical functions. Pair with broader resilience planning.
Q: What’s the most impactful action I can complete today?
A: Conduct a 15-minute air leak audit using the incense test. On a breezy day, walk through your home with a lit incense stick. Hold near windows, doors, electrical outlets on exterior walls, and baseboards. Where smoke wavers, mark the spot. Then seal the top three leaks with caulk or weatherstripping. This single action improves comfort year-round, reduces energy waste, and builds momentum. Note the difference in draftiness near sealed areas within hours.
Q: How do I verify if my home’s insulation meets current recommendations?
A: First, identify your climate zone using the DOE ZIP Code Insulation Calculator. Then safely access your attic (wear a mask, use a sturdy board across joists). Measure existing insulation depth; note material type. Compare to recommended R-values for your zone (e.g., Zone 5 recommends R-49 in attics, approximately 16 inches of cellulose). For walls, look for clues at electrical outlets (remove cover plate carefully). For definitive assessment, hire a certified energy auditor for a blower door test and infrared scan—they quantify deficiencies and prioritize upgrades.
Q: Are there government programs to help fund weatherization upgrades?
A: Yes—multiple avenues exist:
– Weatherization Assistance Program (WAP): Federally funded program providing free insulation, air sealing, and HVAC repairs for income-qualified households. Administered by state agencies—search “WAP [Your State]”.
– Utility Rebates: Most major utilities offer rebates for insulation, windows, HVAC—check DSIRE database (dsireusa.org) or your utility website.
– Tax Credits: The Inflation Reduction Act provides tax credits for insulation, air sealing, and energy audits through 2032.
– PACE Financing: Property Assessed Clean Energy programs offer low-interest loans repaid via property tax bill—available in many states.
Verify eligibility requirements and pre-approval processes before starting projects.
Conclusion and Next Step
Extreme weather resilience is a continuous practice of informed, incremental preparation. The Triple-Layer Defense Framework—foundational protections, adaptive strategies, and emergency protocols—provides a flexible structure to transform concern into capable action. You now hold a detailed, adaptable roadmap grounded in practical experience and building science, designed to address heat, cold, and wind as interconnected challenges. Remember: resilience accumulates through consistent, thoughtful steps. Each sealed gap, each planted tree, each practiced protocol strengthens your home’s capacity to support safety and comfort.
Recap: Three Foundational Principles
- Seal Your Building Envelope Thoughtfully. Air leaks undermine other efforts. Prioritize attic bypasses, rim joists, and window/door perimeters—this focus delivers outsized returns in comfort, efficiency, and protection across all weather extremes.
- Know Your Home’s Specific Context. Generic advice has limits. Use the Annual Resilience Review to identify precise vulnerabilities in your structure and local risk profile. Target upgrades where they matter most—your largest window, your unheated crawlspace, your garage door.
- Practice Before You Need It. Deploying shutters for the first time during a warning invites stress and error. Rehearse seasonal transitions. Time your emergency kit assembly. Verify shutoff locations with household members. Familiarity builds confidence when seconds count.
The 24-Hour Rule
Within the next 24 hours, complete one tangible action from this guide. Choose based on immediacy:
– If warmer weather approaches: Apply static-cling solar film to your sunniest south-facing window.
– If cooler weather approaches: Install foam gaskets behind three electrical outlet plates on exterior walls.
– If storm season is near: Measure your largest window and purchase pre-cut plywood with mounting hardware.
This micro-action builds irreversible momentum. It transforms knowledge into capability. Document your step with a photo—this visual record reinforces commitment and marks your starting point.
The Bigger Perspective
As weather patterns evolve, the most resilient homes share a common trait: adaptability woven into their care. Each weatherization choice you make contributes beyond your property line—reducing strain on community infrastructure during peak demand, supporting environmental stewardship through efficiency, and modeling preparedness for neighbors. Share your journey: discuss air sealing tips with a neighbor; exchange shutter deployment insights; advocate for community resilience planning. Individual action, multiplied by collective effort, strengthens entire communities. Your home is more than shelter—it reflects foresight, care, and commitment. Begin today. Build resilience. Nurture peace of mind.
Explore Our Complete Home Resilience System:
[The Practical Guide to Home Energy Audits: Find Hidden Leaks and Increase Comfort] | [DIY Roof and Exterior Inspection Checklist: Spot Issues Early] | [Creating Defensible Space: Fire-Smart Landscaping Principles] | [Winter Readiness: A Room-by-Room Guide for Cold Months] | [Smart Safety Integration: Alerts and Automation for Peace of Mind] | [Water-Wise Landscaping: Drought-Resilient Plants and Efficient Irrigation] | [Emergency Power Options: Generators, Solar, and Battery Systems Explained]