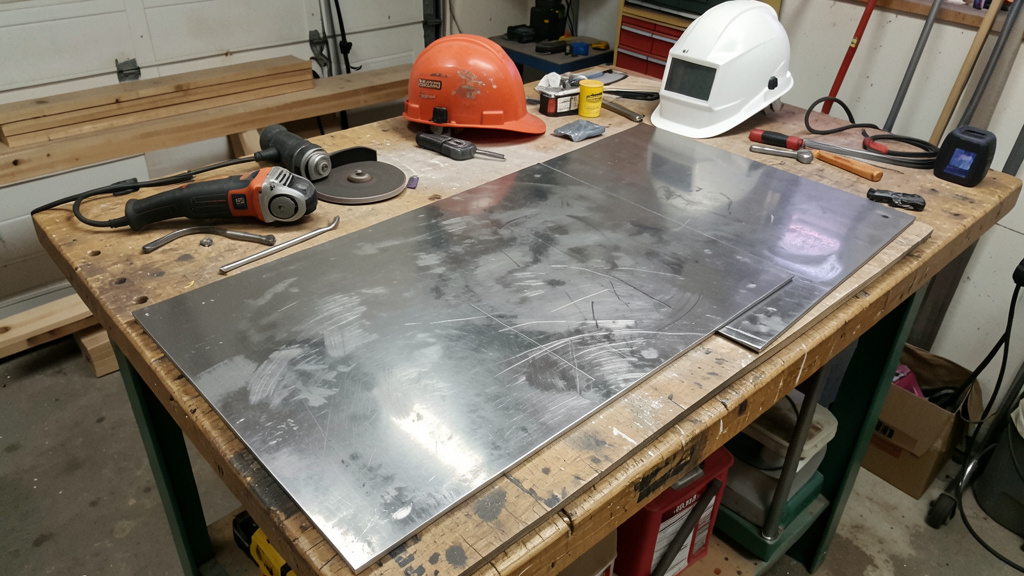
Transform Raw Metal into Purposeful Creations Through Thoughtful Technique, Adaptive Methods, and Unwavering Attention to Safety—No Industrial Workshop Required
Metalworking invites curiosity and creativity. Far from being confined to industrial settings, foundational metal fabrication is accessible to dedicated home crafters who prioritize preparation, safety, and progressive skill development. This guide offers a clear, integrated pathway through the core phases of metalwork—cutting, shaping, and joining—grounded in material science, workshop-tested methods, and adaptable solutions for varying tools, budgets, and project goals. Whether repairing a garden tool, crafting custom hardware, or exploring sculptural forms, you’ll gain structured insight to work intentionally, minimize waste, and build lasting confidence with metal.
Introduction
Metal has shaped human innovation for millennia—from ancient blades to modern infrastructure—and remains uniquely rewarding for makers who appreciate durability, precision, and tactile engagement. Yet many hesitate to begin, deterred by myths of required expense, danger, or innate talent. This guide reframes metalworking as a learnable craft built on observable principles and deliberate practice. Drawing from widely recognized safety standards and techniques documented across vocational resources and fabrication handbooks, we present a cohesive approach that emphasizes why certain methods suit specific materials and contexts. You’ll learn to read metal’s behavior, anticipate workflow interactions, and select tools aligned with your constraints. With patience and preparation, metal becomes not an adversary, but a responsive medium that honors thoughtful effort.
The Metalworking Trinity Framework: An Integrated Approach to Fabrication
Before selecting tools or making cuts, adopt a mental model that treats cutting, shaping, and joining as interconnected phases—not isolated steps. We call this the Metalworking Trinity Framework. It encourages planning the entire workflow upfront to prevent compounding errors.
Consider designing a simple metal bookend. Cutting pieces without considering how they’ll bend or join risks misalignment, weak seams, or wasted material. The Trinity Framework guides you to:
1. Visualize the full sequence during design—sketch not just the final shape, but each operation’s impact.
2. Choose materials and tools compatible across all phases (e.g., selecting a thickness manageable for your cutter yet stable after bending).
3. Anticipate phase interactions—such as heat from welding potentially warping a shaped component, prompting inclusion of post-weld straightening in your plan.
This systems-oriented perspective transforms metalworking from reactive trial-and-error into intentional creation. It reflects methodologies emphasized in foundational fabrication training, adapted thoughtfully for home workshop realities. By seeing how each phase informs the next, you conserve materials, reduce frustration, and cultivate deeper intuition.
The Guiding Insight: Every cut prepares the shape; every shape informs the join; every join respects the integrity of what came before. Understanding this cycle builds reliable competence.
How the Framework Prevents Common Setbacks
Imagine building a metal planter box. Cutting all sides with an angle grinder, then attempting sharp bends, may cause cracks at rough edges. Or welding unclamped corners could warp the assembly. The Trinity Framework addresses this holistically:
– During Cutting: Deburr edges immediately to eliminate stress points before bending.
– During Shaping: Apply bend allowance calculations and respect minimum radii for your metal’s thickness.
– During Joining: Use clamps or simple jigs to maintain alignment prior to fastening.
This proactive sequencing turns potential missteps into learning moments. While formal programs may isolate techniques for weeks, this framework accelerates practical understanding by revealing dependencies—saving time, material, and confidence.
Cutting Metal: Precision Begins with Preparation
A clean, accurate cut establishes the foundation for successful shaping and joining. Rushing this phase introduces errors that amplify downstream. This section details accessible cutting methods for home workshops, emphasizing material awareness, safety, and technique refinement. The goal is not merely separation—it’s preparing edges that are square, smooth, and purpose-ready.
Know Your Material Before Cutting
Metal behavior varies significantly. Mild steel (low-carbon) is beginner-friendly: affordable, widely available, and cuts predictably. Stainless steel is tougher and work-hardens during cutting, requiring slower speeds and dedicated blades. Aluminum cuts readily but gums up tools without lubrication or proper tooth count. Copper and brass are soft yet prone to deformation under pressure.
Practical identification tips:
– Use a magnet (mild steel attracts strongly; aluminum and some stainless grades do not).
– Check for mill markings or supplier documentation.
– When uncertain, test-cut a scrap piece matching your project’s thickness.
– Note thickness: methods suitable for 24-gauge sheet fail on ½-inch plate. Keep a simple reference nearby: hand tools for thin stock (<⅛”), power saws for medium (⅛”–¼”), abrasive/thermal methods for thick (>¼”).
This preliminary step prevents tool damage, poor results, and safety hazards. Material awareness is non-negotiable.
Method 1: Hand-Powered Cutting—Control and Accessibility
Best for: Thin metals (up to ⅛”), intricate curves, quiet environments, or situations demanding maximum control. Ideal for indoor use where sparks are prohibited.
Tools: Hacksaw (with 18–32 TPI metal-cutting blades), aviation snips (for sheet metal), hand shears, jeweler’s saw (delicate work).
Process:
1. Secure firmly: Clamp workpiece in a vise with soft jaws (aluminum/copper) or wood blocks to prevent marring. Never hold metal by hand.
2. Mark precisely: Scribe cut lines with a hardened steel point—pencil smudges during cutting. Use a square for straight lines; trace templates for curves.
3. Select blade wisely: Fine-tooth (32 TPI) for thin metal to prevent snagging; coarse (18 TPI) for thicker stock to reduce binding. Bi-metal blades resist breakage.
4. Cut with rhythm: Full, steady strokes on the push phase; release pressure on return. Maintain 40–50 strokes per minute. For snips, follow curves slowly; make relief cuts at sharp corners.
5. Deburr immediately: Smooth edges with a file, deburring tool, or fine sandpaper to prevent injury, reduce stress points, and prepare for next steps.
Why it matters: Hand tools build foundational muscle memory, require no power, eliminate sparks, and offer unmatched precision for detail work. Many professionals keep a hacksaw at their bench for quick adjustments.
Common pitfalls to avoid:
– Using wood-cutting blades on metal (teeth strip, creating hazards).
– Forcing the blade (causes overheating, breakage, inaccurate cuts).
– Skipping deburring (sharp edges compromise safety and downstream steps).
– Poor blade tension (too loose = wandering; too tight = breakage risk).
Adaptive approaches:
– Budget path: Junior hacksaws or heavy-duty scissors substitute for minor tasks. Coping saws with metal blades handle tight curves.
– Left-handed users: Verify saw frame allows safe blade orientation; prioritize comfort and control.
– Tubing cuts: Rotate the piece slightly after each stroke to prevent blade binding.
Real application: Crafting a floating shelf bracket? Clamp mild steel angle iron vertically, scribe with a square, cut slowly with a 24-TPI blade. The resulting edge requires minimal cleanup before assembly. For copper wind chimes, score 18-gauge sheet lightly with a utility knife before snipping to prevent tearing.
Method 2: Power Saw Cutting—Efficiency for Straight and Curved Cuts
Best for: Straight cuts on rods, tubes, or structural shapes; repetitive cuts; thicker stock where hand tools fatigue the user. Bandsaws excel at curves; chop saws deliver speed for straight cuts.
Tools: Reciprocating saw (“Sawzall”) with metal blades, horizontal/vertical bandsaw, cold-cut chop saw (metal-cutting blade) or abrasive chop saw (non-ferrous metals).
Process:
1. Blade selection is critical: Match teeth per inch (TPI) to material thickness. Rule of thumb: at least three teeth contact the workpiece simultaneously.
2. Secure thoroughly: Clamp workpiece; support long stock on sawhorses to prevent vibration or binding. Never hold by hand.
3. Cut deliberately: Let the tool’s speed work for you. Apply light, consistent pressure. For bandsaws, feed slowly; forcing causes drift.
4. Manage heat: For extended cuts, use light cutting oil (avoid water-based coolants on aluminum to prevent staining).
5. Prioritize safety: Wear ANSI Z87.1 safety glasses with side shields, hearing protection, and gloves. Ensure guards are functional; never bypass safety features.
Why it matters: Power saws deliver straighter, faster cuts on thicker materials with less physical strain. Bandsaws conserve material with minimal kerf; cold-cut chop saws leave edges weld-ready.
Common pitfalls to avoid:
– Using wood blades on metal (dangerous and ineffective).
– Inadequate workpiece support (causes kickback or inaccurate cuts).
– Ignoring blade direction (bandsaw blades have feed arrows—install correctly).
– Overlooking blade tension (loose = wandering; overtightened = premature failure).
Adaptive approaches:
– Budget path: Tool libraries or makerspaces offer affordable bandsaw access. Used horizontal bandsaws can be refurbished. A reciprocating saw provides versatile entry under modest investment.
– Stainless steel caution: Use dedicated blades to avoid cross-contamination (iron particles can cause rust spots on stainless surfaces).
– Blade choice nuance: Abrasive chop saw wheels cut quickly but leave rough, heat-affected edges requiring grinding. Cold-cut blades (carbide-tipped) yield cleaner edges suitable for welding but cut slower. Choose based on your project’s finish needs.
Real application: Building a rose trellis? Use a bandsaw with a stop block against the fence to cut multiple identical lengths of ½-inch square tubing. Smooth, square cuts minimize post-cut cleanup. For rebar in garden path reinforcement, a reciprocating saw with a 10-TPI bi-metal blade cuts efficiently when clamped securely.
Method 3: Abrasive and Thermal Cutting—Versatility for Demanding Tasks
Best for: Thick plate, irregular shapes, demolition, or situations where other methods are impractical. Angle grinders are the most accessible thermal-adjacent tool for home crafters; plasma cutters offer precision for conductive metals; oxy-fuel requires advanced training and is not recommended for beginners.
Tools: Angle grinder with reinforced cutoff wheel, entry-level plasma cutter (for steel, stainless, aluminum), oxy-acetylene torch (not recommended without certified instruction).
Angle Grinder Process (most accessible):
1. Wheel selection: Use thin (1/16″), reinforced cutoff wheels rated for metal. Verify RPM rating matches your grinder. Never use grinding wheels for cutting—they are too thick and prone to violent failure.
2. Workspace setup: Clamp workpiece on non-flammable surface (concrete, dirt). Clear flammables, sawdust, or solvents from a wide radius. Keep a Class ABC fire extinguisher and sand bucket accessible.
3. Stance and grip: Stand to the side of the grinder (not directly behind). Use two hands—one on side handle, one on body. Position guard between you and the wheel.
4. Cutting motion: Apply light, consistent pressure. Let the wheel cut at its own pace. For tubing, cut halfway, rotate 180°, and complete to prevent pinching.
5. Post-cut care: Allow edges to cool completely. Deburr thoroughly. Inspect for squareness—angle grinders can wander without guidance.
Why it matters: Angle grinders are versatile, widely available, and handle diverse thicknesses with appropriate wheels. Plasma cutters (entry-level models accessible to dedicated hobbyists) enable intricate artistic cuts with clean edges.
Critical safety considerations:
– Inspect wheels for cracks, chips, or warping before every use. Discard wheels past manufacturer’s date (typically 2 years).
– Never remove the guard—it contains fragments during failure.
– Sparks travel significant distances; clear the area thoroughly. Wear leather gloves and a face shield over safety glasses.
– Cutting galvanized steel releases zinc fumes (“metal fume fever”). Work outdoors with a P100 respirator; avoid heating coated metals whenever possible.
Adaptive approaches:
– Storage: Keep cutoff wheels flat in a dry place. Hand-tighten mounting nuts—overtightening stresses the wheel.
– Binding response: If the wheel binds, release pressure immediately and reposition. Never force through resistance.
– Curved cuts: Make straight relief cuts perpendicular to the curve, then refine with a grinding wheel or file.
Real application: Removing a seized bolt? Position the grinder so sparks travel away from you and the workpiece. Wear full face protection. For a decorative garden gate from ⅛-inch steel sheet, plasma cutting traces intricate patterns cleanly—edges require minimal grinding before finishing.
Cutting Readiness Checklist
Before any cut, verify:
– [ ] Metal type, thickness, and condition identified (rust, coating)
– [ ] Tool and blade/wheel selected appropriately for material
– [ ] Workpiece secured firmly; long pieces fully supported
– [ ] Cut line marked clearly with scribe or fine marker; measurements double-checked
– [ ] Required PPE worn: safety glasses with side shields, hearing protection, gloves, respirator if needed
– [ ] Workspace cleared of flammables, tripping hazards, bystanders
– [ ] Tool inspected: blade sharpness, wheel integrity, guard function, cord safety
– [ ] Deburring plan confirmed for post-cut edge preparation
– [ ] Fire safety equipment accessible (extinguisher, sand)
– [ ] Downstream needs considered: Will this edge be welded? Painted? Mechanically joined?
This checklist is a safety ritual—not bureaucracy. Tape it visibly. Review it before every cut, regardless of task familiarity. Complacency is the greatest hazard.
Shaping Metal: Bending, Forming, and Texturing with Intention
Shaping transforms flat or linear stock into three-dimensional forms. Success depends on understanding metal’s physical responses: ductility (ability to bend), elasticity (springback), and susceptibility to cracking. This section covers cold and heat-assisted techniques accessible to home workshops, emphasizing material-aware execution, troubleshooting, and artistic expression.
Understanding Bend Allowance: Compensating for Material Behavior
When metal bends, the outer surface stretches while the inner compresses. The total length isn’t merely the sum of straight segments—it increases due to this deformation. Ignoring this leads to misaligned assemblies.
Practical approach for DIYers:
– For mild steel up to ⅛” thick bent at 90°, add approximately 1.5 × material thickness to the sum of leg lengths.
Example: Two 4″ legs on ⅛” steel: Cut length = 4 + 4 + (1.5 × 0.125) = 8.1875″.
– For precision: Create a test bend on matching scrap. Measure resulting legs and adjust.
– Material variations: Stainless steel exhibits greater springback—add 10–15% more allowance. Aluminum requires less due to higher ductility. Always test first.
This small step prevents wasted material and frustration in projects requiring tight tolerances (frames, enclosures, interlocking parts).
Technique 1: Cold Bending with Hand Tools—Precision Without Heat
Best for: Thin to medium metals (up to ¼” mild steel), controlled bends, artistic shaping, or heat-sensitive contexts. Preserves material strength and requires minimal equipment.
Tools: Ball-peen hammer, vise, forming blocks (wood, steel, aluminum), rawhide mallet, bending brake (sheet metal).
Vise Bending Process:
1. Mark the line: Scribe clearly. For sharp bends, lightly score with a center punch to guide the bend and reduce cracking risk.
2. Secure in vise: Position bend line just above jaws. Use soft jaws or wood blocks to protect surfaces. Support long free ends.
3. Bend gradually: Tap evenly along the line with a hammer, working center to edges. Bend slightly past target angle (2°–5°)—springback will return it. Verify frequently with a square.
4. Refine: Tap outer edge to increase angle; inner radius gently to decrease. For repeatability, create a simple bending jig from scrap.
5. Finish: Smooth hammer marks with a file, sanding block, or rubber mallet if needed. Deburr after bending.
Why it matters: Cold bending is reversible within limits, builds tactile intuition, and avoids heat-related distortion. Ideal for brackets, hooks, repairs, or decorative elements.
Common pitfalls to avoid:
– Bending too forcefully (causes cracks, especially on outer radius of thick/brittle metal).
– Ignoring springback (always overbend slightly; test on scrap).
– Marring surfaces (use rawhide mallets, copper hammers, or leather padding on finished metal).
– Bending against grain direction (visible as faint rolling lines on sheet metal—increases crack risk).
Adaptive approaches:
– No vise? Clamp two sturdy wooden blocks in a workbench vise to create a bending channel.
– Thin sheet metal: Score deeply with a utility knife and straightedge, then bend over a sharp table edge for gentle curves.
– Tight-radius bends: Drill small “relief holes” along the inside bend line before bending to reduce compressive stress (common in automotive fabrication).
– Tubing: Insert a spring mandrel or pack with dry sand (plug ends with tape) to prevent collapse.
Real application: Creating a plant hanger? Cut ⅛” mild steel to calculated length (including allowance), clamp at midpoint, and tap upward with a ball-peen hammer to form a smooth U-shape. For a brass drawer pull, bend rod around a clamped steel pipe—no heat needed for this ductile metal.
Technique 2: Bending Brake for Sheet Metal—Repeatable Precision
A bending brake (or box-and-pan brake) delivers consistent, clean bends in sheet metal (up to 16-gauge mild steel or 14-gauge aluminum).
Process:
1. Insert sheet under clamping bar, aligning scribed bend line precisely with the bending leaf edge.
2. Tighten clamp evenly—uneven pressure causes twisted bends.
3. Lift bending leaf smoothly to target angle. Use adjustable stops for common angles (90°, 45°). For acute bends, overbend slightly and tap back.
4. For multiple bends, use previous bends as references. Work from inside out on complex shapes.
Pro tips:
– Bend across the grain direction (perpendicular to rolling lines) to minimize cracking risk.
– Apply masking tape along the bend line to reduce marring.
– For springy materials (stainless steel), overbend 3°–5° to compensate for springback.
– Clean clamping surfaces regularly to prevent debris-induced imperfections.
Real application: Fabricating an electronics enclosure? Calculate all bend allowances, mark lines meticulously, and form sides sequentially from one sheet. Result: a professional, near-seamless box requiring minimal fastening.
Adaptive path: Desktop brakes start modestly priced and handle common gauges. Makerspaces often provide access. Practice extensively on scrap to master pressure and alignment.
Technique 3: Heat-Assisted Shaping—Expanding Possibilities Responsibly
Best for: Thick stock (>¼”), tight radii, complex curves, or metals prone to cracking when cold-bent. Heat increases malleability, reduces required force, and minimizes springback.
Tools: Propane torch (minimum 100,000 BTU), anvil or heavy steel block, tongs, heat-resistant gloves, face shield.
Process for Mild Steel:
1. Heat evenly: Apply torch flame along the bend zone to a dull red heat (~1,200°F—visible in low light). Move flame constantly to avoid hot spots. Heat through the cross-section for thick stock.
2. Bend promptly: While hot, position over a form (pipe for curves) or in vise. Apply steady pressure with tongs or lever. Work deliberately but swiftly.
3. Cooling: Air-cool mild steel unless hardening is intended (which requires tempering). For controlled cooling, bury in vermiculite.
4. Cleanup: Remove scale (oxidized surface) with wire brush, sanding, or pickling solution before finishing.
Non-negotiable safety practices:
– Wear leather apron, heat-resistant gloves (rated 1,000°F+), and face shield over safety glasses.
– Work in well-ventilated area, clear of combustibles, solvents, or flammable gases.
– Have fire extinguisher and sand bucket immediately accessible.
– Never look directly at heated metal without shaded eyewear (infrared radiation hazard).
Critical material considerations:
– Stainless steel: Heating alters corrosion resistance in the heat-affected zone. Requires precise control and post-heat treatment—best for experienced makers.
– Aluminum: Melts near typical steel forging temperatures (~1,200°F). Extremely easy to overheat and ruin. Not recommended for beginners.
– Galvanized/coated metals: Heating releases toxic fumes. Strip coatings first if possible; never heat without industrial-grade respiratory protection and ventilation.
Adaptive path: Start small with mild steel scraps. Learn color-temperature relationships (dull red ≈ 1,000°F; bright orange ≈ 1,800°F). Local blacksmithing guilds often offer supervised introductory sessions—highly recommended for safe skill development.
Real application: Forging a fireplace poker? Heat the tip of ½” mild steel rod to bright orange, then bend over an anvil horn. Reheat as needed. Heat-bending ⅜” rod around a large form creates graceful arches for a garden arbor.
Advanced Shaping: Rolling, Doming, and Texturing
- Rolling: Create cylinders or gentle curves. Use a slip roll machine if available. DIY alternative: Wrap thin sheet tightly around a pipe/form, clamp securely, and let set. For tighter curves, make shallow relief cuts along the edge first.
- Doming: Form shallow domes (e.g., decorative knobs). Place sheet over a depression in a sandbag, wooden block, or doming block. Hammer from edges inward with a rounded punch. Start lightly; increase pressure gradually. Anneal copper/brass periodically if work-hardening occurs.
- Texturing: Add grip, visual interest, or rigidity. Techniques:
- Planishing: Light, overlapping hammer blows to smooth and texture.
- Chasing: Use punches to create raised/recessed designs.
- Stamping: Press with handheld stamps or found objects (nails, chains).
Support metal fully near edges to prevent distortion. Mark grids lightly with a scribe for pattern consistency. Texture can conceal minor imperfections or elevate artistic value.
Shaping Troubleshooting Guide
| Symptom | Likely Cause | Practical Solution |
|---|---|---|
| Cracks on outer bend radius | Bend radius too tight; bending against grain; cold metal brittleness | Increase radius; anneal bend area (heat dull red, cool slowly); bend across grain; add relief holes for tight bends |
| Springback (angle opens after release) | Material elasticity; insufficient overbend | Overbend 2°–5° (test on scrap); use forming block to hold shape during cooling; adjust brake stop |
| Wrinkling on inner bend radius | Excessive compressive force; lack of support | Use mandrel (internal support) for tubing; reduce bending speed; apply even pressure |
| Uneven/twisted bend | Inconsistent pressure; uneven clamping; grain variation | Practice on scrap; use bending jig; ensure uniform clamp pressure |
| Scale/discoloration after heating | Oxidation during heating | Remove with wire brush/sanding; apply anti-scale compound during heating for critical finishes |
| Hammer marks marring surface | Steel hammer on finished metal; excessive force | Place leather/copper sheet between hammer and work; use rawhide mallet; smooth post-bend |
Keep this guide visible. Most shaping challenges have straightforward, science-based solutions. Consult it before forcing corrections.
Joining Metal: Creating Durable, Purposeful Connections
Joining unifies individual components into a cohesive whole. The optimal method depends on required strength, material compatibility, environmental exposure, aesthetics, and your tools/skills. A thoughtfully chosen joint enhances function and longevity; a mismatched one invites failure. This section clarifies mechanical fastening, welding, brazing, soldering, and adhesives—with emphasis on preparation, safety, and adaptive execution.
The Joining Decision Tree: A Practical Selection Guide
Answer these questions before choosing a method:
1. Primary load type?
– High stress (structural frames, hitch points): Welding or high-strength mechanical fasteners.
– Medium stress (shelf brackets, gates): Welding, brazing, or robust mechanical joints.
– Low stress (decorative panels, nameplates): Rivets, soldering, or adhesives.
2. Metals being joined?
– Same metal: Most methods apply.
– Dissimilar metals (steel to aluminum): Mechanical fasteners or specialized adhesives (welding is complex due to melting point/metallurgical differences).
– Coated metals (galvanized): Mechanical fastening preferred; welding requires coating removal and strict fume control.
3. Disassembly needed?
– Yes: Bolts, screws, rivets.
– No: Welding, brazing, soldering, permanent adhesives.
4. Skill level and equipment?
– Beginner: Mechanical fasteners, pop rivets, structural epoxy.
– Intermediate: MIG welding, torch brazing.
– Advanced: TIG welding, oxy-fuel processes.
5. Environmental factors?
– Outdoor/wet: Welded joints (properly sealed) or stainless fasteners; avoid moisture-sensitive adhesives.
– High temperature: Welding or brazing; avoid standard epoxies.
– Electrical conductivity: Soldering or welding; avoid insulating adhesives.
Document your reasoning. This builds expertise and prevents wasted effort. Choosing mechanical fasteners for an aluminum drone frame is smarter than struggling with incompatible welding.
Method 1: Mechanical Fastening—Reversible, Versatile, Beginner-Friendly
Why it shines: No heat required (avoids warping or metallurgical changes), works on dissimilar metals, reversible, ideal for beginners or heat-sensitive contexts. Essential where future maintenance is anticipated.
Bolted Joints (for strength-critical applications):
1. Drill precisely: Center-punch hole locations to prevent bit wander. Select bit size per fastener specs (e.g., #7 drill for ¼-20 tap; 17/64″ for clearance). Use sharp bits and cutting fluid.
2. Deburr holes: Smooth entry/exit edges with countersink bit, file, or deburring tool. Sharp edges create stress concentrations leading to cracks.
3. Prepare surfaces: Clean mating areas with solvent to remove oil, grease, or paint. For corrosion resistance, apply anti-seize compound to threads (especially stainless/aluminum).
4. Strategic washers: Flat washers distribute load on soft materials; lock washers or thread-locking compound prevent vibration loosening. Place split lock washers under the nut.
5. Torque thoughtfully: Tighten in crisscross pattern for even pressure (e.g., on flanges). Use a torque wrench where specifications exist. Overtightening strips threads; undertightening allows movement and fatigue.
Riveting Deep Dive (ideal for sheet metal):
– Pop rivets (blind rivets) join where only one side is accessible.
– Drill hole slightly larger than rivet diameter (e.g., 1/8″ hole for 3/32″ rivet).
– Insert rivet, position gun jaws, squeeze steadily until stem snaps—expanding the body internally.
– Match rivet material to workpiece: aluminum for aluminum (lightweight, corrosion-resistant), steel for steel (stronger), stainless for harsh environments.
– For critical strength: Use structural rivets (larger diameter) or solid rivets (requires access to both sides and bucking bar).
Adaptive insights:
– Outdoor projects: Use stainless steel (304/316) or hot-dipped galvanized fasteners. Match fastener material to base metal where possible to avoid galvanic corrosion.
– Temporary alignment: Cleco fasteners (spring-loaded pins) hold parts perfectly aligned during welding or assembly—highly valuable.
– Budget path: Basic rivet guns cost modestly. Practice on scrap to learn the “feel” of proper setting. Under-set rivets leak; over-set rivets crack.
Real application: Assembling a steel storage cabinet? Drill and countersink corners, apply silicone sealant to seams for moisture resistance, secure with pan-head screws and lock washers. For an aluminum drone frame, aircraft-grade pop rivets provide light, vibration-resistant joints.
Method 2: Welding—Permanent Fusion with Respectful Caution
Welding creates the strongest permanent joints but demands rigorous safety, preparation, and practice. We focus on MIG (GMAW) welding—the most accessible arc process for home workshops working with mild steel.
Essential safety gear: Auto-darkening helmet (shade #10+), welding gloves (gauntlet style), flame-resistant cotton/leather jacket, respirator with P100 filters, and strong ventilation (outdoors or exhaust fan). Never weld galvanized, lead-painted, or coated metals without industrial respiratory protection—fumes are hazardous.
MIG Welding Process for Mild Steel:
1. Prepare meticulously: Clean joint area within 1″ using wire brush (dedicated to steel), grinder, or solvent. Remove rust, paint, oil, or mill scale. Dirty metal causes porosity (weak, hole-filled welds) and spatter.
2. Fit-up and clamp: Parts must align closely (<1/16″ gap). Use clamps, magnets, or tack welds. For thick material (>¼”), bevel edges for full penetration.
3. Machine setup:
– Wire: ER70S-6 solid wire (common for mild steel).
– Gas: 75% argon / 25% CO2 (“C25”) for stable arc and penetration.
– Settings: Start with manufacturer’s chart for your thickness (e.g., 18V, 220 IPM for 1/8″ steel). Always test on scrap first.
– Polarity: Typically DCEN (verify machine manual).
4. Technique fundamentals:
– Gun angle: 10°–15° from vertical, pushing the puddle (improves visibility, reduces spatter).
– Stick-out: Maintain ¼” distance from contact tip to work.
– Travel speed: Move steadily. Too slow = burn-through on thin metal; too fast = weak, convex bead. Listen for consistent “sizzle.”
– Butt joints: Aim arc slightly ahead of puddle; minimal weave.
– Fillet welds (corners): Hold gun at 45° to both surfaces; direct arc equally.
5. Post-weld: Chip slag if using flux-core wire. Grind beads smooth if needed. Immediately apply rust-inhibiting primer to the heat-affected zone.
Common beginner challenges & solutions:
– Porosity (holes): Caused by drafts, dirty metal, or moisture. Weld draft-free; clean metal thoroughly; store wire dry.
– Undercut (groove at edge): Too high voltage, fast travel, or wrong angle. Reduce voltage; slow travel; adjust angle.
– Burn-through: Excessive heat on thin metal. Lower voltage; use stitch welding (short bursts with cooling pauses); add backing bar.
– Excessive spatter: Imbalanced settings, dirty tip, poor gas flow. Fine-tune on scrap; clean tip; verify gas flow (20–25 CFH).
Welding method context:
– TIG (GTAW): Precision work on stainless, aluminum, or thin metals. Requires foot pedal, filler rod, high skill. Clean, spatter-free welds for visible joints.
– Stick (SMAW): Portable, works outdoors (no gas), good for rusty metal. Steeper learning curve; requires slag removal.
– Flux-Core (FCAW): No shielding gas needed (self-shielding), ideal for drafty/outdoor use. Heavier fumes require excellent ventilation; welds less clean than gas-shielded MIG.
Adaptive path: Community college welding classes provide supervised equipment access and foundational training—highly recommended. Practice daily on scrap: beads on plate, lap joints, T-joints. Rent equipment initially if purchase isn’t feasible. Never skip safety gear—even for “quick tacks.”
Method 3: Brazing and Soldering—Capillary Action Joining
Brazing (filler melts above 840°F/450°C) and soldering (below 840°F) join metal without melting the base pieces. Heat applied to the joint draws molten filler into the gap via capillary action.
When to choose:
– Brazing: Stronger joints (approaching base metal strength); ideal for dissimilar metals (copper to steel), plumbing, HVAC, or minimal heat distortion contexts. Silver-based alloys offer high strength.
– Soldering: Electronics, copper pipe, light repairs, decorative work. Lower temperatures protect heat-sensitive components.
Brazing Process (oxy-propane torch for steel):
1. Fit-up: Parts must fit closely (0.001″–0.005″ gap). Too tight blocks flow; too loose weakens joint. Use fixtures/clamps.
2. Clean thoroughly: Abrade joint area to bright metal; remove oil with acetone.
3. Apply flux: Brush flux onto surfaces—prevents oxidation, promotes flow. Use flux specific to filler and base metal.
4. Heat evenly: Heat both pieces uniformly until flux turns clear/liquid (~1,100°F for silver brazing). Avoid overheating one piece.
5. Apply filler: Touch rod to the joint (not flame). Capillary action draws filler in. Move rod around until filled.
6. Cool and clean: Air-cool. Remove residual flux with warm water and brush.
Safety: Wear shaded goggles (shade #3–5). Ventilate area. Secure gas cylinders. Never use oxygen to clean surfaces.
Soldering simplified:
– Plumbing: Clean pipe/fitting, apply acid-core flux, heat fitting evenly until solder flows smoothly into joint. Wipe excess.
– Electronics: Temperature-controlled iron (600°–700°F), rosin-core solder, flux pen. Heat pad and lead simultaneously; apply solder to joint.
Critical distinction: Brazing alloys contain silver/copper/nickel; soldering uses tin-lead or lead-free alloys. Brazed joints withstand higher stress/temperature. Never use plumbing solder on electronics—it contains corrosive acid flux.
Adaptive insight: Joint success hinges on perfect cleanliness and precise fit-up. Practice on scrap first. Use “stop-off” paste to confine filler flow.
Real application: Repairing a steel bicycle frame crack? Clean thoroughly, flux the area, heat evenly, draw brass filler into the joint. File smooth and repaint. For a copper rain chain, solder sections with lead-free solder and plumbing flux for watertight, decorative joints.
Method 4: Adhesive Bonding—Modern Solutions for Specific Needs
Best for: Non-structural applications, bonding dissimilar materials (metal to wood/plastic), vibration damping, or where drilling/welding isn’t feasible. Modern structural adhesives offer impressive shear strength in appropriate contexts.
Common options:
– Two-part epoxy (e.g., metal-filled formulas): Fills gaps, withstands moderate heat, bonds steel/aluminum/ceramic. Ideal for repairs (cracked bracket, broken handle). Mix thoroughly; clamp until cured (follow product timeline).
– Methacrylate adhesives: High impact resistance; bonds oily metals with minimal prep. Used in automotive trim.
– Cyanoacrylate (super glue): Fast bond for small repairs (loose threads, jewelry). Use accelerator for porous metals.
– VHB tape (acrylic foam tape): Mounts panels, signs, trim. Requires clean, dry surfaces; 72-hour cure for full strength.
Surface preparation is critical:
1. Clean with acetone or isopropyl alcohol.
2. Roughen with 80–120 grit sandpaper.
3. Wipe clean. Apply adhesive per instructions.
4. Clamp with even pressure. Wipe excess before curing.
5. Allow full cure time—partial cure feels solid but lacks strength.
Important limitations: Adhesives lack peel strength of mechanical/welded joints. Avoid for high-shear, high-impact, or safety-critical applications (structural supports, lifting points) unless explicitly rated. Always consult the manufacturer’s datasheet. Never rely solely on adhesives where failure could cause injury.
Real application: Mounting a stainless backsplash? Clean surfaces, apply VHB tape to metal perimeter, press firmly, support overnight. Repairing a cracked aluminum lawnmower deck? Grind a V-groove along the crack, clean thoroughly, press mixed epoxy putty into groove, smooth, and cure fully before use.
Environmental note: Dispose of mixing sticks and residue per local regulations. Water-based metal adhesives are emerging but generally lack structural strength.
Joining Method Comparison Guide
| Method | Relative Strength | Ease of Use | Reversibility | Heat Input | Ideal Applications |
|---|---|---|---|---|---|
| Welding | Very High | Moderate to Challenging | No | Very High | Structural steel, permanent high-strength joints |
| Brazing | High | Moderate | No | Medium | Dissimilar metals, plumbing, minimal distortion needs |
| Mechanical Fastening | High (design-dependent) | Easy | Yes | None | Dissimilar metals, disassembly needed, beginners |
| Soldering | Low to Medium | Easy | Difficult | Low | Electronics, copper pipe, light decorative work |
| Adhesives | Medium (shear) / Low (peel) | Easy | No | None | Non-structural bonds, dissimilar materials, vibration damping |
Use this during planning. Strength isn’t the sole factor—consider environment, aesthetics, skill, and reversibility needs. A well-designed bolted joint often outperforms a poorly executed weld.
Material Matters: Choosing Wisely for Your Project
Success begins long before tools touch metal—with thoughtful material selection. This section clarifies common metals accessible to home crafters, their properties, best uses, sourcing considerations, and handling nuances. Understanding material behavior prevents frustration and supports safer, more satisfying outcomes.
Mild Steel (Low-Carbon Steel)
- Properties: Magnetic, weldable with common processes, strong, affordable, but rusts without protection. Contains <0.3% carbon.
- Common forms: Sheet (16–24 gauge), rod (round/square), angle iron, channel, tubing, plate.
- Best for: Structural projects (frames, brackets, gates), outdoor furniture (if finished properly), sculptures, toolmaking. The versatile “workhorse.”
- Practical tips:
- “A36” is a standard structural grade. Beginners: Start with 16–18 gauge sheet—thick enough to hold shape, thin enough for hand tools.
- Hot-rolled: Rough, scaled surface (requires grinding before finishing).
- Cold-rolled: Smoother, more precise dimensions (better for visible parts).
- Work-hardens slightly during bending/cutting; annealing (heat dull red, cool slowly) restores ductility for severe forming.
- Always remove mill scale before welding for strong, clean joints.
Stainless Steel
- Properties: Corrosion-resistant (chromium content ≥10.5%), typically non-magnetic (some grades magnetic), harder to cut/weld than mild steel, higher cost.
- Key grades:
- 304 (A2): General purpose, good corrosion resistance, weldable. Most accessible for DIY.
- 316 (A4): “Marine grade,” superior resistance (molybdenum added), ideal for coastal/harsh environments.
- 430: Magnetic, lower corrosion resistance, budget-friendly for decorative trim.
- Best for: Kitchen fixtures, outdoor projects in humid/salty areas, architectural accents, medical/tool applications.
- Critical considerations:
- Requires stainless-specific blades, abrasives, and welding consumables.
- Work-hardens significantly—cut slowly with lubricant.
- Use dedicated tools (files, brushes) to avoid cross-contamination (iron particles cause rust spots).
- Welding: Backing gas or tape often needed on critical welds to prevent oxidation on the reverse side.
Aluminum
- Properties: Lightweight (~⅓ steel density), non-magnetic, corrosion-resistant (protective oxide layer), excellent conductor, softens when heated.
- Common alloys:
- 6061-T6: Strong, weldable (with AC TIG or specialized MIG), most versatile for fabrication.
- 5052-H32: Excellent for bending/forming, good corrosion resistance, not heat-treatable.
- 3003: General purpose, easy to work, lower strength.
- Best for: Lightweight frames (bikes, furniture), marine applications, heat sinks, decorative projects.
- Practical handling:
- Use lubricant (cutting oil) when cutting/drilling to prevent galling.
- Deburr edges thoroughly—aluminum burrs are exceptionally sharp.
- Store away from steel to avoid galvanic corrosion.
- Joining reality: Welding requires specialized equipment/skill. Most DIYers succeed with mechanical fastening (stainless bolts with insulating washers) or adhesives. Brazing is possible but challenging.
Copper and Brass
- Properties:
- Copper: Highly malleable, excellent electrical/thermal conductor, develops green patina over time.
- Brass (copper + zinc): Stronger than copper, machinable, gold-like appearance, antimicrobial.
- Best for: Plumbing, electrical projects, decorative accents (lamp bases, nameplates), musical instruments, marine hardware (naval brass).
- Working notes:
- Soft metals—use sharp tools to avoid deformation.
- Anneal frequently during bending/forming (copper: heat dull red, quench in water; brass: air-cool).
- Soldering is ideal joining method—use appropriate flux and lead-free solder for potable water.
- Avoid welding brass without proper ventilation—zinc fumes are hazardous.
- Preserve bright finish with clear lacquer; encourage patina with vinegar/salt solutions for antique effects.
Sourcing Metal Responsibly and Economically
- Hardware stores: Small pieces of mild steel, aluminum, copper. Check “cut-off” bins for discounted remnants. Convenient but higher cost per pound.
- Local metal suppliers: Call ahead—many sell “drops” (leftover industrial cuts) at significant discounts. Bring sketches; staff often advise on suitability. Ask about “mill ends” or “seconds” (cosmetically imperfect but structurally sound).
- Salvage yards/scrap dealers: Treasure troves for unique pieces (old machinery, structural steel). Inspect thoroughly for cracks, rust, or unknown alloys. Clean before use. Build relationships for better pricing.
- Online retailers:
- Online Metals, Metal Supermarkets: Precise cuts, wide selection, ship small quantities. Ideal for specialty metals or exact sizes.
- McMaster-Carr: Engineering-grade materials with detailed specs. Higher cost, reliable quality.
- Marketplaces (eBay, Facebook): Search “metal scraps,” “steel cutoffs.” Verify seller reputation.
- Community resources: Tool libraries, makerspaces, vocational schools may sell student remnants. Local metalworking clubs often host material swaps.
- Sustainability practice: Prioritize reclaimed metal. Document salvaged piece histories—they add character to art. Recycle unusable scraps through certified programs.
Material Selection Workflow
- Define requirements: Load-bearing? Outdoor exposure? Weight limits? Aesthetic finish?
- Eliminate unsuitable options: E.g., bare mild steel for saltwater immersion; aluminum for high-temp applications.
- Assess workability: Do you have tools/skills for this metal? (e.g., Avoid stainless if grinding capability is limited).
- Evaluate cost and availability: Include cutting waste. A slightly larger standard size may be more economical than custom cuts.
- Test first: Buy a small sample. Cut, bend, join using your planned methods. Verify results before committing fully.
This workflow prevents costly errors. A garden trellis needs corrosion resistance—choose galvanized steel or aluminum over bare mild steel. A decorative wall sconce prioritizes aesthetics—brass or copper may justify higher cost.
Safety Deep Dive: Cultivating a Culture of Care
Safety is not a chapter—it is the foundation woven through every action. Complacency, not complexity, causes most workshop incidents. This section consolidates essential protocols often fragmented across guides, emphasizing why each practice matters and how to integrate them consistently. Your goal: a workshop where safety feels natural, not burdensome.
Personal Protective Equipment (PPE): Your Essential Barrier
- Eye protection: ANSI Z87.1 safety glasses with side shields for every task—even measuring. For grinding, welding, or chipping: wear a face shield over safety glasses. Replace scratched lenses immediately. Prescription safety glasses are available.
- Hearing protection: Power tools exceed safe noise levels. Use earplugs (NRR 25–33 dB) or earmuffs. For prolonged exposure (grinding), dual protection (plugs + muffs) is wise.
- Respiratory protection:
- N95 mask: Light dust (sanding, filing).
- P100 respirator (half-face): Essential for metal fumes (welding galvanized steel), fine grinding dust, solvent vapors. Fit-test annually.
- Note: “Metal fume fever” from zinc oxide mimics flu but repeated exposure causes lasting harm. Never skip respiratory protection with coated metals or welding.
- Hand protection:
- Leather gloves: Cutting, grinding, handling sharp edges.
- Welding gloves (gauntlet): Heat-resistant for welding/brazing.
- Mechanic’s gloves: Precision tasks (drilling, assembly)—reinforced palms, cut-resistant.
Critical rule: Never wear gloves near rotating tools (drills, lathes, mills)—they can catch and pull hands in. Remove gloves for these operations; use push sticks. - Body protection: Flame-resistant (FR) cotton or leather apron for welding/grinding. Avoid synthetics (nylon, polyester)—they melt onto skin. Wear long sleeves, pants without cuffs (traps sparks), and steel-toed boots.
Workspace Safety: Engineering Out Hazards
- Ventilation:
- Welding/grinding: Use cross-ventilation (fans exhausting out) or dedicated fume extractor positioned near the source. Open windows alone are insufficient.
- Solvents/chemicals: Work outdoors or with exhaust fan vented outside. Store in approved containers away from heat.
- Fire prevention:
- Keep Class ABC fire extinguisher (5-lb minimum) and sand bucket within arm’s reach of hot-work areas.
- Clear flammables (paper, rags, solvents) from a wide radius. Use welding blankets to shield nearby surfaces.
- After welding/grinding, monitor the area for 30+ minutes for smoldering sparks—especially in wall cavities or under floors.
- Tool safety:
- Unplug before changing blades, bits, or wheels.
- Never remove guards—they contain fragments during failures.
- Inspect cords for damage; repair or replace immediately. Use GFCI outlets for outdoor/wet locations.
- Store tools properly: Hang grinders by triggers; coil cords neatly.
- Ergonomics and organization:
- Stand on anti-fatigue mat during prolonged work.
- Keep floor clear of tripping hazards. Use magnetic sweepers for metal shavings.
- Position task lighting to eliminate shadows on workpiece.
- Maintain a well-stocked first aid kit: burn cream, gauze, bandages, tweezers (for splinters), emergency numbers. Refresh quarterly.
- Weather awareness: When working outdoors, avoid wet conditions to prevent electrical hazards and accelerated rust on freshly cut edges.
Emergency Preparedness: Calm Response Saves Harm
- Know your risks:
- Electrical: Keep liquids away from tools. Test GFCIs monthly.
- Fire: Know escape routes. Practice PASS method (Pull pin, Aim low, Squeeze handle, Sweep side-to-side).
- Chemical: Keep SDS sheets accessible. Know first aid (flush eyes/skin with water for 15+ minutes; seek medical help).
- First response protocols:
- Eye injury: Flush immediately with eyewash for 15+ minutes. Seek medical care even if pain subsides.
- Burn: Cool under running water for 10 minutes. Do not apply ice, butter, or ointments. Cover loosely with sterile gauze.
- Embedded metal: Do not remove—stabilize and seek emergency care.
- Communication: Avoid working alone on high-risk tasks (welding, heavy lifting). Inform someone of your location and expected duration. Keep a charged phone accessible.
Safety is a practiced mindset. Begin each session with a 60-second “safety scan”: PPE on? Workspace clear? Tools inspected? Fire equipment ready? Share near-miss experiences with fellow makers—they are invaluable learning opportunities without injury. Respect the tools, honor the material, and protect yourself relentlessly. Your workshop should feel secure, focused, and empowering.
Troubleshooting Common Metalworking Challenges
Even experienced makers encounter hurdles. This section offers actionable solutions to frequent issues across cutting, shaping, and joining—framed not as failures, but as data points for growth. Each solution includes the underlying why, empowering you to adapt confidently.
Cutting Challenges
- Angle grinder wheel shatters:
Cause: Damaged/expired wheel, mismatched RPM, or forced cut.
Solution: Inspect wheel for cracks before every use. Verify grinder RPM ≤ wheel rating. Let the wheel cut at its own pace—never force. Store wheels flat in dry conditions. Replace per manufacturer date (typically 2 years). - Bandsaw blade drifts/cuts crooked:
Cause: Incorrect tension, dull teeth, or improper feed rate.
Solution: Adjust tension until blade “pings” like a guitar string. Ensure guide blocks are snug. Feed metal slowly; forcing causes drift. For thick stock, use a wider blade (½”+) for stability. - Drill bit walks when starting:
Cause: Bit not centered; insufficient pilot dimple.
Solution: Center-punch deeply. Start with small pilot bit (1/16″), then step up. Use a drill guide block for perpendicular holes. Apply light pressure until bit bites.
Shaping Challenges
- Metal cracks when bending (outer radius):
Cause: Bend radius too tight; bending against grain; cold metal brittleness.
Solution: Increase radius. Anneal bend area (heat dull red, cool slowly). Bend across grain direction. For tight bends on thick metal, drill relief holes along the inside bend line first. - Springback (bend opens after release):
Cause: Material elasticity; insufficient overbend.
Solution: Overbend 2°–5° (test on scrap first). Use a forming block to hold shape during cooling. For brakes, adjust the stop block. - Wrinkles form on inner bend radius of tubing:
Cause: Lack of internal support.
Solution: Pack tube with dry sand (plug ends with tape) or insert a spring mandrel before bending.
Joining Challenges
- Weld beads lumpy, porous, or uneven:
Cause: Incorrect settings, dirty metal, or drafts disrupting gas.
Solution: Clean base metal meticulously. Fine-tune voltage/wire speed on scrap—listen for consistent sizzle. Weld draft-free. Verify gas flow rate (20–25 CFH); check hose connections. Replace worn contact tips. - Brazed joint leaks or lacks strength:
Cause: Poor fit-up (gap too large/small), insufficient flux, uneven heating.
Solution: Ensure 0.002″ gap. Apply fresh flux to clean surfaces. Heat both pieces evenly until flux flows clear. Touch filler rod to the joint—not flame—to activate capillary action. - Bolted joint loosens under vibration:
Cause: Insufficient clamping force; no locking mechanism.
Solution: Use thread-locking compound (blue for removable; red for permanent). Add split lock washers or toothed lock washers. For critical joints, use nylon-insert lock nuts or safety wire. Torque in crisscross pattern.
Material-Specific Challenges
- Aluminum gums up blades/bits:
Solution: Use blades/bits designed for non-ferrous metals (higher tooth count). Apply cutting lubricant. Drill at higher RPM with light pressure. - Stainless steel dulls tools rapidly:
Solution: Cut slowly with sharp, stainless-specific blades. Use ample cutting fluid. Maintain continuous motion to reduce work-hardening. - Rust appears quickly after cutting mild steel:
Solution: Apply rust converter or zinc-rich primer within hours. Store metal off concrete floors (moisture wicks up). For storage, use vapor corrosion inhibitor (VCI) paper.
Embracing the Learning Cycle
Every imperfect cut, cracked bend, or weak joint teaches you about material behavior, tool limits, or technique nuances. Keep a simple workshop journal:
– Date, project, material, tool used
– What occurred (photo if helpful)
– Suspected cause
– Solution attempted
– Result
Review monthly. Patterns emerge—e.g., “I consistently under-torque bolts on aluminum.” This transforms setbacks into targeted growth. Share challenges in maker communities; collective wisdom accelerates learning. Mastery isn’t avoiding errors—it’s diagnosing and adapting with patience and purpose.
Your Questions, Answered
Q: What’s the most affordable, low-risk way to start metalworking with no prior experience?
A: Begin with foundational hand tools: a 12-inch hacksaw (with 32-TPI blades), sturdy vise, ball-peen hammer, set of files (flat, round, half-round), center punch, combination square, and ANSI-approved safety glasses. Total investment remains modest. Source free or low-cost mild steel scraps from hardware store cutoff bins or local metal shops. Focus on precision: scribe lines carefully, clamp securely, deburr every edge. This builds essential muscle memory and material intuition without financial pressure. Your first project? A simple key holder from ⅛-inch steel flat bar: cut to size, drill holes, file edges smooth, mount with screws. Success here builds authentic confidence. As projects evolve, add tools intentionally—like an angle grinder for efficient cutting/grinding. Rent or borrow specialized equipment (welders) for initial trials. Engage online maker communities (r/Metalworking, Instagram crafters) for encouragement and advice. Progress patiently; skill compounds with consistent, mindful practice.
Q: Can I create strong, permanent joints without owning a welder?
A: Absolutely. Mechanical fastening and structural adhesives deliver robust, reliable joints for most DIY applications. For a garden bench frame: cut angle iron to size, drill aligned holes, apply thread-locking compound to bolts, assemble with washers and lock nuts. For sheet metal projects (toolbox, enclosure), pop rivets provide strong, clean joints—practice on scrap to master technique. High-strength metal-filled epoxies bond permanently for repairs (cracked bracket, broken handle); meticulous surface preparation is essential. Brazing with a propane torch and brass rod joins steel effectively for non-structural items (decorative art, light fixtures). The key is intelligent design: engineer joints to maximize your chosen method’s strengths (e.g., overlapping surfaces for adhesives, gussets for bolted corners). Many professional fabricators choose mechanical joints for serviceability and predictability—welding isn’t always superior.
Q: How do I prevent rust on mild steel projects after cutting and shaping?
A: Immediate post-fabrication protection is critical. Within hours of cutting/shaping:
1. Clean thoroughly with wire brush or sandpaper to remove scale and contaminants.
2. Wipe with solvent (acetone or mineral spirits) to eliminate oils.
3. Apply a rust-inhibiting primer (zinc-rich or rust-converting formulas work well).
4. Finish with enamel paint, powder coating, or clear protective coating.
For outdoor projects, prioritize complete coverage—pay attention to edges, holes, and hidden surfaces. Store finished pieces off concrete floors. For long-term storage of raw stock, use VCI paper or light oil coating. Regular maintenance (touching up scratches) extends life significantly.
Q: What’s the practical difference between brazing and soldering, and how do I choose?
A: The distinction lies in temperature and strength. Brazing uses filler metals melting above 840°F (450°C), creating joints approaching base metal strength—ideal for plumbing, HVAC, or joining dissimilar metals like steel to copper. Soldering uses lower-temperature fillers (below 840°F), suitable for electronics, copper pipe (with appropriate flux/solder), or light decorative work. Choose brazing when joint strength, temperature resistance, or dissimilar metal joining is required. Choose soldering for heat-sensitive contexts (electronics), quick repairs, or where lower strength suffices. Always match flux and filler to your specific metals and application—using plumbing solder on electronics causes corrosion; using electronics solder on pipes fails under pressure.
Q: Can I use my existing drill press for metal, or do I need a special one?
A: Most standard drill presses handle light to medium metalwork if used correctly. Critical adjustments:
– Use sharp, metal-specific drill bits (cobalt or high-speed steel).
– Reduce speed significantly compared to wood drilling (consult bit charts; often 300–1000 RPM for steel).
– Apply cutting fluid (light oil) to reduce heat and extend bit life.
– Secure workpiece firmly in a vise—never hold by hand.
– Start with a center punch dimple to prevent bit wander.
Avoid forcing the bit; let it cut at its own pace. For frequent or heavy metal drilling, a drill press with variable speed control and robust construction is advantageous, but many successful projects begin with adapted existing tools. Always prioritize secure workholding and appropriate speeds.
Q: How can I practice metalworking techniques safely without a dedicated workshop?
A: Start small and intentional:
– Focus on hand-tool techniques (hacksaw, files, snips) which require minimal space and no power.
– Work outdoors or in a well-ventilated garage with clear, stable surfaces.
– Use portable clamping solutions (bench vise that mounts to a sturdy table).
– Prioritize safety: wear PPE consistently, keep a fire extinguisher nearby, and clear the area of hazards before starting.
– Begin with thin, easy-to-cut metals (mild steel sheet, aluminum) to build confidence.
– Practice cuts and bends on scrap before project work.
– Join a local makerspace—they offer tool access, safety training, and community support at low cost. Many communities have tool libraries too. Progress incrementally; safety and skill development matter more than project scale.
Q: What are the most common beginner mistakes to avoid?
A: Awareness prevents setbacks:
1. Skipping safety gear—even for “quick” tasks.
2. Rushing preparation (poor measurements, unsecured workpieces).
3. Forcing tools (causes breakage, injury, poor results).
4. Neglecting deburring (sharp edges cause injury and weaken joints).
5. Ignoring material properties (trying to bend thick metal cold, using wrong blade).
6. Poor workspace organization (tripping hazards, misplaced tools).
7. Attempting advanced techniques (welding thick steel) before mastering fundamentals.
Start with simple projects. Double-check measurements. Clamp everything. Respect the material and tools. Mistakes will happen—view them as learning data, not failure.
Q: Are there eco-friendly practices for metalworking waste and chemical disposal?
A: Yes—thoughtful stewardship matters:
– Recycle all metal scraps through certified scrap metal dealers (many pay for ferrous metals).
– Collect grinding/swarf debris with magnetic sweepers; keep steel and non-ferrous metals separate for recycling.
– Dispose of solvents, oils, and chemical residues per local hazardous waste regulations—never pour down drains.
– Use biodegradable cutting fluids where feasible.
– Repurpose cutoffs and remnants for smaller projects or donate to schools/makerspaces.
– Choose water-based cleaners over harsh solvents when effectiveness allows.
Small consistent actions create meaningful impact. Many suppliers accept used abrasive wheels for recycling—ask locally.
Q: How do I know if my weld (or joint) is strong enough for its intended use?
A: Strength validation combines technique, design, and context:
– Visual inspection: Look for consistent bead width, no cracks/porosity, full penetration at the root (for critical joints).
– Design margin: Engineer joints to handle expected loads with safety margin (e.g., a shelf bracket should support 3x anticipated weight).
– Non-destructive testing: For critical non-structural joints, perform a gentle flex test on scrap using identical technique.
– Context awareness: A welded garden trellis has different demands than a structural beam. When in doubt:
– Consult engineering resources for load calculations.
– Use mechanical fasteners with known shear values for critical applications.
– Seek feedback from experienced makers on forums.
Never use a joint in a safety-critical application (overhead loads, lifting points) without verified engineering or professional assessment. When uncertainty exists, choose the more conservative joining method.
Q: How do weather and environment affect outdoor metalworking projects?
A: Environmental factors significantly impact outcomes:
– Humidity/Rain: Accelerates rust on cut edges; avoid welding or grinding in wet conditions (electrical hazard, poor weld quality). Complete fabrication indoors when possible; apply primer immediately after final shaping.
– Temperature: Very cold metal becomes more brittle—avoid sharp impacts or bending below freezing. Extreme heat affects adhesive curing times and user stamina.
– Wind: Disrupts shielding gas during welding, causing porosity; creates fire hazards with sparks. Use wind barriers when welding outdoors.
– Coastal/Salty Air: Demands corrosion-resistant materials (stainless 316, aluminum, galvanized steel) and robust finishing (powder coating, marine-grade paint).
Plan projects around favorable conditions. For outdoor fabrication, prioritize weather-resistant materials and immediate protective finishing. Store raw materials covered and elevated off the ground.
Conclusion and Next Step
Recap: Metalworking mastery grows from understanding the interconnected Trinity Framework—cutting, shaping, and joining—and approaching each phase with material awareness, safety mindfulness, and adaptive technique. Success lies not in expensive tools, but in thoughtful preparation, respect for the medium, and learning from each iteration. You’ve explored methods scalable to your space and budget, safety protocols that protect without paralyzing, and troubleshooting mindsets that turn challenges into growth.
The 24-Hour Rule: Before beginning your next project, dedicate 24 hours to intentional planning. Sketch your design. Calculate bend allowances. Select joining methods using the decision tree. Verify tool readiness and safety gear. Source materials thoughtfully. This small ritual prevents wasted effort, builds confidence, and transforms ambition into achievable action. Start with one modest project—a tool hook, a plant label holder—and complete it fully. Momentum builds through finished work.
The Bigger Perspective: Metalworking connects you to a timeless human tradition of shaping material with purpose. Each project cultivates patience, problem-solving, and pride in tangible creation. Your workshop becomes a space of continuous learning—a dialogue between maker and material. Embrace the journey: celebrate small victories, document lessons learned, and share your progress. The most durable creations begin with a single, mindful cut. You are ready to begin.
Explore Our Complete System:
[Workshop Safety Fundamentals: Building a Culture of Care] | [Sustainable Sourcing: Creative Uses for Reclaimed Metal] | [Metal Finishing Mastery: From Rust Prevention to Artistic Patinas] | [Tool Care Essentials: Maximizing Longevity and Performance] | [Beginner Project Pathway: 5 Builds to Build Confidence] | [Reading Metal: A Visual Guide to Material Identification] | [Community Connections: Finding Local Makerspaces and Mentorship]