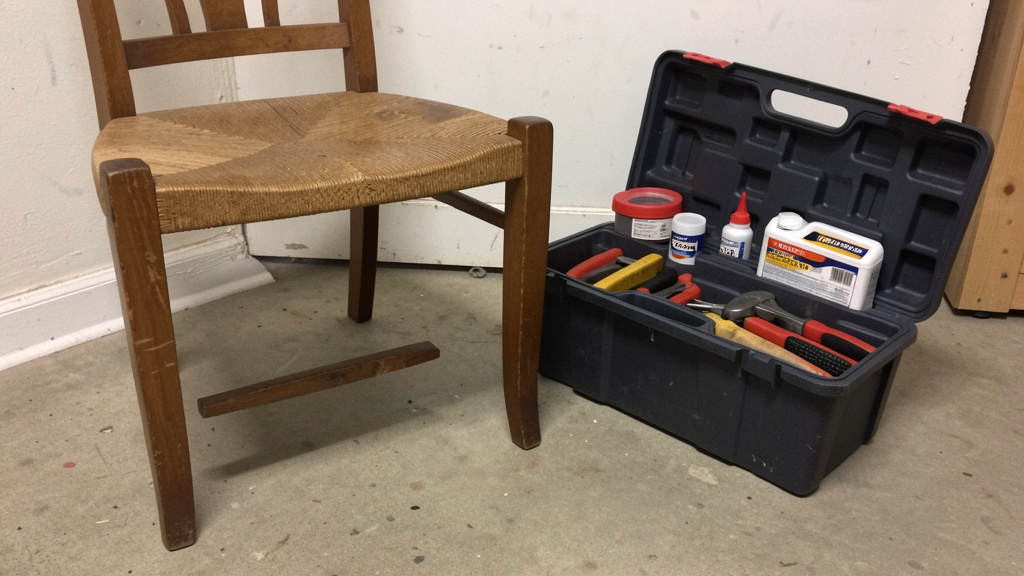
Restore Stability and Function with Thoughtful Techniques, Adaptable Methods, and Respect for Your Furniture’s Journey
That subtle wobble in your favorite dining chair. The hairline crack tracing across a well-loved bookshelf. The leg that finally gave way under your morning coffee mug. Furniture damage is a familiar part of home life—a quiet signal of use, memory, and time. Yet most repairs fall well within reach of patient hands and thoughtful care. This guide offers a clear, adaptable path to diagnosing issues, selecting appropriate methods for your specific situation, and executing repairs that honor both function and history. Whether you’re stabilizing a loose joint before guests arrive or carefully mending a cherished heirloom, this framework meets you where you are, with realistic expectations and practical steps.
Introduction: Understanding Why Furniture Changes
Furniture shifts and settles through natural, predictable processes: wood responds to seasonal humidity changes; repeated use concentrates stress at joints; adhesives and finishes evolve over decades. Recognizing these patterns transforms frustration into informed action. Historically, furniture was designed for repair—mortise-and-tenon joints, pinned connections, and replaceable components allowed generations to maintain pieces thoughtfully. While modern manufacturing sometimes uses less repairable methods (cam locks, particleboard substrates), many items still respond well to careful intervention when approached with realistic expectations and respect for materials.
This guide rests on a foundational perspective: Furniture damage exists on a spectrum of repairability, not as a binary of “fixable” versus “broken.” A wobbly chair leg and a separated table apron share underlying principles—they differ in scale, material constraints, and required patience. By learning core concepts (surface preparation, adhesive behavior, wood movement), you develop adaptable skills applicable across many scenarios. We move beyond fragmented quick-fix videos toward a cohesive approach: assess thoughtfully, prepare thoroughly, choose methods aligned with your constraints, and prioritize safety and sustainability. This isn’t about perfection—it’s about care, continuity, and conscious stewardship of the objects that shape your home.
The Damage Assessment Framework: A Four-Level Approach
Before selecting tools or materials, spend five minutes observing. Thoughtful diagnosis prevents wasted effort and supports lasting results. This framework helps categorize what you see—not as rigid labels, but as guides to appropriate action.
Level 1: Instability & Micro-Movement (The “Wobble Zone”)
Common signs: Chair rocks slightly when used; table leg shifts under gentle pressure; drawer slides unevenly; hairline gap visible at a joint (less than 1/16 inch).
Typical causes: Adhesive fatigue from age, minor wood shrinkage due to humidity shifts, loose mechanical fasteners, or accumulated dust preventing tight contact.
Key insight: At this stage, wood fibers and joint geometry remain sound. The goal is reactivation—cleaning, re-adhering, or re-tightening—not reconstruction. Addressing Level 1 issues early often prevents progression.
Level 2: Surface Compromise & Partial Failure
Common signs: Visible hairline cracks along joints; splintered wood near screw holes; lifted veneer; separation between 1/16 and 1/8 inch; minor chips or dents; drawer front pulling away.
Typical causes: Repeated stress exceeding wood’s flexibility; moisture exposure causing swelling/shrinking cycles; minor impacts; or initial construction limitations.
Key insight: Structural continuity is weakened but often restorable. Success depends on thorough cleaning of old adhesive, precise realignment, and sometimes supplemental reinforcement (dowels, splines). Surface repairs (veneer, finishes) are typically addressed after structural stability is restored.
Level 3: Component Separation & Major Breaks
Common signs: Leg fully detached; apron broken cleanly; crack propagating deeply through solid wood (over 1/8 inch); shattered spindle or slat.
Typical causes: Sudden impact (tripping, falling object); long-term stress concentration; moisture-related degradation; or adhesive failure compounded by movement.
Key insight: Full disassembly is often beneficial for thorough cleaning and alignment. Repair focuses first on restoring mechanical strength, then aesthetics. Grain direction, wood movement, and load paths become essential considerations. Patience during clamp-up prevents misalignment that compromises longevity.
Level 4: Extensive Damage Requiring Reconstruction
Common signs: Multiple broken structural elements; severe water damage causing delamination or softening; missing critical components; fire/smoke residue.
Typical causes: Significant accidents, prolonged environmental exposure, or inherent limitations of low-density materials.
Key insight: This moves into restoration territory. Success requires honest assessment of sentimental value, available skills, tools, and time. Ethical practice includes recognizing when professional conservation is appropriate—especially for pieces with historical significance, documented provenance, or complex craftsmanship. Choosing not to repair is a valid, responsible decision.
A Guiding Principle: Repair follows diagnosis. Selecting tools or adhesives before understanding the damage level often leads to ineffective results. For example, clamping a separated joint without first removing old adhesive residue typically creates a weaker bond than careful preparation would allow.
Level 1 Repairs: Addressing Wobbles with Careful Attention
Level 1 interventions build foundational confidence. They’re often quick (under 30 minutes), require minimal tools, and offer immediate feedback. Precision in preparation makes the difference between a temporary fix and lasting stability.
Step 1: Locate the True Source of Movement
Movement felt in one area may originate elsewhere. A wobbly chair leg might trace back to a loose seat rail connection.
– The Diagnostic Rock Test: Apply gentle, steady pressure while a helper observes exactly where movement begins. Place a fingertip on suspected joints. Does motion start at the leg-to-apron junction? Further up?
– The Paper Test: Slide a thin strip of paper (receipt paper works well) into gaps around joints. Where it slides in easily marks separation. Lightly mark these spots with a pencil.
– Important nuance: Movement in one joint often coexists with looseness elsewhere. Check all connected joints—e.g., a wobbly table leg frequently pairs with a loose stretcher on the opposite side.
Step 2: Clean Before Applying Adhesive
Residue from old glue, wax, or dust creates a barrier to new adhesion. Skipping this step is a frequent cause of premature repair failure.
– For accessible joints (screw holes, bolt connections): Remove fasteners. Gently scrub the hole and threads with a stiff nylon brush (an old toothbrush) dipped in denatured alcohol. Alcohol evaporates quickly, avoids swelling wood like water might, and dissolves oily residues. Allow to dry fully (about 2 minutes).
– For glued joints not being disassembled: Using a syringe (without needle), carefully introduce a small amount of denatured alcohol into the gap. Wait 60 seconds—this softens certain old adhesives like hide glue or PVA. Wipe away dissolved residue with a cotton swab. Avoid water—it can swell wood fibers, complicating reassembly.
– Gentle cleaning tip: For stubborn residue in mortise-and-tenon joints, wrap fine (400-grit) sandpaper around a chopstick. Rotate gently inside the mortise to abrade residue without enlarging the cavity.
Step 3: Select and Apply Adhesive Thoughtfully
Not all wood adhesives suit every situation. Matching the adhesive to the context supports better outcomes.
| Adhesive Type | Best Suited For | Why It Fits | Practical Application Note |
|---|---|---|---|
| PVA Wood Glue (e.g., Titebond Original) | Solid wood indoor joints | Bonds well with wood fibers; sandable; low odor | Apply a thin, even layer to both surfaces. Excess glue can prevent tight contact. |
| Liquid Hide Glue | Antique pieces; repairs where future reversibility matters | Compatible with historic adhesives; can be softened later with heat/moisture | Warm bottle gently in hot water (approx. 120°F) for easier flow into micro-gaps. |
| Polyurethane Adhesive (e.g., PL Premium) | Outdoor furniture; damp-prone areas; bonding wood to metal | Expands slightly to fill tiny voids; waterproof | Lightly dampen the wood surface first—moisture activates curing. Wipe excess foam promptly with mineral spirits. |
| Epoxy (5-minute) | Situations involving metal brackets or non-wood elements | Strong bond across dissimilar materials | Generally avoid for pure wood-to-wood Level 1 repairs—rigidity may not accommodate natural wood movement. |
Application Guidance:
1. Apply sparingly using a disposable brush or toothpick. Target the joint’s center—capillary action draws adhesive inward.
2. For tight gaps identified by the paper test, a syringe allows precise delivery deep into the separation.
3. Wipe away all excess adhesive immediately with a damp cloth. Dried residue inhibits proper clamping pressure.
4. Clamping is essential: Even joints that seem “self-holding” benefit from even pressure. Use rubber bands for delicate spindles; quick-grip clamps for chair legs. Apply pressure until a thin, consistent bead of adhesive appears—this indicates full surface contact.
5. Cure time matters: Allow minimum handling time per product instructions (often 1 hour), but wait 24 hours before regular use. Early stress can create micro-fractures in the bond.
Step 4: Address Loose Mechanical Fasteners
Loose screws often signal stripped holes—not just insufficient tightening. Simply replacing the screw usually worsens the issue.
– Toothpick or matchstick method (for minor looseness): Remove screw. Dip 2–3 wooden toothpicks or matches (sulfur end removed) in adhesive, insert into hole, break flush. Reinsert screw. Note: Best for very slight stripping; compressed wood may not hold long-term under load.
– Dowel reinforcement (more durable):
1. Drill out the stripped hole to match a hardwood dowel diameter (e.g., 3/8″).
2. Cut dowel 1/8″ longer than hole depth.
3. Coat dowel and hole interior with PVA adhesive. Tap firmly into place with a mallet.
4. Saw flush, redrill pilot hole, reinsert screw.
Why it helps: Replaces compromised material with solid, grain-aligned wood for the screw to grip.
Common Level 1 Considerations
- Bolt tension: Tighten until snug, then one-quarter turn more. Over-tightening can create new stress points. If wobble persists, the issue is likely adhesive-related, not torque.
- Adhesive caution: Avoid cyanoacrylate (superglue) for structural wood joints—it creates brittle bonds prone to sudden failure under stress and bonds skin instantly.
- Environmental awareness: Very dry conditions (<30% relative humidity) during repair may lead to future gaps as wood expands. Ideal working humidity is typically 40–50%. A simple hygrometer helps monitor conditions.
- Verification: After clamp removal and full cure, repeat the Diagnostic Rock Test before returning the piece to service.
Example Scenario: Dining Chair with Lateral Leg Movement
Observation: Front-right leg shifts sideways when seated. Paper test reveals a 1/32″ gap at the leg-apron joint. Screw at joint is tight.
Assessment: Level 1 adhesive fatigue in a mortise-and-tenon joint.
Approach:
1. Inject denatured alcohol via syringe into the gap. Wait 60 seconds. Wipe residue.
2. Inject PVA wood glue into the gap using the syringe.
3. Position a rubber band clamp around leg and apron. Tighten until a thin adhesive bead appears.
4. Wipe excess. Allow full cure (24 hours).
5. Re-test: No detectable movement.
Why this approach works: Alcohol cleaned the micro-gap; syringe delivered adhesive precisely; rubber band applied even pressure without marring wood. Disassembly was unnecessary.
Level 2 Repairs: Mending Cracks, Splits, and Surface Issues
Level 2 repairs require deeper attention to surface preparation and material behavior. The focus shifts toward restoring continuity while working with the piece’s existing character. Patience during cleaning and alignment supports durability.
Understanding Crack Types
Not all cracks require identical treatment. Observation guides the response. Examine under angled light (a phone flashlight works well) to see texture and direction.
| Crack Type | Visual Clues | Typical Cause | Repair Consideration |
|---|---|---|---|
| Stress Crack | Follows wood grain; often near joints; smooth edges | Repeated flexing at a weak point | Prioritize—indicates developing structural concern |
| Impact Split | Cuts across grain; jagged edges; possible splinters | Direct blow (knee, dropped object) | Moderate priority—cosmetic but may worsen with use |
| Moisture-Related Crack | Multiple fine cracks (“checking”); common on end grain | Rapid drying or humidity fluctuation | Often stable; focus shifts to environmental prevention |
| Adhesive Failure | Clean separation along joint line; old residue visible | Initial poor glue-up or degraded adhesive | High priority—requires joint re-preparation and re-adhesion |
Step 1: Stabilize Before Cleaning
A crack under tension may widen during cleaning. Gentle stabilization helps:
– For cracks where edges spring apart: Lightly pinch edges together. If they resist staying closed, the wood holds internal stress.
– Temporary stabilization: Place a small piece of low-tack painter’s tape across the crack on both sides. This holds fragments during cleaning without leaving residue.
– Veneer exception: Never tape directly over lifted veneer—adhesive may damage the thin layer. Use gentle finger pressure only.
Step 2: Clean the Fracture Surfaces
Residue prevents new adhesive from bonding to wood fibers.
– Solid wood cracks: Use a dental pick or sharpened ice pick to gently remove debris from the crack interior. Work from both sides toward the center.
– Lifted veneer: Slide a thin blade (utility knife blade wrapped in tape for safety) under the edge. Carefully scrape adhesive residue from the substrate, not the veneer back.
– Solvent guidance:
– Water-based finishes (shellac, lacquer): Denatured alcohol on a cotton swab.
– Oil-based finishes (polyurethane, varnish): Mineral spirits.
– Uncertain finish: Test solvent on an inconspicuous area first.
– Surface preparation: After cleaning, lightly abrade only the fracture surfaces with 220-grit sandpaper wrapped around a toothpick. This creates microscopic “tooth” for adhesion. Avoid sanding surrounding finished areas.
Step 3: Choose a Filling Approach Aligned with Context
Method depends on crack width, location, visibility, and your priorities (strength vs. invisibility).
Method A: Capillary Action for Fine Cracks (< 1/32″)
Ideal for: Hairline cracks on visible surfaces where minimal intervention is preferred.
Materials: Thin-viscosity cyanoacrylate (CA) adhesive, accelerator spray (optional), fine sandpaper.
Process:
1. Align crack edges carefully. Hold with low-tack tape if needed.
2. Apply one small drop of thin CA adhesive to the crack end. Capillary action draws it inward.
3. If using accelerator, apply sparingly to the opposite end to set quickly.
4. Once cured, sand flush with 400-grit paper. Polish gently with paste wax.
Note: Use in a ventilated area. Wear nitrile gloves—CA bonds skin instantly. This method creates a nearly invisible repair but is best for non-structural areas.
Method B: Epoxy Fill for Structural Integrity (Cracks 1/32″ to 1/8″)
Ideal for: Cracks in load-bearing areas (legs, rails) where strength is prioritized.
Materials: Epoxy resin, fine sawdust (“wood flour”) from the same wood species, mixing stick.
Process:
1. Mix epoxy per instructions. Stir in wood flour until consistency resembles peanut butter.
2. Press mixture firmly into the crack with a putty knife. Slightly overfill.
3. Cover with plastic wrap (prevents epoxy from sticking to clamps). Clamp edges together gently.
4. Cure fully (typically 24 hours). Remove plastic. Sand flush.
Color note: Epoxy doesn’t absorb stain like wood. For better blending, mix a tiny amount of artist’s oil paint into the epoxy before application, or accept the repair as part of the piece’s story.
Method C: Dutchman Patch for Larger Damage
Ideal for: Impact damage with missing wood; cracks too wide for filling.
Materials: Matching wood scrap (same species, similar grain), chisel, saw, PVA adhesive, clamps.
Process:
1. Cut a rectangular “plug” from matching scrap (align grain direction).
2. Trace plug shape onto damaged area. Carefully chisel out damaged wood to match plug thickness.
3. Dry-fit plug. Adjust until snug.
4. Apply PVA adhesive to plug and cavity. Insert plug. Clamp. Wipe excess.
5. Cure fully. Sand flush. Blend finish as desired.
Historical note: This technique has been used by woodworkers for centuries to restore integrity while maintaining visual continuity.
Veneer-Specific Guidance
Veneer demands gentle handling due to its thinness.
– Lifted edge: Clean substrate and veneer back. Apply a tiny amount of PVA adhesive with a toothpick. Press down firmly. Weight with a book for 1–2 hours.
– Bubble: Pierce at the edge with a sharp needle. Inject a minimal amount of adhesive. Press flat. Weight.
– Missing section: Cut a patch from veneer scrap. Trace onto damaged area. Carefully cut out damaged veneer. Glue patch. Clamp between wax paper and flat boards.
– Critical note: Avoid water-based adhesives on veneer over particleboard—moisture can cause substrate swelling. Contact cement or hide glue may be preferable.
Addressing Surface Imperfections
Shallow scratches (finish only): Rub gently with walnut meat—natural oils can darken the scratch. Alternatively, use a scratch-concealing marker matched to wood tone.
Medium dents (compressed wood): Place a damp cloth over the dent. Apply a warm (not hot) iron for 5–10 seconds. Steam may help fibers expand. Repeat cautiously. Lightly sand afterward if needed.
Deep gouges: Fill with epoxy/wood flour mix (Method B). For antique pieces with historical value, consider whether visible wear adds character—over-repair can diminish authenticity.
Level 2 Repair Checklist
- [ ] Identified crack type and location before proceeding
- [ ] Stabilized edges gently during preparation (if needed)
- [ ] Cleaned fracture surfaces thoroughly
- [ ] Selected fill method matching the damage context
- [ ] Tested color match on scrap material first (if applicable)
- [ ] Allowed full cure time before sanding or use
- [ ] Considered root cause (e.g., added humidity monitoring if moisture-related)
Level 3 Repairs: Rejoining Broken Components with Patience
Level 3 repairs involve detached parts or clean breaks. Success hinges on meticulous surface preparation, precise alignment, and respecting wood’s natural behavior. Rushing alignment often leads to weak, misaligned joints.
Step 1: Consider Disassembly (When Feasible and Safe)
Why it helps: Access to hidden surfaces allows thorough cleaning of old adhesive—a critical factor for bond strength. Spot repairs on complex breaks often leave weak points.
– Identify connection types:
– Mortise-and-tenon: Look for wooden pegs (dowels). Drill out carefully with a bit slightly smaller than the peg.
– Dovetail: Gently wiggle while applying low heat (hair dryer) to soften old adhesive. Never force—splintering is likely.
– Screws/Bolts: Remove all fasteners. If seized, apply penetrating oil, wait 15 minutes, tap screw head lightly with a hammer to break corrosion.
– Document first: Take clear photos from multiple angles before disassembly. Sketch joint orientations. Store screws in labeled containers (an egg carton works well).
– Safety reminder: Wear safety glasses. Old adhesive can fragment unexpectedly during disassembly.
Step 2: Thorough Surface Preparation
A repair bond is only as strong as its contact with clean wood.
– Removing old adhesive: Use a sharp chisel (bevel side down) to pare residue from joint surfaces. Work with the wood grain. For mortises, a narrow chisel helps.
– Final smoothing: After scraping, lightly sand joint surfaces with 120-grit paper until uniformly smooth. Avoid rounding edges—flat surfaces ensure full contact.
– Solvent wipe (final step): Wipe surfaces with denatured alcohol on a lint-free cloth. Removes oils, dust, and microscopic residue. Allow to dry fully (about 2 minutes).
– Dry-fit check: Press cleaned surfaces together without adhesive. They should mate closely with minimal gaps. If light passes through, further flattening may be needed.
Step 3: Reinforcement Options for Longevity
A simple re-glue may not withstand repeated stress. Reinforcement distributes load. Choose based on break location, wood type, and your tools.
Dowel Reinforcement (Widely Applicable for Legs, Rails)
Why it helps: Dowels create mechanical interlock beyond adhesive strength and aid alignment during clamp-up.
Materials: Hardwood dowels (maple, oak), dowel jig (helpful for accuracy), drill, sandpaper.
Process:
1. Dry-fit broken pieces. Mark alignment with pencil lines across the break.
2. Clamp pieces temporarily in perfect alignment.
3. Drill matching holes: Use a dowel jig to help ensure holes are perpendicular. Depth should be ~1.5x dowel diameter (e.g., 3/8″ dowel → 9/16″ deep).
4. Test-fit dowels. They should slide in snugly. Lightly sand dowel ends if tight.
5. Apply adhesive to holes and dowels. Insert dowels. Apply adhesive to break surfaces.
6. Clamp firmly. Wipe excess. Cure fully.
Alignment tip: Position dowel holes slightly offset from the break line to avoid creating a new stress concentration directly on the repair.
Splines for Flat Breaks (Tabletops, Panels)
Why it helps: Splines (thin wood strips) bridge breaks across the grain, resisting shear forces.
Materials: Thin hardwood strip (approx. 1/8″ thick), router or handsaw, PVA adhesive.
Process:
1. Cut a shallow groove (approx. 1/16″ deep) across the break on both pieces.
2. Cut spline to fit groove snugly.
3. Apply adhesive to groove and spline. Insert spline. Clamp break surfaces together.
4. Cure. Sand flush.
Alternative: For pieces where routing isn’t feasible (e.g., antiques), a “butterfly key” (inlaid bowtie-shaped patch) serves both function and decoration.
Sistering for Compromised Sections
Why it helps: Adds supportive material alongside weakened areas, sharing load. Especially useful for particleboard, MDF, or rotted sections.
Materials: Matching wood strip, epoxy adhesive, clamps.
Process:
1. Cut wood strip slightly longer than the damaged section.
2. Roughen surfaces of both strip and damaged area with sandpaper.
3. Mix epoxy. Apply to both surfaces.
4. Clamp strip firmly against the damaged area. Wipe excess.
5. Cure fully (epoxy often requires 48+ hours for maximum strength).
Application example: Reinforcing a broken chair seat rail; stabilizing the base of a table leg with soft spots.
Step 4: Thoughtful Clamp-Up
Clamping applies controlled pressure—not just “tightening.”
– Clamp selection guidance:
– Bar clamps: Ideal for long, straight joints (table aprons, shelves).
– Pipe clamps: Useful for extra-long reaches (bed frames, large tables).
– Band clamps: Conform to complex shapes (chair seats, curved parts).
– Spring clamps: Helpful for temporary holds during setup.
– Protect surfaces: Always place scrap wood, leather pads, or cardboard between clamp jaws and furniture to prevent marring.
– Pressure indicator: Tighten clamps until a thin, continuous bead of adhesive appears along the joint. No bead suggests insufficient pressure; thick globs indicate too much adhesive was applied.
– Alignment check: Verify alignment with a square during clamping. Adjust clamp pressure incrementally—don’t wait until adhesive sets.
– Cure time reality: PVA adhesive reaches handling strength in about an hour, but full strength typically requires 24 hours. Epoxy or polyurethane adhesives may need 48–72 hours. Avoid stressing the repair early. Cold or humid conditions may extend cure times.
Example Scenario: Chair Leg Detached at Apron Joint
Observation: Leg separated cleanly at mortise-and-tenon joint. Tenon fragment remains in mortise.
Assessment: Level 3 component failure requiring mortise cleaning, tenon repair, and reinforcement.
Approach:
1. Clear mortise: Carefully remove tenon fragment using needle-nose pliers and a dental pick. Clean mortise thoroughly.
2. Repair tenon: Reattach broken tenon fragment to leg using epoxy. Clamp. Cure fully (24 hours).
3. Reinforce: Drill two small holes (e.g., 1/4″) through the apron into the leg area near the joint (avoiding the original mortise). Insert short hardwood dowels with epoxy.
4. Reassemble: Apply hide glue to mortise and tenon. Insert leg. Secure with a band clamp. Wipe excess.
5. Cure and verify: Allow 48 hours. Perform rock test—no movement detected.
Why this approach works: Dowels provide mechanical strength beyond the reglued tenon; hide glue allows potential future disassembly; full cure time ensures bond integrity.
When Level 3 Repair May Not Be Practical
- Particleboard/MDF with shattered edges: Material lacks cohesive fibers for reliable bonding. Replacement of the component may offer better longevity.
- Multiple breaks in thin elements (spindles, slats): Time investment may outweigh functional or sentimental value. Consider creative adaptation (e.g., repurposing as a plant stand) or replacement.
- Structural breaks in valuable antique frames: When historical integrity is a priority, consulting a professional conservator is a responsible choice.
Level 4 Considerations: Reconstruction and Thoughtful Choices
Level 4 situations represent complex scenarios where repair intersects with personal values, skill awareness, and material limitations. This section emphasizes decision-making principles rather than prescriptive steps, supporting informed choices.
The Value Reflection Framework
Before investing significant time or resources, consider these dimensions calmly:
1. Personal Significance: Does this piece hold irreplaceable emotional meaning? (e.g., a grandparent’s rocking chair, a child’s first desk). High personal significance may justify greater effort.
2. Functional Role: Will the repaired piece serve an important daily purpose? Is replacement cost or availability a factor?
3. Historical Context: Is the piece antique (generally pre-1950), signed by a known maker, or part of a documented collection? When uncertain about historical value, pausing to consult a professional is prudent.
Sourcing Components Responsibly
- Original manufacturer: Many companies maintain parts archives or sell replacements years later. A polite inquiry can yield results.
- Salvage sources: Habitat ReStores, architectural salvage yards, or online marketplaces may offer “donor” pieces of similar era/style.
- Modern fabrication: For broken plastic components (drawer stops, brackets), 3D printing may be viable if you have access to scanning/modeling resources.
- Wood matching: If crafting a replacement, prioritize matching wood species and grain direction. A dissimilar patch (e.g., maple on oak) may be visually jarring and structurally problematic due to differing expansion rates.
Moisture Damage: A Patient Approach
Water exposure requires thorough drying before any repair attempt.
– Drying process: Place the piece in a dry, well-ventilated area (avoid direct sun or intense heat, which can warp wood). Use fans for airflow. For enclosed spaces (drawer boxes), include silica gel packs. Monitor with a moisture meter if available—proceed only when wood moisture content is near ambient levels (typically below 12%).
– Assessing soft areas: Gently probe with an awl. If wood feels soft or crumbles:
– Surface softness: Sand away compromised material until solid wood remains. Apply a wood hardener product. Fill voids with epoxy/wood flour mix.
– Deep compromise: Structural integrity may be too degraded for reliable DIY repair. Sistering (Level 3 technique) or professional assessment may be needed.
– Delaminated layers: For separated plywood or veneer, inject PVA adhesive between layers using a syringe. Clamp firmly between flat boards lined with wax paper. Apply even weight. Cure fully (72 hours is often wise).
Fire or Smoke Exposure: Prioritizing Safety and Sensitivity
- Structural check first: Ensure the piece is sound. Charred wood is brittle and may not support weight safely.
- Odor management: Wipe surfaces with a solution of 1 part white vinegar to 2 parts water. For persistent odors, place activated charcoal bags inside enclosed spaces for 1–2 weeks.
- Surface cleaning: Use a TSP substitute per label instructions. Always test in a hidden area first—some cleaners can raise wood grain.
- Personal consideration: Severely damaged pieces may carry emotional weight. There is no obligation to restore. Choosing to repurpose materials or honor the piece’s history in another way is valid.
Recognizing Boundaries with Compassion
Ethical care includes knowing when to seek help or step back. Consider professional assistance when:
– The piece has documented historical significance or museum potential.
– Repairs require specialized tools or skills beyond your current scope (e.g., lathe work, steam bending).
– You feel persistent uncertainty or anxiety about causing irreversible change.
– The time, cost, or emotional investment feels disproportionate to the outcome.
Remember: Choosing not to repair is a conscious, respectful decision. Donating to a skilled woodworker, repurposing materials thoughtfully, or recycling components responsibly all honor the object’s journey.
Building a Practical Repair Toolkit
You don’t need an extensive workshop. Strategic investment in versatile, quality tools supports better results than numerous single-use items. This curated list covers most Level 1–3 scenarios.
Essential Toolkit (Approx. $150 Investment)
| Tool | Primary Use | Budget-Friendly Option | When to Upgrade | Practical Tip |
|---|---|---|---|---|
| Claw Hammer | Driving nails, light tapping | Stanley 16oz | Estwing 16oz | Use a wooden or rubber mallet for assembling joints to avoid surface dents. |
| Rubber Mallet | Assembling joints gently | Harbor Freight | Vaughan Dead Blow | Delivers controlled force without marring wood—essential for chair repairs. |
| Pry Bar (Small) | Separating stubborn joints | Stanley Wonder Bar | Vaughan | Slide a thin wood shim under the tip to protect surfaces during prying. |
| Clamps (Set) | Applying even pressure | Jorgensen Pony (2x 6″, 2x 12″) | Bessey | Start with versatile sizes. Add a band clamp later for complex shapes. |
| Chisels (1/4″, 1/2″) | Cleaning joints, paring | Narex | Lie-Nielsen | Keep edges sharp—dull tools require more force and increase slip risk. |
| Cordless Drill/Driver | Driving screws, drilling | DeWalt 20V | Milwaukee M18 | Include a variety of drill bits (1/16″–1/2″) and magnetic driver bits. |
| Screwdriver Set | Tightening fasteners | Klein Tools | Wiha | Magnetic tips prevent dropped screws in tight spaces. |
| Utility Knife | Trimming patches, cutting | Olfa | X-Acto | Change blades frequently—dull blades tear wood fibers. |
| Sandpaper Assortment | Smoothing repairs | 3M | Norton | Organize by grit (80, 120, 220, 400) in labeled envelopes. |
| Safety Glasses | Eye protection | Uvex | 3M | Non-negotiable. Wood chips and adhesive splatter pose real risks. |
Adhesive Selection Guide
- PVA Wood Glue (Titebond III): Waterproof variant; versatile for most indoor wood repairs.
- Liquid Hide Glue: Preferred for antiques or repairs where future reversibility is valued.
- Polyurethane Adhesive (PL Premium): Suitable for outdoor projects or bonding wood to metal.
- Epoxy System (e.g., System Three T-88): Ideal for structural fills, rotted wood repair, or gap-filling.
- Thin CA Glue + Accelerator: For hairline cracks (capillary action) or temporary holds.
- Pre-stained Wood Filler: For non-structural cosmetic fills where color match matters.
Specialty Items Worth Considering
- Dowel Jig ($20–30): Guides drill bits for perpendicular holes, improving dowel alignment accuracy.
- Moisture Meter ($30–50): Helps assess wood dryness before repair—critical for moisture-related damage.
- Clamp Pads ($10–15): Reusable rubber or felt pads protect finishes during clamping.
- Flush-Cut Saw ($15–25): Cuts dowels, pegs, or splines perfectly flush without scratching wood.
Tool Care Habits
- Clean after use: Wipe adhesive residue with a damp cloth. Dry thoroughly.
- Maintain edges: Sharpen chisels regularly—a sharp tool is safer and more effective.
- Prevent rust: Lightly oil metal parts (drill chucks, clamp screws) with 3-in-1 oil.
- Organize thoughtfully: Hang tools on pegboard or store in labeled containers. Reduces frustration during projects.
Safety Fundamentals
- Eye protection: Always wear safety glasses—wood fragments and adhesive splatter are unpredictable.
- Respiratory care: Use an N95 mask when sanding (especially older finishes) or working with epoxy dust.
- Ventilation: Work near open windows or use a fan when using solvents, adhesives, or finishes.
- Sharp tools: Counterintuitively, sharp blades require less force and slip less than dull ones.
- Workspace setup: Clear clutter, ensure good lighting, and keep a basic first-aid kit accessible.
Understanding Materials: Wood, Adhesives, and Movement
Grasping core material behaviors transforms repair from guesswork to informed practice. This section clarifies key concepts without overwhelming detail.
Wood Movement: Working With Nature
Wood absorbs and releases moisture with ambient humidity, causing expansion and contraction—primarily across the grain, not along its length. Ignoring this leads to future cracks or joint stress.
– Practical implications:
– Tabletops: Should attach to aprons with figure-8 fasteners or elongated slots—never glued directly across the grain. This allows seasonal movement.
– Panels in frames: Leave a small gap (approx. 1/8″) around the panel within the frame groove. The panel “floats” to expand and contract.
– Repair consideration: When patching, align the grain direction of the new wood with the surrounding area. Gluing across grain directions creates internal stress.
– Environmental management: Ideal indoor humidity for wood furniture is generally 35–55%. A $10 hygrometer helps monitor conditions. In dry winter months, a humidifier helps; in humid summers, a dehumidifier may be beneficial.
Adhesive Behavior: Matching Product to Purpose
| Property | PVA (Titebond) | Hide Glue | Epoxy | Polyurethane | CA Glue |
|---|---|---|---|---|---|
| Bond Strength | High (when applied correctly) | High | Very High | High | Medium (brittle) |
| Gap Filling | Poor | Fair | Excellent | Good | Poor |
| Water Resistance | Titebond III: Waterproof | Low | Waterproof | Waterproof | Low |
| Working Time | 5–10 min | 5–15 min (heat-sensitive) | 5–30 min | 15–20 min | Seconds |
| Reversibility | Difficult | Possible (heat/steam) | Permanent | Permanent | Permanent |
| Best Context | General wood repairs | Antiques, musical instruments | Structural fills, rotted wood | Outdoor, dissimilar materials | Hairline cracks, quick holds |
Application Insights:
– Clamping pressure: PVA adhesives bond best with firm, even pressure (visual cue: a thin, consistent bead of adhesive squeezing out). Too little pressure = weak bond; too much = starved joint.
– Temperature matters: Most adhesives cure poorly below 50°F (10°C). In cool workshops, warm the adhesive bottle gently in hot water (not microwave) before use.
– Wood porosity: Dense woods (maple, cherry) require less adhesive than porous woods (pine, oak). Excess adhesive on dense wood can create weak “glue lines.”
Filler Considerations
- Epoxy + Wood Flour: Creates a composite material that can exceed the strength of the original wood. Mix to a “peanut butter” consistency—too runny weakens the fill; too thick traps air.
- Commercial Fillers: Often contain gypsum or cellulose. Suitable for non-structural cosmetic fills but generally weaker than wood. Pre-stained options simplify finishing.
- Color matching reality: Perfect matches are challenging due to wood aging and finish variations. Strategies:
- Mix a tiny amount of artist’s oil paint into epoxy before application.
- Apply a matching stain over the cured fill (test first).
- Embrace the visible repair as part of the piece’s history—a testament to care.
Finish Awareness During Repair
- Identify existing finish (if possible):
- Shellac: Softens with denatured alcohol (test hidden spot).
- Lacquer: Softens with lacquer thinner.
- Polyurethane/Varnish: Resists common solvents; usually requires light sanding for adhesion.
- Repair approach:
- Clean the repair area with a compatible solvent.
- Sand only the repair zone, feathering edges into the surrounding finish.
- Apply matching finish sparingly to the repaired area, blending outward.
- For large repaired areas, refinishing the entire component (e.g., one leg) often yields more uniform results.
- Pro tip: When acquiring new wood furniture, save a small drop of its finish in a labeled vial for future repair reference.
Knowing When to Seek Professional Support
Confidence grows with experience; wisdom includes recognizing boundaries. Consulting a professional protects the piece, your safety, and your peace of mind.
Situations Warranting Professional Assessment
- Antique furniture (generally pre-1950): Original finishes, construction methods, and historical significance require specialized knowledge. Well-intentioned repairs can significantly impact value and integrity.
- Critical structural breaks: Bed frames, sofa frames, or chair seats supporting regular weight. Incorrect repair poses safety risks.
- Extensive environmental damage: Hidden mold, deep rot, or smoke residue may require specialized evaluation.
- Intricate craftsmanship: Marquetry, inlay, carved details, or complex joinery benefit from expert hands.
- Documented provenance: Pieces with historical records, maker signatures, or family documentation.
Finding the Right Specialist
- For antiques/art pieces: Seek a conservator certified by the American Institute for Conservation (AIC). They prioritize preservation and reversibility.
- For structural repairs: A master woodworker or furniture restorer with documented experience. Request to see examples of similar work.
- For upholstered pieces: A certified upholsterer. Frame repairs often accompany reupholstery.
- Vetting tips: Ask about their philosophy (“Do you prioritize minimal intervention?”), request references, and get a written estimate detailing methods and materials.
A Simple Decision Framework
- Estimate professional repair cost (get 2–3 quotes if possible).
- Research replacement cost for a comparable new or vintage piece.
- Reflect on personal significance (rate 1–10, where 10 = irreplaceable).
- Consider:
- Repair may be worthwhile if: Personal significance is high (≥7) OR repair cost is less than half the replacement cost.
- Replacement or alternative may be sensible if: Personal significance is low (≤3) AND repair cost exceeds 75% of replacement cost.
- Discuss further if: The situation falls in between—talk with a trusted professional.
Ethical Reflections in Repair
- Transparency: If selling a repaired piece, disclose repairs honestly. Concealment undermines trust.
- Historical respect: On antiques, “over-restoration” (making a piece look new) can diminish authenticity and value. Patina and gentle wear often contribute to character.
- Environmental perspective: Repairing extends an object’s life, reducing waste and resource consumption. Each thoughtful repair supports sustainability.
- Personal well-being: If a repair project causes ongoing stress or anxiety, it’s acceptable to pause or stop. Your peace of mind has value.
Preventive Care: Gentle Habits for Longevity
The most successful repairs are those never needed. Integrating simple, consistent practices preserves furniture for years.
Seasonal Awareness Calendar
- Spring: Check joints for looseness. Tighten mechanical fasteners gently. Apply paste wax to bare wood surfaces if desired.
- Summer (Humid): Place silica gel packs inside enclosed cabinets or drawers. Ensure airflow around furniture—avoid tight placement against exterior walls.
- Fall: Inspect for insect activity (small holes, fine dust). Address with borate-based wood preservatives if needed and appropriate.
- Winter (Dry): Use a humidifier to maintain 35–45% relative humidity. Keep furniture away from heating vents—dry, direct heat accelerates cracking.
Daily and Weekly Practices
- Lift, don’t drag: Teach household members to lift chairs when moving them. Dragging stresses joints and legs.
- Rotate use: Alternate chairs around the dining table. Rotate sofa cushions. Prevents uneven wear patterns.
- Address spills promptly: Wipe with a dry cloth first, then a slightly damp cloth if needed. Standing water damages finishes and wood.
- Dust mindfully: Use a soft microfiber cloth, wiping with the wood grain. Avoid feather dusters (they scratch) and silicone-based polishes (they build residue).
Environmental Optimization
- Light exposure: UV rays fade finishes and weaken wood fibers over time. Use UV-filtering window film. Periodically rotate furniture so light exposure is even.
- Temperature stability: Avoid placing furniture directly beside radiators, fireplaces, or air conditioning vents. Rapid fluctuations encourage expansion/contraction cycles.
- Humidity monitoring: A simple hygrometer ($10–15) provides awareness. Target 35–55% relative humidity for wood stability.
Proactive Reinforcement (Where Appropriate)
- Chair leg braces: Small, discreet metal L-brackets installed inside the seat frame where legs attach can prevent wobble before it starts.
- Table apron blocks: Gluing small wood blocks inside apron corners adds rigidity to large tables.
- Drawer maintenance: Rub wooden drawer slides lightly with paraffin wax or a candle. Reduces friction and stress on joints.
Your Questions, Answered
Q: Can I use superglue (CA glue) for all furniture repairs to save time?
A: CA glue is best reserved for specific uses: hairline cracks (via capillary action) or temporary holds. It creates brittle bonds unsuited for structural joints subject to stress or movement. For chair legs, rails, or load-bearing areas, PVA wood glue or epoxy provides more flexible, durable bonds compatible with wood’s natural behavior. Always prioritize eye protection when sanding or using adhesives.
Q: My repaired joint feels solid but has a visible adhesive line. How can I minimize its appearance?
A: After full cure (24+ hours), lightly sand only along the joint line with 220-grit paper. Avoid sanding surrounding finish. For light woods, rub the line gently with walnut meat—natural oils may darken it slightly. For stained pieces, use a fine artist’s brush to apply a matching stain just to the line. Finish with a touch of paste wax to blend sheen. Many find visible repairs meaningful—a quiet story of care.
Q: Is it safe to repair furniture with lead-based paint (pre-1978)?
A: Extreme caution is essential. Do not sand, scrape, or heat painted surfaces—this creates hazardous dust. For minor repairs:
1. Wear an N95 respirator, gloves, and eye protection.
2. Clean the area gently with a TSP substitute.
3. Apply repair over existing paint without disturbing it.
4. Seal the repaired area with clear polyurethane.
For anything beyond minor surface stabilization, consult an EPA-certified lead abatement professional. Safety must always come first.
Q: How do I fix a stripped screw hole in particleboard?
A: Particleboard lacks wood fibers for reliable grip. Standard toothpick methods often fail. Try this:
1. Remove the screw. Clean the hole.
2. Fill the hole completely with 5-minute epoxy mixed with fine sawdust.
3. Insert the screw partway into the wet epoxy to form threads.
4. Let epoxy cure fully (about 1 hour). Remove the screw.
5. Reinsert the screw into the hardened epoxy threads.
For critical joints, replacing the particleboard component with solid wood (where feasible) offers greater longevity.
Q: Can swollen particleboard from water exposure be repaired?
A: Swelling is often permanent due to broken-down binders. For minor swelling:
1. Dry thoroughly using fans and dehumidification (48+ hours).
2. Sand the swollen area flat with 80-grit paper.
3. Seal with a shellac-based primer (like BIN) to stabilize fibers.
4. Fill remaining voids with epoxy/wood flour mix.
If swelling is severe (>1/8″), replacement is usually more durable. This highlights why solid wood repairs often endure longer across generations.
Q: What’s the practical difference between wood filler and wood putty?
A: Terminology varies, but generally:
– Wood filler: Hardens rigidly (water- or solvent-based). Applied before final finishing. Sandable. Suitable for structural fills.
– Wood putty: Remains slightly pliable (oil-based). Applied after finishing for tiny surface dings. Not sandable.
For repairs requiring strength, epoxy-based fillers are preferable. In antique conservation, traditional gesso (chalk + hide glue) is sometimes used for its reversibility.
Q: How can I match stain color on an older repair?
A: Perfect matching is challenging due to wood aging and finish variations. Helpful approaches:
1. Test first: Practice on scrap wood or an inconspicuous area (inside a drawer).
2. Layer colors: Apply a lighter stain base, then a darker glaze selectively.
3. Patina techniques: For oak, a solution of vinegar and steel wool (aged 24 hours) can create a gray patina on repairs.
4. Blend outward: Feather stain from the repair into surrounding areas.
5. Embrace character: A slightly visible repair can honor the piece’s history—many appreciate this authenticity.
Q: Is repairing inexpensive ready-to-assemble furniture worthwhile?
A: Consider the Value Reflection Framework: personal significance, functional role, and effort versus outcome. For high-use items (a desk, bed frame), reinforcement techniques (dowels, sistering) can extend life meaningfully. For low-significance items with complex damage, recycling may be sensible. However, practicing repairs on accessible pieces builds skills for future heirlooms. Many manufacturers (including IKEA) offer free replacement parts—check their website or contact customer service.
Q: How long should I wait before using repaired furniture?
A: Minimum guidelines (adjust for cool/humid conditions):
– PVA Glue: 1 hour for light handling; 24 hours for regular use.
– Epoxy: 4–6 hours handling; 48–72 hours for full strength.
– Polyurethane Glue: 2 hours handling; 24 hours full cure.
When uncertain, waiting longer is safer. Early stress can create hidden weaknesses that fail later.
Q: Can bubbled veneer from moisture exposure be repaired?
A: Yes, if the substrate beneath is still solid:
1. Dry thoroughly (dehumidifier, fans, 48+ hours).
2. Pierce the bubble at the edge with a needle.
3. Inject a small amount of PVA adhesive with a syringe.
4. Press flat firmly. Cover with wax paper.
5. Apply even weight (books).
6. Cure fully (24 hours).
If the substrate feels soft or crumbles, professional assessment is recommended—repairing the substrate is complex.
Q: What’s the most frequent oversight in beginner furniture repair?
A: Rushing surface preparation. Old adhesive, dust, or finish residue creates a barrier preventing new adhesive from bonding directly to wood fibers. A perfectly aligned clamp-up will fail if surfaces aren’t clean. Allocate ample time for careful cleaning and drying—it’s the foundation of lasting repair. For pieces with historical significance (generally pre-1950), consulting a professional conservator ensures methods honor the piece’s integrity.
Q: How can I help repaired joints last longer?
A: Address underlying causes:
– Humidity swings: Maintain stable indoor humidity (35–55% RH) with monitoring and adjustment.
– Repeated stress: Add reinforcement (dowels, discreet brackets) during repair where appropriate.
– Usage patterns: Avoid standing on repaired chairs; distribute weight evenly.
– Cure time: Always allow full adhesive cure before regular use.
Preventive care—seasonal checks, gentle handling—is as vital as the repair itself.
Conclusion and Your Next Step
Furniture repair is a practice of patience, presence, and care. Each stabilized wobble, each mended crack, reflects a choice to honor an object’s place in your home and history. You now have a adaptable framework: observe damage thoughtfully, prepare surfaces meticulously, select methods aligned with your context, respect material behaviors, and prioritize safety. These principles build confidence not through perfection, but through mindful action.
Three Anchoring Principles
- Thoughtful Diagnosis: Taking time to understand the damage level guides every subsequent choice. Level 1 needs differ fundamentally from Level 3.
- Surface Preparation: Clean, dry, compatible surfaces are the non-negotiable foundation of any lasting adhesive bond.
- Patience in Process: Allowing full cure times, monitoring environmental conditions, and integrating preventive habits contribute more to longevity than any single technique.
The 24-Hour Invitation: One Small Observation
Within the next day, choose one piece of furniture showing early signs of change—a slightly loose drawer pull, a chair with faint movement, a table with a hairline mark. Perform only the Paper Test or Diagnostic Rock Test. Note where movement originates. Take a simple photo. Do not repair yet. This gentle act cultivates observational awareness without pressure. It shifts perspective from passive noticing to engaged care. Tomorrow, you’ll decide the next step—with clarity and without rush.
A Wider Perspective
Every repaired chair kept in use reduces demand for new resources. Every skill practiced builds capability for future projects. Every visible mend tells a quiet story of attention to those who share your space. This mindset extends beyond wood and glue—it nurtures patience with objects, processes, and ourselves. Begin where you are. Celebrate small progress. Honor the journey of the pieces around you. And know that with each thoughtful action, you contribute to a more intentional, connected home.
Explore Further:
Understanding Wood Movement: A Visual Guide | Seasonal Furniture Care Calendar | Building a Beginner-Friendly Repair Toolkit | Ethical Choices in Furniture Restoration | Wood Adhesives Compared: A Practical Reference | Sustainable Home Care: Repair Over Replace | Finish Identification and Matching Basics