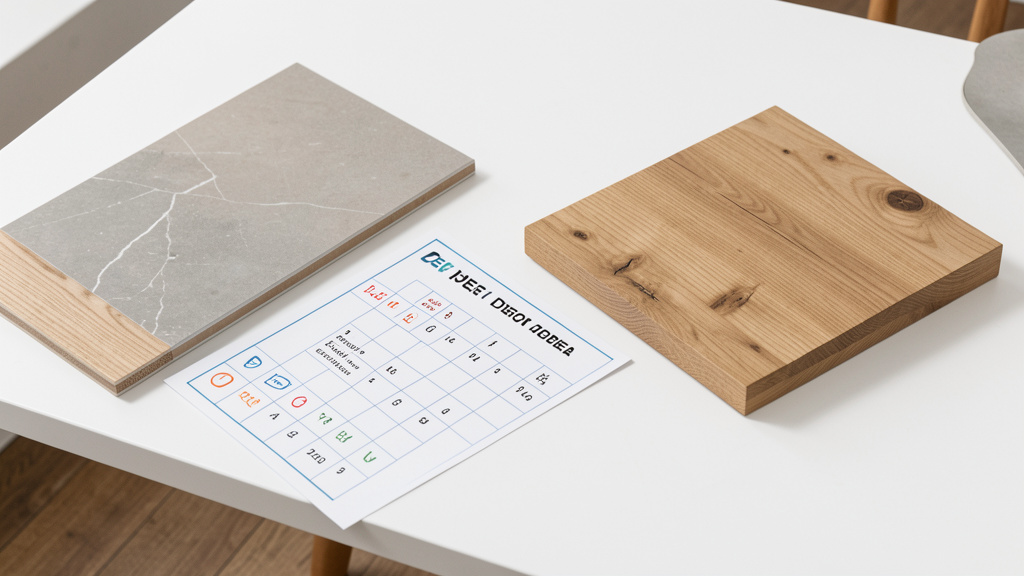
Move beyond guesswork with a structured, adaptable process that aligns material choices with your unique project constraints, values, and environment—without overpromising or oversimplifying.
Every home project reaches a pivotal moment: standing before two compelling material options, each with persuasive merits. Will natural wood decking deliver the warmth you envision without demanding relentless upkeep? Does engineered quartz truly balance durability and aesthetics for your family’s kitchen rhythm? These decisions ripple across budget, daily life, long-term satisfaction, and property stewardship. Yet conventional advice often defaults to generic pros/cons lists, influencer endorsements, or fragmented online reviews—ignoring your climate, skill level, timeline, household dynamics, and non-negotiables. This framework offers a neutral, repeatable methodology to cut through noise. Adapted from principles used in architectural specification and lifecycle assessment, it guides you through contextual evaluation—not to declare a universal “winner,” but to identify the right fit for your specific situation. By anchoring choices in documented criteria rather than fleeting impressions, you cultivate clarity, reduce regret, and build confidence that lasts long after installation.
Introduction: Why Material Decisions Feel Complex (And How Structure Creates Clarity)
Material selection sits where practicality meets personal values. A well-aligned choice supports daily living, reflects care for your space, and ages with grace. A misaligned choice—even a “high-quality” material—can lead to ongoing friction: unexpected maintenance, aesthetic dissonance, or functional gaps. This tension isn’t a personal failing. It stems from three common gaps in typical decision processes:
First, context omission. Advice rarely accounts for your microclimate (a shaded damp patio vs. sun-blasted desert deck), household patterns (toddlers, pets, frequent entertaining), or skill/resources. What succeeds in one setting may falter in another.
Second, hidden factor neglect. Upfront cost dominates discussions, while lifetime effort, repair accessibility, seasonal constraints, or future flexibility remain unexamined.
Third, emotional override. A showroom sample under perfect lighting can eclipse practical realities like long-term upkeep or compatibility with existing elements.
This framework bridges these gaps. It transforms an emotionally charged choice into a transparent, stepwise evaluation where your priorities—not marketing narratives—guide the outcome. It acknowledges uncertainty (“Will humidity affect this?”) and builds in checks for it. There is no mythical “perfect” material. Only the option that best serves this project, your constraints, and your vision. The process itself builds discernment you’ll carry into future decisions.
The Material Decision Matrix: A Context-Aware Evaluation Process
This is not a rigid scoring template. It’s a reflective workflow designed to surface what matters for you. Work through each step sequentially. Document responses in a notebook or digital file—this record becomes your anchor against doubt or external pressure. Pause between steps. Revisit earlier answers as new insights emerge. The goal is alignment, not speed.
Step 1: Clarify Project Non-Negotiables and Success Metrics
Before comparing materials, define what “success” means here. Without this anchor, comparisons drift toward irrelevant features. Answer these questions concretely:
- Core Function: What must the material do? (e.g., Decking: support weight safely, shed water, provide slip-resistant surface when wet; Countertop: resist stains from daily cooking, tolerate moderate heat exposure).
- Usage Intensity: Light (guest room), Moderate (family bathroom), Heavy (main kitchen floor), Extreme (workshop surface). Be specific: “Two large dogs,” “daily baking,” “frequent entertaining.”
- Timeline Constraints: Must completion align with seasons (e.g., “deck usable before summer”), weather windows, or life events? Note curing/drying times that affect usability.
- Skill & Resource Reality: Honestly assess: Are you comfortable with required tools/techniques? Will you hire help? If DIY, what’s your realistic time commitment per week?
- Absolute Constraints: List deal-breakers. Examples: “Must avoid annual sealing due to physical limitations,” “Budget cap: $X for materials only,” “Must be repairable by local handyman,” “Non-toxic for child’s space.” Any material failing a non-negotiable is set aside immediately.
- Time Horizon: Optimizing for long-term enjoyment (10+ years) vs. near-term resale (2–5 years)? This shapes weight given to neutrality, durability messaging, or trend alignment.
Why this step matters: Misalignment here causes most post-installation regret. A stunning marble-look surface may delight visually but frustrate daily if stain resistance is critical for your household. Defining success first ensures every comparison serves your reality.
Practical application: Create a simple table:
| Criterion | Your Requirement | Priority (H/M/L) |
|———–|——————|——————|
| Function | Support 50+ lbs/sq. ft., resist moisture | H |
| Usage | Heavy (daily family use, pets) | H |
| Non-Negotiable | No annual sealing/staining | H |
| Budget | Materials ≤ $7,500 | H |
| Timeline | Complete before rainy season (10 weeks) | M |
Common pitfalls to avoid:
– Vagueness: Replace “durable” with “resists scratching from pet claws for 10+ years.”
– Overlooking hidden users: Involve all household members. Will elderly relatives need non-slip surfaces?
– Aesthetics-first bias: Address beauty formally in Step 4—don’t let it override safety or function here.
– Ignoring downstream impact: Will this choice complicate future renovations? (e.g., heavy stone veneer requiring wall reinforcement).
Hypothetical illustration: A homeowner considering bathroom vanity materials defines non-negotiables: “Must resist makeup/perfume stains, repairable by spouse with basic tools, budget under $600.” Marble is set aside immediately due to stain vulnerability. Focus shifts to quartzite or solid surface—options aligned with core needs.
Step 2: Map True Lifetime Resource Investment
Sticker price reveals little. True investment includes all resources expended from purchase through end-of-life. Evaluate holistically:
- Initial Outlay: Material cost × quantity + 10–15% waste allowance + all ancillaries (fasteners, adhesives, underlayment, trim, sealants).
- Installation Effort: DIY time (value your hours realistically: $20–$50/hr reflects opportunity cost) + tool rental/purchase. For pros: get written quotes specifying exactly what’s included.
- Ongoing Maintenance: Annual tasks (cleaning, sealing, repairs). Estimate time, supplies, and frequency. Example: “Deck cleaning: 4 hours × $25/hr + $40 supplies = $140/year.”
- Repair Realities: Cost and accessibility of fixing common issues (scratches, chips, warped boards). Can you do it? Is local expertise available?
- End-of-Life Consideration: Disposal fees, recycling options, or salvage potential. Some materials pose logistical or cost hurdles here.
- Indirect Factors: Energy impact (dark roofs increasing cooling load), water usage for cleaning, or time burden affecting quality of life.
Why this step matters: A material with 30% higher upfront cost may demand far fewer resources over time. Conversely, “budget” options often incur hidden burdens. This step shifts perspective from transactional to stewardship.
Practical application: Sketch a simplified 15-year projection. Use conservative estimates (round maintenance up, lifespan down). Compare totals. Illustrative example:
– Option A (Higher initial cost): $12,000 initial + $100/year maintenance ≈ $13,500 over 15 years.
– Option B (Lower initial cost): $7,000 initial + $400/year maintenance + $3,000 mid-life repair ≈ $16,000 over 15 years.
Note: Actual numbers vary widely by region, labor rates, and usage. Your calculation is essential.
Adaptive approaches:
– Budget-conscious: Apply the “Rule of Three”—multiply initial material cost by 3 for a rough lifetime estimate. Reveals stark disparities.
– Time-constrained: Focus only on Year 0 costs including realistic labor. Acknowledge this is a short-term filter with potential long-term trade-offs.
– Uncertain: Research local contractor rates for maintenance tasks. A $75 service call fee changes the math for minor repairs.
Common pitfalls to avoid:
– Valuing DIY time at $0 (ignores opportunity cost).
– Underestimating waste (patterned materials often exceed 15% waste).
– Overlooking substrate prep (leveling floors, moisture barriers)—often 30% of project effort.
– Assuming “waterproof” means immune to all moisture scenarios (subfloor conditions matter).
Step 3: Assess Performance Within Your Environmental Context
Durability is relational—not inherent. A material thriving in one setting may struggle in another. Evaluate how each option interacts with your specific conditions:
- Climate Factors:
- Temperature: How does material handle your recorded lows/highs? (e.g., Some composites expand significantly above 100°F; PVC becomes brittle below freezing).
- Moisture/Humidity: Critical for basements, bathrooms, coastal zones. Does it absorb moisture? Require vapor barriers? Trap moisture if installed incorrectly?
- UV Exposure: South-facing surfaces face intense degradation. Check fade warranties and independent reviews for your region. “UV-stable” varies widely.
-
Local Stressors: Salt air (coastal), freeze-thaw cycles (northern climates), hail, high winds, or wildfire zones (requiring fire-rated materials per local code).
-
Wear Patterns Aligned to Usage:
- Scratch/Abrasion: Hardness matters less than your risk factors (pet claws, furniture movement). Matte finishes often hide scratches better than gloss.
- Stain/Chemical Resistance: Porous materials need sealing; test protocols exist (search “[material] ANSI stain resistance”).
- Heat Tolerance: Know limits (e.g., quartz may discolor above 150°F; laminate scorches lower than stone).
-
Impact Resistance: Relevant for high-traffic zones or workshops.
-
Installation-Dependent Durability:
- Even robust materials fail with improper installation (e.g., missing flashing, inadequate ventilation, wrong fasteners). Research required installation steps—not just material specs.
- Consult manufacturer technical data sheets (search “[product] technical data sheet PDF”), not just marketing pages.
Why this step matters: Environmental mismatch causes premature wear. Installing standard materials in challenging microclimates (e.g., dense shade retaining moisture, west-wall sun exposure) without adaptation invites problems. This step grounds decisions in physics, not hope.
Practical application:
1. Document your site specifics: “Zone 6B climate, 40″ annual rainfall, south-facing deck under partial tree cover, basement averages 60% humidity.”
2. Research: Manufacturer datasheets, Building Science Corporation resources, university extension services (e.g., “University of Minnesota wood durability”), local supplier insights.
3. Seek real-world evidence: Search “[material] [your city] review” or “[material] 5 years later” on homeowner forums. Note why and when issues arose.
4. Consult locally: Specialty suppliers (not big-box stores) often share invaluable regional experience. Ask: “What holds up best here?”
Common pitfalls to avoid:
– Trusting “all-weather” claims without regional verification.
– Ignoring microclimates (a shaded deck stays damp longer; a west wall bakes).
– Confusing hardness with overall durability (dimensional stability may matter more in humid climates).
– Overlooking warranty fine print (e.g., “lifetime” may cover only manufacturing defects, not fading or staining).
Hypothetical illustration: In a humid basement, Luxury Vinyl Plank (LVP) with rigid core passes the “waterproof” non-negotiable. Engineered hardwood—even with vapor barrier—is set aside due to moisture vulnerability history. The system (material + environment + installation) drives the decision.
Step 4: Evaluate Aesthetic Integration and Temporal Journey
Beauty sustains daily connection to your space—but aesthetics must harmonize with function and evolve gracefully. Move beyond “I like this sample” to intentional assessment:
- Visual Harmony:
- View large samples (min. 12″x12″) in the actual space across morning, noon, and evening light. Digital screens distort color and scale.
- Assess against fixed elements: cabinets, wall color, flooring transitions. Does the undertone (warm/cool) complement or clash?
-
Consider texture and sheen: Gloss shows every footprint; matte hides imperfections but may lack depth. Textured surfaces aid grip but trap debris.
-
Temporal Evolution:
- Patina vs. Deterioration: Do you value aging character (cedar silvering, brass patina) or consistent appearance? Some “wear” feels intentional; other wear feels shabby.
- Consistency: Natural materials (wood, stone) vary; engineered options offer uniformity. Request multiple samples to see the range.
-
Longevity of Appeal: Will this feel dated in 5 years? Neutral bases (warm grays, classic whites) offer flexibility; bold trends carry higher regret risk.
-
Design Integration:
- How does it interact with light? Light surfaces brighten small rooms; dark surfaces create coziness.
- Compatibility with adjacent materials: Transition strips, height differences, expansion gaps.
- Customization limits: Can edges be profiled? Can it be cut onsite for unique layouts?
Why this step matters: Aesthetic misalignment causes quiet daily friction, even if functionally sound. Choosing a cool-toned surface against warm cabinets creates visual tension. Selecting a high-maintenance finish because it looks authentic without accepting the upkeep breeds resentment.
Practical application:
– Live with samples: Tape them in place for 3–5 days. Observe at different times.
– Build a physical mood board: Include paint chips, fabric swatches, photos of the room. Does the sample enhance the whole?
– Visit installed projects: Ask suppliers for local references (with permission). See real wear, lighting, and integration.
– Test the “ugly phase”: Research installation process. Will grout haze, unfinished edges, or curing time cause stress?
Adaptive approaches:
– Budget-limited: Buy one unit (tile, linear foot). Photograph it in your space at different times. Cost is trivial versus replacement regret.
– Function-priority zones (utility rooms, closets): Defer deep aesthetic analysis. Prioritize Steps 1–3. Save detailed aesthetic focus for high-visibility areas.
– Resale-focused: Research recent sold homes in your area. What materials appealed broadly? Neutral, timeless choices often resonate widest.
Common pitfalls to avoid:
– Relying solely on digital images or tiny showroom chips.
– Ignoring maintenance aesthetics (e.g., high-gloss black tile showing every water spot).
– Chasing hyper-trends without considering long-term satisfaction.
– Overlooking how grout color, trim style, or lighting fixtures alter the final look.
Step 5: Honestly Assess Installation Realities
The finest material fails if installation isn’t feasible within your constraints. Evaluate the full journey from delivery to completion:
- Skill Alignment:
- Beginner-friendly: Click-lock systems, peel-and-stick options, pre-finished items. Forgiving of minor errors; mistakes easy to correct.
- Intermediate: Tile setting, traditional hardwood nailing, standard deck framing. Requires specific tools, leveling skill, understanding of expansion gaps.
-
Advanced/Professional: Structural elements, complex patterns, natural stone, roofing. Demands engineering knowledge, specialized tools, code compliance. Critical question: Does your verified skill level match this?
-
Tool and Safety Requirements:
- List required tools. Can you rent them locally? Comfortably operate them?
-
Safety gear is non-negotiable: Respirators (for silica dust), eye/ear protection, fall protection for heights. Factor cost and access.
-
Time and Workflow:
- Preparation often exceeds installation time (substrate repair, moisture testing, demolition).
- Phasing: Does it require multiple visits? (e.g., Tile: set → cure 24h → grout → cure 72h).
- Curing/drying times: Affected by temperature/humidity. Rushing causes failure.
-
Disruption: Can you live in the space during install? (Kitchen counter replacement halts cooking).
-
Code and Compliance:
- Verify local requirements before choosing: Permits? Fire ratings? Structural specs? Contact your building department.
- Manufacturer installation specs often void warranties if not followed precisely. Document adherence.
Why this step matters: Installation errors cause many perceived “material failures.” Cracked tile from unstable substrate; siding failure from missing flashing. Choosing beyond your capacity risks safety, cost, and satisfaction. This step aligns ambition with reality.
Practical application:
– Watch full-installation videos from reputable sources (manufacturer channels, This Old House). Note prep time, tool needs, common pitfalls mentioned.
– Read the entire manufacturer installation guide. Don’t skim prerequisites or warnings.
– Get contractor quotes even if DIYing: Ask “What’s the most common DIY mistake with this?” Their insight is invaluable.
– Dry-fit layouts first: Lay pieces without adhesive/fasteners to catch measurement errors or waste issues.
Common pitfalls to avoid:
– Underestimating prep work (substrate leveling is rarely optional).
– Ignoring physical demands (kneeling for hours, lifting heavy materials).
– Assuming “YouTube made it look easy” reflects real-world time/effort (add 2–3x buffer).
– Skipping local code verification (wildfire zones, coastal areas have strict material rules).
Hypothetical illustration: Intricate mosaic tile requires perfectly flat substrate and precision cutting. A homeowner with uneven existing tile substrate realizes the prep work exceeds their capacity. They pivot to larger-format tile (more forgiving) or budget for professional substrate prep—avoiding future cracks and frustration.
Step 6: Visualize Long-Term Maintenance and Repair Pathways
Installation day is just the beginning. Your future self will live with the upkeep rhythm. Honestly assess:
- Maintenance Routine:
- Frequency: Daily wipe? Weekly mop? Seasonal cleaning? Annual sealing?
- Effort: “Wipe with damp cloth” vs. “Strip sealant, sand, reapply, cure 48h.” Watch maintenance videos. How long realistically?
- Cost: Supplies, hired help, your time valued.
-
Disruption: Does it require vacating the space? Creating mess?
-
Repair Accessibility:
- DIY feasibility: Can minor damage be fixed locally? (Solid wood sanded; laminate often requires full plank replacement).
- Professional support: Are local handymen familiar with repairs? Get quotes for common fixes now.
-
Part availability: Will matching material exist in 10 years? Discontinued lines create future headaches. Natural materials often matchable; proprietary composites less so.
-
Wear Pattern Alignment:
- How does wear manifest? Does it age gracefully (patina) or look neglected (fading, chipping)?
- Does it align with your lifestyle tolerance? Textured floors hide scratches; light colors show dust.
Why this step matters: Neglected maintenance accelerates wear. Choosing a material whose upkeep rhythm aligns with your actual habits prevents resentment. Low-maintenance isn’t “lazy”—it’s strategic alignment. Peace of mind has tangible value.
Practical application:
– Draft a “Maintenance Calendar”: List tasks, frequency, time, cost. Place it where you’ll see it. Does “Stain entire deck: 2 weekends, $300” feel manageable?
– Interview long-term owners: Search forums for “[material] 10 years later.” Ask: “What surprised you about upkeep?”
– Test a repair kit: Practice on a sample. Is the result acceptable? Is the process something you’d do?
– Consider future self: Will physical ability to maintain change? (e.g., Climbing ladders for gutter cleaning).
Common pitfalls to avoid:
– “I’ll maintain it diligently this time”: Past behavior predicts future action. Be honest.
– Underestimating small recurring tasks (cleaning grout lines daily adds up).
– Ignoring seasonal timing constraints (staining must occur in specific weather windows).
– Overlooking required cleaning products (pH-neutral cleaners for stone; wrong products cause damage).
Hypothetical illustration: A family with active kids and pets chooses textured Luxury Vinyl Plank over solid bamboo. Bamboo showed scratches prominently, causing daily stress. LVP hides minor wear, withstands spills, and requires only sweeping/mopping—aligning with their actual lifestyle, not an idealized version. The slightly higher initial cost justified eliminated anxiety and future refinishing.
Step 7: Synthesize Insights and Reach a Grounded Decision
You now hold contextual intelligence. This step transforms analysis into a clear, defensible choice—without false precision.
- Consolidate Criteria: Group insights from Steps 1–6:
- Project Fit (Non-negotiables, Usage, Timeline)
- Resource Investment (Initial, Ongoing, Repair)
- Environmental Performance (Climate, Wear)
- Aesthetic Integration (Harmony, Evolution)
-
Practical Realities (Installation, Maintenance)
-
Apply Weighted Reflection (Not Rigid Scoring):
- Assign relative importance based on your Step 1 priorities. Example weights for a low-maintenance-focused deck:
- Meets Non-Negotiables (No annual sealing): 25%
- Maintenance Burden: 20%
- Climate Resilience: 15%
- Lifetime Resource Investment: 15%
- Visual Harmony: 10%
- Installation Feasibility: 10%
- Repair Accessibility: 5%
-
Why weighting matters: Prevents less-critical factors (e.g., minor aesthetic preference) from overshadowing core needs.
-
Compare Qualitatively:
- For each high-weight criterion, note which material aligns more strongly.
- Acknowledge trade-offs explicitly: “Material A requires higher initial investment but eliminates annual sealing—a priority for my constraints.”
-
Avoid precise numerical scores (e.g., 8.2 vs. 5.7). They imply false precision. Use descriptive comparison: “Material A significantly outperforms on our top-priority criteria: non-negotiable compliance and maintenance burden.”
-
Tie-Breaking Protocol (If Truly Balanced):
- Revisit Step 1: Is there an unspoken non-negotiable? (e.g., “Must be available locally within 2 weeks”).
- Future-self projection: Which choice creates less friction in 5–10 years? (Aging in place? Resale horizon?)
- Opportunity cost: Does choosing the slightly less expensive option free resources for another high-priority project?
- Local ecosystem check: Which material has stronger local installer/repair support in your area?
- Informed intuition: After 48 hours of reflection, which option feels seamless when visualizing daily use? Document your rationale: “Chose X because [specific alignment], accepting [known trade-off] because [reason].”
The Guiding Insight: A material’s value emerges solely from alignment between its properties and your project’s unique context, constraints, and vision. There is no universal “best.” Only the most coherent choice for this moment, this place, your life.
Why this step matters: Humans face cognitive biases (anchoring on price, emotional attachment to samples). This synthesis injects objectivity. Documenting your rationale creates an anchor against future doubt or unsolicited opinions. It also builds decision-making muscle for future projects.
Common pitfalls to avoid:
– Equal weighting all factors (dilutes critical priorities).
– Introducing new criteria post-analysis to favor a preferred option.
– Dismissing the process because “both are good”—in true ties, either is valid; the goal is confident action.
– Over-engineering for simple decisions (reserve full framework for significant, emotionally charged choices).
Applying the Framework: Contextual Scenarios
Theory gains clarity through application. These hypothetical scenarios demonstrate how the same materials yield different optimal choices based entirely on user context—not inherent superiority.
Scenario A: Decking Choice – Pressure-Treated Wood vs. Capped Composite
Context: Suburban home, humid climate with freeze-thaw cycles. Family with young children and a dog. Planning to stay 15+ years. DIY-capable but time-limited. Non-negotiables: Splinter-free surface, no annual sealing/staining, materials budget ≤ $7,000. Prioritize safety and low upkeep over “natural wood” aesthetics.
Framework Insight:
– Wood fails the “no annual sealing” non-negotiable immediately. Sealing is critical in this climate to prevent splintering and rot—especially with kids/dog usage.
– Composite meets all non-negotiables: Splinter-resistant, minimal maintenance (sweeping/cleaning), consistent appearance.
– Lifetime resource investment favors composite despite higher initial cost—eliminating recurring sealing time/cost aligns with time constraints.
– Local supplier confirms composite performs well in regional humidity with proper spacing.
Outcome: Composite is the coherent choice for this context. The framework prevented distraction by wood’s lower sticker price or nostalgic appeal.
Scenario B: Countertop Choice – Quartz vs. Granite
Context: Renovating kitchen for resale within 3 years. Mid-century modern home in a competitive market. Budget-conscious but seeking strong buyer appeal. Non-negotiables: Stain resistance for coffee/wine, neutral palette, professional installation.
Framework Insight:
– Both materials meet core functional needs if maintained. Granite requires periodic sealing; quartz does not.
– Resale context shifts weight: “Low-maintenance perception” becomes critical. Buyers increasingly favor quartz’s “no sealing ever” messaging. Local real estate data shows homes with quartz countertops sold faster in this market.
– Aesthetic flexibility: Neutral quartz patterns (e.g., subtle veining) offer broad appeal without granite’s variability risk (a “busy” slab may deter buyers).
– Installation complexity similar (both require pros), so not a differentiator.
Outcome: Quartz aligns more strongly with resale goals and buyer expectations in this specific market. The framework highlighted how context—not material “quality”—drives the optimal choice.
Scenario C: Basement Flooring – Luxury Vinyl Plank (LVP) vs. Engineered Hardwood
Context: Finishing basement rec room in Zone 5 climate. History of minor humidity spikes (dehumidifier runs continuously). Active family, occasional spills. Long-term residency. Non-negotiables: Truly waterproof (not just water-resistant), comfortable underfoot, materials budget ≤ $4,000 for 500 sq. ft.
Framework Insight:
– “Waterproof” is the decisive filter. Rigid-core LVP is inherently waterproof. Engineered hardwood is moisture-resistant but vulnerable to subfloor vapor or prolonged exposure—high risk given basement history.
– LVP meets comfort need with underlayment options; modern visuals convincingly mimic wood.
– Installation: Click-lock LVP is DIY-friendly over concrete with vapor barrier. Engineered hardwood requires perfect subfloor flatness and acclimation—higher risk for moisture-related issues.
– Lifetime investment: LVP’s resilience to humidity events avoids potential costly repairs.
Outcome: LVP is the only rational choice given the strict waterproof non-negotiable and environmental context. The framework prevented an emotionally appealing but high-risk selection.
These scenarios affirm the core principle: Optimal material choice is contextual, not absolute. The framework’s power lies in revealing why a choice fits your situation—not declaring universal winners.
Navigating Close Calls: Strategies for Confident Resolution
Even thorough analysis may yield two strong contenders. This isn’t failure—it signals both options have merit. Use these grounded strategies to move forward:
Strategy 1: The Micro-Validation Test
Purchase the smallest feasible quantity of both materials. Install a small section (e.g., one flooring plank in a closet, one countertop remnant on a cart). Live with them for 7–10 days. Observe:
– How do they feel underfoot at different times of day?
– How do colors shift in your actual lighting?
– Does cleaning one feel noticeably easier?
This bridges data and embodied experience—revealing subtle preferences spreadsheets miss.
Strategy 2: Future-Self Projection
Project 5–10 years ahead. Ask:
– “Will my physical capacity to maintain this change?”
– “Could life circumstances shift priorities (relocation, aging in place)?”
– “Does this choice support long-term well-being over short-term preference?”
Example: Choosing slip-resistant textured tile over smooth tile for a master bathroom supports future mobility needs—a small aesthetic trade-off for significant long-term safety.
Strategy 3: Local Ecosystem Verification
Materials depend on local support systems. Investigate:
– Search “[Material] repair [Your City]”. Are multiple qualified professionals available? Read reviews.
– Visit local suppliers: Are samples well-maintained? Is staff knowledgeable? Do they stock replacement parts?
– Observe neighborhoods: What materials appear consistently well-maintained in homes similar to yours over 10+ years? Local prevalence often signals climate suitability and installer familiarity.
Strategy 4: Intentional Compromise Pathways
When core criteria tie, blend strengths:
– Countertops: Quartz near sink/cooktop (stain/heat resistance), natural stone on low-use baking station (aesthetic warmth).
– Decking: Composite surface (low maintenance), sustainably sourced cedar for visible railings (natural accent, easier replacement).
– Flooring: LVP in wet zones (kitchen, bath), engineered wood in dry living areas.
Caution: Confirm compatibility (height transitions, expansion needs) with an installer first.
Strategy 5: Documented Intuition
After exhausting logic, if a subtle preference remains:
1. Step away from research for 48 hours.
2. Visualize using the space one year from now. Which material feels seamless? Which creates tiny friction?
3. Ask: “Can I genuinely accept this option’s known trade-offs without resentment?”
4. Document your rationale plainly: “Chose Material X because it aligns with [priority], and I accept [trade-off] because [reason].”
This transforms vague “gut feeling” into accountable, informed intuition.
Remember: In a true tie, either choice is valid. The goal is confident action—not mythical perfection.
Your Questions, Answered
These responses address nuanced, real-world concerns with practical clarity.
Q: How do I verify if a material meets local building codes before purchasing?
A: Codes are non-negotiable filters. First, contact your city/county building department directly—ask: “Are there specific material requirements for [project type] in my jurisdiction?” Provide material specifications. Second, consult licensed local contractors; their experience with local enforcement is invaluable. Third, verify certifications (e.g., ICC-ES reports) are accepted locally. Critical: Wildfire-prone areas often mandate non-combustible siding within defensible space zones; coastal regions may require corrosion-resistant fasteners. Never assume compliance—get written confirmation.
Q: What if my preferred material is discontinued or faces supply delays?
A: Proactively mitigate risk: 1) Research manufacturer stability—established companies with core product lines have lower discontinuation risk. 2) Purchase 10–15% extra material at initial buy (store properly, labeled) for future repairs. 3) Identify 1–2 backup materials before ordering that meet your core criteria. 4) For delays, confirm lead times in writing and build buffer time into your schedule. Flexibility prevents project paralysis.
Q: How can I evaluate sustainability claims without falling for greenwashing?
A: Demand specificity over slogans. Look for third-party certifications: FSC (wood), Cradle to Cradle, GREENGUARD (low emissions), or EPDs (Environmental Product Declarations). Assess the full lifecycle: extraction impact, manufacturing energy, transportation distance, installation chemicals, maintenance needs, and end-of-life options. Prioritize durability—long-lasting, low-maintenance materials often have lower lifetime environmental impact than “natural” options requiring frequent replacement or chemical upkeep. Local sourcing significantly reduces transportation footprint.
Q: Is mixing materials between adjacent rooms acceptable? How to do it well?
A: Yes—intentional transitions enhance spatial definition and function. Key principles: 1) Use transition strips (T-molding, thresholds) deliberately at doorways. 2) Ensure visual harmony: complementary colors, undertones, or textures (e.g., light oak LVP flowing into medium-toned engineered hardwood). 3) Match function to room (waterproof surfaces in wet zones). 4) Verify finished heights align or plan gradual transitions to avoid tripping hazards. 5) Test samples side-by-side in the transition zone under your lighting. Thoughtful mixing adds character without chaos.
Q: What should I scrutinize in a material warranty beyond the headline duration?
A: Warranties vary widely in coverage. Read the fine print: 1) Scope: What’s covered? (Manufacturing defects only? Fading? Staining?) 2) Proration: Is coverage full-value initially, then decreasing? 3) Labor exclusion: Most warranties cover material replacement only—not labor costs. 4) Installation requirements: Voided if installed without specific underlayment, fasteners, or by non-certified installers. 5) Transferability: Does it apply to future homeowners? A “lifetime” warranty often means “lifetime of the product,” not the homeowner. When in doubt, request the full warranty document before purchasing.
Q: How do I handle a contractor recommending a different material than my framework choice?
A: Treat their input as valuable data—not a directive. Ask: “What specific concern drives this recommendation?” (e.g., local climate experience, installation complexity they’ve observed). Revisit your framework: Does their insight reveal an unconsidered constraint (e.g., substrate condition, code requirement)? If their rationale aligns with your non-negotiables or high-weight criteria, adjust. If it conflicts with your documented priorities, respectfully hold your ground. A good contractor explains why; their expertise should inform your process, not override your defined needs.
Q: Does material color impact performance beyond aesthetics?
A: Yes—significantly. Dark surfaces absorb heat (increasing cooling loads on roofs/walls; making decks too hot to walk on barefoot). Light surfaces reflect heat but may show dirt more readily. In sunny climates, lighter decking or roofing materials enhance comfort and energy efficiency. For countertops, very dark surfaces show dust and water spots more prominently. Always consider color’s functional role alongside visual appeal—test samples in your actual environment across seasons.
Q: How can I assess material quality when shopping in-store?
A: Go beyond the sample chip. For flooring: Examine the wear layer thickness (critical for longevity), core density (rigid core resists dents), and edge treatment. For decking: Check cap layer thickness on composites; feel for density and uniformity. For countertops: Inspect slab edges for consistency, pits, or resin pooling. Ask staff: “What’s the most common issue customers report with this product after 5 years?” Request technical data sheets—not just brochures. When possible, visit installed projects to see real-world performance.
Q: What role does material choice play in home energy efficiency?
A: Materials contribute meaningfully to thermal performance. Examples: Light-colored or “cool” roofing reflects solar radiation, reducing attic heat gain. Insulated siding adds R-value to walls. Thermal mass materials (tile, concrete) absorb heat during day, release slowly at night—beneficial in climates with large day/night temperature swings. Conversely, metal roofing without proper underlayment can conduct heat. Consult resources like the Department of Energy’s guides on building materials and efficiency. For significant projects, a home energy audit can identify high-impact material opportunities aligned with your climate.
Q: How do I factor emotional connection into a logical framework?
A: Emotion isn’t the enemy—it’s data. In Step 4, explicitly evaluate: “Does this material evoke a feeling that supports my well-being in this space?” (e.g., Warm wood tones creating calm in a bedroom; vibrant tile energizing a kitchen). The key is conscious integration: “I value this aesthetic enough to accept [specific trade-off, e.g., higher maintenance].” Document this trade-off. If the emotional benefit outweighs documented drawbacks for you, it’s a valid choice. The framework prevents emotion from overriding critical constraints—but honors it as one legitimate factor among many.
Conclusion: Clarity Through Context
You now hold a repeatable process to navigate material decisions with confidence. This isn’t about finding perfection—it’s about cultivating alignment.
Three enduring takeaways:
1. Context is king: The “best” material exists only in relation to your environment, constraints, and values.
2. Clarity prevents regret: Defining non-negotiables before comparing options eliminates distraction by irrelevant features.
3. Trade-offs are inevitable—and acceptable: Every choice involves balancing priorities. Documenting your rationale transforms trade-offs from sources of doubt into conscious, empowered decisions.
Your 24-Hour Action: Within the next day, write down one non-negotiable for your current project. Be specific: “Must require no annual sealing,” or “Must be repairable with tools I own.” This single act creates immediate focus.
The Bigger Perspective: Material choices are threads in the larger tapestry of home stewardship. Each decision builds discernment for the next. By approaching selections with curiosity rather than anxiety, you honor both your space and your peace of mind. The goal isn’t a flawless outcome—it’s a choice you can stand by, years later, knowing it reflected your thoughtful consideration of what truly matters.
Explore Further Guidance:
Understanding Material Technical Data Sheets | Navigating Local Building Codes Confidently | Sustainable Material Selection Without Greenwashing | Aging-in-Place Design Principles for Long-Term Homes | The Homeowner’s Guide to Working With Contractors