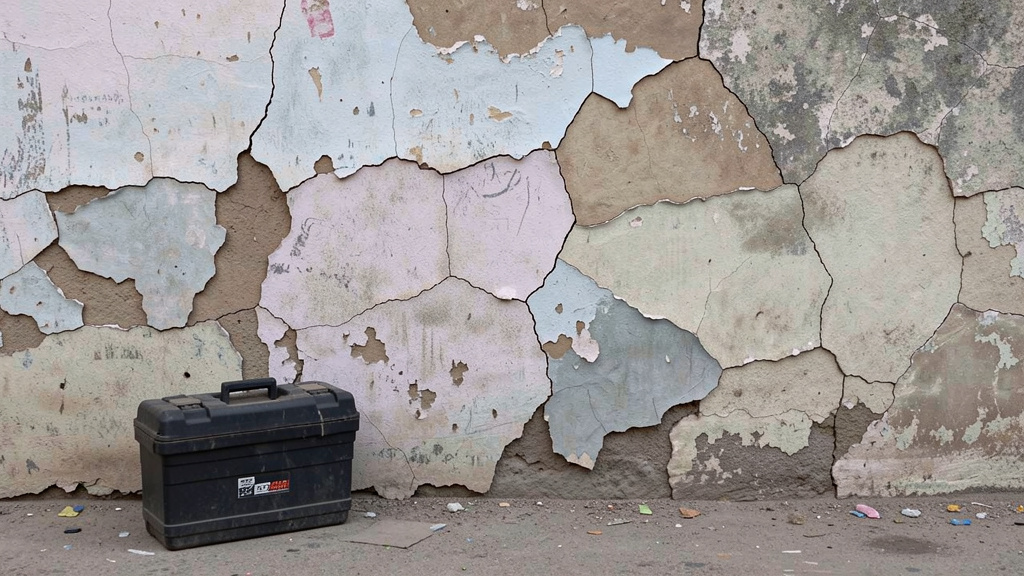
Stop risking costly repairs. This guide dissects pervasive home improvement falsehoods with forensic detail, revealing the hidden structural, electrical, and moisture-related damage they cause—and exactly how to correct them safely.
Many well-intentioned DIY projects are built on dangerous misconceptions that silently compromise your home’s integrity. This definitive resource exposes the most destructive DIY myths documented across building science literature and professional inspection patterns, explains the precise mechanisms of damage they trigger, and provides actionable, context-aware corrective protocols to protect your largest investment. What feels like a shortcut today could manifest as rot, mold, fire risk, or structural compromise tomorrow—often in places you cannot see. Understanding the why transforms reactive fixes into proactive stewardship.
Introduction
Homes function as integrated ecosystems where physics, material science, and environmental forces interact continuously. A seemingly minor intervention—sealing a vent, applying incompatible sealant, rerouting wiring—can disrupt delicate balances governing moisture movement, structural load paths, thermal dynamics, or electrical safety. Patterns observed across thousands of documented home inspections and building science publications consistently identify specific DIY misconceptions as leading causes of preventable, expensive damage. These are not merely ineffective tips; they actively initiate deterioration pathways. This guide moves beyond surface-level myth-busting to explore the underlying principles: the hygrothermal dynamics driving hidden mold growth, the material incompatibilities causing premature failure, the engineering rationale behind code requirements. Grasping these mechanisms empowers you to evaluate any DIY advice through a lens of building science. Whether you reside in a humid Gulf Coast climate, a freeze-thaw northern region, or an arid southwestern zone, the core principles adapt to your environment. True home preservation lies not in avoiding DIY, but in aligning actions with how buildings actually perform. Knowledge becomes your most reliable tool for long-term resilience.
The Home Integrity Framework: Your 3-Filter Defense Against Damaging DIY
Before evaluating any DIY tip, hack, or shortcut, apply this foundational mental model. Every proposed action should pass through three non-negotiable filters. Failure at any stage signals significant risk requiring professional consultation.
-
Filter 1: Safety & Systems Impact
Does this action interfere with a critical home system (electrical, structural, plumbing, HVAC, fire suppression)? Could it create an immediate hazard (shock, fire, collapse) or a delayed hazard (moisture trapping, gas leakage, compromised egress)? Systems are deeply interconnected; altering one component often affects others invisibly. If the answer is “possibly,” professional involvement shifts from optional to essential. Safety boundaries are not suggestions—they are lessons learned from documented failures. -
Filter 2: Material Science & Environmental Compatibility
Are the materials specified chemically and physically compatible with the substrate, local climate (UV exposure, humidity cycles, temperature extremes), and intended function? Will the solution age predictably, or degrade prematurely, creating new problems? Silicone sealant fails on porous stone; interior paint peels rapidly on sun-exposed siding; standard drywall swells in damp basements. Physics and chemistry operate independently of intention. Verify compatibility before application—manufacturer technical data sheets are invaluable resources. -
Filter 3: Long-Term Consequence Mapping
Project 5, 10, or 20 years forward. Where will moisture migrate? How will materials expand, contract, or degrade? Will this create a hidden failure point or maintenance burden? A quick patch trapping moisture behind a wall guarantees future rot. Cosmetic coverage over a foundation crack masks ongoing movement. Sustainable home care prioritizes solutions that allow assemblies to dry, breathe, or move as designed—longevity over immediacy.
The Fundamental Principle: When a DIY solution bypasses established building science principles for speed, cost, or perceived simplicity, it almost certainly creates hidden pathways for deterioration. Empowered stewardship works with your home’s inherent systems, not against them.
This framework elevates DIY from task completion to informed decision-making. It is not a barrier to action, but a compass for safe, effective intervention. Now, let’s apply this lens to pervasive myths with documented consequences.
Myth 1: “Power-Washing Any Exterior Surface Cleans It Safely”
The Myth: “Grab a pressure washer! It’s the fastest way to blast away dirt, mildew, and old paint from siding, decks, driveways, and even roofs. Higher PSI = cleaner results.”
Why It Persists: Pressure washers are widely accessible, satisfyingly effective on concrete, and heavily marketed for “instant curb appeal.” Social media highlights dramatic visual transformations while omitting collateral damage. The immediate gratification of visible grime removal reinforces the behavior, overshadowing invisible risks.
The Damage Unveiled:
Pressure washing is a precision tool, not a universal cleaner. Misapplication causes severe, often hidden, damage:
* Wood Siding & Decks: High-pressure streams (above 1,200–1,500 PSI) force water deep into wood grain and behind lap joints. This saturates the substrate, accelerating rot at nail lines and within wall cavities. On decks, it gouges softer springwood between harder growth rings, creating grooves that trap moisture and dirt, worsening future staining. Water injected behind siding travels downward, saturating insulation, promoting mold on sheathing, and causing interior drywall damage weeks later.
* Vinyl/Aluminum Siding: Forceful spray lifts panels at locking seams. Water infiltrates behind siding, pooling at the bottom track or saturating wall insulation. This leads to hidden mold growth, wood rot on underlying sheathing, and potential insect infestation. Re-securing lifted panels is difficult and often incomplete.
* Roof Shingles: Even low-pressure washing dislodges protective mineral granules from asphalt shingles. These granules shield the asphalt mat from UV degradation. Their loss dramatically shortens roof life, leading to premature cracking, leaks, and costly replacement. Water forced under shingle edges saturates the roof deck.
* Mortar Joints (Brick/Stone): High pressure erodes soft mortar, especially in older homes with lime-based mortar. This creates pathways for water intrusion into the wall cavity, leading to spalling, efflorescence, and structural deterioration. Repointing damaged mortar requires skilled masonry work.
* Windows & Doors: Water forced around frames compromises seals, leading to fogged insulated glass units (IGUs) and interior water damage.
The Safe Correction Protocol:
Assess First: Identify the material. Consult manufacturer guidelines (e.g., James Hardie for fiber cement, GAF for shingles). When uncertain, assume low pressure is required.
* Prefer Soft Washing for Organic Growth: For mold, mildew, or algae on siding, roofs, or decks, use a pump sprayer with an oxygen bleach solution (sodium percarbonate—not chlorine bleach, which damages plants and metals) or a dedicated biodegradable cleaner. Apply, allow dwell time per instructions (typically 10–15 minutes), then rinse gently with a garden hose (under 500 PSI). Chemicals lift the growth; water merely rinses residue. This is the industry-standard method for roof cleaning to preserve granules.
* Correct Pressure Settings (If Necessary):
* Wood Decks/Siding: Max 1,200 PSI, 25-degree (green) nozzle, held 12+ inches away, spraying with the wood grain.
* Concrete/Driveways: 2,500–3,000 PSI acceptable with appropriate nozzle.
* Always test in an inconspicuous area first. Observe for 24 hours.
* Technique Matters: Maintain consistent wand distance. Never aim directly at seams, joints, windows, electrical outlets, or roof edges. Work systematically: rinse from top down to prevent dirty water from running over cleaned areas.
* Dry Time:* Allow surfaces 24–48 hours of dry weather before painting or sealing. Trapped moisture under new coatings causes blistering and adhesion failure.
Critical Consideration: In humid climates (Southeast US, Pacific Northwest), the risk of forcing moisture into wall cavities is significantly elevated. Soft washing is strongly preferred. For historic homes with original wood siding, soft brick, or delicate finishes, consult a preservation specialist—aggressive cleaning can destroy irreplaceable character and value. Seasonal timing matters: avoid washing during high humidity or before forecasted rain.
Myth 2: “More Insulation Always Equals Better Energy Efficiency”
The Myth: “Stuff every available cavity with the highest R-value insulation you can find! Seal every crack! The more insulation, the lower your bills and the cozier your home.”
Why It Persists: Energy efficiency is universally praised. Marketing emphasizes “R-value per inch” as the sole metric of quality. The logic appears irrefutable: cold stays out, heat stays in. Online anecdotes celebrate dramatic savings from “super-insulating” attics or walls, omitting critical context.
The Damage Unveiled:
Insulation manages heat flow, but homes also require controlled moisture movement and ventilation. Over-insulating or insulating incorrectly without addressing vapor drive creates conditions for catastrophic failure:
* Trapped Moisture & Condensation: Warm, moist indoor air moves toward cooler surfaces. Adding thick insulation to the interior of a cold-climate wall without a properly placed vapor retarder causes moisture to condense within the wall cavity. This saturates insulation (rendering it ineffective), rots framing lumber, and fosters hidden mold growth behind drywall—often undetected for years. Similarly, sealing an attic floor tightly while adding deep cellulose without ensuring adequate soffit-to-ridge ventilation traps moisture from the living space, leading to roof deck rot and mold on sheathing.
* Thermal Bridging Ignored: Focusing solely on cavity R-value ignores heat loss through studs, joists, and concrete foundations. Adding R-30 to a wall with R-5 studs yields diminishing returns. Significant efficiency gains require continuous exterior insulation (rigid foam) that breaks thermal bridges—a complex retrofit demanding professional detailing at transitions.
* Combustion Appliance Safety: Sealing a home too tightly without addressing combustion air for fuel-burning appliances (furnace, water heater) risks backdrafting. Exhaust gases, including carbon monoxide, can be pulled back into living spaces. An energy audit with combustion safety testing is essential before major air sealing.
* Material Incompatibility: Spraying closed-cell foam directly against old knob-and-tube wiring traps heat, creating a fire hazard. Installing fiberglass batts tightly against chimney flues can cause overheating. Using vapor-impermeable insulation on the interior of a wall in a mixed-humid climate traps moisture inside the assembly.
The Safe Correction Protocol:
Professional Energy Audit First: Non-negotiable for major projects. A certified auditor (BPI or RESNET) uses blower door tests, infrared imaging, and combustion safety checks to identify air leaks, assess current insulation, and evaluate ventilation needs. They provide a prioritized, safe roadmap.
* Climate Zone Awareness: The U.S. Department of Energy defines 8 climate zones. Vapor retarder placement and ventilation requirements differ drastically. In cold climates (Zones 5–8), a vapor retarder belongs on the interior warm side. In hot-humid climates (Zones 1–3), walls often need to dry to the interior; interior vapor barriers can be dangerous. Consult the DOE climate zone map and insulation guidelines.
* Ventilation is Integral: For attics, ensure soffit vents are unobstructed and paired with ridge vents for continuous airflow. Install rafter vents (baffles) to maintain a clear air channel before adding insulation. For walls, consider smart vapor retarders (e.g., CertainTeed MemBrain) that adjust permeability based on humidity, allowing walls to dry when needed.
* Strategic Air Sealing: Seal major leaks first (recessed lights, attic hatches, plumbing penetrations, rim joists) using appropriate materials (fire-rated foam, caulk, rigid board). Never seal combustion air intakes.
* Respect Material Limits:* Do not compress fiberglass batts—they lose R-value. Ensure spray foam installers are certified. Keep insulation clear of flues and chimneys per code (typically 2+ inches).
Critical Consideration: In older homes (pre-1980s), adding significant interior insulation without exterior weatherization can shift the dew point dangerously within the wall assembly. A building science consultant is highly recommended for historic structures. Efficiency gains must never compromise structural drying potential, indoor air quality, or safety. Seasonal humidity fluctuations significantly impact moisture dynamics—solutions must accommodate year-round conditions.
Myth 3: “Sealing Your Crawl Space Completely Prevents Moisture Issues”
The Myth: “Close all vents! Seal the dirt floor with thick plastic! Insulate the walls! A sealed, conditioned crawl space is dry, energy-efficient, and rodent-proof. Ventilation just lets in humid air.”
Why It Persists: Traditional vented crawl spaces often have moisture problems, especially in humid regions. The “closed crawl space” concept gained traction through energy programs and case studies showing reduced humidity within the crawl space. Marketing highlights cleaner air and lower bills, omitting critical implementation requirements.
The Damage Unveiled:
A fully sealed crawl space is a precision-engineered system, not a simple DIY seal-and-forget task. Done incorrectly—which is common without professional design—it becomes a moisture and air quality hazard:
* Trapped Ground Moisture: While a vapor barrier on the ground is essential, sealing all vents without active moisture control is disastrous. Soil continuously emits moisture vapor. In a sealed environment with no exhaust, relative humidity skyrockets (often >80%), saturating the vapor barrier, causing condensation on cold ductwork or pipes, and creating ideal conditions for mold growth on wood joists. This moisture-laden air can be drawn into living spaces via the stack effect.
* Radon Accumulation: Soil gas, including radon, becomes trapped with no ventilation path. Radon levels can concentrate to dangerous levels and infiltrate the home. Mitigation requires a dedicated sub-membrane depressurization system—installed before sealing.
* Combustion Appliance Backdrafting: If fuel-burning appliances reside in the sealed space, lack of makeup air can cause dangerous backdrafting of combustion gases. Sealing requires relocating appliances or installing dedicated, code-compliant combustion air intakes—a complex HVAC task.
* Inadequate Dehumidification: Simply sealing vents is insufficient. A sealed crawl space requires a dedicated, properly sized dehumidifier (crawl-space specific) running continuously, or integration with the home’s HVAC system. DIYers often skip this essential, costly component.
* Pest Havens: While sealing vents deters rodents, trapped moisture attracts termites, carpenter ants, and other wood-destroying insects that thrive in damp, dark environments.
The Safe Correction Protocol:
Test Before You Seal: Conduct a radon test. Check for existing mold, wood rot, or pest activity. Consult a structural engineer if foundation issues are suspected.
* Hybrid Approach (Often Safest for Initial Steps): Install a high-quality, sealed vapor barrier (minimum 10–20 mil reinforced poly, seams overlapped 12+ inches and taped with UL-181 tape, extended 6+ inches up foundation walls and secured). Then, install a small, humidity-sensing exhaust fan (e.g., Humidex system) in one vent, paired with an intake vent opposite. This creates gentle, controlled airflow only when humidity exceeds a set point (e.g., 60%), expelling moist air without drawing in excessive outdoor humidity.
* Full Sealing Requires Professional Design: If pursuing a conditioned crawl space:
1. Install robust vapor barrier system.
2. Install radon mitigation system first if levels are elevated.
3. Seal all penetrations meticulously.
4. Insulate foundation walls with rigid foam board (not fiberglass).
5. Install dedicated dehumidifier with continuous drain OR integrate conditioned air supply/return ducts sized by an HVAC professional.
6. Ensure combustion appliances are relocated or have dedicated combustion air.
Monitor Relentlessly: Install a wireless hygrometer/thermometer. Check readings weekly. Ideal: <55% relative humidity, temperature within 10°F of living space. Investigate spikes immediately.
Critical Consideration: Building codes vary significantly. The International Residential Code (IRC) Appendix P provides guidelines, but local amendments may differ. In flood-prone areas, fully sealed crawl spaces can trap water during events. Always check with your local building department. Climate is critical: humid regions demand more robust moisture management than arid zones. Seasonal monitoring (especially during spring thaw or heavy rainy seasons) is essential for early detection of issues.
Myth 4: “Interior Paint Works Fine for a Quick Exterior Fix”
The Myth: “Ran out of exterior paint? No problem! Use leftover interior paint for a small touch-up on siding, trim, or porch. It’s paint—it covers color. No one will notice.”
Why It Persists: Convenience and cost-saving are powerful motivators. The immediate visual result (coverage) seems successful. Many lack awareness of fundamental chemical differences between interior and exterior formulations. “It’s just a tiny spot” feels low-risk.
The Damage Unveiled:
Interior and exterior paints are engineered for radically different environments. Using interior paint outside actively damages the substrate and complicates future repairs:
* UV Degradation: Exterior paint contains UV-resistant resins and high levels of titanium dioxide. Interior paint lacks these. Within weeks or months, the patched area chalks (turns to powder), fades dramatically, and peels, exposing the substrate to direct UV damage and accelerating deterioration.
* Moisture Vulnerability: Exterior paints are formulated to be flexible and vapor-permeable, allowing moisture within the wall to escape outward. Interior paints form a harder, less flexible, and often less vapor-permeable film. This traps moisture behind the paint, causing blistering, aggressive peeling, and promoting wood rot at the patch site. On masonry, trapped moisture causes spalling.
* Mildew Resistance: Exterior paints include potent mildewcides. Interior paints have minimal protection. The patched area becomes a prime target for unsightly mold and mildew, especially on north-facing walls or in humid climates.
* Adhesion Failure: Exterior paints have superior adhesion promoters for weathered surfaces. Interior paint adhesion fails quickly on exterior surfaces exposed to rain, dew, and temperature cycling, often taking surrounding good paint with it during failure.
* Compounding Future Repairs: When repainting, the area with interior paint fails differently. Sanding creates an uneven surface. Achieving a seamless blend is nearly impossible, often requiring repainting a much larger section.
The Safe Correction Protocol:
Never Mix Formulations: Treat interior and exterior paint as completely non-interchangeable. Store leftover exterior paint properly (sealed tightly, temperature-stable location) for future touch-ups.
* Proper Touch-Up Technique (Using Correct Paint):
1. Clean thoroughly with TSP substitute or mild detergent; rinse and dry completely (24+ hours).
2. Sand feathered edges of existing paint around the spot.
3. Prime only the bare substrate with a high-quality exterior primer compatible with the substrate.
4. Apply the exact same exterior paint (same brand, product line, color batch if possible) in thin coats, feathering edges outward.
5. “Paint to a break”—extend to a natural corner, window trim edge, or architectural line for seamless blending.
If Interior Paint Was Applied: Remove it completely before substrate damage occurs. Gently scrape and sand back to sound substrate. Clean thoroughly. Prime the bare spot. Repaint correctly with exterior paint. Ignoring it guarantees worse damage.
* Emergency Temporary Measure (Not Recommended): If bare wood must be covered immediately before rain, apply a clear exterior wood preservative or water repellent (e.g., Thompson’s WaterSeal for wood). This offers minimal UV protection but buys time. It is NOT a paint substitute and must be fully removed before proper painting.
Critical Consideration: Climate dictates failure speed. In sunny, arid climates (Arizona, Nevada), UV failure happens fastest. In humid, rainy climates (Florida, Washington), moisture trapping and mildew dominate. Coastal areas add salt spray corrosion. Always choose paint formulated for your region’s challenges (e.g., “Mildew Resistant” labels). When matching color, take a chip of existing paint to the store; digital matching on weathered surfaces is often inaccurate. Seasonal timing matters: avoid painting during high humidity, rain forecasts, or temperature extremes outside the product’s specified range.
Myth 5: “You Don’t Need a Permit for Small Electrical Projects”
The Myth: “Replacing an outlet, installing a new light fixture, or adding an outdoor plug is simple. Permits are only for big rewires or new panels. It’s just a few wires—I watched a 5-minute YouTube video.”
Why It Persists: Permit processes can feel bureaucratic. Fear of inspection failure or project delays discourages compliance. Online tutorials frequently omit permit requirements, focusing solely on physical steps. The immediate task seems straightforward, masking systemic risks.
The Damage Unveiled:
Electrical work without permits and inspections creates hidden, life-threatening hazards that compromise your entire home’s safety system:
* Fire Hazard from Incorrect Wiring: Miswiring (reversing hot/neutral), using undersized wire, or failing to secure cables properly causes arcing, overheating, and electrical fires inside walls, where they smolder undetected. Loose connections under wire nuts generate intense heat. Mismatched outlet and circuit amperage (e.g., 15-amp outlet on 20-amp circuit) creates unsafe conditions.
* Electrocution Risk: Incorrectly installing a GFCI (Ground Fault Circuit Interrupter) outlet—critical for kitchens, bathrooms, garages, outdoors—renders it useless. Without proper GFCI protection, a fault (like a hairdryer falling in water) won’t trip the breaker, risking severe shock or electrocution. Similarly, missing required AFCI (Arc Fault Circuit Interrupter) protection misses a critical fire prevention layer.
* Compromised Grounding: Replacing ungrounded (2-prong) outlets with modern 3-prong outlets without establishing a proper ground path (via new cable or GFCI protection with specific labeling) creates a deadly illusion of safety. Appliances have no path to safely divert fault current.
* Insurance & Resale Catastrophe: If a fire traces to unpermitted electrical work, homeowner’s insurance can deny the claim entirely. During a sale, inspectors flag unpermitted work. Buyers may demand costly corrections, lower offers significantly, or walk away. Disclosure is legally required in most jurisdictions.
* Systemic Overload: Adding circuits or outlets without assessing panel capacity can overload the main service or specific circuits, causing nuisance tripping, voltage drops (damaging electronics), and increasing fire risk at panel connections.
The Safe Correction Protocol:
Know Local Requirements: Contact your city or county building department before starting. Ask: “Do I need a permit to replace X?” Requirements vary significantly. Many jurisdictions allow homeowner electrical work with a permit and inspection, but some require licensed electricians for all work. Never assume.
* Permits Are Safety Verification: Paying for a permit buys a professional inspection. The inspector checks wire gauge, box fill capacity, proper grounding, GFCI/AFCI placement, connection torque, and overall compliance. This is invaluable quality control you cannot provide yourself.
* When DIY Electrical May Be Acceptable (With Permit):
* Replacing like-for-like fixtures/outlets/switches on an existing, properly wired circuit.
* Installing a new light fixture where wiring and a box already exist, within circuit capacity.
* Crucially: Turn off power at the breaker, verify dead with a multimeter (not just a non-contact tester), understand circuit layout, and follow current NEC standards meticulously.
When to Call a Licensed Electrician (Non-Negotiable):
* Any new circuit installation (running new cable from panel).
* Panel upgrades, replacements, or adding breakers.
* Installing GFCI/AFCI protection where none existed.
* Working inside the main electrical panel.
* Any work involving aluminum wiring.
* If you feel uncertain at any point.
Document Everything:* Keep permit and final inspection certificate with home records for future sales.
Critical Consideration: The National Electrical Code (NEC) updates every three years; local amendments apply. GFCI and AFCI requirements have expanded significantly beyond original scopes. Relying on outdated knowledge or generic online videos is dangerous. When in doubt, consult a professional. The cost of an electrician for a few hours is trivial compared to fire, injury, or denied insurance claims. Safety is not a DIY experiment. Seasonal considerations: avoid electrical work during storms or high humidity when risk of shock increases.
Myth 6: “Dish Soap is a Safe, All-Purpose Cleaner for Every Surface”
The Myth: “Dawn or Palmolive cuts grease! It’s gentle, cheap, and in every kitchen. Mix it with water for floors, countertops, windows, cars, even delicate fabrics. It’s the ultimate natural cleaner.”
Why It Persists: Dish soap’s effectiveness on greasy dishes is undeniable. Its ubiquity and low cost make it a default choice. Marketing phrases like “powerful degreaser” are misapplied to all cleaning contexts. Many believe “if it’s safe for dishes, it’s safe for everything.”
The Damage Unveiled:
Dish soap is engineered for one specific task: emulsifying food grease on non-porous ceramics/glass under warm water, followed by thorough rinsing. Using it broadly causes cumulative damage:
* Residue Buildup: Dish soaps contain surfactants, fragrances, dyes, and moisturizers designed to rinse cleanly from dishes. On larger surfaces (floors, countertops, car paint), these leave a sticky, invisible film that attracts and traps dust, dirt, and grime, making surfaces dirtier faster and creating slip hazards on floors. On car paint, it strips protective waxes and leaves a film that dulls the finish.
* Surface Degradation:
* Natural Stone (Granite, Marble, Limestone): Most dish soaps are slightly acidic or alkaline. Repeated use etches polished surfaces of calcareous stones, causing permanent dull spots and loss of shine. It degrades sealers prematurely.
* Wood Floors & Furniture: Residue attracts grit that scratches finishes. Moisture from improper drying seeps into seams. Some formulations contain oils that stain unfinished wood.
* Vinyl/Linoleum Floors: Residue buildup makes floors look perpetually dirty and degrades the wear layer over time.
* Windows & Glass: Leaves streaks and a hazy film due to surfactants not designed for glass.
pH Imbalance: Skin-friendly dish soap (pH ~7–10) is too alkaline for many surfaces. Using the wrong pH repeatedly degrades sealants, finishes, and materials. Stone requires neutral pH cleaners; wood floors need pH-balanced cleaners.
* Environmental Impact:* Phosphates (in some formulas), surfactants, and fragrances are not designed for large-scale environmental release via floor mopping or car washing. They can harm aquatic ecosystems. Dedicated eco-cleaners are formulated for broader use with lower impact.
The Safe Correction Protocol:
Match Cleaner to Surface & Soil:
* Floors: Manufacturer-recommended cleaners. Sealed hardwood: pH-neutral wood floor cleaner. Tile/vinyl: dedicated floor cleaner. Stone: neutral pH stone cleaner.
* Countertops: Stone: stone cleaner or 70% isopropyl alcohol. Laminate/Quartz: mild all-purpose cleaner. Avoid abrasives.
* Windows/Glass: 1:1 vinegar-water solution or ammonia-free glass cleaner. Use microfiber cloths.
* Cars: pH-neutral car wash soap designed to preserve wax/sealant. Never use dish soap.
* Delicate Fabrics: Mild detergent formulated for the fabric type.
Safer All-Purpose Base: For general non-porous surfaces (laminate counters, appliance exteriors, sealed tile), a solution of 1–2 tablespoons of clear, fragrance-free, dye-free castile soap (e.g., Dr. Bronner’s Pure-Castile) per quart of warm water is far superior to dish soap. Castile soap is plant-based, biodegradable, and leaves minimal residue. Always spot test first.
Rinse Thoroughly: If using diluted dish soap in a pinch (e.g., greasy stovetop), follow immediately with a clean water wipe to remove all residue. Never let it air dry.
Read Labels: Check surface manufacturer care instructions and cleaner labels for “safe for,” “avoid on,” pH information, and “residue-free” claims.
Microfiber Advantage:* High-quality microfiber cloths lift dirt and grease with minimal cleaner, reducing chemical use and residue. Use color-coded cloths for different zones (bath, kitchen, dusting) to avoid cross-contamination.
Critical Consideration: “Natural” does not equal “safe for all surfaces.” Vinegar (acidic) damages stone and waxed surfaces. Baking soda (abrasive) scratches glass and polished metals. Even water damages unsealed wood. Understanding the chemistry of both cleaner and surface is essential. For high-value surfaces (antique furniture, honed marble, exotic wood floors), invest in cleaners specifically engineered for that material. Cleaning is preservation, not just aesthetics. Seasonal note: In high-humidity months, residue buildup attracts mold; thorough rinsing is even more critical.
Myth 7: “Adding Rigid Foam Insulation to Interior Walls is a Simple Energy Saver”
The Myth: “Glue foam board insulation directly to your interior basement or exterior walls, then cover with drywall! Instant R-value boost, no demolition, cheap and easy. Perfect for cold rooms.”
Why It Persists: The visual of adding thick insulation seems logically beneficial. Foam board is inexpensive and readily available. Tutorials show seemingly straightforward installation. The promise of warming a cold basement wall is highly appealing.
The Damage Unveiled:
Installing rigid foam insulation on the interior side of walls, especially foundation walls or in cold climates, is a classic moisture trap with severe consequences:
* Condensation Within the Wall Assembly: In winter, warm, moist indoor air hits the cold surface of the foundation wall. If vapor-impermeable foam (like XPS or foil-faced polyiso) is installed without an air gap or drainage plane, moisture condenses between the foam and the cold wall. Trapped moisture has no drying path, saturating the concrete, leading to:
* Efflorescence & Spalling: Moisture dissolves salts, which crystallize on the surface. Wet/dry cycles cause concrete to flake and crumble, compromising integrity over time.
* Hidden Mold Growth: The damp, dark space becomes a perfect mold breeding ground behind drywall, contaminating indoor air. Remediation requires full demolition.
Thermal Bridging at Studs: If installed over framed walls, foam is interrupted by wood studs. Heat flows more easily through studs (thermal bridging), creating cold spots on interior drywall. These spots become condensation points for indoor humidity, leading to mold growth on the interior side at every stud location.
Fire Hazard: Most rigid foam boards are highly flammable and require a thermal barrier (like 1/2″ drywall) per code. Gaps during installation allow fire to spread rapidly within concealed spaces. Some foams release toxic fumes when burned.
Code Violations & Warranty Issues:* Installing insulation that traps moisture against a foundation wall often violates building codes (IRC Section R404.1.4) and can void structural warranties. It addresses a symptom while ignoring root causes (moisture intrusion, lack of exterior drainage).
The Safe Correction Protocol:
Address Moisture FIRST, Always: Before any interior wall treatment:
1. Fix exterior grading: Soil slopes away from foundation (6+ inches over 10 feet).
2. Ensure gutters/downspouts direct water at least 6 feet from foundation.
3. Inspect and repair foundation cracks from the exterior if possible, or use interior injection only after confirming crack stability (consult engineer for significant cracks).
4. Install or verify interior French drain and sump pump if chronic moisture exists.
For Foundation Walls: Correct Approaches:
* Best (Exterior): Excavate, apply dampproofing/waterproofing membrane, install rigid foam on the outside, add drainage board, backfill with gravel. Keeps wall warm and allows inward drying. (Major project, typically during renovation).
* Acceptable Interior Method (Ventilated Air Gap): Install vertical furring strips (1×2 or 1×3) against the foundation wall, creating a continuous 3/4″–1″ air gap. Attach rigid foam board to the furring strips, not directly to the wall. This gap allows moisture on the foundation wall to evaporate and be vented (via passive vents at top/bottom or a small fan). Then attach drywall to furring strips. Crucially: The air gap must vent to the interior conditioned space (not sealed!) to allow moisture dissipation. Requires careful detailing; best designed by a building professional.
For Above-Grade Framed Walls: Adding interior rigid foam is generally not recommended for retrofits due to thermal bridging complexity. Focus on air sealing gaps (caulking, spray foam at rim joists) and adding attic insulation (where heat loss is greatest). If wall insulation is critical, blown-in cellulose or fiberglass through small siding holes (by a professional) is far superior.
Consult a Building Science Professional: For basements or persistent cold walls, hire an energy auditor or building scientist. They perform moisture testing, identify true causes of cold/dampness, and design a safe, effective solution tailored to your home’s construction and climate.
Critical Consideration: Climate is paramount. In cold climates (Zones 5+), interior condensation risk on foundation walls is highest. In hot-humid climates (Zones 1–3), primary moisture drive is inward from outside; adding an interior vapor barrier can trap moisture inside the wall cavity during summer cooling. There is no universal “simple fix.” Building science principles must guide the solution. Never insulate a damp wall. Dry it first, understand why it’s damp, and choose a strategy allowing the assembly to dry in at least one direction. Seasonal monitoring (especially after heavy rains or during seasonal transitions) is essential.
Myth 8: “Installing a New Roof Over the Old One Saves Time and Money”
The Myth: “Skip the tear-off! Just nail the new shingles right over the existing layer. It’s faster, cheaper (no disposal fees), and adds extra protection. Many roofers offer this option.”
Why It Persists: Upfront cost savings are significant and immediately tangible. Contractors may promote it as budget-friendly. Homeowners see it as extending the existing roof’s life. The visual result (new roof surface) appears identical initially.
The Damage Unveiled:
While permitted by code in limited situations (typically only one existing layer, slope >2:12, structurally sound deck), overlaying shingles is rarely wise and often masks or accelerates underlying problems:
* Hiding Critical Damage: The existing roof deck (plywood/OSB) remains hidden. Rot, delamination, water damage, or inadequate nailing from the old roof goes unrepaired. New shingles nailed over a compromised deck fail prematurely. Water travels laterally under the new layer, causing extensive hidden damage before interior leaks appear.
Reduced Roof Lifespan: Shingles need a smooth, flat surface. Nailing over uneven, curled, or buckled old shingles creates stress points. Shingles bridge gaps between old shingles, leading to premature cracking, granule loss, and wind uplift failure. Heat buildup between layers accelerates asphalt shingle degradation. An overlay roof typically lasts 15–20 years vs. 25–30+ for a proper tear-off and install.
Structural Overload: Asphalt shingles weigh 200–400 lbs per square (100 sq ft). Adding a second layer significantly increases dead load. Older homes, especially those built before modern snow load codes, may not support this extra weight, risking long-term structural stress or failure under heavy snow.
Voided Manufacturer Warranties: Most shingle manufacturers explicitly void warranties if installed over more than one existing layer or without deck verification/repair. You lose coverage for material defects.
Ice Dam Aggravation: In cold climates, overlays can worsen ice dams. The extra layer adds insulation at the roof surface, potentially making the roof deck colder at the eaves while the attic remains warm, increasing the temperature differential that drives ice damming. Proper attic ventilation and insulation are the real solutions.
Resale and Inspection Red Flags:* Home inspectors note overlay roofs. Buyers perceive them as deferred maintenance or corner-cutting. This can complicate sales, lower offers, or trigger demands for full replacement before closing. Insurance companies may view it negatively.
The Safe Correction Protocol:
Full Tear-Off is Almost Always Recommended: The only reliable way to ensure a long-lasting, warrantied, safe roof is to remove all existing materials down to the deck. This allows for:
* Thorough deck inspection and repair.
* Installation of proper ice and water shield membrane along eaves and valleys.
* Verification and correction of roof ventilation (soffit, ridge).
* Installation of new drip edge flashing.
* A smooth, sound surface for new shingles.
When an Overlay Might Be Considered (Rare):
* Only one existing layer of shingles is present.
* Existing shingles are flat, smooth, and in good condition (no curling, buckling, severe granule loss).
* A structural engineer verifies the roof framing can support the additional weight.
* Local building code explicitly permits it for your roof slope and condition.
* You accept reduced lifespan, potential warranty limitations, and future complications. Get this assessment in writing from a reputable, independent roofing consultant—not just the contractor proposing the overlay.
Choose a Reputable Contractor: Get multiple bids. Ensure scope includes full tear-off, debris removal, deck inspection/repair, ice/water shield, and ventilation assessment. Verify licenses, insurance (liability and workers’ comp), and references. Check BBB reviews. A slightly higher bid for a proper job is vastly cheaper than premature failure.
Recycling: Ask about shingle recycling programs. Many facilities grind old shingles for use in asphalt paving, reducing landfill waste and sometimes lowering disposal costs.
Critical Consideration: True cost isn’t upfront savings—it’s shortened lifespan, hidden damage repairs, voided warranties, and negative impact on home value. Think cost per year of service. A $10,000 tear-off roof lasting 30 years costs ~$333/year. An $8,000 overlay lasting 18 years costs ~$444/year—and risks costly hidden damage. Invest in the foundation of your roof system: the deck and underlayment. When quotes vary significantly, scrutinize the scope; the lowest bid often cuts critical corners like full tear-off or adequate ice shield. Seasonal timing: Schedule roof replacement in mild, dry weather (spring or fall in most regions) to avoid weather delays and ensure optimal adhesion.
Myth 9: “Vinegar is a Universal, Safe Cleaner for Stone and Grout”
The Myth: “White vinegar cuts soap scum and hard water deposits! It’s natural, cheap, and great for shower tiles, grout, and even granite counters. Just spray and wipe.”
Why It Persists: Vinegar’s acidity effectively dissolves mineral deposits on glass and ceramic tile. Its “natural” label creates a false sense of universal safety. Countless DIY blogs promote vinegar solutions for bathroom cleaning without critical caveats.
The Damage Unveiled:
Vinegar (acetic acid, typically 5% concentration) is highly corrosive to calcareous (calcium-based) materials and degrades sealers. Its use on inappropriate surfaces causes irreversible damage:
* Etching Natural Stone: Marble, limestone, travertine, onyx, and some granites contain calcium carbonate. Vinegar reacts chemically, dissolving the polished surface. This creates dull, rough, permanent etch marks that cannot be wiped away. A single application can cause visible damage; repeated use destroys the finish. Honed (matte) stone is slightly more resistant but still vulnerable.
Degradation of Grout: While vinegar cleans surface grime on cement-based grout, its acidity slowly erodes the cement binder over time. This weakens grout, making it crumbly, porous, and more susceptible to staining and mold growth. It also strips grout sealers prematurely.
Sealer Destruction: Most stone and grout sealers (impregnators) resist water and oils, not strong acids. Vinegar breaks down the sealer’s molecular structure, rendering it ineffective. Unsealed stone absorbs stains instantly.
Metal Fixture Damage: Vinegar can tarnish or corrode chrome, nickel, brass, and other metal finishes on faucets and hardware, especially with prolonged contact.
Ineffective on True Mold: Vinegar kills some surface mold but does not penetrate porous grout to kill roots. Bleach is also ineffective on porous surfaces and damages grout. Vinegar’s acidity can even feed certain mold types.
The Safe Correction Protocol:
Know Your Surface Material:
* SAFE for Vinegar (Diluted): Glass, ceramic tile (glazed), porcelain, chrome fixtures (rinse immediately), coffee makers.
* NEVER Use Vinegar On: Natural stone (marble, limestone, travertine, onyx, some granite), unsealed grout, waxed surfaces, hardwood floors, cast iron, aluminum.
Cleaning Stone Safely:
* Daily: Damp microfiber cloth with pH-neutral stone cleaner or mild dish soap (rinse well!).
* Soap Scum/Hard Water on Stone: Use a cleaner specifically formulated for natural stone. For light deposits, a paste of baking soda and water gently rubbed with a soft cloth can work (baking soda is mildly abrasive but non-acidic; test first). Rinse thoroughly.
* Stubborn Stains: Use a poultice designed for the specific stain type following product instructions. Consult a stone restoration professional for valuable surfaces.
Cleaning Grout Safely:
* Prevention: Seal grout lines annually with a high-quality impregnating sealer after installation and cleaning.
* Routine Cleaning: Use a dedicated grout cleaner (check label for stone safety) or a paste of baking soda and hydrogen peroxide (3%). Apply, wait 10–15 minutes, scrub gently with soft nylon brush, rinse thoroughly. Hydrogen peroxide has mild antimicrobial properties without acidity.
* Mold/Mildew: For surface mold on sealed grout, diluted hydrogen peroxide (3% H₂O₂) is safer than vinegar or bleach. For deep mold in porous grout, professional remediation or grout removal/replacement may be necessary. Fix the moisture source (poor ventilation, leaks) to prevent recurrence.
Universal Stone/Grout Cleaner Test: When in doubt, mix 1 part clear ammonia with 3 parts water. Ammonia is alkaline and generally safe for stone (unlike acid). ALWAYS spot test in an inconspicuous area first and wait 24 hours. Never mix ammonia and bleach—deadly fumes result.
Critical Consideration: “Natural” does not mean “non-reactive.” Chemistry matters. Lemon juice (citric acid) causes the same etching damage as vinegar on stone. Even hard water left to dry on marble can cause etching over time. Prevention is key: use coasters, wipe spills immediately (especially acidic ones like wine, juice, coffee), and maintain sealers. For high-value stone surfaces, invest in professional cleaning and sealing services annually. Respect the material—its beauty requires specific care. Seasonal note: In humid months, mold growth accelerates; ensure bathroom ventilation runs during and 20+ minutes after showers.
Myth 10: “Closing HVAC Vents in Unused Rooms Saves Energy”
The Myth: “Why heat or cool an empty guest room? Just close the vents! You’re redirecting conditioned air to rooms you use, reducing the load on your system, and lowering bills.”
Why It Persists: The logic seems intuitive: less space to condition = less energy used. It feels like direct control. Many report feeling like their system runs less when vents are closed.
The Damage Unveiled:
Modern forced-air HVAC systems are engineered as balanced, closed-loop systems. Closing vents disrupts this balance, creating inefficiencies and mechanical stress that increase energy use and risk system failure:
* Increased Static Pressure: Closing vents (especially more than 1–2) restricts airflow. The blower fan works significantly harder to push air through restricted ductwork. Consequences include:
* Reduced Efficiency: The system moves less total air. The thermostat senses temperature slowly in main areas, causing longer run cycles to reach the setpoint, using more energy overall. Studies (Lawrence Berkeley National Laboratory) show closing vents can increase energy consumption by 5–15%.
* Frozen Evaporator Coil (AC): Restricted airflow over the cold coil causes moisture to freeze on it. Ice buildup insulates the coil, drastically reducing cooling. If ice melts rapidly, it can cause water damage from drain pan overflow. Severe freezing can damage the compressor.
* Cracked Heat Exchanger (Furnace): In heating mode, restricted airflow causes the heat exchanger to overheat. Repeated thermal stress leads to cracks—a critical safety hazard allowing carbon monoxide to leak into living spaces. Repair requires full heat exchanger or furnace replacement.
Amplified Duct Leakage: Most homes have leaky ducts (especially in attics/crawl spaces). Higher static pressure from closed vents forces more conditioned air out of these leaks. You pay to heat or cool unconditioned spaces. Sealing duct leaks is far more effective for savings.
Comfort Imbalance & Short Cycling: Closing vents causes pressure imbalances. Air seeks the path of least resistance, leading to uneven temperatures and increased noise (whistling). The system may short-cycle (turn on/off frequently), reducing dehumidification (in AC mode) and increasing component wear.
Voided Equipment Warranties:* Manufacturers design systems for specific airflow ranges. Operating outside these parameters due to restricted airflow can void compressor or heat exchanger warranties.
The Safe Correction Protocol:
Keep All Vents Open (Minimum 80% Open): Ensure furniture, rugs, or curtains aren’t blocking vents. Maintain balanced airflow throughout the system.
Address Real Causes of High Bills:
* Seal Duct Leaks: Hire an HVAC professional to seal accessible duct joints in attics, crawl spaces, and garages with mastic sealant (not duct tape!). Highest-return energy upgrade.
* Improve Building Envelope: Focus on attic insulation, sealing gaps around windows/doors, rim joists. Reduces the actual load on your HVAC system.
* Install a Programmable or Smart Thermostat: Set temperatures back (e.g., 62°F heat / 85°F cool) during unoccupied periods. Modern systems handle setbacks efficiently.
* Regular Maintenance: Change air filters monthly during peak season (use correct MERV rating—typically 8–11; higher MERV restricts airflow if system isn’t designed for it). Schedule annual professional tune-ups.
For True Zoning Needs:
* Install a Zoning System: Involves motorized dampers inside ductwork controlled by multiple thermostats, plus a bypass damper to manage pressure. Complex, professional installation designed to maintain proper airflow. Not simply closing manual vents.
* Consider Ductless Mini-Splits:* For additions, conversions, or rooms with persistent comfort issues, provides independent, efficient heating/cooling without modifying the main duct system.
Critical Consideration: The myth persists because closing vents feels effective—you feel less air from that vent. However, physics dictates inefficient system compensation. Trust building science, not sensation. If a room is consistently too hot or cold, the issue is likely undersized ducts, poor insulation, solar gain, or system imbalance—not a need to close vents. Consult a qualified HVAC technician (NATE certified) to diagnose comfort issues. They can perform Manual J load calculation and Manual D duct design assessment. Protecting your HVAC system’s health saves far more money and prevents dangerous failures than the false economy of closed vents. Seasonal note: During extreme temperature swings (heatwaves, deep freezes), maintaining balanced airflow is even more critical to prevent system strain.
Myth 11: “Standard Drywall is Fine for Bathrooms and Basements”
The Myth: “Drywall is drywall. Just paint it with semi-gloss in the bathroom! For the basement, slap up regular sheets—it’s cheap and easy. Moisture isn’t a big deal if you’re careful.”
Why It Persists: Standard drywall (gypsum board with paper facing) is ubiquitous, inexpensive, and familiar. The immediate installation process is identical to moisture-resistant types. Many homes have standard drywall in these areas that seem fine for years, reinforcing the misconception. “It hasn’t failed yet” feels like validation.
The Damage Unveiled:
Bathrooms and basements present unique moisture challenges. Standard drywall is highly vulnerable. Failure is often slow and hidden until severe:
* Bathrooms:
* Paper Facing Absorption: Paper facers readily absorb moisture from steam, splashes, and humidity. Once damp, paper loses integrity, becomes soft, and provides a food source for mold.
* Hidden Mold Growth: Mold spores are ubiquitous. Moisture + organic paper = mold colony. Growth starts behind the paint and within the wall cavity, invisible until bubbling paint, discoloration, or musty odors appear. Remediation requires full removal, framing inspection, and professional cleaning—costly and disruptive.
* Sagging and Failure: Prolonged moisture exposure softens the gypsum core. Ceilings above showers can sag or collapse. Walls become soft to the touch.
Basements:
* Ground Moisture Intrusion: Basements are below grade. Moisture vapor constantly migrates through concrete foundation walls and slabs. Standard drywall wicks this moisture upward.
* Condensation: Cool foundation walls meet warm, humid basement air, causing condensation directly on the back of the drywall. Standard drywall absorbs this instantly.
* Catastrophic Failure: During heavy rain or minor flooding, standard drywall acts like a wick, drawing water high up the wall. It becomes saturated, heavy, and collapses. Mold growth is rapid and extensive. Replacement requires full demolition down to the studs.
Compounded by Paint: Painting standard drywall with semi-gloss traps moisture inside the board. Moisture enters through edges or the back, but the paint film prevents drying to the room air, accelerating internal damage and mold growth.
The Safe Correction Protocol:
Bathrooms: Use Appropriate Materials:
* Green Board (Moisture-Resistant): Waxed paper facers and additives. Acceptable only for walls outside shower/tub areas (e.g., vanity walls). Never use in wet areas. Seal seams thoroughly with mold-resistant joint compound.
* Cement Board (e.g., HardieBacker, Durock): MANDATORY for shower/tub surrounds, steam rooms, areas behind tile. Portland cement and aggregate board, completely impervious to water. Provides stable, non-organic substrate for tile. Install over moisture barrier per manufacturer instructions. Tape seams with alkali-resistant mesh tape and thinset mortar.
* Glass-Mat Drywall (e.g., DensArmor Plus, XP): Superior to green board. Fiberglass mats replace paper facers, highly resistant to mold and moisture absorption. Excellent choice for all bathroom walls and ceilings, including areas near sinks. Still requires cement board in direct wet zones.
Basements: Prioritize Moisture Management FIRST:
1. Fix exterior water: Grade soil away, clean gutters, extend downspouts.
2. Interior drainage: Ensure French drain and sump pump are functional.
3. Dehumidify: Run a high-capacity dehumidifier year-round to maintain <50% relative humidity.
4. Then choose wall system:
* Best Practice (Ventilated Assembly): Install rigid foam insulation board (XPS) against foundation wall with drainage mat/air gap. Frame a 2×4 wall in front, leaving small air gap. Install moisture-resistant drywall (glass-mat) on framed wall. Allows moisture on foundation wall to drain/evaporate.
* Acceptable Alternative: Use moisture- and mold-resistant drywall (glass-mat type) on framed walls at least 1 inch away from foundation wall. Never attach drywall directly to concrete.
* Avoid: Standard drywall, green board (insufficient for basements), or attaching any drywall directly to concrete blocks or poured walls.
Ceilings: In both bathrooms and basements, use moisture-resistant drywall (glass-mat preferred). Ensure adequate bathroom ventilation (fan rated for room size, vented outside*, not into attic) runs during and 20+ minutes after showers.
Critical Consideration: “Waterproof” drywall doesn’t exist. All gypsum-based products fail if submerged. The goal is moisture resistance and mold resistance for humidity and minor splashes. In areas with known leaks, active seepage, or high flood risk, drywall of any kind is inappropriate. Consider alternatives like cementitious panels, rigid PVC panels, or leaving walls unfinished with painted concrete (after proper moisture mitigation). When finishing a basement, consult a professional experienced in below-grade construction. Cutting corners on moisture management guarantees future damage, health hazards, and costly remediation. The small premium for proper materials and techniques is insignificant compared to mold remediation and reconstruction costs. Seasonal note: Basements are most vulnerable during spring thaw and heavy rainy seasons; monitor humidity closely during these periods.
Myth 12: “Tree Branches Touching the House Are Harmless”
The Myth: “A few leaves or small twigs brushing the roof or siding won’t hurt. It’s natural. The tree provides nice shade. Trimming is messy and expensive.”
Why It Persists: Damage is slow, incremental, and often hidden. The aesthetic and shade benefits of trees are immediate and valued. Many underestimate the persistent abrasive force of wind-driven branches or the biological pathways they create.
The Damage Unveiled:
Branches in contact with your home are active agents of deterioration across multiple systems:
* Roof Damage:
* Shingle Abrasion: Wind causes branches to rub against shingles like sandpaper. This scrapes off protective granules, exposing asphalt mat to UV degradation. Granule loss leads to premature cracking, leaks, and significantly shortened roof life. Damage concentrates along roof edges where branches contact.
* Moisture Trapping: Leaves and debris accumulate where branches rest on the roof, especially in valleys or against chimneys. This traps moisture against shingles and decking, promoting rot, mold, and algae growth. Clogged valleys are a primary cause of roof leaks.
* Gutter Clogging: Overhanging branches dump leaves, twigs, and seeds directly into gutters, causing frequent clogs. Overflowing gutters lead to water damage on fascia boards, soffits, siding, and foundation walls.
Siding and Structure Damage:
* Abrasion and Scratches: Constant rubbing wears away paint, stain, or siding surface. This exposes substrate to moisture and UV damage, accelerating deterioration. On wood siding, it creates entry points for moisture and insects.
* Moisture Retention: Branches block sunlight and airflow against walls, keeping siding damp longer after rain or dew. This promotes mold, mildew, and wood rot, particularly on north-facing walls or in humid climates.
* Insect Highways: Branches provide direct access for carpenter ants, termites, rodents, and squirrels to bypass pest barriers and enter through eaves, soffits, or damaged siding. Squirrels chew entry holes; ants establish trails to food sources inside.
Safety Hazards:
* Storm Damage: During high winds, heavy snow, or ice storms, branches resting on the house can snap and cause immediate, severe damage to roofs, gutters, windows, or siding. Larger limbs pose falling risks.
* Fire Risk (Wildfire Zones): In fire-prone areas, branches touching the house provide a direct “ladder fuel” path for flames to reach the roof and engulf the structure. Defensible space guidelines universally require clearance.
The Safe Correction Protocol:
Establish Minimum Clearance: Maintain at least 6–10 feet of clearance between all tree branches and your roof, walls, gutters, and chimney. For large trees near the house, 10+ feet is safer. Prevents contact during wind sway and allows sunlight/airflow for drying.
Professional Tree Trimming (Arborist):
* Do NOT attempt major trimming yourself, especially near power lines, roofs, or large limbs. Falling branches cause serious injury or death. Improper cuts damage the tree, inviting disease.
* Hire a certified arborist (ISA certification). They understand proper pruning techniques (cutting just outside the branch collar to promote healing), tree biology, and safety protocols. They have equipment and insurance.
* Request “crown raising” (removing lower branches) and “crown thinning” (selectively removing branches to reduce wind resistance) rather than “topping,” which severely damages trees.
Regular Maintenance Schedule: Inspect trees near your home seasonally (spring and fall). After major storms, check for broken limbs or new contact points. Schedule professional trimming every 3–5 years, depending on species and growth rate.
Strategic Tree Placement for New Plantings: When planting new trees, consider mature height and spread. Place large shade trees (oaks, maples) at least 15–20 feet from the house. Use smaller ornamental trees closer for aesthetics without risk. Consult local nursery experts on species suitable for your climate and soil.
Gutter Guards (Supplemental):* While not a substitute for branch clearance, high-quality gutter guards (reverse curve or fine mesh) can reduce debris accumulation from remaining overhang, but require maintenance and are not foolproof.
Critical Consideration: Trees are valuable assets—they increase property value, provide energy-saving shade, improve air quality, and enhance well-being. The goal is responsible coexistence, not removal. Proper pruning improves tree health, structure, and longevity. Document trimming with photos and keep records; this demonstrates proactive maintenance to insurers. In wildfire-prone regions (CAL FIRE zones, etc.), strict defensible space regulations mandate specific clearance distances—compliance is non-negotiable for safety and insurance. View tree maintenance as essential home preservation. The cost of professional trimming is minor compared to roof repairs, pest infestations, or fire damage. Protect your home’s envelope; let trees thrive at a safe distance. Seasonal timing: Schedule trimming in late winter or early spring for most species to minimize stress and disease risk; avoid trimming during active growth periods or extreme weather.
Myth 13: “DIY Foundation Crack Injection is a Permanent Fix”
The Myth: “See a hairline crack in your basement wall? Buy an epoxy or polyurethane injection kit from the hardware store! Inject the resin, and it’s sealed forever. Cheap, easy, and stops water leaks.”
Why It Persists: Injection kits are prominently marketed with compelling before/after photos. The process seems straightforward: drill holes, insert ports, inject. The immediate result (crack filled, leak stopped) feels like a complete solution. The high cost of professional foundation repair makes DIY appealing.
The Damage Unveiled:
Injecting a foundation crack without understanding its cause is like putting a bandage on a broken bone. It addresses the symptom while ignoring potentially serious underlying conditions, often worsening the problem:
* Masking Structural Movement: Not all cracks are equal. Hairline vertical cracks in poured concrete are often shrinkage cracks and may be stable. However, diagonal cracks, stair-step cracks in block walls, cracks wider at the top or bottom, or cracks that are actively leaking/widening indicate structural movement (settling, heaving, lateral pressure). Injecting these cracks seals them shut but does nothing to stop ongoing movement. Pressure continues to build, causing the crack to re-open next to the injection, or worse, causing new cracks elsewhere. You’ve spent money and effort while the structural issue progresses unchecked.
Improper Material Selection: Kits offer epoxy (rigid, high strength) or polyurethane (flexible, expands with moisture). Using rigid epoxy on a crack subject to any movement guarantees re-cracking. Using hydrophobic polyurethane on a crack with active water flow might not seal properly; hydrophilic polyurethane is needed. DIYers rarely have expertise to choose correctly.
Incomplete Injection & Hidden Damage: Achieving complete, deep injection requires precise pressure, port spacing, and technique. DIY kits often result in surface-level sealing only. Water finds the path of least resistance—bypassing the injected section through voids behind the wall or along the crack deeper in the foundation. Moisture remains trapped within the wall assembly, promoting hidden mold growth and continued deterioration of concrete or rebar (spalling, rust jacking).
Voiding Professional Repair Options: Poorly executed DIY injection can contaminate the crack with incompatible materials, making future professional repair (like carbon fiber straps or wall anchors) more difficult, expensive, or impossible. Professionals may refuse to work on a previously injected crack.
Ignoring the Water Source: A leaking crack is a symptom of water pressure against the foundation. Injecting the crack stops the leak at that point but does nothing to address the root cause: poor grading, clogged gutters, inadequate drainage. Water pressure remains high, seeking the next weakest point—often causing a new leak nearby or exacerbating pressure on other walls.
The Safe Correction Protocol:
Diagnose Before You Treat (Non-Negotiable):
1. Monitor the Crack: Clean the area. Place tape or a crack gauge across it. Check monthly for 6–12 months. Is it widening? Changing direction? Is water leaking only during heavy rain (hydrostatic pressure) or constantly (possible plumbing leak)?
2. Identify Crack Type:
* Vertical, hairline, uniform width: Likely shrinkage crack. Monitor. May not need injection if dry.
* Diagonal, wider at top/bottom, stair-step in block: RED FLAG. Indicates structural movement. STOP. CONSULT A PROFESSIONAL.
* Horizontal crack in poured wall: CRITICAL RED FLAG. Indicates severe lateral pressure. IMMEDIATE PROFESSIONAL ASSESSMENT REQUIRED.
3. Fix Exterior Water Management FIRST: Before any interior crack repair:
* Ensure soil slopes away from foundation (6″ over 10′).
* Clean gutters; extend downspouts 6+ feet from foundation.
* Verify exterior drainage (French drain) is functional.
* Address plumbing leaks near foundation.
When DIY Injection Might Be Appropriate (Rare):
* Only for small, stable, dry shrinkage cracks in poured concrete walls with no signs of movement.
* Only after exterior water management is confirmed optimal.
* Use a high-quality kit with clear instructions. Follow meticulously: drill angled holes, clean dust, insert ports correctly, inject slowly until resin emerges from next port. Wear full PPE (respirator, gloves, eye protection).
* Understand this is a cosmetic/sealing fix, not structural reinforcement.
When to Call a Foundation Specialist (Most Common Scenario):
* Any crack showing signs of movement (widening, shifting).
* Any horizontal crack.
* Any crack with active water leakage (after confirming exterior fixes are done).
* Cracks accompanied by sticking doors/windows, sloping floors, or wall bowing.
* Get Multiple Assessments: Hire 2–3 reputable, licensed foundation repair contractors for inspections and proposals. Look for companies with engineering support, warranties, and good BBB/local reviews. Ask about their diagnostic process. A trustworthy contractor explains the cause* and recommends solutions addressing the root problem (e.g., wall anchors for bowing walls, pier systems for settling), not just crack injection.
Critical Consideration: Your foundation is the literal base of your home. Mistakes here are catastrophic and exponentially expensive to fix later. The cost of a professional inspection ($300–$600) is trivial insurance. A structural engineer’s report (highly recommended for significant cracks) provides an unbiased diagnosis. Never let fear of cost drive a decision that risks your home’s structural integrity. Reputable foundation companies offer financing. Prioritize safety and long-term stability over a quick, cheap fix. Document all cracks with photos and measurements over time—this data is invaluable for professionals. True peace of mind comes from knowing the problem is correctly diagnosed and resolved, not merely hidden. Seasonal monitoring is crucial: cracks may widen during freeze-thaw cycles or after heavy rains; inspect after significant weather events.
Myth 14: “Pressure-Treated Wood Doesn’t Need Sealing”
The Myth: “It’s ‘pressure-treated’—the chemicals protect it forever! No need for stain or sealant. Saves time and money. It will weather to a nice gray patina.”
Why It Persists: The term “pressure-treated” implies comprehensive, permanent protection. Many see weathered gray decks as “natural” or “rustic.” The initial cost and effort of sealing feel avoidable. Hardware stores prominently display treated lumber but may not emphasize ongoing maintenance requirements.
The Damage Unveiled:
Pressure treatment protects against insect infestation and fungal decay within the wood core. It does nothing to protect the wood surface from the primary enemies of outdoor wood: UV radiation and moisture cycling. Skipping sealing causes rapid, visible deterioration:
* UV Degradation (Graying and Fiber Loss): Sunlight’s UV rays break down lignin, the natural polymer binding wood fibers. Untreated surface wood turns gray within months. Continued exposure causes surface fibers to become brittle and erode (checkering, splintering). This rough, splintered surface is uncomfortable and hazardous. The wood loses structural integrity at the surface, though the core may remain sound initially.
Moisture Cycling Damage: Wood swells when wet and shrinks when dry. Without a water-repellent sealant, the surface absorbs rain and dew, then dries out. This constant expansion and contraction causes cracks, checks (surface splits), and warping. Cracks allow deeper moisture penetration, accelerating decay at the core over time. Even pressure-treated wood will rot if constantly saturated. Treatment chemicals can also leach out faster with repeated wetting, reducing long-term protection.
Splintering and Safety Hazard: The combination of UV degradation and moisture cycling creates a rough, splintered surface. This is particularly hazardous on decks, stairs, and handrails where bare feet or hands make contact. Splinters cause injuries and make the surface unpleasant to use.
Reduced Lifespan and Value:* An unsealed pressure-treated deck may show significant deterioration in 3–5 years, requiring sanding, repair, or replacement. Properly sealed and maintained, the same deck can last 10–15 years or more. The initial effort of sealing pays dividends in longevity, safety, and aesthetic value. A weathered, splintered deck diminishes curb appeal and property value.
The Safe Correction Protocol:
Wait Before Sealing: New pressure-treated wood is saturated with preservatives and moisture. Sealing too soon traps moisture inside, causing premature failure. Wait until the wood is dry to the touch and accepts water (sprinkle test: water soaks in rather than beading up). This typically takes 4–12 weeks depending on climate, season, and wood moisture content. Patience prevents future problems.
Clean Thoroughly First: Remove dirt, mildew, and mill glaze using a deck cleaner specifically formulated for pressure-treated wood. Follow with a brightener to restore pH balance and open wood pores for better sealant absorption. Rinse thoroughly and allow to dry completely (48+ hours of dry weather).
Choose the Right Product:
* Water Repellent Sealers: Penetrating oils (e.g., linseed oil-based, synthetic) that repel water without forming a film. Require reapplication every 1–2 years but are easy to maintain. Best for natural wood look.
* Semi-Transparent Stains: Combine UV inhibitors, water repellents, and pigment. Pigment blocks UV rays significantly better than clear sealers. Reapply every 2–4 years. Offers color options while showing wood grain.
* Solid Color Stains: Provide maximum UV protection and hide imperfections. Reapply every 4–7 years. Resemble paint but allow some wood movement.
* Avoid Film-Formers (Paint, Varnish): Trap moisture, peel, and are difficult to maintain on horizontal surfaces.
Apply Correctly:
* Work in cool, dry, shaded conditions (avoid direct sun, high heat, or humidity).
* Use a high-quality brush, roller, or sprayer (back-brush if spraying).
* Apply liberally to all surfaces—top, bottom, edges, ends. Pay special attention to end grains and cut ends, which absorb moisture most readily.
* Follow manufacturer’s coverage rates and drying times between coats.
Maintain Proactively:* Inspect annually. Reapply sealant at the first sign of water beading failure or color fading. Light cleaning before reapplication ensures adhesion. Consistent maintenance extends service life dramatically.
Critical Consideration: Climate significantly impacts maintenance frequency. In sunny, arid climates (Southwest), UV degradation is the primary concern—semi-transparent or solid stains with high UV inhibitors are essential. In humid, rainy climates (Southeast, Pacific Northwest), moisture resistance is paramount; penetrating sealers with mildewcides are critical. Coastal areas require products resistant to salt spray corrosion. The “nice gray patina” is a sign of active surface degradation, not benign aging. For high-traffic areas like deck stairs or handrails, prioritize safety: splintered wood is a liability. When in doubt about product selection or application timing, consult the wood supplier or a reputable paint/decking specialist. Seasonal timing is crucial: seal in spring or early fall during stable, dry weather; avoid sealing before rain or during extreme heat. Properly maintained pressure-treated wood delivers decades of safe, attractive service—neglect guarantees premature failure and higher long-term costs.
Myth 15: “Bleach is the Best Solution for Mold on Walls”
The Myth: “See black spots? Mix bleach and water! It kills mold instantly, whitens the surface, and leaves a clean smell. It’s what professionals use.”
Why It Persists: Bleach’s disinfecting power on non-porous surfaces (countertops, tiles) is well-known. Its ability to whiten surfaces creates an illusion of cleanliness. Marketing and common household practice reinforce its use for all mold situations. The immediate visual change (spots lightening) feels like success.
The Damage Unveiled:
Using bleach on porous surfaces like drywall, wood, or grout is ineffective for mold remediation and often worsens the problem:
* Surface-Only Action: Bleach (sodium hypochlorite) is mostly water (94–97%). On porous materials, the water component soaks deep into the material while the chlorine remains on the surface. This feeds the mold roots (hy