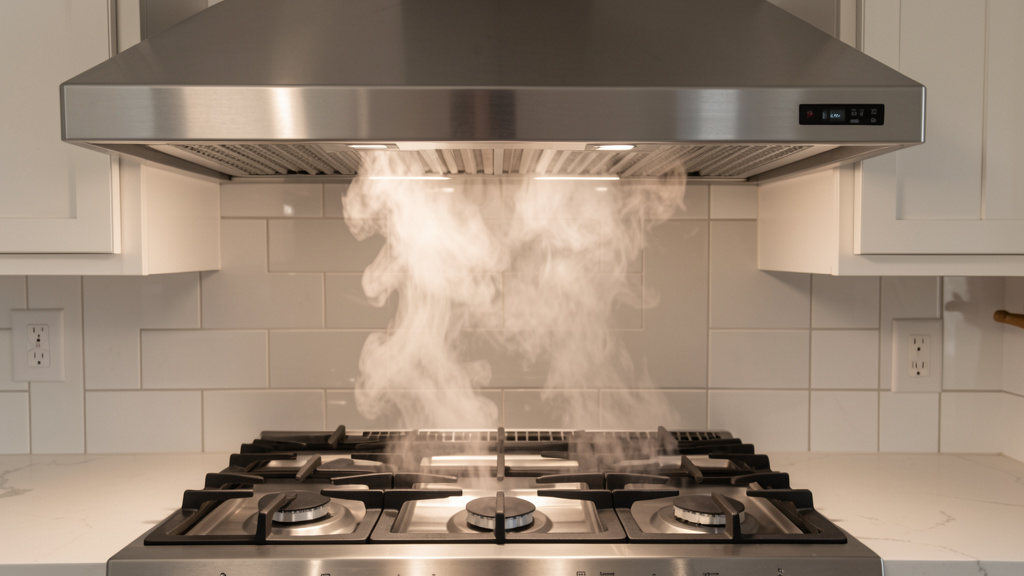
A systematic approach to selecting a range hood that meets your kitchen’s ventilation needs while navigating real-world constraints and priorities.
Your kitchen’s air quality, comfort, and long-term maintenance depend significantly on effective ventilation. Yet selecting a range hood often involves navigating technical specifications, conflicting advice, and spatial limitations. This guide offers a structured methodology grounded in established engineering principles, building science standards, and practical installation considerations. You’ll learn how to determine appropriate airflow for your specific layout, interpret noise ratings meaningfully, evaluate installation feasibility early, and align choices with your cooking habits and home context. The focus remains on actionable steps, adaptable solutions, and informed decision-making—without reliance on marketing claims or unverifiable assertions.
Introduction: Why Ventilation Choice Matters
Consider a typical cooking session: boiling pasta releases steam; searing meat generates smoke and grease particles; simmering sauces leaves lingering aromas. Without effective capture and exhaust, moisture may contribute to cabinet warping or hidden mold growth over time. For gas cooktops, incomplete combustion can release nitrogen dioxide and carbon monoxide—compounds linked to respiratory irritation with prolonged exposure in poorly ventilated spaces. Grease accumulation on surfaces increases cleaning frequency and may degrade finishes. Building codes in many regions require mechanical exhaust for kitchen ranges precisely because of these cumulative impacts on indoor environments and structural integrity. While performance varies widely across installations, understanding core principles empowers you to select a system suited to your space, usage patterns, and constraints. This framework prioritizes function, safety, and long-term usability—whether you’re renovating, building new, or replacing an existing unit.
The Three Pillars Framework: A Holistic Approach to Selection
Effective range hood selection balances three interconnected dimensions: Airflow Integrity, Acoustic Harmony, and Installation Reality. Overemphasizing one pillar often compromises the others. A high-CFM unit paired with restrictive ducting underperforms and creates excess noise. A whisper-quiet model may lack sufficient capture capacity for your cooktop. A visually striking hood might be impossible to install within your structural constraints. This framework encourages evaluating all three pillars before aesthetics or brand influence take precedence. Each section includes adaptable diagnostics, contextual considerations, and decision filters to guide your process.
Pillar 1: Airflow Integrity – Determining Functional Airflow Needs
Airflow capacity, measured in Cubic Feet per Minute (CFM), reflects how much air the system moves. However, the CFM rating listed on packaging typically represents ideal laboratory conditions—not real-world performance. Actual effectiveness depends on kitchen size, cooktop output, duct configuration, and installation quality. This section provides transparent methods to estimate requirements while acknowledging variables.
Step 1: Establish a Baseline Using Kitchen Volume
This approach aligns with ventilation guidelines from the Home Ventilating Institute (HVI) and supports the intent of residential building codes (e.g., IRC Section M1503):
1. Calculate kitchen volume: Length (ft) × Width (ft) × Ceiling Height (ft).
Example: 12′ × 15′ kitchen with 9′ ceilings = 1,620 cubic feet.
2. Apply air changes per hour (ACH): Standard guidance suggests 15 ACH for typical residential kitchens. For high-BTU ranges (over 60,000 BTU) or open layouts flowing into living areas, 20 ACH is commonly referenced.
3. Calculate baseline CFM: (Kitchen Volume × ACH) ÷ 60 minutes.
Example (Standard): (1,620 × 15) ÷ 60 = 405 CFM.
Example (High-BTU/Open Plan): (1,620 × 20) ÷ 60 = 540 CFM.
Why this matters: This establishes a foundational requirement. A hood rated near this baseline may still underperform if ducting is restrictive or the cooktop generates significant heat load. It serves as a starting point—not a final specification.
Step 2: Adjust for Cooktop Type and Output
Your cooking surface directly influences contaminant generation:
– Electric Coil/Induction (Under 15,000 BTU): Minimal adjustment needed; baseline CFM often sufficient.
– Standard Gas Range (15,000–40,000 BTU): Baseline calculation generally adequate; ensure hood width matches or exceeds cooktop width.
– High-Output Gas Range (40,000–100,000+ BTU): Supplement baseline with cooktop-focused estimation: approximately 1 CFM per 100 BTU of total burner output.
Example: 75,000 BTU range → ~750 CFM.
Note: When cooktop-derived CFM exceeds volume-based baseline, prioritize the higher value.
Contextual nuance: Island installations typically require 15–25% more airflow than wall-mounted setups at equivalent BTU levels due to the absence of a rear wall to contain rising plumes. Always round up to the nearest standard hood rating (e.g., 540 CFM → select 600 CFM minimum).
Step 3: Account for Ducting Impact on Performance
Duct configuration significantly influences real-world airflow. Every transition, elbow, and foot of duct introduces resistance. While precise engineering calculations require professional tools, these generalized estimates help set expectations:
– Duct Length: Longer runs increase resistance. Minimizing total length is ideal.
– Elbows (90-degree): Each sharp turn impedes airflow. Long-radius elbows reduce resistance compared to standard 90s.
– Transitions: Adapting between duct shapes (e.g., round to rectangular) creates turbulence.
– Dampers and Caps: Exterior caps with functional dampers are essential but add minor resistance. Ensure dampers move freely.
– Duct Material: Smooth, rigid metal duct (galvanized steel or aluminum) maintains airflow efficiency. Flexible duct—especially crimped sections—substantially restricts flow and is discouraged inside walls or ceilings.
Illustrative synthesis:
Baseline requirement: 600 CFM. Estimated duct path: 12 feet total, two 90° elbows, one transition, roof cap.
Conceptually, resistance from this path means the hood must be rated higher than 600 CFM to deliver ~600 CFM at the cooktop.
Practical step: Select a hood rated for 800–900 CFM and prioritize optimizing the duct path (shorter route, fewer elbows, correct sizing).
Note: These derating estimates are generalized. Actual performance varies based on specific components and installation quality. For complex paths or high-CFM needs (>700 CFM), consulting a ventilation professional is advisable.
Important Considerations and Common Misconceptions
- “Bigger CFM is always better”: Oversized systems can create negative pressure, potentially interfering with other combustion appliances (e.g., water heaters). They often require larger ducts (challenging in retrofits), increase energy use, and may operate louder. Match capacity to documented need.
- Ductless (Recirculating) Hoods: These use charcoal filters to address odors but do not remove heat, moisture, or combustion gases. Industry guidelines and building codes generally do not recommend them for gas ranges. They may be considered only for low-BTU electric/induction cooktops in situations where ducting is structurally impossible—and with awareness of their limitations. Charcoal filters require replacement every 3–6 months to maintain minimal effectiveness.
- Makeup Air: In tightly constructed homes or when exhaust capacity exceeds 400 CFM, introducing replacement air may be necessary to prevent pressure imbalances. Requirements vary by local code and home characteristics. For installations above 400 CFM, discuss makeup air needs with a qualified HVAC professional. This is a safety consideration, not merely an optional upgrade.
The Fundamental Principle: Airflow performance emerges from the entire system—hood, duct path, and installation—not just the unit’s rated CFM. Optimizing the duct path is often the most impactful step toward achieving functional results.
Pillar 2: Acoustic Harmony – Understanding Real-World Noise
A hood that performs well acoustically encourages consistent use. Noise is measured in sones (perceived loudness) and decibels (dB). Sones offer intuitive comparison: 1 sone resembles a quiet refrigerator; 2 sones sounds roughly twice as loud. Manufacturers sometimes advertise noise levels only at the lowest speed; focus on ratings for medium or medium-high speeds—the settings used during active cooking.
Interpreting Noise Ratings Contextually
- < 1.5 sones (≈ 28–32 dB): Very quiet; suitable for low-speed operation (simmering, baking). Less common in higher-CFM models.
- 1.5 – 3.0 sones (32–42 dB): Comparable to soft conversation. A practical target for medium speeds in many residential settings.
- 3.0 – 4.5 sones (42–50 dB): Noticeable but generally acceptable during active cooking. Common in higher-CFM units.
- > 4.5 sones (>50 dB): Comparable to a shower or blender; may feel intrusive during extended use, especially in open layouts.
Key insight: Noise does not scale linearly with airflow. A hood moving significantly more air may produce disproportionately higher noise if not engineered for acoustic efficiency. When comparing models, consider noise ratings relative to their CFM output at the same speed setting. Reputable manufacturers often provide noise data across multiple speeds in technical documentation.
Factors Influencing Operational Sound
- Blower Design: Backward-curved impeller wheels typically operate more quietly and efficiently than simpler forward-curved designs.
- Internal Construction: Hoods with sound-absorbing liners (e.g., mass-loaded vinyl, specialized composites) reduce resonance compared to bare-metal interiors.
- Vibration Management: Isolation mounts between the motor assembly and hood chassis minimize structure-borne noise transfer to cabinets.
- Ducting Quality: Restrictive duct paths force the motor to work harder, increasing noise. A well-designed duct run is a highly effective—and often overlooked—noise reduction strategy. A properly ducted 600 CFM hood can operate more quietly than a poorly ducted 400 CFM unit.
Adapting to Your Living Context
- Open-Concept Layouts: Sound travels freely. Prioritize models with lower sone ratings at medium speeds. Remote blowers (mounted away from living spaces) offer significant noise reduction for higher-CFM needs.
- Compact Kitchens: Proximity to the hood amplifies perception. Even moderate noise levels may feel prominent. If possible, test operation in a showroom setting.
- Frequent High-Heat Cooking: Since higher speeds are used regularly, verify noise specifications at medium-high settings. Contact manufacturers directly if spec sheets lack this detail.
Practical Noise-Reduction Strategies by Scenario
- Budget-Conscious Approach: Maximize duct efficiency (correct size, minimal elbows, smooth rigid duct). Select a hood rated slightly above your calculated CFM need so it can operate effectively at lower, quieter speeds. Ensure all duct joints are sealed tightly with high-temperature foil tape to prevent rattling.
- Mid-Range Focus: Seek brands with documented attention to acoustic engineering. Verify internal dampening features in product descriptions or cutaway diagrams. Consider an in-line blower installed remotely (e.g., in an attic space), which requires professional installation but significantly reduces kitchen noise.
- Premium/High-Performance Needs: Explore hoods designed for remote blower compatibility. European models often emphasize acoustic performance due to regional standards. Factor in the cost and installation complexity of a remote blower system early in planning.
Pillar 3: Installation Reality – Verifying Feasibility Early
The most carefully selected hood cannot function if installation constraints are overlooked. Conducting physical measurements and pathway assessments before purchasing prevents costly mismatches.
Essential Pre-Purchase Measurements
- Cooktop Width: Hood width should equal or exceed cooktop width. For optimal capture of side-burner plumes, 3–6 inches of overhang is often recommended (e.g., 36″ cooktop → 39″–42″ hood). Island installations benefit most from this overhang.
- Mounting Height:
- Electric Cooktops: Typically 24″–30″ from cooktop surface to hood bottom.
- Gas Cooktops/Ranges: Minimum 30″ is commonly specified by manufacturers and referenced in safety standards for fire clearance. Never mount below the manufacturer’s stated minimum.
- Island Hoods: May require higher mounting (33″–39″) for head clearance; compensate with increased width or CFM.
- Vertical Clearance: Measure from intended mounting height to ceiling. Confirm the hood’s required ceiling height accommodates your space, including chimney or canopy components.
- Depth (Front to Wall): Standard wall-mount hoods project 18″–22″. Ensure this does not obstruct upper cabinets or interfere with cabinet door swing. Island hoods are often deeper (24″–28″).
- Duct Pathway: Trace the most direct route from hood location to exterior exit. Note:
- Joist direction and potential obstructions (plumbing, HVAC ducts)
- Distance to nearest exterior wall or roof penetration point
- Exterior surface type (siding, brick, stucco), which affects cap installation
Ducting Best Practices for Safety and Performance
- Material: Use smooth, rigid, non-combustible metal duct (galvanized steel or aluminum). Flexible metal duct should only be used sparingly for the final connection to the hood if absolutely necessary—and must be fully extended, not crimped. Avoid flexible foil or plastic duct entirely within walls/ceilings due to fire risk, airflow restriction, and grease accumulation.
- Diameter: Match duct size precisely to the hood’s outlet. Undersizing creates significant resistance. Common residential sizes range from 6″ to 10″; higher-CFM systems generally require larger diameters. Consult duct sizing references if upgrading CFM significantly.
- Routing: Prioritize the shortest, straightest path. Horizontal runs before vertical turns often simplify installation. Avoid terminating ducts into attics, crawlspaces, or wall cavities—exhaust must exit outside the building envelope. In cold climates, insulating ducts running through unconditioned spaces (like attics) helps prevent condensation during winter months.
- Exterior Cap: Must include a functional backdraft damper to block wind, rain, pests, and cold air infiltration when the hood is off. Metal caps with robust dampers are preferable to plastic alternatives.
Code and Safety Considerations (Verify Locally)
- Ventilation Requirements: Most residential codes mandate mechanical exhaust vented outdoors for kitchen ranges. Ducts must be constructed of non-combustible material.
- Clearances: Minimum height above cooktops (especially gas) is critical for fire safety. Always follow the manufacturer’s specifications, which align with safety standards.
- Electrical: Hood installation must comply with local electrical codes. Some jurisdictions require hardwiring; others permit plug-in connections with specific receptacle types. Dedicated circuits may be needed depending on the unit’s total electrical load (motor + lighting). Consult a licensed electrician.
- Makeup Air: As noted earlier, requirements for introducing replacement air vary by location, home tightness, and exhaust capacity. For systems exceeding 400 CFM, professional assessment is strongly recommended.
- Permits and Inspections: Local amendments may apply (e.g., coastal areas requiring corrosion-resistant materials, historic districts restricting cap placement). Obtaining necessary permits and scheduling inspections ensures compliance and protects your investment long-term.
Installation Complexity: Self-Assessment Guide
- Straightforward Replacement: Swapping an existing hood in the same location with identical duct size and route. Requires basic mounting and electrical reconnection skills. Verify compatibility beforehand.
- Moderate Complexity: New installation with accessible duct path (e.g., through open attic space directly above), standard framing, and no major obstructions. Involves framing adjustments, duct assembly, electrical work, and exterior penetration. Significant time commitment; errors can lead to leaks or performance issues.
- High Complexity:
- CFM > 400 (potential makeup air system)
- Complex duct routing (multiple joist penetrations, tight spaces)
- Roof penetrations on steep, tile, or slate roofs
- Structural modifications for heavy island hoods
- Uncertainty about local codes or electrical requirements
Recommendation: Engage licensed professionals (HVAC, electrician, roofer) with kitchen ventilation experience. Request proof of licensing, insurance, and references. A detailed scope of work protects all parties.
Navigating Hood Types: Aligning Style with Function
Your kitchen’s layout and structural constraints determine viable hood styles. Selecting a type incompatible with your space guarantees frustration.
Wall-Mount Chimney Hoods
- Ideal For: Cooktops against an exterior wall; traditional or contemporary aesthetics.
- Advantages: Efficient plume capture (rear wall aids containment), broad CFM range (300–1200+), often straightforward duct routing horizontally through the wall.
- Considerations: Chimney height must accommodate ceiling height; may interfere with upper cabinets. Verify telescoping chimney range or extension kit availability for non-standard ceilings.
- Selection Tip: Confirm the chimney cover is included. Prioritize models where width exceeds cooktop width by 3–6 inches for better edge capture.
Island Mount Hoods
- Ideal For: Cooktops on kitchen islands; open layouts where the hood serves as a visual focal point.
- Advantages: Unobstructed sightlines, social cooking experience, strong design presence.
- Considerations: Requires higher CFM (15–25% more than equivalent wall-mount) due to lack of rear wall containment; duct routing is more complex (through island base and ceiling); head clearance must be verified; installation is typically more involved and costly.
- Selection Tip: Width is critical—aim for 6+ inches wider than the cooktop. Confirm structural support within the island for heavier units. Assess duct path feasibility before purchase. Remote blowers can reduce canopy weight and noise.
Under-Cabinet Hoods
- Ideal For: Compact kitchens, galley layouts, apartments, or situations where preserving vertical cabinet space is essential.
- Advantages: Low profile, space-efficient, often more affordable, simpler horizontal duct routing into the wall.
- Considerations: Typically limited to lower CFM ranges (max ~600 CFM); capture efficiency may be reduced for tall pots; noise may feel closer to the user.
- Selection Tip: Ensure cabinet depth accommodates hood depth without blocking filter access or lighting. Verify duct outlet alignment with wall cavity. Best suited for electric or lower-BTU gas cooktops in smaller spaces.
Downdraft Ventilation
- Ideal For: Very specific constraints—peninsula cooktops with zero overhead clearance (e.g., beneath a window), architectural mandates prohibiting overhead units.
- Advantages: No overhead visual obstruction; minimalist aesthetic.
- Considerations: Significantly lower capture efficiency compared to overhead hoods. Air is pulled horizontally across the cooktop rather than vertically from the source, making it less effective for tall pots, boiling liquids, or high-heat tasks. Requires complex subfloor ducting; often noisier at effective speeds; generally not recommended by ventilation professionals for primary cooking zones.
- Selection Tip: Only consider if overhead installation is structurally impossible. Pair exclusively with low-BTU electric or induction cooktops. Manage expectations regarding performance. Verify local code acceptance, particularly for gas applications.
Professional-Grade and Custom Hoods
- Ideal For: High-BTU commercial-style ranges, custom cabinetry integration, unique architectural requirements, or prioritizing acoustic performance and longevity.
- Advantages: Highest CFM capacities (1000+), robust construction, remote blower compatibility, custom sizing/finishes, advanced filtration options.
- Considerations: Higher investment ($2,000+), complex coordination required between cabinetmaker, HVAC, and electrician, longer lead times.
- Selection Tip: Involve specialists during the kitchen design phase. Provide exact cooktop specifications, duct constraints, and performance goals. Request detailed drawings. Budget explicitly for associated systems (remote blower, makeup air if needed).
Material and Filter Considerations: Durability and Maintenance
Exterior materials and filter types impact long-term usability, cleanability, and integration with your kitchen design.
Exterior Materials: Practical Attributes
- Stainless Steel (304-grade): Industry standard for durability and heat resistance.
- Brushed/Satin Finish: Most practical; hides fingerprints and minor scratches.
- Polished/Mirror Finish: High-gloss aesthetic but shows smudges and requires frequent polishing.
- Matte/Textured Finish: Excellent fingerprint resistance; modern look; may show grease buildup more readily.
Maintenance: Clean regularly with pH-neutral stainless cleaner. Avoid chlorine bleach or abrasive pads.
- Alternative Finishes:
- Copper/Zinc: Develop natural patina over time; require professional sealing; heavier weight demands reinforced mounting; best suited for controlled environments.
- Powder-Coated Paint (White, Black, etc.): Must be high-temperature rated. Standard paints may yellow or peel. Scratches are difficult to repair invisibly. Verify warranty coverage.
- Wood Veneer (over steel chassis): Purely aesthetic; requires meticulous sealing and maintenance. Never use solid wood due to fire and warping risks. Only consider from specialized fabricators with fire-rated barriers.
Filter Types: Function and Upkeep
- Baffle Filters (Stainless Steel): Recommended. Angled plates cause grease to coalesce and drip into a collection tray. Highly effective, durable, dishwasher-safe, and maintain airflow when clean. Clean every 1–4 weeks depending on usage. Replace only if bent or damaged (years of service).
- Mesh Filters (Aluminum): Common on budget models. Multiple fine layers trap grease but clog faster, reducing airflow significantly when dirty. Harder to clean thoroughly; often require replacement every 6–12 months. Less efficient than baffles.
- Charcoal Filters: Used only in ductless/recirculating mode to address odors. Do not capture grease, heat, or moisture. Must be replaced every 3–6 months. Effectiveness diminishes rapidly when saturated. Never rely on these for gas range ventilation.
- Critical Practice: Never operate the hood without filters installed. Grease accumulation on the blower wheel creates fire hazards, reduces performance, and damages the motor. Establish a regular cleaning schedule based on your cooking frequency.
Budgeting Thoughtfully: Total Value Perspective
Range hoods span a wide price spectrum. Smart allocation focuses on performance, longevity, and installation quality—not just the unit cost.
Understanding Value Across Tiers
| Consideration | Budget Tier (<$400) | Mid-Range Tier ($400–$1,200) | Premium Tier (>$1,200) |
|---|---|---|---|
| Unit Focus | Basic function; verify duct size and filter type | Balanced performance, noise control, build quality | Advanced engineering, custom integration, acoustic refinement |
| Installation Reality | May require significant duct upgrades; DIY risk higher | Often designed for smoother installation; clearer documentation | Requires specialist coordination; budget for professional installation |
| Long-Term Factors | Shorter lifespan; higher filter replacement frequency; potential noise issues | Durable baffles; better energy efficiency; longer warranty coverage | Highest durability; remote blower options; strongest resale appeal |
| Strategic Tip | Prioritize correct ducting materials over hood aesthetics. Avoid units with undersized outlets or mesh-only filters. | Allocate ~60% to hood, ~30% to professional installation/ducting, ~10% to accessories. Seek HVI-certified models with detailed specs. | Factor in remote blower, makeup air system (if needed), and specialist labor. Value lies in seamless integration and daily comfort. |
Navigating Marketing Claims and Pricing
- CFM Claims: A $300 hood advertising “900 CFM” is highly suspect for standard residential ducting. Verify performance data through independent reviews or the HVI Certified Products Directory. Look for CFM ratings tested at realistic static pressure levels (e.g., 0.3″ w.c.).
- Spec Sheet Transparency: Reputable manufacturers provide detailed documentation: performance curves (CFM vs. static pressure), noise ratings at multiple speeds, duct requirements, and clear installation manuals. If unavailable pre-purchase, proceed cautiously.
- Warranty Clarity: “Lifetime warranty” often applies only to the motor and excludes labor. Standard coverage for quality brands is 1–5 years on parts/labor for the entire unit. Read terms carefully.
- Form vs. Function: Aesthetic appeal matters, but prioritize models where engineering supports performance. Hood shape significantly impacts airflow dynamics—deep capture areas and smooth internal contours enhance efficiency.
Addressing Common Constraints and Scenarios
Real kitchens present unique challenges. These adaptable pathways offer starting points—always verify feasibility with your specific space and local requirements.
“No Exterior Wall Behind the Cooktop”
- Ceiling/Roof Route: Most reliable solution. Run duct vertically through ceiling/attic to roof. Requires attic access, proper flashing, and cap installation. Hire roofing/HVAC professionals. Insulate duct if running through unconditioned attic space, especially in cold climates.
- Floor/Crawlspace Route: Feasible if crawlspace/basement is accessible and near an exterior wall. Seal floor penetration meticulously. Insulate duct in cold climates to prevent condensation.
- Remote Blower Setup: Lightweight capture canopy mounted overhead; blower unit installed remotely (attic, garage). Reduces kitchen noise and canopy weight. Requires sufficient remote space and professional installation.
- Ductless as Last Resort: Only for low-BTU electric/induction where ducting is confirmed impossible by a contractor. Select highest-CFM ductless model with dual-stage filtration. Commit to strict charcoal filter replacement (every 3 months). Understand limitations: heat and moisture remain indoors. Not suitable for gas ranges.
“Low Ceiling Clearance”
- Low-Profile Wall Mounts: Seek models designed for 8-foot ceilings with integrated or minimal chimneys. Verify CFM capacity remains adequate after duct loss considerations.
- Flush-Mount Island Options: Ceiling-mounted canopies designed to sit close to the ceiling. Require precise mounting and sufficient overhead structure. Confirm head clearance below.
- Critical Reminder: Never compromise the manufacturer’s minimum mounting height above the cooktop (typically 30″ for gas). Safety clearances prevent fire hazards and ensure effective capture. If physical clearance is genuinely impossible, consult a structural professional about localized ceiling modification—a significant but sometimes necessary step.
“Noise Sensitivity in Open Layouts or Near Bedrooms”
- Pre-Purchase: Request noise data at medium cooking speeds. Target ≤ 2.5–3.0 sones for open plans. Prioritize brands with documented acoustic engineering.
- Installation Focus: Perfect the duct path—smooth, correct size, minimal elbows. Use vibration isolators on the duct near the hood. Seal all joints to prevent rattling.
- Remote Blower Solution: For hoods >600 CFM or noise-sensitive environments, this is often the most effective upgrade. The motor operates outside living spaces; the kitchen canopy remains quiet. Budget for unit cost and professional installation.
- Operational Habit: Use the lowest effective speed. Many tasks require only low or medium settings. Reserve high speed for intense cooking moments.
“Rental Property Constraints”
- Discuss with Landlord: Frame ventilation as property protection—reducing grease buildup on cabinets and moisture-related wear. Provide neutral documentation on standard ventilation expectations. Offer to cover part of a proper ducted installation cost (which remains with the property).
- If Ducting Is Denied: Select the highest-quality ductless hood feasible:
- Minimum 300 CFM
- Stainless steel baffle filters + thick, replaceable charcoal filters
- Easy filter access
- Commit to replacing charcoal filters every 2–3 months
- Use primarily with electric/induction; minimize high-heat gas cooking
- Supplement with opening windows and nearby exhaust fans during cooking
Document the arrangement in writing to clarify maintenance responsibilities.
Your Questions, Answered
Q: Is CFM the only number that matters for performance?
A: No. CFM must be considered alongside static pressure—the resistance the blower must overcome (from duct length, elbows, etc.). A hood rated for 600 CFM under ideal lab conditions (near-zero static pressure) may deliver far less in a real installation. Reputable manufacturers provide performance curves showing CFM at various static pressure levels (e.g., 0.1″, 0.3″ w.c.). For residential contexts, data at ≥ 0.3″ static pressure is more indicative of real-world capability. HVI certification verifies these claims independently.
Q: How often should I clean or replace filters?
A: Baffle/mesh filters: Clean every 1–4 weeks based on cooking frequency (daily frying = weekly; light use = monthly). Soak in degreaser or use dishwasher (top rack). Replace only if damaged. Charcoal filters (ductless mode): Replace every 3–6 months without exception—saturated filters lose effectiveness and may harbor odors. Never operate without filters; grease on the blower wheel is a fire hazard and degrades performance.
Q: Can I reduce duct size (e.g., 7″ hood outlet to 6″ existing duct)?
A: Strongly discouraged. Reducing diameter significantly increases resistance. A 6″ duct has approximately 40% less cross-sectional area than a 7″ duct, potentially cutting effective airflow by 25–35% and increasing noise. Always match duct size precisely to the hood’s outlet. If existing duct is undersized, replacing it with the correct size is a critical investment for performance and safety.
Q: Are remote blowers worth the investment?
A: For hoods exceeding 600 CFM, or in open-concept homes where noise is a priority, remote blowers often provide exceptional value. By relocating the motor/blower assembly outside living spaces (attic, garage, exterior wall), operational noise in the kitchen is dramatically reduced. They also allow lighter, more decorative canopies for islands. Trade-offs include higher initial cost ($300–$1,000+ for blower unit) and more complex installation requiring professional expertise. For noise-sensitive or high-performance needs, the improvement in daily usability is frequently worthwhile.
Q: What does HVI certification actually mean?
A: The Home Ventilating Institute (HVI) operates a third-party certification program. Units bearing the HVI Certified logo with a unique certification number have had their CFM and noise claims verified by independent laboratories. This is distinct from packaging that merely states “Meets HVI standards” or displays the HVI logo generically without certification—this is unverified marketing language. Always verify certification via the HVI website’s product directory for confidence in performance data.
Q: Is makeup air truly necessary for a 500 CFM hood?
A: It depends on your home’s construction and existing appliances. Building codes (e.g., IRC M1503.5) often require makeup air when exhaust exceeds 400 CFM and the home contains naturally drafted fuel-burning appliances (standard gas water heater/furnace) or is very airtight. Without replacement air, strong exhaust can create negative pressure, potentially causing backdrafting of combustion gases—a serious safety concern. A qualified HVAC professional should assess your specific situation. Never dismiss this recommendation without verification; safety must come first.
Q: Can I install a range hood myself?
A: Simple replacements (same location, existing ducting, plug-in connection) may be feasible for skilled DIYers. However, new installations, duct modifications, electrical circuit additions, roof penetrations, or systems requiring makeup air demand licensed professionals. Electrical work must comply with NEC; ductwork must meet building code; roof work requires proper flashing to prevent leaks. Permits and inspections are often mandatory. When uncertain, hire qualified contractors—improper installation risks fire, carbon monoxide exposure, water damage, and voided warranties.
Q: Why do some hoods feature dual blowers?
A: Dual blowers (common in hoods wider than 42″ or high-CFM models) improve airflow distribution across the entire capture area. A single blower in a very wide hood may create weaker suction at the edges, reducing effectiveness for side burners. Dual blowers ensure consistent capture strength. They also provide operational redundancy. This is an engineering solution for performance, particularly valuable for large island cooktops or professional-style ranges.
Q: Are integrated LED lights preferable to halogen?
A: For new purchases, yes. Modern LED modules run cooler (reducing heat load on the hood), use significantly less energy, last longer (25,000+ hours vs. 2,000–4,000 for halogen), and provide brighter, more accurate light for food preparation. Seek models with high Color Rendering Index (CRI >90) for true color representation. Crucially, verify that LEDs are replaceable modules—not soldered to circuit boards—to avoid replacing the entire hood when lighting eventually fails.
Q: How do I assess if existing ductwork suits a new hood?
A: Conduct a duct audit:
1. Measure duct diameter at all sections; note reductions or transitions.
2. Trace the full path; count elbows, transitions, and estimate total length.
3. Check for flexible duct (replace with rigid metal if found).
4. Verify the exterior cap has a freely operating damper.
5. If upgrading CFM by more than 20%, or if duct is undersized (<7″), has multiple elbows, or uses flex duct, plan to replace the ducting. A new high-CFM hood paired with restrictive old ducting will underperform and likely be louder. Budget duct replacement as part of the system upgrade.
Q: What’s the most frequent selection mistake?
A: Prioritizing aesthetics before verifying functional requirements. Falling in love with a hood’s appearance without confirming it meets your calculated CFM needs, fits the mounting space, aligns with duct path feasibility, and operates within acceptable noise levels for your lifestyle. Always complete the Three Pillars diagnostics first. Once you have clear parameters (required CFM range, max noise tolerance, dimensional constraints, duct path viability), then explore styles and finishes within that filtered set. Function must inform form.
Q: Does a range hood require a dedicated electrical circuit?
A: It depends on the unit’s total electrical load (motor + lighting + accessories) and local code. Many modern hoods with bright LED arrays and powerful motors may exceed 50% of a standard circuit’s capacity, necessitating a dedicated 15- or 20-amp circuit per electrical code (NEC Article 422). Check the specification plate for amperage. When installing during a remodel or new build, running a dedicated circuit is widely considered best practice for safety and reliability, regardless of minimum code thresholds. Consult a licensed electrician for assessment.
Conclusion: Confident, Context-Aware Selection
Choosing a range hood becomes manageable when approached systematically. By anchoring your decision in the Three Pillars—Airflow Integrity, Acoustic Harmony, and Installation Reality—you shift from uncertainty to informed action. This process protects your indoor environment, preserves your kitchen’s finishes, supports structural longevity, and enhances daily cooking comfort. Remember: the goal is not perfection, but a solution thoughtfully aligned with your kitchen’s dimensions, your cooking habits, your spatial constraints, and your priorities.
Recap: Three Foundational Steps
- Define Functional Needs: Calculate baseline airflow using kitchen volume and cooktop output. Acknowledge ducting impact—optimize the path first. Prioritize HVI-certified data over marketing claims.
- Assess Acoustic Fit: Evaluate noise ratings at realistic operating speeds. Match the solution to your living layout (open plan = prioritize quiet operation). Remember: duct quality is a powerful noise reducer.
- Verify Installation Feasibility: Measure before browsing. Confirm mounting dimensions, duct pathway, ceiling clearance, and local code considerations. For systems above 400 CFM, proactively discuss makeup air with an HVAC professional.
Your 24-Hour Action Step
Within the next day, complete one concrete task: Sketch your kitchen’s duct pathway. Note cooktop width, desired mounting height (respecting safety minimums), ceiling height, distance to nearest exterior exit point, joist direction, and any obstructions. Calculate your baseline CFM using the kitchen volume method. This tangible groundwork eliminates guesswork and focuses your research. Avoid browsing products until this step is complete—clarity precedes choice.
Final Perspective
A well-chosen range hood operates quietly in the background yet delivers outsized value: cleaner air during cooking, reduced cleaning burden from grease and moisture, protection for cabinetry and walls, and peace of mind regarding indoor air quality. In the broader context of home systems, it collaborates with your HVAC, electrical, and structural elements. By applying this adaptable framework, you select not just an appliance, but a component that supports a healthier, more enjoyable, and better-maintained kitchen for years to come. Proceed with patience, verify details, and prioritize solutions that fit your unique context.
Explore Related Guidance:
Kitchen Lighting Layouts for Task and Ambiance | Cabinet Material Guide: Durability and Care | Countertop Selection: Balancing Beauty and Function | Plumbing Fixture Basics: Efficiency and Installation | Smart Kitchen Wiring: Planning for Future Tech | Sustainable Kitchen Choices: Materials and Practices