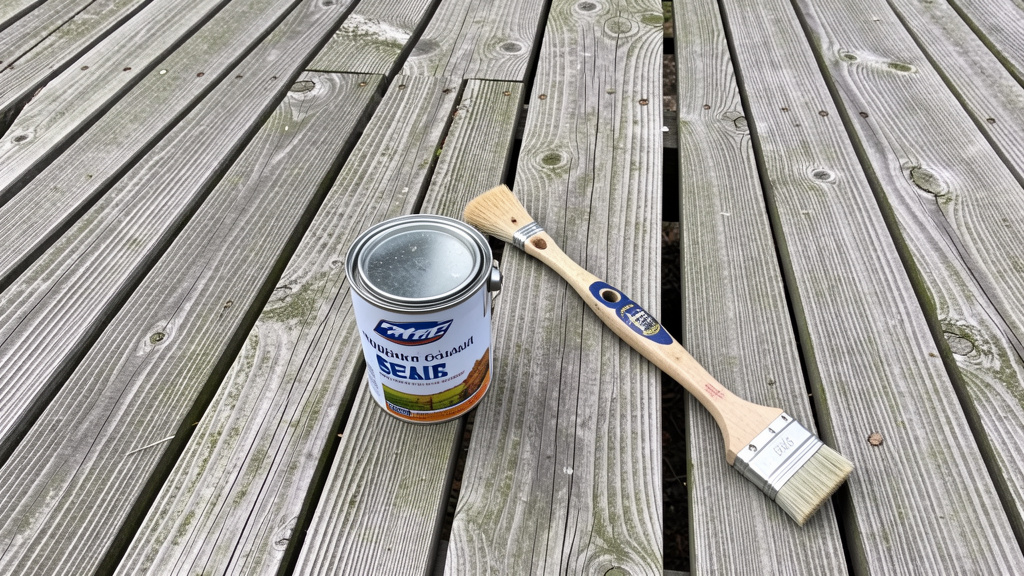
A Practical Guide to Selecting Suitable Wood, Applying Effective Protection, and Establishing a Maintenance Routine for Long-Lasting Outdoor Projects
Stop watching your outdoor wood projects fade, crack, warp, or deteriorate prematurely. This guide provides clear, actionable steps to help you select resilient woods, apply appropriate protective systems, and establish maintenance habits that support longevity. Whether you’re building a deck in a northern climate, a pergola in a humid region, or garden furniture near the coast, you’ll find adaptable strategies to match materials, techniques, and timing to your specific conditions—helping you avoid common pitfalls that shorten wood’s service life.
Introduction
Wood offers unmatched warmth, texture, and connection to nature—qualities synthetics struggle to replicate. Its grain tells a story; its scent evokes craftsmanship. Yet this organic beauty carries vulnerability when exposed to sun, rain, humidity, temperature shifts, insects, and fungi. The difference between a structure that weathers gracefully for decades and one requiring early replacement lies not in chance, but in informed choices made before the first cut. Grounded in established research from institutions like the Forest Products Laboratory and aligned with international durability frameworks (EN 350, AWPA), this guide synthesizes fragmented knowledge into a cohesive, adaptable system. At its core is understanding wood’s relationship with moisture: wood swells when absorbing humidity or rain, contracts when drying, and becomes susceptible to biological decay when moisture content remains elevated for extended periods. This isn’t simply about “hardwood vs. softwood”—it’s about matching a species’ natural chemical defenses, density, and stability to your project’s exposure level, local climate patterns, and your willingness to maintain it. By the end, you’ll have a clear decision framework to confidently select materials, apply protection that works with the wood, and implement a maintenance rhythm that preserves both safety and beauty. This knowledge helps transform wood from a perceived high-maintenance material into a thoughtful, sustainable choice for outdoor living.
The Three-Pillar Framework for Outdoor Wood Longevity
Forget fragmented tips like “just use cedar” or “apply two coats.” True resilience emerges from intentionally integrating three interdependent pillars. Neglecting any single pillar weakens the entire system. This framework—shaped by documented field performance and material science—provides a mental model for evaluating every decision, from lumber selection to seasonal upkeep. Each pillar addresses a distinct phase in the wood’s outdoor lifecycle, creating layered defense against environmental stressors.
Pillar 1: Wood Selection Mastery – Choosing Species with Innate Defenses
Selecting wood isn’t about finding the “strongest” species; it’s about identifying species whose natural biochemical composition and physical structure align with your specific environmental pressures. Focus on heartwood—the dense, darker inner core of the tree. Unlike sapwood (the lighter, outer growth rings), heartwood contains extractives: natural oils, resins, tannins, and phenolic compounds evolved to resist decay, insects, and moisture penetration. Concentration and effectiveness vary by species, region, and even individual tree. Durability ratings, standardized internationally (terminology varies slightly by region), categorize heartwood resistance:
- Class 1 (Very Durable): Expected service life exceeding 25 years in ground contact under favorable conditions. Examples: Black Locust, Teak, Ipe, White Oak (especially quartersawn).
- Class 2 (Durable): Expected service life 15–25 years. Examples: Cedar (Western Red, Eastern White), Redwood, Cypress, Black Walnut.
- Class 3 (Moderately Durable): Expected service life 10–15 years. Examples: Douglas Fir (heartwood only), Hemlock, Spruce (requires robust finishing).
- Class 4 (Slightly Durable): Expected service life 5–10 years. Examples: Pine (heartwood), Birch, Maple (generally unsuitable for high-exposure projects without intensive treatment).
- Class 5 (Not Durable): Expected service life under 5 years. Examples: Most sapwood, Poplar, Basswood (avoid for permanent outdoor structures).
IF your project has ground contact or constant moisture exposure (e.g., post in soil, planter box lining), THEN prioritize Class 1 species.
IF your project is above-ground but fully exposed (deck flooring, fence panel), THEN Class 1 or 2 species are strongly recommended.
IF your project is sheltered (covered porch ceiling, interior of a shed), THEN Class 3 species may suffice with diligent finishing.
Why This Pillar Matters: No finish is permanent. All coatings degrade, crack, or wear over time. When protection temporarily fails, the wood’s innate durability becomes the critical defense against rot and insect damage. Choosing a Class 1 or 2 species means the wood itself actively resists degradation during maintenance intervals or after minor finish damage. Conversely, placing a less durable species like untreated pine heartwood in a damp, shaded area significantly increases the risk of premature failure, regardless of initial finish quality. Evidence from long-term observational studies suggests structures built with naturally durable species in appropriate climates often outlast alternatives when maintenance protocols are comparable, primarily due to superior resilience during finish breakdown periods.
How to Execute Wood Selection Correctly:
1. Assess Your Project’s Exposure Level: Is it fully exposed to sun/rain? Partially shaded? In constant ground contact? High moisture splash zone? Ground contact demands the highest durability class; high-exposure above-ground benefits strongly from Class 1 or 2; sheltered structures can utilize Class 3 with consistent finishing.
2. Consider Your Climate Zone: Humid, warm climates accelerate fungal growth—prioritize species with high tannin/resin content (Cypress, Redwood). Arid, high-UV climates cause surface checking—prioritize dimensionally stable species (Ipe, Black Locust). Coastal/salty air demands resistance to moisture cycling and corrosion (Teak, White Oak). Freeze-thaw cycles exacerbate moisture-related movement—prioritize tight, straight grain (Quartersawn White Oak, Cedar).
3. Verify Heartwood Content: At the lumberyard, inspect boards closely. For cedar or redwood, ensure the majority is rich reddish-brown heartwood, not pale sapwood. Reputable suppliers label “All-Heart” or “Clear Heart” grades. For Douglas Fir, specifically request “Heartwood Fir” or “Vertical Grain” stock for better stability and higher heartwood proportion.
4. Evaluate Sustainability and Sourcing: Look for certifications like FSC (Forest Stewardship Council) or SFI (Sustainable Forestry Initiative). Black Locust, abundant in parts of North America, offers exceptional durability with a lower transport footprint than imported tropical hardwoods. Reclaimed wood (properly de-nailed and inspected) from old structures (often old-growth Heart Pine or Cypress) can provide character and durability, though requires careful assessment for structural soundness and hidden damage.
Common Selection Mistakes to Avoid:
* Assuming “Pressure-Treated = Universally Best”: Modern ACQ or CA pressure-treated pine is highly effective for structural posts in ground contact due to chemical preservation. However, for visible surfaces like deck boards or furniture, it often contains elevated moisture when purchased, leading to warping, twisting, or checking as it dries after installation. Its initial color may also bleed. It’s a specialized solution for specific structural roles, not a universal answer for all outdoor wood. Using it for furniture without allowing adequate drying time and applying appropriate finishes often leads to frustration.
* Confusing Hardness with Durability: Janka hardness measures resistance to denting (e.g., Ipe is very hard; Cedar is softer). Durability measures resistance to rot/insects. White Oak is moderately hard but highly durable due to tyloses (natural pore blockages); Maple is hard but has low natural durability. Choose based on outdoor performance needs, not just hardness.
* Ignoring Grain Orientation: Flat-sawn lumber (growth rings at 30–60 degrees to face) cups and warps significantly more than quartersawn lumber (growth rings near 90 degrees). For stability-critical elements like tabletops, bench seats, or fence boards, seek quartersawn or rift-sawn stock, especially in species like Oak or Douglas Fir. The added investment often prevents future movement issues.
* Overlooking Locally Appropriate Species: Before considering imported options, investigate durable woods native to your region. In the Pacific Northwest, Western Red Cedar is abundant and well-suited. In the Southeast, Cypress is a resilient native choice. Using regionally appropriate species reduces transport impact, supports local economies, and ensures the wood is acclimated to regional climate patterns.
Pillar 2: Finish and Protection Strategy – Building a Multi-Layered Defense System
A finish is more than cosmetic—it’s a functional component designed to manage moisture exchange and mitigate UV damage. The goal isn’t to create an impervious plastic shell (which traps moisture inside the wood, potentially causing blistering and decay), but to establish a breathable barrier that slows moisture absorption during wet periods and allows trapped moisture to escape during dry periods. This requires matching product chemistry to wood species, project demands, and climate.
IF the wood surface is damp, dusty, or has failing old finish, THEN thorough preparation is required before any new application.
IF you are working with dense tropical hardwoods (Ipe, Teak), THEN use a penetrating oil formulated for dense woods and employ the “flood and wipe” method.
IF your climate has intense sun exposure, THEN prioritize finishes with UV inhibitors and higher pigment content.
Why This Pillar Matters: Unprotected wood exposed to UV rays undergoes photodegradation: lignin (the binder holding wood fibers) breaks down, causing graying, surface brittleness, and erosion. Simultaneously, rain and humidity drive cyclic swelling and shrinking, opening microscopic pathways for deeper moisture penetration and biological growth. A well-chosen finish mitigates both threats. However, applying an incompatible finish (e.g., a film-forming varnish on dense Ipe) or applying any finish incorrectly (e.g., on damp wood) can create more problems than it solves. The finish must complement the wood’s natural properties.
How to Execute Finish Application Correctly: The 5-Step Protocol
- Surface Preparation is Foundational: New wood often benefits from 2–4 weeks of weathering (depending on sun exposure) to allow mill glaze (a compressed surface layer from sawing) to dissipate and pores to open. Clean thoroughly with a wood cleaner/brightener (oxalic acid-based for tannin stains/mold; sodium percarbonate-based for general graying) before the first finish application. For previously finished wood, complete removal of failing finish via sanding or chemical stripper is essential—applying new finish over peeling material guarantees poor adhesion. Sand progressively (e.g., 80-grit to 120-grit), always with the grain, and remove all dust with a tack cloth or vacuum.
- Confirm Dryness: Wood should be dry—ideally below 15% moisture content. Use a moisture meter for accuracy. Applying finish to wood above 18% moisture risks trapping water inside, leading to blistering, peeling, or internal decay. If rain is forecast within 48 hours, postpone application. Ideal conditions: temperatures between 50°F–90°F (10°C–32°C), moderate humidity, and no direct, hot sun on the surface (apply early morning or on overcast days).
- Select Finish Type Based on Wood and Project:
- Penetrating Oils (Recommended for Most Outdoor Projects): These soak into wood fibers, protecting from within without forming a surface film. They allow the wood to breathe. Ideal for: Cedar, Redwood, Cypress, Pine, Douglas Fir. Types:
- Traditional Oils (Tung, Linseed): Enhance grain beautifully but require frequent reapplication (annually). Use only exterior-formulated versions with mildewcides and UV inhibitors. Avoid raw linseed oil.
- Fortified Penetrating Oils: Combine natural oils with synthetic resins and UV blockers. They penetrate deeply, provide rich color, resist UV graying longer than pure oils (typically 2–4 years), and re-coat easily without stripping. Look for labels indicating “non-film-forming,” “breathable,” and “for exterior use.”
- Semi-Transparent Stains: Contain more pigment than penetrating oils, offering superior UV protection while showing wood grain. Ideal for: Softwoods like Pine, Fir, Spruce; projects in high-sun areas. Requires careful application to avoid lap marks. Re-coating interval: typically 2–3 years. Choose water-repellent formulas with mildewcides.
- Solid Color Stains: Function like thin, breathable paint. Ideal for: Highly deteriorated wood needing concealment, utility structures, or specific color needs. Hides grain. Requires meticulous prep; failure (peeling) is more noticeable. Re-coating interval: typically 3–5 years. Ensure labeled “breathable” or “elastomeric.”
- Marine Varnishes (Use Selectively): High-build, UV-resistant film finishes. Only suitable for: Dense, stable tropical hardwoods (Teak, Ipe) on furniture stored under cover. Avoid on: Decks, fences, or large surfaces exposed to movement or foot traffic. Film finishes on moving wood often crack, peel, and trap moisture underneath. Application requires multiple thin coats with sanding between—a demanding process.
- Penetrating Oils (Recommended for Most Outdoor Projects): These soak into wood fibers, protecting from within without forming a surface film. They allow the wood to breathe. Ideal for: Cedar, Redwood, Cypress, Pine, Douglas Fir. Types:
- Apply with Care: Use a natural bristle brush for oil-based products, synthetic for water-based. Apply generously, working with the grain. For large flat surfaces, a stain pad applicator promotes even coverage. Maintain a wet edge to avoid lap marks. For dense woods like Ipe or Teak, use the “flood and wipe” method: saturate the surface, let soak 10–15 minutes, then thoroughly wipe off all excess with clean rags. Leaving excess oil creates a sticky surface that attracts dirt and mildew.
- Respect Curing Time: Follow manufacturer’s recoat and cure times exactly. “Dry to touch” is not “fully cured.” Curing involves chemical processes that achieve maximum durability. Walking on a deck or placing furniture too soon embeds dirt and compromises protection. In cool or humid conditions, extend cure times. Patience here prevents future issues.
Common Finish Mistakes to Avoid:
* Finishing “Green” Pressure-Treated Wood: PT lumber is saturated with preservative solution. Installing and finishing immediately traps moisture. Allow at least 60–90 days (longer in humid climates) for it to dry thoroughly. Test by sprinkling water—if it beads, it’s still too wet; if it soaks in readily, it’s ready.
* Using Interior Finishes Outdoors: Polyurethane or oils labeled “interior” lack UV inhibitors and mildewcides. They degrade quickly outdoors, often turning amber, cracking, or peeling within months.
* Over-Applying Product: Especially on dense hardwoods. Excess finish on the surface becomes the weak point. It gums up, attracts grime, and fails prematurely. When in doubt, wipe off more.
* Neglecting End Grain: End grain absorbs moisture 10–15 times faster than face grain. Always seal cut ends thoroughly with multiple coats of finish before assembly. This single step helps prevent moisture wicking deep into the board—a common cause of end-splitting and internal decay.
* Skipping the Test Patch: Always test your chosen finish on an inconspicuous area or scrap piece of the actual wood you’re using. Colors and absorption vary between species and batches. This avoids unexpected results.
Pillar 3: Proactive Maintenance Protocol – The Rhythm of Preservation
Longevity isn’t achieved at installation; it’s sustained through consistent, observant care. Reactive maintenance (waiting until wood is gray, cracked, or peeling) requires significantly more effort than proactive upkeep. A simple, scheduled protocol preserves protection, extends intervals between major refinishing, and allows early detection of minor issues.
IF you live in a humid climate with frequent rain, THEN prioritize bi-annual cleaning and inspect for mold/mildew monthly during wet seasons.
IF your structure is in a high-UV area, THEN plan for more frequent finish inspections and potential recoating.
IF snow accumulates on your deck, THEN remove it gently with a plastic shovel before it compacts or melts against the wood.
Why This Pillar Matters: All finishes degrade predictably. UV radiation breaks down resins; rain washes away surface protectants; foot traffic abrades coatings; biological growth establishes footholds in microscopic breaches. Proactive maintenance interrupts this cycle before the wood substrate is compromised. It’s the difference between a brief seasonal check-in and a major restoration project. Furthermore, regular inspection builds familiarity with your structure, allowing you to spot subtle signs of trouble—like a slightly loose post base, early insect activity, or minor softening at a joint—when intervention is simple and inexpensive.
How to Execute Maintenance Correctly: The Seasonal Rhythm
-
Spring (Assessment & Clean): As temperatures consistently rise above 50°F (10°C):
- Inspect Thoroughly: Walk the entire structure. Look for loose fasteners (tighten or replace with corrosion-resistant deck screws), splintering wood, signs of insect activity (sawdust, holes), soft spots indicating decay (probe gently with a screwdriver—sound wood resists; compromised wood feels spongy), and areas where finish is thinning. Pay special attention to joints, end grains, and areas with poor drainage or constant shade.
- Clean Gently: Sweep away debris. For decks, fences, furniture: Clean with a dedicated wood cleaner/brightener solution and a soft-bristle brush. For mildew/algae: Use a solution of oxygen bleach (sodium percarbonate—never chlorine bleach, which damages wood fibers and corrodes fasteners) diluted per label instructions. Apply, let dwell 10–15 minutes (don’t let dry), scrub gently, rinse thoroughly with low-pressure water. Allow to dry completely (48–72 hours) before proceeding.
- Address Minor Issues: Sand light splinters. Fill small cracks with exterior-grade wood filler only if the area is structurally sound and the filler is compatible with your finish type (test first). Replace severely damaged boards promptly.
-
Summer (Protection Boost): After cleaning and once wood is bone dry:
- Replenish Finish: Apply a maintenance coat of your chosen penetrating oil or semi-transparent stain only to areas showing wear. You rarely need to recoat the entire structure annually. Focus on high-traffic areas (deck walking paths, chair arms), sun-exposed surfaces (south/west faces), and spots identified during spring inspection. This “spot maintenance” preserves overall finish integrity far longer than waiting for uniform failure. Use the same product and technique as the initial application. Wipe excess thoroughly.
- Verify Drainage: Ensure water flows away from wood structures. Clear gutters directing water onto decks. Verify soil slopes away from fence posts or deck footings. Standing water accelerates deterioration.
-
Fall (Preparation & Protect): Before leaves fall and temperatures drop:
- Final Clean: Remove all leaves, pine needles, and organic debris. These trap moisture against the wood surface, creating ideal conditions for mold, mildew, and decay, especially in shaded areas.
- Furniture Care: For movable items: Clean thoroughly. Apply a fresh maintenance coat of finish. Store indoors or under a breathable cover (canvas, solution-dyed polyester) if possible. If covering outdoors, ensure the cover is taut to prevent water pooling and allows air circulation at the bottom to reduce condensation. Avoid plastic tarps directly on wood—they trap moisture.
- Re-check Fasteners: Temperature shifts can cause slight movement; verify tightness.
-
Winter (Observation): While active maintenance is minimal:
- Monitor Snow/Ice: Avoid piling heavy, wet snow directly against wood structures. When removing snow from decks, use a plastic shovel and push with the grain of the boards. Avoid rock salt or standard ice melt containing chloride directly on wood decks—it accelerates deterioration and corrodes fasteners. Use sand for traction or calcium magnesium acetate (CMA), labeled as wood-friendly.
- Note Problem Areas: Mentally note spots where snow lingers longest or ice forms—these are priority areas for spring inspection and potential drainage solutions.
Common Maintenance Mistakes to Avoid:
* Routine High-Pressure Washing: High-pressure water (above 1,200 PSI) forces water deep into wood grain, damages surface fibers (creating a “fuzzy” texture that traps dirt), and can drive moisture behind siding. Use low pressure (<500 PSI) with a wide fan tip only after chemical cleaning, held at least 12 inches from the surface, and always at a low angle with the grain. Often, chemical cleaners and soft brushing suffice.
* Waiting for Visible Failure: By the time wood is uniformly gray or finish is peeling extensively, significant UV damage and moisture intrusion have likely occurred. The wood surface is degraded, requiring aggressive sanding to reach sound wood—a much larger job. Annual light maintenance prevents this degradation cycle.
* Using Chlorine Bleach: Chlorine bleach (sodium hypochlorite) weakens lignin, making wood more susceptible to future damage, and corrodes metal fasteners. It also leaves residues that interfere with new finish adhesion. Oxygen bleach (sodium percarbonate) is the safer, effective standard for organic growth removal.
* Neglecting Undersides and Hidden Areas: For decks, inspect the underside annually if accessible. Look for water staining, decay at joist connections, insect nests, and ensure ventilation is unobstructed. Early detection here prevents serious structural issues.
The Fundamental Principle: Long-term wood performance outdoors is not a single event but a continuous cycle of thoughtful selection, appropriate protection, and observant, rhythmic care—where each pillar reinforces the others to support enduring resilience.
Deep Dive: Wood Species Decoded for Outdoor Use
Moving beyond generic labels, this section provides nuanced insights on specific species. Understanding their properties allows precise matching to your project’s demands. The table below summarizes key characteristics, followed by detailed profiles highlighting ideal applications, considerations, and performance context. Note: Durability ratings refer to heartwood only. Sapwood of even durable species has low resistance.
| Wood Species | Durability Class | Best Project Applications | Climate Suitability | Maintenance Level | Cost Range (Relative) | Key Considerations |
|---|---|---|---|---|---|---|
| Ipe (Brazilian Walnut) | 1 (Very Durable) | Decking, docks, high-traffic furniture | All climates; excels in humid/coastal | Low (if oiled) | $$$$ (High) | Extremely dense/hard; requires pre-drilling; natural oils affect adhesion; use stainless steel fasteners; “flood & wipe” oil method essential. |
| Black Locust | 1 (Very Durable) | Decking, posts, fence rails, furniture | All climates; exceptional freeze-thaw | Very Low | $$ (Moderate) | Native North American species; rivals tropical hardwoods in durability; tight grain; minimal movement; sustainable choice; verify “all-heart” grade. |
| Teak | 1 (Very Durable) | Premium furniture, boat decks, trim | All climates; legendary marine use | Low | $$$$$ (Very High) | High natural oil content; weathers gracefully to silver-gray; verify sustainable sourcing (FSC); quality varies significantly. |
| White Oak (Quartersawn) | 1 (Very Durable) | Furniture, boat building, barrels, trim | All climates; excellent moisture barrier | Moderate | $$$ (Medium-High) | Tyloses block pores; quartersawn critical for stability; less prone to checking; beautiful ray fleck pattern; heavier than Red Oak. |
| Western Red Cedar | 2 (Durable) | Siding, shingles, fences, pergolas, furniture | Cool/moist climates; good UV resistance | Moderate | $$ (Moderate) | Lightweight; straight grain; excellent workability; natural insect repellent; can develop surface checks (often normal); avoid contact with copper/iron. |
| Redwood (All-Heart) | 2 (Durable) | Decks, fences, garden structures, furniture | Mild coastal climates (Pacific NW) | Moderate | $$$ (Medium-High) | Similar to cedar; prized for color; sustainability concerns—insist on certified sources; softer than cedar. |
| Cypress (Pecky or Clear) | 2 (Durable) | Siding, shutters, docks, outdoor furniture | Humid/southern climates; resists rot | Moderate | $$ (Moderate) | Contains “cypressene” oil; pecky cypress has unique decorative patterns; excellent stability; weathers to soft gray. |
| Douglas Fir (Heartwood, VG) | 3 (Moderately Durable) | Structural beams, porch posts, rustic furniture | Dry/mountain climates | High | $ (Low) | “Vertical Grain” (VG) or “Clear Heart” essential for stability; prone to checking/splitting if not VG; requires robust finishing. |
| Pressure-Treated Pine (Ground Contact) | Varies (Chemically Treated) | Structural posts, deck framing, hidden elements | All climates (for structural use) | Moderate (for visible surfaces) | $ (Low) | ACQ/CA treated; must dry thoroughly before finishing; prone to warping/checking; use corrosion-resistant fasteners; green tint fades. |
| Black Walnut | 2 (Durable) | Accent pieces, furniture, trim | Sheltered applications | High | $$$$ (High) | Beautiful rich color; softer than oak; expensive; best for low-traffic decorative elements; requires quality finish for UV protection. |
| Hickory | 3 (Moderately Durable) | Tool handles, rustic furniture (sheltered) | Dry climates only | Very High | $$ (Moderate) | Extremely hard/dense; very high movement with moisture changes; prone to splitting; generally not recommended for exposed outdoor use. |
| Bamboo (Thermally Modified) | 2-3 (Depends on Process) | Decking, fencing (modern applications) | Moderate climates | Moderate | $$$ (Medium) | Not a wood, but a grass; requires thermal modification for outdoor use; verify manufacturer warranty and independent certifications; quality varies. |
Detailed Species Insights:
-
Ipe (Tabebuia spp.): Often called “ironwood,” Ipe is renowned for density and durability. Its hardness makes it highly resistant to wear, insects, and fire. However, this density presents challenges: standard drill bits struggle (carbide-tipped recommended), natural oils can inhibit finish adhesion, and its weight requires robust structural support. Ipe weathers to a distinguished silvery-gray if left unfinished—a look many prefer. If maintaining its rich color, expect to reapply a penetrating oil formulated for dense hardwoods every 1–2 years. Context: Ipe decks in demanding environments like marinas often demonstrate exceptional longevity with routine cleaning. The initial investment is significant, but lifecycle value can be favorable compared to woods requiring frequent replacement.
-
Black Locust (Robinia pseudoacacia): This native North American species is highly valued for its heartwood durability, dimensional stability, and sustainability profile. It resists rot and insects effectively, swells and shrinks very little with moisture changes, and is fast-growing in many regions. It has a warm golden-brown color that ages gracefully. Critical Consideration: Sapwood is wide and non-durable; insist on “all-heart” or “clear heart” grades. Availability of milled lumber can vary; seek specialty suppliers. For those prioritizing local sourcing and longevity without tropical imports, Black Locust is an outstanding choice.
-
Western Red Cedar (Thuja plicata): A North American staple for outdoor projects due to its straight grain, light weight, natural decay resistance (from thujaplicin oils), and pleasant aroma. It’s relatively soft (can dent under heavy impact) but this is rarely an issue for fences, siding, or furniture. Cedar weathers to a soft silver-gray. Nuance: In consistently damp, shaded locations (e.g., north-facing fence in the Pacific Northwest), even cedar will eventually succumb to decay faster than denser hardwoods. Prioritize finish maintenance in such scenarios. Avoid direct contact with copper or iron flashing to prevent unsightly stains; use stainless steel or aluminum fasteners.
-
Cypress (Taxodium distichum): Particularly valued in humid regions, Cypress contains “cypressene,” a natural preservative oil. “Pecky Cypress” features unique pocket patterns created by a fungus before harvest; this is purely aesthetic and does not compromise integrity. Cypress has good stability and weathers attractively. Important Note: Ensure you purchase heartwood. “Sap Cypress” has minimal durability. Old-growth is scarce; plantation-grown Cypress performs well for most applications with proper care. Its moisture resistance makes it suitable for docks, boardwalks, and planters.
-
White Oak (Quercus alba) – Quartersawn: Not all oak is suitable outdoors. Red Oak has open pores that readily absorb moisture. White Oak contains tyloses—natural deposits that plug pores, creating a moisture barrier (why it’s used for barrels). This benefit is maximized in quartersawn lumber, where growth rings are oriented to minimize end-grain exposure and improve stability. Flat-sawn White Oak will cup and warp significantly outdoors. Quartersawn White Oak is heavier, more expensive, and displays a distinctive ray fleck pattern. Ideal for high-end furniture, boat trim, or architectural elements where longevity and classic beauty are priorities. Requires a quality penetrating oil for UV protection.
-
Pressure-Treated Pine (Southern Yellow Pine – ACQ/CA): Modern pressure-treated lumber is effective for its intended purpose: structural components in contact with soil or moisture. Copper-based preservatives (ACQ, CA) resist rot and insects well. However, its use for visible deck surfaces is debated. When delivered, it often contains elevated moisture. As it dries in place over months, warping, twisting, cupping, and checking are common, especially in wider boards. Strategic Use: Best reserved for deck framing, posts set in concrete footings (use post anchors to separate wood from concrete), and hidden structural elements. If used for deck boards, select “KDAT” (Kiln-Dried After Treatment) lumber for reduced warping risk. Always allow ample drying time before finishing, use corrosion-resistant fasteners rated for ACQ/CA, and apply a penetrating stain designed for pressure-treated wood. Manage expectations: even with care, PT pine decking typically requires more frequent maintenance than naturally durable species.
Climate-Specific Strategies: Tailoring Your Approach
Wood responds to local environmental pressures. A strategy ideal for Arizona may falter in Louisiana. Identify your primary climate challenges and implement targeted countermeasures.
Hot & Arid Climates (Southwest US, Mediterranean regions)
- Primary Challenges: Intense UV radiation, extreme heat, low humidity causing rapid moisture loss, significant day-night temperature swings.
- Wood Vulnerabilities: Surface checking (cracks), accelerated UV graying, increased warping risk from rapid drying, finish embrittlement.
- Strategic Countermeasures:
- Species Selection: Prioritize dimensionally stable species with tight grain: Ipe, Black Locust, Quartersawn White Oak. Avoid species prone to checking like flat-sawn Douglas Fir. Cedar performs reasonably but requires diligent finish maintenance.
- Finish Strategy: UV protection is critical. Use semi-transparent stains with higher pigment content (darker tints offer more UV blocking) or penetrating oils explicitly fortified with UV inhibitors. Avoid clear finishes—they offer minimal UV defense. Re-coat intervals may be shorter (every 1–2 years) due to intense sun. Apply finishes in early morning before surfaces heat up.
- Maintenance Protocol: Clean more frequently (bi-annually) to remove dust and pollen that can abrade the finish. Inspect for checking after the first major heat wave. Consider strategic shading: pergolas with climbing vines provide dappled shade that significantly reduces UV exposure on surfaces below. Ensure adequate ventilation under decks.
- Critical Tip: Avoid installing wood during peak summer heat. Schedule projects for spring or fall. Allow lumber to acclimate on-site, stacked with spacers in the shade for at least one week before installation.
Humid & Subtropical Climates (Southeast US, Gulf Coast)
- Primary Challenges: High humidity (prolonged wood moisture), frequent rainfall, warm temperatures accelerating fungal growth (mold, mildew, rot), insect pressure.
- Wood Vulnerabilities: Rot at joints and end grains, persistent mold/mildew growth, swelling causing binding, finish failure from trapped moisture vapor.
- Strategic Countermeasures:
- Species Selection: Prioritize Class 1 or high-end Class 2 species: Ipe, Black Locust, Cypress, All-Heart Redwood. Avoid Douglas Fir, Pine (even PT for visible surfaces), and wood with significant sapwood. For structural posts in ground contact, use pressure-treated lumber rated for “Ground Contact” (UC4B) or naturally durable Black Locust posts.
- Finish Strategy: Penetrating oils with mildewcides and water repellents are essential. Avoid film-forming finishes (varnishes, solid stains) on large surfaces—they can trap moisture vapor trying to escape from humid wood, causing blistering. Ensure excellent drainage: slope deck boards slightly (1/8″ per foot), use hidden fastening systems that allow airflow underneath boards, and maintain clearance (minimum 6 inches) between wood and soil.
- Maintenance Protocol: Spring cleaning is critical—remove all organic debris before the humid season begins. Inspect under decks and in shaded corners monthly during wet seasons for early signs of mold or soft wood. Use oxygen bleach cleaner proactively at the first sign of graying or mildew. Ensure gutters direct water away from wood structures. Consider a moisture barrier (like landscape fabric) under decks in consistently damp areas.
- Critical Tip: Design for airflow. Avoid solid skirting around decks or sheds. Use lattice with large openings or leave sections open. Stagnant, humid air promotes decay. Elevate furniture slightly off deck surfaces using plastic glides.
Coastal & Marine Environments (Within ~5 miles of ocean)
- Primary Challenges: Salt spray (corrosive to fasteners and wood surfaces), high humidity, constant moisture cycling, intense UV reflection off water.
- Wood Vulnerabilities: Accelerated fastener corrosion, salt crystallization damaging wood surface, finish degradation from salt abrasion, increased rot risk.
- Strategic Countermeasures:
- Species Selection: Prioritize the most durable, dense species: Ipe, Teak, Black Locust. White Oak (quartersawn) is a good secondary option. Cedar and Redwood may be used but monitor closely; their natural oils can interact with salt over very long periods. Avoid standard pressure-treated pine near saltwater; preservatives can react adversely.
- Fastener Imperative: Use only grade 316 stainless steel fasteners (screws, bolts, joist hangers). Grade 304 stainless is generally insufficient for direct salt exposure. Hot-dipped galvanized fasteners corrode rapidly. Inspect fasteners annually for any signs of corrosion.
- Finish Strategy: Penetrating oils designed for marine environments are recommended. They resist salt penetration and allow the wood to breathe. Re-coat more frequently (annually for high-exposure areas). After major storms, gently rinse wood surfaces with fresh water to remove salt deposits.
- Maintenance Protocol: Rinse structures with fresh water after significant salt spray exposure. Inspect fasteners meticulously every spring. Pay close attention to areas where water pools or salt accumulates. For docks, ensure wood is not constantly submerged; use marine-grade treated timber or concrete pilings for submerged sections.
- Critical Tip: Design details matter. Use generous overhangs on roofs covering decks to minimize direct salt spray. Angle surfaces slightly to promote runoff. Avoid designs where water can pool on horizontal surfaces.
Cold & Freeze-Thaw Climates (Northeast US, Canada, Northern Europe)
- Primary Challenges: Repeated freezing and thawing cycles, snow load, ice dam formation, moisture absorption followed by expansion when frozen, de-icing chemicals.
- Wood Vulnerabilities: Checking and splitting from ice expansion within wood fibers, warping from uneven moisture absorption/drying, rot where snow/ice lingers, damage from improper snow removal or de-icers.
- Strategic Countermeasures:
- Species Selection: Dimensional stability is key. Black Locust excels. Ipe is excellent but can be less flexible in extreme cold. Cedar and Cypress perform well due to natural decay resistance, crucial for areas where snow melts slowly. Avoid species with high movement like flat-sawn Oak or Hickory.
- Finish Strategy: A high-quality penetrating oil that remains flexible in cold temperatures is vital. Rigid finishes crack during freeze-thaw cycles. Ensure strong water repellency to minimize moisture absorption before freezing. Apply the last maintenance coat in early fall, before temperatures drop consistently below 50°F.
- Maintenance Protocol: Before winter: Clean thoroughly and remove debris. Ensure drainage paths are clear. Snow Removal: Use a plastic shovel; push snow with the grain of deck boards. Avoid metal shovels or snow blowers that can gouge the surface. Avoid piling heavy, wet snow against wood structures. De-icing: NEVER use rock salt (sodium chloride) or standard ice melt on wood decks. These chemicals accelerate wood deterioration and corrode fasteners. Use sand for traction, or calcium magnesium acetate (CMA), labeled as safe for wood. Sweep off residue after ice melts.
- Critical Tip: Design for snow shedding. Steeper roof pitches on pergolas prevent heavy accumulation. Ensure deck framing has adequate slope for drainage. After heavy snowfall, gently brush snow off horizontal surfaces like rail caps to prevent prolonged moisture contact.
Project-Specific Guidance: Tailored Protocols
Generic advice often falls short. A deck faces foot traffic and water pooling; a planter battles constant soil moisture; furniture endures handling and storage cycles. This section addresses unique failure points for common projects.
Decks & Porches: Managing High Stress
Decks endure structural loads, foot traffic abrasion, water exposure, and UV radiation. Failure is often structural (rotted posts, joists) or surface-related (splintering, slippery algae).
* Wood Selection: For decking boards: Ipe, Black Locust, or high-grade Cedar/Redwood. For structural framing: Pressure-treated lumber rated for “Above Ground” (UC3B) or “Ground Contact” (UC4B) for posts. Critical: Use post anchors (galvanized or stainless steel) to separate wood posts from concrete footings—this prevents moisture wicking from concrete into the wood end grain, a leading cause of post rot. Never set wood posts directly in concrete.
* Design for Longevity:
* Slope: Ensure deck surface slopes away from the house at 1/8″ per foot for drainage.
* Spacing: Leave 1/8″ to 1/4″ gaps between deck boards (use spacers during installation) for expansion when wet and to allow debris/water to fall through. Wider gaps may be needed for wider boards or humid climates.
* Ventilation: Maintain at least 18 inches of clear airspace under the deck for airflow. Avoid enclosing the perimeter solidly; use lattice with large openings.
* Flashing: Install Z-flashing (aluminum or copper) where the ledger board attaches to the house. This directs water away from the critical house-wall connection point, preventing hidden rot—a major failure point in poorly built decks.
* Finish & Maintenance: Penetrating oil or semi-transparent stain. Clean bi-annually (spring and fall). Inspect structural elements underneath annually. Check for loose boards, protruding fasteners, and soft spots near posts or ledger board. Re-coat high-traffic areas annually; full deck every 2–3 years depending on wood and climate. Pro Tip: Place small, discreet felt pads under furniture legs to prevent scratching and allow airflow underneath.
Fences & Gates: Perimeter Durability
Fences face constant weather exposure on all sides, soil contact at posts, and gate mechanisms endure stress. Common failures: leaning posts, rot at ground line, gate sagging, warping boards.
* Wood Selection: Posts: Pressure-treated lumber rated for “Ground Contact” (UC4B) or naturally durable Black Locust/Cedar posts (set in gravel, not concrete, for easier replacement). Rails & Boards: Cedar, Redwood, Cypress, or pressure-treated pine (for budget). For gates, use stable wood like Cedar or Cypress; avoid wide, flat-sawn boards prone to cupping.
* Installation Insights:
* Post Setting: Dig post holes below frost line (check local guidelines). Place 6 inches of gravel at bottom for drainage. Set post on gravel. Do not pour concrete directly against wood post. Instead, use a post anchor set in concrete, or wrap the buried portion of a wood post with a moisture barrier before backfilling with gravel. Backfill with gravel, not soil, for superior drainage.
* Gate Construction: Build gates with a diagonal brace (Z-pattern) to prevent sagging. Use heavy-duty, corrosion-resistant hinges (strap hinges are strongest). Install a gate wheel or anti-sag kit for gates over 4 feet wide. Ensure gate latch hardware is robust.
* Board Orientation: Install fence boards with the natural curve (cup) facing outward. This allows water to shed off the convex surface rather than pooling in a concave curve against the fence.
* Finish & Maintenance: Penetrating oil or semi-transparent stain. Seal all cut ends thoroughly before installation. Clean annually. Inspect post bases for softness (probe with screwdriver). Tighten gate hardware annually. Re-coat every 2–3 years. Pro Tip: Install fence boards with a slight gap (1/4″) at the bottom above soil level to prevent soil contact and moisture wicking.
Outdoor Furniture: Balancing Beauty and Function
Furniture faces handling stress, exposure to elements, and often improper storage. Failures: loose joints, splintering, finish peeling, warping.
* Wood Selection: Prioritize stability and workability. Cedar, Cypress, Teak, and White Oak (quartersawn) are excellent. Avoid woods prone to splintering or high movement (like some pines or Hickory). For Adirondack chairs or benches, Cedar is ideal—lightweight, comfortable, and durable.
* Construction Details:
* Joinery: Use mortise-and-tenon or dowel joints with waterproof wood glue (e.g., Titebond III) for strength. Avoid relying solely on nails or screws in end grain. Pre-drill all holes to prevent splitting.
* Design: Incorporate slight curves or chamfers on edges to prevent splintering and improve comfort. Avoid sharp 90-degree inside corners where water can pool.
* Drainage: Drill small (1/4″) weep holes in horizontal surfaces (like chair seats or table tops) to allow water to escape.
* Finish Strategy: For dense woods (Teak, Ipe): High-quality marine penetrating oil. For softer woods (Cedar, Cypress): Penetrating oil or semi-transparent stain. Apply finish to all surfaces, including undersides and insides of joints—moisture enters from all sides. Re-coat annually for best appearance, or allow Teak/Cedar to weather naturally to gray (requires only occasional cleaning).
* Storage & Care: Store furniture indoors (garage, shed) during winter or prolonged wet seasons. If covering outdoors, use a breathable cover and ensure it’s taut. Never store furniture directly on damp ground; use feet or blocks. Clean cushions separately; store them dry. Tighten hardware annually. Pro Tip: For wooden slats on chairs or tables, leave a tiny gap (1/16″) between slats during assembly to allow for seasonal expansion.
Garden Structures: Pergolas, Arbors, Planters
These structures blend architecture with horticulture, creating unique moisture challenges—especially planters holding soil.
* Pergolas & Arbors:
* Wood: Cedar, Redwood, or pressure-treated pine (for structural posts/beams). Ensure all wood is rated for exterior use.
* Design: Slope rafters slightly for water runoff. Use corrosion-resistant hardware. Consider adding a polycarbonate or fabric canopy for shade/rain protection, which significantly reduces wood exposure.
* Maintenance: Clean annually. Inspect connections. Re-coat every 2–3 years. Train vines to grow on the structure, not through joints where moisture can be trapped against wood.
* Planter Boxes:
* Wood: High-risk due to constant soil moisture. Use only Class 1 species: Ipe, Black Locust, or Cypress. Avoid Cedar for edible gardens—it can leach oils affecting some plants, and moisture accelerates degradation. Pressure-treated pine is acceptable if lined with a waterproof barrier (like pond liner or heavy-duty plastic sheeting) to separate wood from soil. Never use pre-2004 CCA-treated lumber for planters due to arsenic concerns.
* Construction: Line the inside completely with a waterproof barrier, ensuring it extends over the top edge. Drill multiple drainage holes (1/2″ diameter) in the bottom. Elevate the planter on feet or bricks to prevent the bottom from sitting in pooled water. Use stainless steel screws.
* Maintenance: Inspect liner annually for tears. Check wood at soil line for softness. Re-coat exterior annually with a penetrating oil. Pro Tip: For edible gardens, use untreated Black Locust or meticulously line PT pine—prioritize safety.
Common Pitfalls and How to Avoid Them
Recognizing recurring mistakes transforms you from reacting to failure into proactively building resilience. Analysis of outdoor wood projects reveals consistent themes.
-
Pitfall 1: Ignoring Moisture Content at Installation
- The Issue: Installing wood with elevated moisture content (common with pressure-treated lumber or improperly stored wood) leads to warping, cupping, twisting, and checking as it dries after being fastened. Boards pull away from fasteners, gaps open unevenly, surfaces become uneven.
- The Insight: Wood moves primarily across the grain. When constrained by fasteners while drying, internal stresses build until the wood deforms. A board installed at high moisture content in a dry climate undergoes significant dimensional change.
- The Solution: Check moisture content with a meter before installation. Ideal range: 12–18% for most climates. For pressure-treated lumber, stack it stickered (with small wood spacers between layers) in a dry, shaded, well-ventilated area for at least 2–4 weeks (longer in humid climates) before use. Kiln-dried (KD) or Kiln-Dried After Treatment (KDAT) lumber is worth considering for visible surfaces. When uncertain, allow more drying time. Patience prevents permanent deformation.
-
Pitfall 2: Trapping Moisture with Impermeable Barriers
- The Issue: Applying a non-breathable finish to wood that isn’t dry, or using non-breathable materials against wood (like plastic sheeting directly on soil under a deck, or solid skirting with no ventilation), traps moisture vapor. This creates conditions for hidden rot, mold growth, and finish blistering.
- The Insight: Wood constantly exchanges moisture vapor with the surrounding air. A non-breathable barrier blocks this exchange. Trapped moisture saturates wood fibers, enabling decay. Vapor pressure builds until it forces the finish off the surface.
- The Solution: Use breathable finishes (penetrating oils, semi-transparent stains) on most outdoor wood. For barriers: Use landscape fabric (geotextile), not plastic, under decks. Ensure enclosed structures have ventilation gaps at top and bottom for cross-flow. Guiding Principle: Design every assembly to allow moisture to escape as easily as it enters.
-
Pitfall 3: Metal-Wood Corrosion Reactions
- The Issue: Using standard steel fasteners with cedar, redwood, or pressure-treated lumber causes rapid corrosion. Rust stains streak the wood. More critically, corroded fasteners lose holding power, leading to structural loosening (wobbly railings, sagging gates). In coastal areas, this accelerates significantly.
- The Insight: Natural acids in cedar/redwood, and copper compounds in modern pressure-treated wood (ACQ, CA), are corrosive to standard steel. Salt air exponentially accelerates this reaction.
- The Solution: Match fasteners to the wood and environment. For cedar, redwood, cypress: Use stainless steel (grade 304 minimum, 316 for coastal) or hot-dipped galvanized (look for high coating weight). For pressure-treated lumber (ACQ/CA): Use fasteners specifically rated for “ACQ” or “CA-B”—typically stainless steel or heavy polymer-coated. Avoid standard galvanized or uncoated steel. The small extra cost prevents costly repairs and unsightly stains. Verify compatibility with your supplier.
-
Pitfall 4: Neglecting End Grain Vulnerability
- The Issue: Moisture wicks rapidly into the exposed end grain of boards (at cuts, joints, post tops), causing end-splitting, checking, and internal rot that starts unseen. This is a primary failure point for deck boards, fence rails, and post tops.
- The Insight: End grain has open capillary tubes that absorb liquid water 10–15 times faster than face or edge grain. Once moisture enters the end, it travels deep into the board.
- The Solution: Seal every cut end thoroughly before assembly. Dip ends in finish, or apply multiple generous coats with a brush, ensuring full saturation. For post tops, consider adding a metal or plastic post cap that overhangs the edges to shed water away from the vulnerable end grain. This simple step significantly extends project life.
-
Pitfall 5: Inadequate Surface Preparation Before Finishing
- The Issue: Applying new finish over dirty, grayed, or failing old finish results in poor adhesion, uneven appearance, and drastically shortened service life. The new finish peels prematurely.
- The Insight: Dirt, mildew, degraded lignin (gray wood), and chalky old finish create a weak boundary layer. New finish bonds to this weak layer, not the sound wood underneath. Moisture penetrates through cracks, causing failure at the interface.
- The Solution: Preparation is essential. For new wood: Allow weathering (2–4 weeks), then clean with wood brightener. For old wood: Remove all failing finish via sanding or chemical stripper. Clean thoroughly with oxygen bleach solution to kill mold/mildew and brighten grayed wood. Rinse well. Sand lightly to “de-gloss” any remaining sound finish for better adhesion. Wipe away all dust. The surface must be clean, dry, and sound. Skipping this step compromises the entire finish system.
Advanced Techniques: Expanding Your Toolkit
For those seeking enhanced longevity, unique aesthetics, or solutions to challenging scenarios, these methods leverage wood science and craftsmanship. These are optional enhancements, not requirements for success.
-
Thermal Modification: A controlled, chemical-free process where wood is heated to high temperatures (180–230°C / 356–446°F) in an oxygen-limited environment. This reduces the wood’s ability to absorb moisture by altering its cell structure. The result is wood with dramatically improved dimensional stability (less swelling/shrinking), enhanced decay resistance (often achieving Class 1 or 2 ratings, even for species like Pine), and a rich, uniform brown color. Thermally modified woods are increasingly available for decking and cladding. Benefits: Can utilize fast-growing species sustainably, consistent color, excellent stability. Considerations: Slightly reduced bending strength (factor into design), requires specific finishing protocols, higher initial cost than untreated softwoods. This technology is well-established in Europe and growing globally.
-
Acetylation (e.g., Accoya® Wood): A process where wood (typically Radiata Pine) is infused with acetic anhydride (derived from vinegar). This permanently alters the wood’s cell structure to be hydrophobic (water-repelling). Acetylated wood achieves Class 1 durability, exceptional dimensional stability, and retains workability. It’s used in high-end windows, doors, and marine applications. Benefits: Unmatched stability and durability for a softwood base, sustainable source material, long warranties common. Considerations: Highest cost option, limited availability for DIY projects (more common in pre-fabricated elements), requires standard finishing but intervals are greatly extended. Represents advanced wood modification science.
-
Shou Sugi Ban (Yakisugi): An ancient Japanese method of charring the surface of wood (traditionally Cedar) with flame, then cleaning and oiling it. The carbonized layer creates a durable, water-resistant, insect-resistant, and fire-retardant surface. Modern adaptations use propane torches. Process: Pass flame evenly over wood until a consistent black char forms (1–2mm deep). Crucially: Brush off loose char with a stiff wire brush. Wipe clean. Apply a natural oil (like Tung oil) to seal the charred surface. Benefits: Unique aesthetic, proven historical longevity, chemical-free preservation. Considerations: Labor-intensive, requires safety precautions (fire, inhalation), char layer can be abrasive initially (smooths with weathering), not suitable for high-traffic walking surfaces like deck floors (ideal for siding, fences, accent walls). A fusion of art and function.
-
Ventilated Rain Screen Detail: For siding, fences, or cladding, this architectural detail creates an air gap between the wood surface and the underlying structure. Install vertical furring strips (1x2s) over the weather barrier, then attach the wood cladding to the furring strips. This gap allows air to circulate freely behind the wood, promoting rapid drying of any moisture that penetrates the cladding joints. It significantly reduces the risk of trapped moisture causing rot or mold behind the visible surface. This is standard in high-performance building but underutilized in DIY projects. Adding this simple air gap can substantially extend the service life of wood cladding.
-
Thoughtful Oil Selection: While commercial products are reliable, understanding oil properties helps selection. For Dense Hardwoods (Ipe/Teak): Look for penetrating oils specifically formulated for dense woods, often containing solvents to aid penetration. Apply using the “flood and wipe” method. Caution: Custom oil blends require experience; improper ratios can cause stickiness or poor curing. Always test on scrap wood first. For most users, high-quality commercial penetrating oils designed for exterior use provide consistent, reliable results.
Your Questions, Answered
Q: How can I tell if my outdoor wood needs re-finishing?
A: Perform the “water test.” Sprinkle a few drops of water on the wood surface. If the water beads up and sits on top for several minutes, the existing finish is still providing adequate water repellency—no immediate recoating is needed. If the water soaks into the wood within seconds (leaving a dark spot), the finish has degraded significantly, and moisture is penetrating the wood fibers. This is a good time to clean and consider applying a maintenance coat. Waiting until the wood is uniformly gray or feels rough means UV damage has already occurred, requiring more intensive preparation.
Q: Is it better to let wood weather naturally to gray, or should I always apply a finish?
A: Both approaches have merit, with trade-offs. Natural Weathering: Requires minimal maintenance (just periodic cleaning). Many appreciate the silvery-gray patina as elegant and low-fuss. However, UV exposure permanently degrades the wood surface (lignin loss), making it slightly more vulnerable to moisture absorption and erosion over decades. It offers no protection against checking or biological growth in damp climates. Applying Finish: Preserves the wood’s original color and grain, provides active protection against UV degradation and moisture, and can enhance longevity, especially for less durable species. It requires a maintenance commitment. For maximum longevity with minimal effort on highly durable woods (Ipe, Cedar), natural weathering is a sound choice. For preserving appearance or using moderately durable woods, finishing is generally recommended.
Q: Can I use interior wood finishes (like polyurethane) on outdoor projects if I reapply them frequently?
A: It is not recommended. Interior polyurethanes lack UV inhibitors and mildewcides. Sunlight will break down the finish rapidly (within months), causing it to amber, crack, and peel. This not only looks poor but can trap moisture underneath the failing film, potentially accelerating wood decay. The frequent reapplication needed (every 6–12 months) involves stripping the failed finish each time—a far more labor-intensive process than using a proper exterior penetrating oil that re-coats easily over itself. Always use products explicitly labeled for “Exterior Use.”
Q: How do I remove black stains on my cedar deck caused by rusting nails?
A: These stains result from iron reacting with tannins in the cedar. Oxygen bleach cleaners are typically ineffective. Use a solution designed for iron stain removal: Mix oxalic acid crystals (available at hardware stores) with warm water per label instructions. Wear gloves and eye protection. Apply to the stain, let dwell briefly (do not let dry), then scrub gently and rinse thoroughly. Test on an inconspicuous area first. For prevention, replace rusting fasteners with stainless steel screws during your next maintenance cycle.
Q: What’s the absolute minimum maintenance I can do to keep my pressure-treated pine deck safe and functional?
A: For basic safety and function (not appearance): 1) Sweep debris weekly to prevent moisture-trapping buildup. 2) Clean thoroughly with oxygen bleach solution and soft brush twice a year (spring/fall) to remove mold/mildew that creates slippery surfaces. 3) Inspect monthly for protruding fasteners, loose boards, or soft/rotten spots (probe with screwdriver); repair immediately. 4) Ensure drainage paths are clear. While it will gray and show wear, this regimen helps prevent hazardous conditions. For appearance and extended life, add an annual maintenance coat of penetrating stain after cleaning and drying.
Q: Are “waterproof” deck coatings (like liquid rubber) a good solution for an old, damaged deck?
A: Generally not recommended for wood decks. These thick, elastomeric coatings form a complete membrane that traps all moisture vapor trying to escape from the wood underneath. Any tiny breach allows water in, but the membrane prevents drying, leading to severe hidden rot and structural damage. They also peel dramatically when they fail. For a damaged deck, the correct solution is to replace rotten boards, prepare the surface properly, and apply a breathable penetrating finish. Waterproof coatings are designed for non-porous substrates like concrete.
Q: How do I prevent carpenter bees from drilling holes in my untreated cedar fence posts?
A: Prevention is key: 1) Apply a quality penetrating oil or stain to all surfaces, especially the top end grain of posts—bees prefer bare, unpainted softwoods. 2) Fill any existing holes in late fall (after bees emerge) with wood putty or caulk, then seal. 3) Hang carpenter bee traps near problem areas in early spring. 4) As a deterrent, lightly apply a borate-based insecticide into existing holes before sealing (follow label instructions carefully). Avoid broad-spectrum insecticides that harm beneficial pollinators.
Q: Can I use reclaimed barn wood for an outdoor project?
A: Proceed with caution. Reclaimed wood can be beautiful and sustainable, but requires rigorous assessment: 1) Structural Integrity: Check thoroughly for rot, insect damage (powdery residue, holes), cracks, or warping. Probe suspect areas. 2) Contaminants: Test for lead paint (common in pre-1978 wood). Sanding creates hazardous dust. 3) Fasteners: Remove all nails, screws, and metal thoroughly—use a metal detector. 4) Moisture Content: Ensure it’s dry and stable. 5) Species: Identify the wood type—is it durable enough for your intended outdoor use? Reclaimed Heart Pine or Cypress can be excellent; reclaimed Poplar is not. When in doubt, use reclaimed wood only for sheltered outdoor applications (like a covered porch ceiling) or interior projects. Never use it for structural elements without professional assessment.
Q: Why does my deck feel slippery even after cleaning?
A: Slipperiness is often caused by a biofilm of algae, mold, or mildew embedded in the wood pores. Oxygen bleach cleaning helps, but for persistent cases: 1) Use a deck cleaner specifically formulated to kill algae/mold. 2) Scrub vigorously with a stiff nylon brush (wire brushes damage wood). 3) Consider applying a non-slip additive mixed into your next coat of penetrating stain (products designed for this exist). 4) Improve airflow and sunlight exposure around the deck if possible—trim overhanging branches. 5) For high-risk areas (steps), install non-slip adhesive strips designed for outdoor wood.
Q: How long should I wait after rain before applying finish to my deck?
A: Wood must be completely dry. A general guideline is 48–72 hours of dry, sunny, breezy weather after rain. However, this varies significantly with humidity, temperature, wood species, and thickness. Do not guess. Use a moisture meter. The wood surface and just below should read below 15% moisture content. Sprinkling water on the surface is unreliable—if it soaks in, the surface might be dry but the core could still be wet. Applying finish to damp wood traps moisture, causing blistering, peeling, and promoting decay. Patience is essential; rushing this step compromises the entire finish system.
Q: Is bamboo decking a good eco-friendly alternative to tropical hardwoods?
A: It depends heavily on the product. Untreated bamboo is not durable outdoors. Look for bamboo that has undergone thermal modification or acetylation specifically for exterior use. Check for independent certifications (FSC, SCS) and, crucially, a long-term warranty (25+ years) against checking, fading, and structural failure. Quality varies immensely—cheap bamboo decking can delaminate, fade rapidly, or become susceptible to moisture damage. Research specific brands thoroughly, read independent reviews of installations 5+ years old, and verify the modification process. High-quality modified bamboo can be a sustainable choice; low-quality bamboo is often a poor investment.
Q: What’s the single most important factor for making outdoor wood last?
A: Based on analysis of project performance, it is managing moisture exposure at the design and installation phase. This encompasses: selecting wood with appropriate innate durability for the exposure level, ensuring proper drainage and ventilation in the structure, sealing all end grains, using compatible fasteners to prevent corrosion-induced moisture traps, and installing wood at the correct moisture content. No finish or maintenance regimen can fully compensate for a design that chronically traps moisture against the wood. Getting these moisture-management fundamentals right during planning and construction creates a foundation where finishes and maintenance can perform effectively for decades.
Conclusion and Next Step
You now have a comprehensive, adaptable system—not just scattered tips—for supporting the longevity of your outdoor wood projects. The path to resilience is built on three interconnected pillars: selecting wood with innate defenses matched to your climate and project demands, applying protection that manages moisture and UV without trapping vapor, and embracing a proactive, rhythmic maintenance approach that preserves protection and catches issues early. This knowledge helps transform wood into a thoughtful, sustainable choice that deepens in character over time. Remember the core insight: wood’s relationship with moisture is central to its outdoor performance. Every decision—from species selection to the gap between deck boards—should support the wood’s ability to breathe and shed moisture efficiently.
Recap: The 3 Foundational Practices
1. Match Wood to Mission: Choose species with durability appropriate for the exposure level and climate. When uncertain, select a species with slightly higher inherent durability.
2. Finish for Function: Prioritize breathable, penetrating finishes that protect from within. Meticulous surface preparation and correct application technique are more critical than brand names. Never neglect sealing end grain.
3. Maintain Proactively: Integrate the seasonal rhythm—assess and clean in spring, protect in summer, prepare in fall, observe in winter. Small, consistent actions prevent major interventions later.
Your 24-Hour Action: Within the next day, take five minutes to inspect one outdoor wood item you own—a deck board, fence post, or piece of furniture. Note its current condition: Is the finish intact? Are there signs of moisture, checking, or loose hardware? Simply observing builds awareness. If you have unfinished wood stored for a project, check its moisture content or ensure it’s stacked with spacers for airflow. This small step initiates the habit of mindful care.
The Bigger Picture: Thoughtful wood stewardship connects to broader values—appreciating natural materials, reducing waste through longevity, and creating outdoor spaces that foster connection and well-being. Each project maintained with care becomes part of a legacy of craftsmanship and respect for resources. Your informed choices today contribute to landscapes that endure and inspire for years to come.
Explore Our Complete System:
Understanding Wood Grain and Movement | Sustainable Sourcing Guide for Outdoor Lumber | Seasonal Maintenance Calendar Template | DIY Wood Cleaner Recipes for Every Climate | Troubleshooting Common Outdoor Wood Issues | Climate Zone Finder for Wood Selection | Essential Tools Checklist for Outdoor Wood Projects