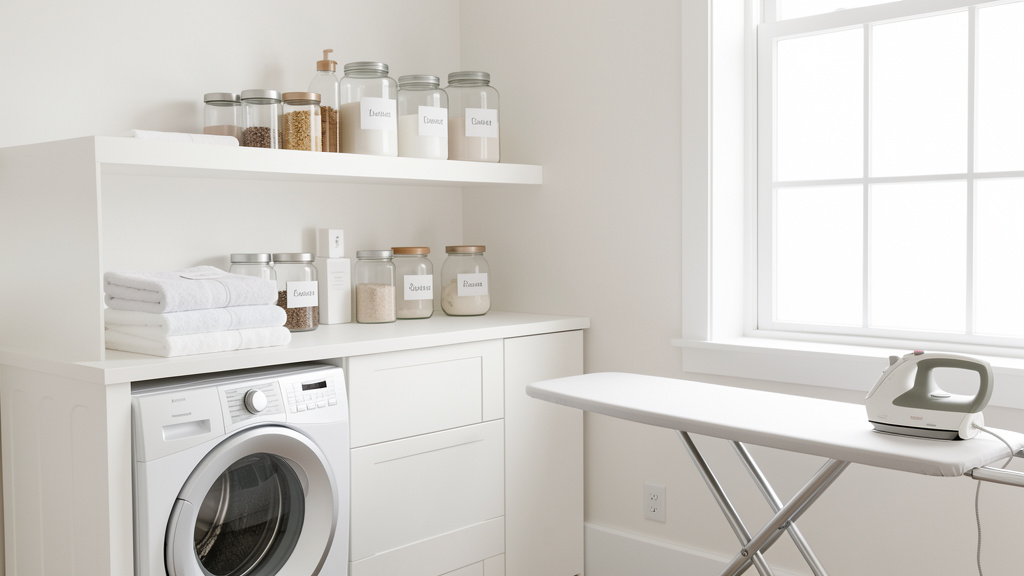
Transform Chaos into Calm with a Step-by-Step System Designed for Real Homes and Real Lives
Laundry day doesn’t have to mean frustration, scattered socks, or hours lost to folding mountains of clothes. This definitive guide delivers a proven, workflow-centered framework to design a laundry space that saves time, reduces mental load, and adapts to your household’s unique rhythm—whether you’re working with a dedicated room, a closet nook, or a shared utility area. Forget generic inspiration pins; here, you’ll discover actionable strategies grounded in ergonomic principles, spatial psychology, and real-world constraints that turn laundry from a chore into a seamless, even satisfying, part of daily life.
Introduction
Walk into most homes, and you’ll find the same scene: detergent bottles crammed beside the sink, clean clothes piled on the dryer for days, mismatched socks hiding in shadowy corners, and a lingering sense of “I’ll deal with this later.” This isn’t a failure of willpower—it’s a failure of design. For decades, laundry spaces have been treated as afterthoughts: tucked behind doors, squeezed into hallways, or repurposed from closets never intended for the task. The result? A space that works against you, adding friction to an already repetitive task.
Environments designed around human behavior—not just aesthetics—consistently support smoother daily routines. When a space anticipates your needs, eliminates unnecessary steps, and provides intuitive storage, even mundane tasks become more manageable. This guide synthesizes established principles from ergonomics, spatial organization, and workflow design to deliver a comprehensive system. We move beyond “pretty pictures” to address the micro-decisions that make or break functionality: Where should the folding surface sit relative to the dryer? How deep should shelves be for detergent bottles? What lighting prevents color-matching errors? By the end, you’ll possess a personalized blueprint—not just for organizing what you have, but for designing a space that actively supports your life.
The Workflow-First Framework: Designing Around Your Daily Reality
Most laundry room guides begin with paint colors or cabinet styles. This is precisely where they fail. Aesthetics follow function. If your layout forces you to backtrack between sink, washer, and folding area, no amount of matching baskets will create efficiency. The Workflow-First Framework flips the script: we start by mapping your unique process, then build the physical space around it. This five-step system is designed around observable household patterns to help streamline your routine and minimize physical strain.
Think of your laundry process as a river. Obstacles create turbulence. Smooth channels allow effortless flow. Our goal is to eliminate every rock, eddy, and unnecessary bend in your personal river.
Step 1: Map Your Unique Laundry Workflow
Before measuring a single inch of wall space, grab a notebook. For three consecutive laundry cycles, document exactly what you do. Don’t assume—observe. Track:
- Pre-Wash Actions: Sorting (by color? fabric? family member?), stain treatment location, checking pockets, turning clothes inside out
- Washing Sequence: Loading order, detergent measurement spot, adding boosters (vinegar, baking soda), starting cycle
- Post-Wash Transition: Unloading path, immediate folding vs. basket transfer, hanging damp items
- Drying Process: Transferring to dryer, adding dryer sheets/wool balls, unloading method
- Finishing Steps: Folding location, sorting clean items by owner/room, ironing needs, storage placement
Why this step is crucial: Two households with identical square footage may have wildly different needs. A family with three young children in sports uniforms requires robust pre-treatment stations and heavy-duty sorting zones. A retiree couple washing delicate linens needs gentle handling space and immediate hanging solutions. A college student in a dorm laundry closet prioritizes speed and minimal storage. Mapping reveals your non-negotiables.
How to do it correctly:
1. Time each phase: Use your phone timer. Note where you pause, backtrack, or feel rushed.
2. Identify friction points: “I always trip over the hamper,” “I can’t see stains clearly near the washer,” “I forget to add fabric softener.”
3. Note tool locations: Where do you wish the stain brush lived? Where do you actually grab the detergent?
4. Involve all users: If teens or partners use the space, document their workflow too. Conflicting habits cause long-term friction.
Common mistakes to avoid:
– Assuming “standard” workflows apply to you: There is no universal standard. Your habits are valid data.
– Skipping the observation phase: Guessing leads to designing for an idealized version of yourself, not reality.
– Ignoring emotional triggers: Does folding near the dryer feel chaotic? Does poor lighting make you avoid laundry after dark? These matter.
Illustrative example: A household tracking their workflow discovered significant time was spent after drying: sorting clean clothes into multiple baskets scattered across the house. Their solution? A dedicated “sorting station” with labeled bins inside the laundry room, reducing post-dry sorting time noticeably.
Common pitfall: Someone redesigned their laundry closet based on aesthetic photos—open shelves for pretty baskets. But their workflow required frequent stain treatment. Without a dedicated sink zone, they carried stained items to the kitchen, treated them there, then returned to the laundry closet. The “pretty” design added steps. Mapping would have revealed the sink’s critical role.
Step 2: Zone Your Space for Uninterrupted Flow
With your workflow mapped, divide your space into four functional zones. These zones should exist in sequence, with minimal steps between them. Imagine an assembly line where each station passes work smoothly to the next.
| Zone | Core Purpose | Minimum Requirements | Ideal Placement Sequence |
|---|---|---|---|
| Prep Zone | Sorting, stain treatment, pocket checks | Sorting bins (3+), task lighting, stain station, pocket-check reminder | First zone upon entry |
| Wash Zone | Loading, detergent access, cycle start | Washer clearance (front/side), detergent storage within arm’s reach, utility sink (if used) | Adjacent to Prep Zone |
| Dry Zone | Transferring, drying, unloading | Dryer clearance, immediate folding surface or hanging rod, lint trap access | Directly beside Wash Zone |
| Finish Zone | Folding, sorting, storage, ironing | Folding surface (min. 24″x36″), sorted storage bins, hanging space, ironing station | Final zone before exit |
Why this step is crucial: Zoning eliminates the “laundry dance”—that exhausting shuffle between scattered tools and tasks. Each zone contains everything needed for its phase. When zones are sequential, muscle memory develops. You move forward through the process without retracing steps.
How to do it correctly:
1. Sketch your space (graph paper or digital tool). Mark permanent fixtures: plumbing, electrical outlets, doors, windows.
2. Place zones in workflow order: Prep → Wash → Dry → Finish. Never place Finish Zone before Dry Zone—that forces backtracking.
3. Calculate clearance:
– Washer/dryer need 1–2 inches on sides for vibration and airflow
– Front-loaders require 21+ inches of clear floor space for door swing
– Folding surface needs 36+ inches of clear approach space
4. Prioritize adjacency: The Dry Zone must touch the Finish Zone. Unloading directly onto a folding surface saves seconds per load that compound over time.
Common mistakes to avoid:
– Forcing zones into equal sizes: Your Prep Zone might need more space if you have complex sorting needs; Finish Zone might need more if folding is slow. Size zones by your workflow data.
– Ignoring traffic flow: If the laundry room is a hallway pass-through, zones must not block movement. Use pocket doors or recessed elements.
– Placing storage outside zones: Detergent stored across the room breaks workflow. Every tool must live in its usage zone.
Illustrative example: A homeowner converted a narrow hallway closet (3’x6′) into a laundry zone. They placed:
– Prep Zone: Over-door pocket organizer with sorting bags (left side of door)
– Wash Zone: Stackable washer/dryer centered in closet
– Dry Zone: Pull-down folding board mounted above dryer (unloads directly onto board)
– Finish Zone: Wall-mounted rod on right side for hanging items immediately
The entire workflow happens within a compact radius. No steps wasted.
Common pitfall: A popular layout showed a beautiful laundry room with a central island for folding. But the island sat between the washer and dryer, forcing the user to walk around it after unloading. This single design flaw added unnecessary steps per load. Zoning isn’t about furniture placement—it’s about movement efficiency.
The Fundamental Principle: A laundry room’s value isn’t measured in square footage, but in the reduction of steps, decisions, and friction between dirty clothes and put-away clothes.
Step 3: Optimize Every Inch of Storage—Vertically and Horizontally
Storage fails when it’s generic. “Shelves for baskets” isn’t a plan. Storage succeeds when it’s purpose-built for specific items, sized to their dimensions, and positioned at the exact height where they’re used. This step transforms clutter into calm through thoughtful precision.
Vertical Strategy: The Three-Tier System
Human reach and visibility vary by height. Design storage tiers accordingly:
- Lower Tier (Floor to 30″): Heavy, infrequently used items.
- Ideal for: Bulk detergent (large containers), ironing board, step stool, backup supplies
- Pro Tip: Use pull-out drawers or rolling carts. Bending to retrieve heavy items strains the back. A slide-out shelf for detergent bottles prevents spills and makes pouring effortless.
-
Common Mistake: Storing daily-use items here. If you bend more than twice per laundry session, redesign.
-
Prime Tier (30″ to 60″): Daily workflow essentials.
- Ideal for: Current detergent bottle, stain treatments, dryer sheets, sorting bins, folding surface
- Pro Tip: This is your “golden zone.” Place the folding surface at elbow height (typically 36–42″) to prevent shoulder strain. Mount shelves at eye level for sorting bins—no squinting to read labels.
-
Illustrative example: A user installed a narrow shelf above their washer (within Prime Tier) holding only the items used during washing: detergent cap, stain pen, mesh laundry bags. No reaching across the room mid-cycle.
-
Upper Tier (60″ to ceiling): Lightweight, seasonal, or overflow items.
- Ideal for: Extra hangers, gift wrap, vacuum cleaner, off-season clothing storage
- Pro Tip: Use uniform, labeled bins. Clear bins with contents visible prevent “bin diving.” Install library-style label holders on shelves for easy updates.
- Accessibility Note: If any user is under 5’4″ or has mobility limitations, avoid storing essentials above 54″. Use vertical space for non-essentials only.
Horizontal Strategy: Depth Matters More Than Width
Shelf depth is rarely discussed—but it’s critical. Too shallow? Bottles fall off. Too deep? Items vanish into the abyss.
| Item Category | Ideal Shelf Depth | Why It Works |
|---|---|---|
| Detergent bottles, stain sprays | 10–12 inches | Prevents tipping; allows easy grabbing of front item |
| Standard laundry baskets | 14–16 inches | Fits baskets without overhang blocking adjacent zones |
| Folding surface | Minimum 24 inches deep | Accommodates king-size sheets without draping |
| Hanging rod clearance | 24 inches from wall | Prevents clothes from brushing against wall or shelves |
| Drawer interiors | 18–22 inches deep | Fits folded towels without cramming; allows full extension |
Why this step is crucial: Poorly dimensioned storage creates hidden friction. Reaching deep into a shelf for a small stain pen wastes seconds. A folding surface too narrow forces repositioning mid-fold. Precision storage eliminates these micro-frustrations.
How to do it correctly:
1. Measure your actual items: Bring detergent bottles, baskets, and folded towels to your design sketch. Trace their footprints.
2. Group by workflow sequence: In the Prep Zone, place sorting bins side-by-side at identical heights for quick visual sorting. In the Finish Zone, position family member bins in the order clothes are sorted.
3. Incorporate “landing zones”: Leave one small, clear shelf (12″x12″) near the washer door for items removed mid-cycle (a forgotten sock, a pocket knife). Prevents floor clutter.
4. Use adaptive hardware:
– Tension rods create instant dividers in deep shelves
– Pegboard walls (mounted in Prime Tier) hold stain brushes, scissors, clothespins within sight and reach
– Under-shelf baskets double storage in narrow gaps
Common mistakes to avoid:
– Uniform shelf heights: Not everything needs identical spacing. Tall detergent bottles need more height; folded washcloths need less. Adjustable shelving is highly recommended.
– Ignoring appliance dimensions: Measure your current washer/dryer depth. Newer models may be deeper. Leave clearance behind for hoses and airflow.
– Overlooking the “dead zone”: The narrow wall space beside appliances (often 2–4 inches wide) is perfect for a magnetic strip holding scissors, seam rippers, or safety pins.
Illustrative example: A laundry closet had 3 inches of unused space between the dryer and wall. A slim, floor-to-ceiling wire rack (2.5″ deep) was installed, holding dryer balls, lint rollers, and a small basket for “mending pile” items. This transformed wasted space into high-value workflow storage.
Common pitfall: A suggested “laundry room hack” recommended using deep cubes for storage. But without internal dividers, socks and small items disappeared into the back. Users spent more time searching than organizing. Depth without organization creates chaos.
Step 4: Select Appliances with Workflow Integration in Mind
Appliances aren’t just appliances—they’re the engine of your workflow. Choosing based solely on price, capacity, or aesthetics ignores their profound impact on daily efficiency. This step guides selection through a workflow lens, not a spec-sheet lens.
Washer/Dryer Configuration: Stackable vs. Side-by-Side
This decision shapes your entire zone layout.
| Configuration | Best For | Workflow Impact | Critical Consideration |
|---|---|---|---|
| Stackable | Spaces under 35 sq. ft., closets, apartments | Maximizes floor space for folding/storage; creates vertical workflow (load bottom, unload top) | Requires sturdy wall mounting; folding surface must be adjacent (not below) to avoid bending after unloading |
| Side-by-Side | Spaces over 40 sq. ft., dedicated rooms | Enables true assembly-line flow: Prep → Washer (left) → Dryer (right) → Folding | Needs minimum width clearance; ensures unobstructed path between units |
| Pedestal Drawers | Any configuration with budget | Raises units to reduce bending; adds Prime Tier storage for detergent, dryer sheets | Verify clearance under units for drawer operation |
Why this step is crucial: A mismatched configuration forces awkward movements. Unloading a top-loader dryer requires lifting heavy, damp clothes upward—a strain risk. Side-by-sides in a narrow space can create a “pinch point” where you can’t open both doors fully. Your appliance choice must serve your body and space.
How to do it correctly:
1. Simulate the motion: At the appliance store, practice loading/unloading. Does the door swing interfere with your stance? Can you comfortably reach the drum bottom?
2. Measure door swing radius: Front-loaders need clear floor space. In tight spaces, consider models with reversible doors.
3. Prioritize features that reduce steps:
– Steam cycles: May reduce ironing needs (integrates with Finish Zone)
– Delay start: Run loads during off-peak hours without manual timing
– Large door openings: Easier loading/unloading of bulky items
– Internal drum light: See stray socks without flashlight
4. Consider noise levels: If laundry room adjoins living spaces, look for quieter operation models. This allows running loads during evening hours without disruption.
Common mistakes to avoid:
– Oversizing capacity: A very large washer may be inefficient for small, frequent loads. Match capacity to your typical load size.
– Ignoring hose/access requirements: Stackables need reinforced wall studs. Side-by-sides need clearance for vents. Verify before purchase.
– Discounting maintenance access: Can you easily reach the lint trap? Is the detergent drawer removable for cleaning? Hard-to-maintain units become workflow bottlenecks.
Illustrative example: A homeowner in an older home with narrow doorways chose a slightly narrower stackable unit after careful measurement. Though slightly smaller capacity, it fit without door removal during delivery—a decision that prevented installation complications and workflow disruption.
Common pitfall: Someone purchased side-by-side units online without measuring their space. The units arrived too wide for the alcove. They spent days modifying cabinetry, delaying laundry, and creating a permanent gap where dust collected. Measurement isn’t optional—it’s foundational.
The Utility Sink Consideration
Often omitted to save space or cost, a utility sink can be valuable for households that:
– Treat stains frequently
– Hand-wash delicates
– Rinse cloth diapers or pet bedding
– Soak heavily soiled items (gardening clothes, sports gear)
Workflow integration tips:
– Place sink within Prep Zone, between sorting area and washer
– Choose deep basin to help prevent splashing
– Install pull-down spray faucet for targeted rinsing
– Add a small shelf above sink for stain treatments and brushes
– Ensure counter space beside sink for pre-soaking items
If space prohibits a full sink, consider:
– Wall-mounted fold-down sink: Creates sink functionality only when needed (ideal for closets)
– Portable utility tub: Stores under counter; brings sink function to floor level for soaking
Why it matters: Without a dedicated sink zone, stain treatment often happens at the kitchen sink—breaking workflow, potentially contaminating food prep areas, and adding steps. A purpose-built sink contains the process.
Step 5: Build in Maintenance and Future-Proofing
The most beautiful laundry room fails if it’s hard to clean or can’t adapt to life changes. This final framework step ensures longevity through proactive design.
Maintenance-First Design
Design elements that simplify cleaning prevent neglect:
– Floors: Choose seamless, waterproof materials. Luxury vinyl plank (LVP) or sheet vinyl are often easier to maintain than tile with grout lines. Slope floor slightly toward drain if possible.
– Walls: Semi-gloss or satin paint wipes clean after splashes. Install wainscoting (36″ high) in Prep/Wash zones for easy wipe-downs.
– Countertops: Solid surface materials (quartz, solid surface acrylic) have fewer crevices for residue than some laminates.
– Open vs. Closed Storage: Closed cabinets hide clutter but collect dust on tops. Open shelving shows clutter but is easier to wipe. Hybrid solution: Closed storage for bulk items, open for daily-use bins with uniform containers.
Pro Tip: Install a small, wall-mounted vacuum (like a handheld unit in a charging dock) specifically for quick lint/debris cleanup. Place it in the Dry Zone—where lint accumulates fastest.
Future-Proofing for Life Changes
Your needs will evolve. Design flexibility now avoids costly changes later:
– Adjustable shelving: Use pin-hole systems instead of fixed shelves. Easily reconfigure for new baskets, growing children’s needs, or hobby equipment.
– Extra electrical outlets: Install additional outlets before walls are closed. Place near future ironing station, folding area (for steamer), or ceiling for task lighting. Label circuits clearly.
– Plumbing considerations: If budget allows during construction/renovation, rough-in connections for a future sink. Cap pipes neatly; saves effort later.
– Universal design elements:
– Fold-down ironing board that locks securely (safer than wall-mounted)
– Lever-style faucet handles (easier with arthritic hands or wet fingers)
– Non-slip flooring with minimal thresholds
– Task lighting at multiple heights (over washer, over folding area)
Illustrative example: A family designed their new laundry room with adjustable shelving and extra outlets. Years later, when a new hobby required dedicated space, they added a station on an existing shelf—no renovation needed. The space adapted seamlessly.
Common pitfall: A homeowner installed custom cabinetry with fixed shelves sized perfectly for their current detergent bottles. When they switched to a different packaging format, the new container didn’t fit. They resorted to storing it on the floor—a tripping hazard. Flexibility supports longevity.
Solving Real-World Constraints: Small Spaces, Tight Budgets, and Rental Limitations
Theory meets reality in constrained spaces. This section delivers actionable adaptations for the most common obstacles—without compromising core workflow principles.
The Closet Laundry Room (Under 25 Sq. Ft.)
When space is measured in inches, every choice must pull double duty.
The Vertical Workflow Strategy:
1. Door as Prime Real Estate:
– Over-door organizer with clear pockets: Sorting bins (whites, colors, delicates)
– Magnetic strip on door interior: Holds scissors, stain pen, safety pins
– Hooks on back of door: For drying delicate items or hanging “to mend” clothes
2. Above-Appliance Zones:
– Mount a pull-down folding board above the dryer (use sturdy hinges; test weight capacity). Unload directly onto board.
– Install narrow shelf (8″ deep) above washer for detergent and stain treatments.
3. Floor Optimization:
– Use a rolling cart (24″W x 14″D) on casters: Stores ironing board, backup supplies. Tucks beside units; pulls out only when needed.
– Place hamper outside the closet door (in hallway) to preserve internal workflow space.
Critical Measurement: Verify clearance when appliance doors are open. Stackables need depth clearance; side-by-sides need width for both doors. If doors hit walls when open, choose models with reversible doors or shallower depth.
Budget Hack: Repurpose a sturdy wooden board (salvaged or affordable) as a folding surface. Sand, seal with waterproof finish, mount on heavy-duty hinges. Cost-effective alternative to commercial options.
The Shared Utility Space (Laundry + Mudroom + Pantry)
When laundry shares space with coats, shoes, and groceries, zoning becomes essential.
The Visual Barrier Technique:
– Use partial-height cabinets (42″ high) to separate zones without closing off light
– Differentiate flooring: Vinyl plank in laundry zone, durable tile in mudroom zone
– Color-code zones: Paint laundry zone walls a calming color; mudroom zone a distinct accent
– Install a sliding barn door (if structural) to close off laundry zone when not in use
Workflow Protection Rules:
1. No cross-traffic through laundry zones: Position mudroom elements (bench, hooks) so entry path doesn’t cut through Prep or Finish Zones.
2. Dedicated “landing pad”: Place a small tray outside the laundry area for items removed from pockets (keys, phones). Prevents contamination of clean zones.
3. Time-based awareness: If space is used by multiple people simultaneously, gentle communication about zone usage can reduce conflicts.
Illustrative example: A household shares a utility room for laundry, pet care, and garage access. They installed:
– A floor-to-ceiling curtain on a ceiling track to visually separate laundry zone
– A wall-mounted pet hair remover at the exit of the laundry zone
– A labeled “command center” clipboard listing load status
This reduced conflicts and kept workflows distinct.
Rental-Friendly Solutions (No Permanent Changes)
You can dramatically improve workflow without drilling, painting, or violating leases.
| Constraint | Solution | Workflow Benefit |
|---|---|---|
| Cannot mount shelves | Tension rod shelves (between walls) | Creates Prime Tier storage for sorting bins |
| Cannot install folding board | Over-door folding rack (hooks over top of closed door) | Provides immediate folding surface post-dryer |
| Cannot change flooring | Large, washable rug (non-slip backing) | Defines zones; catches lint; adds comfort |
| Cannot add lighting | Plug-in LED task lights (adhesive-backed) | Targets Prep Zone (stain treatment) and Finish Zone (folding) |
| Cannot modify cabinets | Adhesive hooks inside cabinet doors | Holds dryer sheets, lint rollers, small tools |
Pro Tip: Use removable adhesive products rated for double the item’s weight. Test on inconspicuous area first. Remove slowly with hairdryer on low heat to avoid residue.
Budget Tier Breakdown:
– Under $50: Tension rod + over-door organizer + adhesive hooks + plug-in task light
– $50–$150: Rolling cart + fold-down drying rack + uniform storage bins + non-slip rug
– $150–$300: Wall-mounted pegboard (rental-safe with heavy-duty anchors) + pull-down folding board (clamp-style) + under-cabinet lighting kit
When Budget is Truly Tight: The 24-Hour Micro-Redesign
You don’t need money to start. You need strategy. In one hour:
1. Empty everything from the space. Wipe surfaces.
2. Group items by workflow phase (Prep, Wash, Dry, Finish). Discard expired detergent, broken hangers, orphaned socks.
3. Place daily-use items in Prime Tier (eye to waist level). Store backups below or above.
4. Create one clear “landing zone” near the dryer: a small tray for items removed during unloading.
5. Label three sorting bins (even if just cardboard boxes): “Whites,” “Colors,” “Delicates.”
This costs nothing but creates immediate mental clarity. Efficiency begins with intention, not expenditure.
Beyond the Basics: Lighting, Ventilation, and Sensory Design
Functional design addresses the body; sensory design addresses the mind. These elements transform a utilitarian space into one you want to spend time in—reducing the psychological resistance to starting laundry.
Layered Lighting: Eliminating Shadows and Errors
Poor lighting causes real problems: mismatched socks, missed stains, eye strain. Implement three lighting layers:
- Ambient Layer (General Illumination):
- Recessed LED cans (4″ diameter) spaced evenly across ceiling
- Color temperature: 3000K (warm white) for calming effect; avoid harsh cooler tones
-
Dimmer switch essential—bright for sorting, soft for folding
-
Task Layer (Workflow-Specific):
- Over Prep Zone: Under-cabinet LED strip light illuminates sorting bins and stain treatment area. Critical for seeing subtle stains.
- Over Folding Surface: Swing-arm wall lamp provides direct, shadow-free light. Adjustable height accommodates different users.
-
Inside Cabinets: Motion-sensor LED puck lights activate when doors open. No more fumbling for detergent in dark cabinets.
-
Accent Layer (Psychological Comfort):
- Small table lamp on folding surface (if space allows)
- LED tape light along base of cabinets for gentle nightlight effect
- Natural light maximization: Keep window treatments minimal; use light-filtering shades
Why it matters: Well-lit task areas support accuracy and efficiency. In laundry terms: fewer missed stains, faster sorting, less re-washing.
Budget Adaptation:
– Ideal: Hardwired under-cabinet lighting
– Budget: Plug-in LED strip lights (adhesive-backed; plug into nearby outlet)
– Emergency: Clip-on book light aimed at folding surface
Ventilation: Protecting Your Home and Health
Moisture from washing and drying requires attention. Proper ventilation helps prevent mold, mildew, and structural damage.
Dryer Venting Essentials:
– Use rigid metal ducting (not flexible foil/plastic) from dryer to exterior
– Keep vent run as short and straight as possible
– Terminate vent outdoors with a louvered cap (prevents pest entry)
– Clean lint trap before every load; inspect duct periodically for blockages
Whole-Room Ventilation:
– Install exhaust fan rated for humidity
– Place fan near ceiling (moisture rises)
– Pair with timer switch: Runs after laundry cycle
– Add hygrometer (humidity monitor) to track levels; ideal range is typically 30–50%
Critical Note: Always vent dryers outdoors per local building codes. Venting indoors creates moisture and fire hazards. For spaces without exterior access, consult a professional about ventless dryer options and moisture management strategies.
Small Space Hack: In closet laundries without exterior walls, a compact dehumidifier can help manage moisture. Run during and after cycles. Empty reservoir regularly or use continuous drain hose.
Sensory Design: Reducing Cognitive Load
Laundry is mentally taxing. Sensory cues can ease the burden:
- Sound:
- Add soft-close hinges to cabinet doors (prevents loud slams)
- Place thick rug underfoot to dampen appliance vibration noise
- Install small Bluetooth speaker for podcasts/music (mounted out of splash zone)
- Scent:
- Avoid overpowering air fresheners (can transfer to clothes)
- Place open container of baking soda in corner to neutralize odors naturally
- Use essential oil diffuser outside laundry room (e.g., hallway) for calming scent upon entry
- Texture:
- Choose soft-close drawers for satisfying, quiet operation
- Line shelves with non-slip liner to prevent bottle clatter
- Select folding surface material with slight grip to keep fabrics in place
Illustrative example: After adding a small, warm-white table lamp to the folding area and playing calming instrumental music during laundry sessions, a user noticed they no longer “dreaded” folding. The sensory shift made the task feel intentional, not punitive.
Safety, Accessibility, and Inclusive Design Considerations
A truly efficient space is one where every user feels safe, capable, and respected. This section integrates principles that benefit everyone—from children to seniors, from able-bodied to those with temporary or permanent limitations.
Electrical and Fire Safety Fundamentals
Laundry rooms concentrate water, electricity, and heat—requiring vigilant safety practices:
– GFCI Outlets: Outlets near water sources should be GFCI-protected per electrical codes. Test monthly using outlet’s test/reset buttons.
– Dedicated Circuits: Washer and dryer typically require dedicated circuits. Prevents overloads when running simultaneously.
– Clearance Around Dryer: Maintain clear space around dryer for airflow and safety. Never store flammable materials within this zone.
– Lint Management: Clean lint trap before every load. Schedule periodic duct inspection. Lint buildup is a fire hazard.
– Chemical Storage: Store detergents and stain removers in original containers with child-resistant caps. Place on high shelves or in locked cabinets if young children or pets are present. Never mix chemicals.
Pro Tip: Install a battery-operated smoke detector inside the laundry room (in addition to home’s main system). Place on ceiling, away from steam sources. Test quarterly.
Accessibility Adaptations That Benefit All Users
Universal design creates ease for everyone. Implement these adaptable features:
| Feature | Standard Design | Accessible Adaptation | Universal Benefit |
|---|---|---|---|
| Countertop Height | Fixed 36″ | Adjustable height or multiple surfaces | Accommodates various heights; reduces strain |
| Appliance Controls | Top-mounted dials | Front-facing, tactile-button controls | Easier for users with limited reach or vision |
| Flooring | Smooth tile | Non-slip vinyl with minimal seams | Prevents slips when wet; easier rolling |
| Storage Access | High shelves | Pull-down shelves or lazy Susans | Eliminates ladder use; safer for all ages |
| Door Hardware | Round knobs | Lever-style handles | Easier with wet hands, arthritis, or carrying baskets |
Real-Life Implementation:
– Install a fold-down ironing board that locks securely at multiple heights
– Use color contrast: Light countertops against dark cabinets help distinguish surfaces
– Place frequently used items on pull-out shelves at waist height—no bending or stretching
– Ensure adequate turning radius clearance for mobility devices (also benefits anyone carrying bulky items)
Child and Pet Integration Strategies
Laundry rooms attract curious hands and paws. Design for safety without sacrificing function:
– Child Zones:
– Low, labeled bin for “helping”: Child places sorted socks here
– Step stool with non-slip surface stored nearby for supervised participation
– Visual timer showing “dryer cycle remaining” to manage expectations
– Pet Zones:
– Dedicated low drawer for pet towels, grooming wipes, paw cleaners
– Wall-mounted brush holder near exit for quick de-shedding
– Lint roller stored at accessible height for immediate use
Critical Safety Note: Secure all cleaning products in locked cabinets. Laundry detergent pods require special care—store in opaque, latched containers above counter height. Their appearance can attract young children and pets. If exposure occurs, contact poison control immediately. Prevention through secure storage is essential.
Ergonomic Principles for Long-Term Health
Repetitive motions in poorly designed spaces cause cumulative strain. Protect your body:
– Folding Surface Height: Measure from floor to your elbow while standing. Ideal height = elbow height ± 2 inches. Prevents shoulder and back fatigue.
– Hamper Placement: Position hamper so you bend knees (not waist) to load. Use hampers with handles at comfortable height for easy lifting.
– Tool Weight: Choose lightweight stain brushes, spray bottles. Heavy tools increase strain during repetitive motions.
– Anti-Fatigue Mat: Place cushioned mat (½” thick) in front of washer/dryer and folding area. Reduces leg and back fatigue during long sessions. Look for beveled edges to prevent tripping.
Professional Insight: Reducing bending below knee level and reaching above shoulder level minimizes injury risk. Design your zones to keep motions within this “power zone.”
Your Questions, Answered
Q: How much space do I really need for a functional laundry room?
A: Absolute minimum is approximately 36 inches wide by 60 inches deep for a stackable unit with minimal clearance. However, true functionality requires space for workflow: 48″x72″ allows for a stackable unit, small folding surface, and sorting zone. For side-by-side units, minimum 60″x84″. Remember: Space isn’t just about appliances—it’s about movement. Measure your workflow steps (from mapping exercise) to determine your personal minimum.
Q: Should I put my laundry room on the main floor, upper floor, or basement?
A: There’s no universal answer—it depends on your household’s movement patterns. Main floor reduces carrying loads up/down stairs (ideal for multi-generational homes or those with mobility concerns). Upper floor near bedrooms minimizes transport distance for most households. Basement locations require careful moisture management but free up prime living space. Prioritize proximity to where dirty clothes originate and clean clothes are stored.
Q: What’s the most common laundry room design mistake you see?
A: Designing for aesthetics before workflow. Beautiful open shelving fails if detergent bottles tip over. A large folding island is useless if it blocks the path between washer and dryer. Always validate layout with your mapped workflow first. If your design adds steps or forces backtracking, no amount of decor will make it efficient.
Q: How do I handle laundry in a home without a dedicated laundry space?
A: Create a “laundry station” within another room using mobile elements:
– Rolling cart with sorting bins, detergent, stain kit
– Over-door organizers on bedroom or bathroom doors
– Portable drying rack that folds flat when not in use
– Designate a specific chair or corner as the “folding zone” with good lighting
The key is consistency—always return tools to the cart so the system remains portable and contained.
Q: Are front-load or top-load washers better for efficiency?
A: Front-loaders typically use less water and energy, and are gentler on fabrics. However, they require bending to load/unload (a strain risk for some). High-efficiency top-loaders have improved significantly. Choose based on your physical needs and workflow: If you have back issues, a top-loader on a pedestal may be more efficient for your body. If water conservation is critical, front-loader may be preferable. Always prioritize ease of use for your daily reality.
Q: How often should I clean my washing machine to prevent odors?
A: Run an empty hot water cycle with white vinegar or a dedicated washing machine cleaner periodically. Wipe the door gasket and detergent drawer regularly to prevent buildup. Leave the door and detergent drawer slightly ajar between uses to allow airflow and drying. For front-loaders, this helps prevent musty smells.
Q: What’s the safest way to store laundry pods around children or pets?
A: Treat pods like medication. Store in original container with child-resistant cap, inside a locked cabinet above counter height. Never transfer to unlabeled containers. Safety organizations note that pods’ appearance can attract young children. If a pod is punctured, rinse skin/eyes immediately with water and contact poison control. Prevention through secure storage is critical.
Q: Can I install a washer and dryer in a closet without exterior ventilation?
A: Electric dryers must be vented outdoors per safety codes—no exceptions. Venting indoors creates severe fire and moisture hazards. For closet installations without exterior access:
– Choose a condenser or heat-pump dryer (vented or ventless models available; check local codes)
– Install a dedicated dehumidifier to manage moisture
– Ensure robust room ventilation with exhaust fan
Always consult a licensed HVAC professional before installation. Safety overrides convenience.
Q: How do I make my laundry room feel larger without remodeling?
A: Three high-impact, low-cost strategies:
1. Mirror strategically: Mount a large mirror on the back wall to reflect light and create depth (ensure it’s securely mounted away from vibration zones)
2. Lighten surfaces: Paint walls and cabinets in light, reflective colors (soft whites, pale grays). Use high-gloss finish on trim to bounce light
3. Declutter vertically: Remove items from floor. Use wall-mounted storage to create visual breathing room. A clear floor = larger perceived space
Q: What’s one upgrade that provides the biggest ROI for laundry efficiency?
A: A dedicated folding surface positioned immediately adjacent to the dryer. This single change eliminates the most common workflow break: carrying damp clothes to another location. Whether it’s a pull-down board, countertop extension, or sturdy table, having a clean, well-lit surface at the exact point of unloading reduces folding time, prevents wrinkles, and creates psychological closure for the drying phase.
Q: How do I maintain organization long-term?
A: Build “reset rituals” into your workflow:
– After unloading dryer: Wipe folding surface, return tools to zones, empty lint trap
– Weekly: 5-minute sweep—return stray items to zones, check supply levels
– Seasonally: Reassess zones against current workflow. Adjust shelf heights, bin labels, or tool placements as needs evolve
Organization isn’t a one-time project—it’s a maintained system. Design for easy resetting.
Conclusion: Your Path to a Laundry Room That Works for You
You now hold a complete framework—not just a collection of tips—to transform your laundry experience. Let’s crystallize the journey:
The 3 Key Principles to Carry Forward:
1. Workflow precedes aesthetics. Map your unique process first; let every design decision serve that flow.
2. Zones create calm. Sequence Prep → Wash → Dry → Finish without backtracking. Protect these zones fiercely.
3. Precision beats perfection. A shelf sized exactly for your detergent bottle creates more peace than a perfectly painted but poorly organized cabinet.
This isn’t about achieving a magazine-worthy space. It’s about designing a tool that serves your life. A household didn’t need more square footage—they needed a sorting station that matched their rhythm. Another didn’t need custom cabinetry—they needed a pull-down board that turned vertical space into functional workflow. Your solution is equally personal.
The 24-Hour Rule: Your First Step Starts Now
Don’t wait for a renovation. Within the next 24 hours, complete this single action:
Place three labeled containers (Whites, Colors, Delicates) in your current laundry space. Use cardboard boxes, baskets, or bins you already own. Position them in the order you sort.
This micro-action does three things:
– It begins rewiring your workflow muscle memory
– It creates immediate visual order (reducing mental load)
– It proves that progress requires intention, not budget
Tomorrow, you might add a small tray beside the dryer for “landing zone” items. Next week, you might measure your folding surface height against your elbow. Momentum builds from action.
The Big Picture: Laundry as a Lens for Home Harmony
How we design functional spaces reflects how we honor our daily lives. A laundry room that works quietly in the background—anticipating needs, reducing friction, respecting our time and bodies—is more than efficient. It’s an act of self-care. It whispers: Your time matters. Your comfort matters. Your peace matters.
When laundry ceases to be a source of stress, energy redirects elsewhere—to connection, creativity, rest. This ripple effect touches every corner of home life. You’re not just organizing socks; you’re designing a foundation for calm.
Start where you are. Use what you have. Build intentionally. Your most efficient laundry day is waiting—not in a future renovation, but in your next thoughtful decision.
Explore Our Complete Home Organization System:
Small Laundry Room Storage Hacks That Actually Work | Choosing the Right Washer and Dryer for Your Home | The 15-Minute Daily Reset: Maintaining Home Organization | Universal Design Principles for Every Room | Creating Calm: Sensory Design for Stress-Free Living | Budget-Friendly Home Upgrades Under $100 | The Complete Guide to Home Maintenance Scheduling