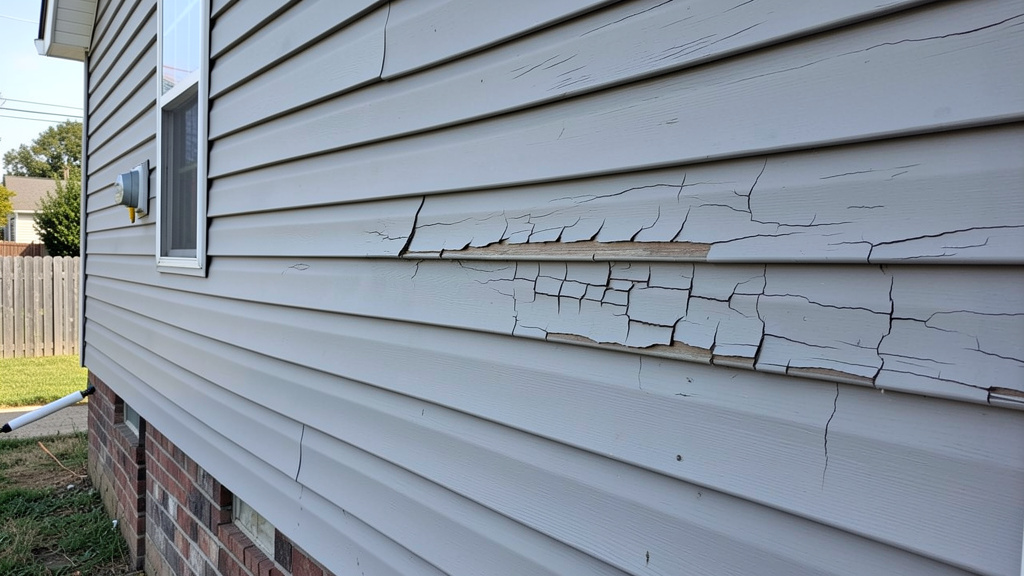
Stop minor damage from becoming major headaches. Learn exactly how to assess, repair, and protect your home’s exterior with material-specific techniques, clear decision frameworks, and prevention strategies grounded in building science principles.
Your home’s siding forms a critical protective barrier against rain, wind, sun, pests, and temperature extremes. Even durable cladding systems will eventually show signs of wear. A hairline crack in fiber cement, a warped vinyl panel after severe weather, or soft spots indicating moisture intrusion beneath wood siding are rarely just cosmetic concerns. Unaddressed, they can compromise structural integrity, reduce energy efficiency, and invite interior damage. This comprehensive guide moves beyond fragmented DIY snippets to deliver a unified, material-aware repair framework. You’ll learn how to accurately diagnose damage across vinyl, wood, fiber cement, metal, and stucco; execute repairs using accessible tools and methods; navigate the repair-versus-replace decision with confidence; blend repairs seamlessly with existing surfaces; and establish a practical maintenance rhythm that supports long-term performance. Whether addressing an immediate issue or planning proactive care, this resource provides clear, actionable knowledge tailored to real-world conditions.
Introduction: Why Thoughtful Assessment Matters Before Action
Siding deterioration follows patterns influenced by material properties, environmental exposure, installation quality, and ongoing maintenance. Ignoring early signs is rarely prudent—what appears minor may indicate deeper issues. Moisture entering behind cladding can affect underlying sheathing; persistent dampness in wall cavities may encourage mold development or material degradation over time. Energy performance can also be impacted as gaps allow uncontrolled air movement. Critically, visible symptoms often mask root causes. Peeling paint on wood siding frequently signals trapped moisture behind the board rather than surface failure alone. Buckling vinyl commonly results from restricted thermal movement during installation rather than panel defect. This guide synthesizes widely accepted building science principles, manufacturer installation guidelines, and field-tested repair approaches to support clear diagnosis. Understanding why damage occurs is essential for effective, lasting intervention. As emphasized in industry resources on building envelopes, exterior cladding functions as an integrated system—not isolated parts. A repair addressing only the visible symptom without resolving contributing factors (such as inadequate flashing, poor drainage, or ventilation issues) may offer only temporary relief. This guide helps you see connections and make informed choices.
The 5-Point Siding Damage Assessment Framework: Diagnose Before You Act
Rushing into repairs without assessment can waste effort, materials, and time—and potentially worsen conditions. This structured approach transforms observation into actionable insight. Use this checklist during a perimeter walk on a dry, overcast day (direct sun can obscure subtle cracks or shadows). Document findings with notes and photos.
Point 1: Location Provides Clues
Where damage appears often reveals its origin. Note each issue carefully:
– South/West Walls: Intense sun exposure may accelerate fading, chalking (powdery residue), or thermal stress. Vinyl can become less flexible over time; wood may dry and check.
– North/East Walls: Persistent shade retains moisture longer, encouraging biological growth like moss, algae, or mildew. Wood rot and paint blistering are more common here.
– Below Roof Overhangs or Gutters: Look for staining, erosion, or ice-related damage. Check for clogged gutters, missing drip edges, or disconnected downspouts above.
– Near Ground Level (Within 18 inches): Vulnerable to splash-back, soil contact, insect activity (carpenter ants, termites), or rodent gnawing. Maintain clearance between soil/mulch and siding.
– Around Windows, Doors, Vents: Common sites for sealant failure, flashing issues, or settlement-related cracks—key water intrusion pathways.
– Impact Zones: Near driveways (equipment debris), play areas (sports), or trees (falling branches). Signs include dents, punctures, or cracks.
Why this matters: Repairing algae-stained wood on a shaded wall without improving drainage or airflow likely leads to recurrence. Location informs both repair technique and preventive adjustments.
Point 2: Categorize Damage Type and Severity
Use this scale to gauge urgency and method. Severity depends on material, extent, and context—not just appearance.
| Damage Type | Mild (Monitor) | Moderate (Plan Repair) | Severe (Address Promptly) |
|---|---|---|---|
| Cracks | Hairline (<1/16″), surface-only | Cracks >1/8″, through material | Cracks spanning multiple panels/boards |
| Rot/Decay | Surface softness, no structural loss | Probe penetrates >1/4″, localized | Probe penetrates deeply, widespread |
| Warping/Buckling | Slight wave visible at angle | Panel bows >1/4″, gaps at seams | Panel detached, severe distortion |
| Holes/Punctures | Pinprick (<1/8″) | Hole 1/8″–2″ | Hole >2″, structural concern |
| Loose Panels | Slight wiggle at edge | Panel moves freely, nails visible | Panel detached, hanging |
| Biological Growth | Light surface mildew (washes off) | Embedded moss/algae, discoloration | Wood softening beneath growth |
Practical Tip: Gently probe suspicious wood areas with a flat-head screwdriver. Solid resistance indicates sound material; easy penetration suggests decay requiring attention. For vinyl or metal, apply light pressure; unusual flex may signal hidden damage.
Point 3: Confirm Siding Material
Repair methods are highly material-dependent. Misidentification leads to ineffective or damaging fixes.
– Vinyl: Lightweight, hollow sound when tapped, interlocking tabs. Often has manufacturer markings on the back. Flexible when warm.
– Wood (Clapboard, Shakes, Shingles): Visible grain, solid “thunk” when tapped, may show nail heads. Cedar has a distinctive scent when lightly sanded.
– Fiber Cement (e.g., HardiePlank®): Heavy, gritty texture, stone-like tap sound, often beveled. Important: Siding installed before the mid-1980s may contain asbestos. Do not sand, cut, or disturb without professional testing.
– Metal (Aluminum, Steel): Magnetic (steel) or non-magnetic (aluminum), smooth or embossed finish. Dents but typically doesn’t crack.
– Stucco (Traditional or EIFS): Rough, cementitious texture. Tap test: hollow sound may indicate delamination. EIFS feels slightly flexible; traditional stucco is rigid.
– Engineered Wood (e.g., LP SmartSide®): Uniform wood-strand appearance, often factory-primed. Lighter than solid wood.
Verification Step: If possible, examine the back of a loose fragment or consult original home records. When uncertain, take a small sample to a knowledgeable hardware specialist. Using incorrect fasteners, adhesives, or patch compounds compromises repair integrity.
Point 4: Investigate Root Cause
Ask “Why?” iteratively. Example:
1. Observation: Rotted wood board near downspout.
2. Why? Water pooled against siding.
3. Why? Downspout extension was disconnected.
4. Why? Extension cracked from freeze-thaw cycles.
5. Why? No routine inspection of drainage components.
Action: Repair decay and install a durable downspout extension with splash block. Without addressing drainage, new material will face the same stress.
Common Contributing Factors:
– Moisture Traps: Soil contacting siding, missing kick-out flashing at roof-wall junctions, clogged weep holes in vinyl systems.
– Thermal Movement Issues: Vinyl nailed too tightly (restricting expansion/contraction), dark colors on sun-exposed walls in hot climates.
– Physical Impact: Lawn equipment, sports, falling branches.
– Biological Activity: Carpenter bees (neat 1/2″ holes in wood), rodents (gnawed edges), woodpeckers (searching for insects).
– Installation Details: Over-driven nails, insufficient panel overlap, missing or improperly installed weather-resistant barrier.
Point 5: Safety and Scope Consideration
Before proceeding:
– Electrical Awareness: Is damage near outdoor outlets, lighting, or meter boxes? Turn off the relevant circuit at the breaker before touching.
– Height Safety: Work above 8 feet requires proper ladder setup (1:4 ratio), stable footing, and ideally a spotter. Never stand on gutters. When uncomfortable, consult a professional.
– Material Safety: For homes built before the mid-1980s with cementitious siding showing damage, assume potential asbestos content. Do not sand, cut, or remove material. Contact a certified inspector.
– Scope Evaluation: Is damage isolated (<5% of a wall section) or widespread? Extensive visible damage may indicate systemic issues (compromised weather barrier, major flashing errors) where spot repairs offer limited benefit.
The Fundamental Principle: A durable siding repair addresses both the visible symptom and its contributing cause. Ignoring root factors turns a manageable fix into a recurring challenge.
Universal First Steps: Securing the Area and Preparing Thoughtfully
These preparatory actions support safety, efficiency, and better outcomes—regardless of material or damage type. Skipping them increases risk of injury, poor adhesion, or unintended damage.
Temporary Protection for Exposed Areas
If damage compromises the weather barrier and rain is expected:
1. Clear Gently: Remove loose fragments by hand (wear gloves). Avoid forcing stuck pieces.
2. Dry Surface: Use a hairdryer on low setting (keep moving) to evaporate surface moisture. Avoid heat guns on vinyl or painted surfaces.
3. Apply Temporary Cover:
– For holes/cracks: Cut heavy-duty aluminum flashing slightly larger than the opening. Secure with temporary butyl tape (e.g., Flex Seal Tape), overlapping edges by ~1 inch. Avoid duct tape—it leaves residue and degrades quickly in sunlight.
– For loose panels: Gently reposition. Secure edges temporarily with low-tack painter’s tape. Do not nail yet.
4. Redirect Water: Place a bucket under active leaks. Extend downspouts away from the area if possible.
Why this approach works: Butyl tape creates a flexible, waterproof seal that accommodates slight movement. It provides short-term protection (typically 1–4 weeks) without trapping moisture, buying time for a proper repair. Photograph the temporary fix for reference later.
Essential Tool Kit for Most Repairs
You don’t need specialized contractor equipment. These core items handle the majority of common repairs:
| Category | Recommended Tools & Supplies | Practical Notes |
|---|---|---|
| Safety | Safety glasses, N95 mask (for dust), work gloves, stable ladder | Knee pads help for ground-level work; wear non-slip footwear |
| Measurement | Tape measure, carpenter’s square, level (24″), chalk line | Smartphone level apps can supplement; use a straight board as a makeshift square |
| Cutting | Utility knife (sharp blades), tin snips, oscillating multi-tool | Hacksaw with fine-tooth blade works for vinyl; hand saw for wood (use guide) |
| Fastening | Hammer, cordless drill/driver, nail set, flat pry bar (12″) | Place scrap wood behind pry points to protect siding; magnetize screwdriver tip |
| Material-Specific | Zip tool (vinyl), wood chisel, trowel (stucco), caulk gun | A stiff plastic card can substitute for a zip tool in a pinch |
| Consumables | Exterior-grade caulk (silicone/polyurethane), matching paint, sandpaper | Store spare siding pieces labeled by location for future repairs |
Key Insight: A quality zip tool ($8–$15) is invaluable for vinyl repairs. This slender hook releases interlocking panels without damage—critical for accessing hidden areas or replacing sections. Practice on scrap material first. For fiber cement, always use carbide-tipped blades; standard blades dull rapidly and increase chipping risk.
Workspace Preparation Checklist
- Weather Timing: Schedule repairs for dry days within moderate temperatures (roughly 40°F–90°F / 5°C–32°C). Extreme cold makes vinyl brittle; high heat affects adhesive curing and panel expansion. Avoid windy conditions (debris, caulk issues).
- Protect Surroundings: Lay tarps to catch debris and shield landscaping. Secure edges with bricks or weights.
- Adequate Lighting: Use a headlamp or clamp light for shaded areas or detailed work. Good light reveals cracks, uneven surfaces, and alignment issues.
- Test First: Before applying caulk, paint, or patch compound to the visible repair site, test on a hidden area (e.g., back of replacement piece) to check adhesion, color, and texture match.
- Neighbor Consideration: Notify neighbors if work involves ladders near property lines or intermittent tool noise.
Material-Specific Repair Guides: Precision Techniques for Every Siding Type
Vinyl Siding: Respect Thermal Movement
Vinyl expands and contracts significantly with temperature changes (up to 1/4″ per 12-foot panel). Forcing panels causes stress. Work on mild days when material is pliable but not hot.
Repairing Small Holes & Cracks (<2 inches)
Tools: Zip tool, utility knife, matching vinyl scrap, exterior flexible adhesive (e.g., Loctite PL Premium), caulk gun, fine sandpaper.
1. Unlock Adjacent Panel: Insert zip tool under the top edge of the panel above the damage. Slide horizontally to release the locking tab. Lift gently to expose the nailing hem of the damaged panel.
2. Prepare Opening: Score the damaged area with a utility knife guided by a straightedge. Cut inward from edges to minimize stress on surrounding vinyl. Remove fragment.
3. Cut Patch: Shape a patch from matching scrap vinyl 1 inch larger than the hole on all sides. Lightly sand edges for better adhesion.
4. Apply Adhesive: Apply a thin bead of flexible exterior adhesive to the back of the patch. Press firmly onto the hole from behind (if accessible) or over the front. Avoid nails or screws on patches—they restrict movement and invite new cracks.
5. Seal Edges: Apply a thin bead of paintable silicone caulk around the patch perimeter. Smooth with a damp finger. Wipe excess immediately.
6. Re-lock Panel: Gently press the upper panel back into place until it clicks. Verify alignment is smooth.
Why this works: Flexible adhesive bonds while allowing natural movement. Caulk seals edges without creating rigid stress points. Rigid fillers (like standard epoxy) often fail as vinyl flexes.
Common Pitfall: Using non-flexible compounds. Vinyl moves; rigid patches crack at the bond line. Always choose adhesives formulated for plastics or flexible substrates.
Replacing a Full Vinyl Panel
Tools: Zip tool, pry bar, exact-match replacement panel, tin snips, measuring tape.
1. Unlock Upward: Release panels upward from the damage site until you reach a secure panel above the damaged one.
2. Remove Fasteners: Locate nails in the nailing hem (top edge) of the damaged panel. Use a flat pry bar behind the hem to gently lift nails out. Avoid pulling nails straight out—they can tear the hem.
3. Slide Out Panel: Once fasteners are removed, slide the damaged panel horizontally out of the locking channel below. Note the overlap direction (panels install left-to-right or right-to-left).
4. Prepare New Panel: Cut replacement to length with tin snips. Critical: Leave a 1/4″ gap at each end for thermal expansion. File sharp edges smooth.
5. Install New Panel: Slide the new panel’s bottom edge into the locking channel of the panel below. Align the top edge under the upper panel’s hem. Do not nail yet.
6. Fasten Correctly: Drive nails vertically centered in the nailing slots. Leave a slight gap (~1/16″) between the nail head and vinyl (do not snug tight). Space nails 12–16″ apart. Nails must allow horizontal movement.
7. Re-lock Upper Panels: Slide upper panels back down into place. Check for smooth alignment with no buckling or gaps.
Helpful Tip: When replacing multiple panels, work from the bottom up. Keep a labeled scrap piece to verify fit and color match before final installation. Match the existing lap direction—reversing it creates visible seams.
Addressing Warped or Buckled Vinyl
Typical Causes: Improper nailing (too tight) or concentrated heat reflection (e.g., from energy-efficient windows).
– If nails are tight: Carefully remove nails from the affected section. Reinstall with proper clearance (1/16″ gap under nail head). If buckling remains, the panel may be permanently deformed—replace it.
– If heat-related: Install reflective window film on the interior of the problematic window. Replace the warped panel. For future replacements in this location, consider lighter colors which absorb less heat.
Wood Siding: Prioritize Moisture Management
Wood repairs succeed when moisture sources are eliminated and sound material is preserved. Focus on thorough drying, decay removal, and creating a repair that manages future moisture.
Repairing Localized Rot (Clapboard, Shakes)
Tools: Flat chisel, hammer, wood consolidant (e.g., Minwax High-Performance Wood Hardener), epoxy-based wood filler (e.g., Abatron WoodEpox), putty knife, sandpaper, primer, paint.
1. Remove Decayed Wood: Use a chisel to carefully excavate all soft, crumbly material until solid wood remains. Probe with a screwdriver to confirm soundness. Do not stop at surface hardness—decay often extends deeper.
2. Ensure Dryness: Allow ample drying time (48+ hours in dry weather) or use a hairdryer on low. A moisture meter is ideal (target <18% moisture content before proceeding).
3. Apply Wood Consolidant: Brush penetrating consolidant liberally into the remaining sound wood fibers. This strengthens weakened areas and creates a stable base. Cure per product instructions.
4. Mix & Apply Filler: Knead epoxy filler components until uniform. Press firmly into the cavity with a putty knife, slightly overfilling. Sculpt to match the board profile (use a cardboard template for complex shapes).
5. Cure & Finish: Allow full cure (follow product guidelines, often 24 hours). Sand smooth with progressively finer grits (120 then 220). Feather edges into surrounding wood.
6. Prime & Paint: Apply an oil-based or bonding primer to the entire repaired board. Follow with two coats of quality exterior paint. Protecting the repair from UV exposure is essential for longevity.
Why epoxy filler? Unlike polyester-based fillers, epoxy bonds chemically with wood fibers, accommodates slight movement, and resists moisture. It provides structural restoration, not just surface coverage.
Important Boundary: If decay affects more than 30% of the board’s width or depth, or if underlying sheathing feels soft, replace the entire board. Patching extensive rot compromises integrity.
Replacing a Full Wood Board
Tools: Pry bar, hammer, reciprocating saw (metal-cutting blade), matching replacement board, corrosion-resistant nails, caulk.
1. Cut Nail Heads: Slide the reciprocating saw blade carefully between the damaged board and the one above. Cut through securing nails. Wear safety glasses—metal fragments can fly.
2. Remove Board: Gently pry out the damaged board. Clean old caulk or debris from the reveal (overlap area) of the board below.
3. Dry Fit: Hold the new board in place. Mark cuts for corners or windows. Cut to length. Tip: Briefly dampening end grain before priming can reduce uneven paint absorption (“picture framing”).
4. Prime Thoroughly: Before installation, prime all surfaces of the new board—back, edges, and face. Unprimed end grain readily absorbs moisture.
5. Install: Slide the new board into place under the upper board’s reveal. Nail only through the top nailing strip using galvanized ring-shank nails. Space nails 16″ apart. Avoid face-nailing—it traps moisture and risks splitting.
6. Seal Joints: Apply a thin bead of paintable silicone caulk where the new board meets corners, windows, or the board below. Do not caulk the bottom edge—this allows any incidental moisture to escape.
Refinement Tip: For irregular historic profiles, trace an intact board onto the replacement using a flexible curve ruler. Cut with a jigsaw. Matching grain direction where possible aids visual blending.
Addressing Paint Issues & Biological Growth
- Blistering/Peeling Paint: Indicates moisture behind the coating. Remove loose paint, sand to feather edges, apply a stain-blocking primer to bare wood, then repaint. Crucially: Identify and correct the moisture source first (e.g., leaking gutter, poor ventilation).
- Mildew (Black/Green Spots): Mix 1 part household bleach with 3 parts water (or use oxygen bleach like OxiClean™ for eco-friendlier option). Apply with a soft brush, wait 10–15 minutes, rinse thoroughly. Avoid pressure washing—it can force water behind siding. Repaint with a quality paint containing mildewcide.
Fiber Cement Siding: Precision, Patience, and Protection
Heavy, brittle, and dust-producing. Prioritize safety: wear an N95 mask and eye protection during cutting or sanding. For homes built before the mid-1980s, assume cementitious siding may contain asbestos. Do not disturb without professional testing.
Patching Cracks & Small Holes
Tools: Carbide-tipped utility knife blade, sandpaper (80/120/220 grit), fiber cement patch compound (e.g., James Hardie Patch), putty knife, primer, paint.
1. Prepare Crack: Gently widen hairline cracks into a “V” groove using a knife blade (improves adhesion). Remove all dust with a brush or vacuum.
2. Apply Patch Compound: Mix compound to a peanut butter-like consistency. Press firmly into the crack/hole with a putty knife. Overfill slightly. For deep holes, apply in thin layers, allowing partial cure between layers.
3. Smooth & Cure: Smooth the surface with a damp sponge before full set (check product timing). Allow full cure (typically 24 hours).
4. Sand & Prime: Sand the cured patch flush with the surrounding surface. Wipe clean. Apply an alkyd (oil-based) primer—latex primers may not adhere well to highly alkaline cement surfaces. Finish with 100% acrylic latex paint.
Why alkyd primer? Fiber cement’s alkalinity can compromise latex primer adhesion over time. Alkyd primers form a stronger chemical bond with cementitious substrates.
Replacing a Fiber Cement Panel
Tools: Carbide-tipped blade (circular saw or oscillating tool), pry bar, replacement panel, corrosion-resistant nails (stainless steel or hot-dipped galvanized), caulk.
1. Score Paint Line: Use a utility knife to cut through paint along the top edge of the damaged panel. Prevents chipping adjacent panels during removal.
2. Remove Fasteners: Carefully pry up the top edge. Cut or pull out nails securing the panel. Work slowly—fiber cement cracks easily under stress.
3. Remove Panel: Slide the panel out horizontally. Clean debris from the starter strip or panel below.
4. Cut Replacement: Measure meticulously. Cut on a stable surface using a fine-tooth carbide blade. Cut outdoors with proper respiratory protection—cement dust is hazardous. Sand cut edges smooth.
5. Install: Slide the new panel into place. Nail only through the top nailing hem using nails specified for fiber cement (typically 1-1/4″ long). Drive nails flush—do not overdrive. Space nails 12″ apart (tighter than vinyl/wood due to weight and rigidity).
6. Seal Joints: Apply paintable silicone caulk at all seams, corners, and where the panel meets trim. Critical for long-term moisture management.
Practical Note: Replacement panels from the same production lot blend best. Check box codes when purchasing. Store labeled spare pieces in a dry location for future needs.
Minimizing Crack Risk During Handling/Installation
- Expansion Gap: Maintain a 1/8″ gap between panel ends and corners or trim.
- Nail Placement: Center nails precisely within nailing slots. Off-center fastening creates stress points.
- Support: Panels exceeding 12 feet in length benefit from intermediate support during installation to prevent sagging.
Metal Siding (Aluminum/Steel): Focus on Corrosion Control
Metal repairs prioritize stopping rust progression and maintaining the protective coating integrity.
Fixing Dents & Small Holes
Tools: Dent puller kit (shallow dents), matching metal scrap, self-tapping screws, rust converter, metal primer, paint.
– For Dents: Clean the area. Apply dent puller adhesive tab. Attach puller and twist gradually to lift the dent. Sand smooth. Prime and paint.
– For Holes: Cut a patch from matching scrap metal 1″ larger than the hole. If rust is present, apply rust converter to stabilize the area. Position the patch. Secure with self-tapping metal screws at corners only. Seal the entire perimeter with butyl rubber tape or polyurethane caulk. Paint to match.
Critical Note: Avoid steel wool on aluminum siding—it embeds steel particles that accelerate galvanic corrosion. Use nylon abrasive pads instead.
Treating Rust Spots
- Remove Loose Rust: Scrub with a wire brush dedicated to rust removal until bright metal is visible.
- Apply Rust Converter: Brush on converter (e.g., Naval Jelly). It chemically transforms rust into a stable polymer layer. Wait per product instructions (typically 15–20 minutes).
- Prime Promptly: Apply a rust-inhibiting primer (zinc-rich). Follow with a compatible topcoat within the timeframe specified by the primer manufacturer to prevent flash rusting.
- Seal Perimeter: Caulk around the repaired area to block moisture re-entry.
Why this sequence? Painting directly over active rust traps moisture and accelerates failure underneath. Converter neutralizes the corrosion process, creating a stable base for coating.
Stucco Repairs: Texture Matching is Key
First, distinguish between traditional 3-coat stucco (cement, sand, lime over wire lath) and EIFS (Exterior Insulation and Finish System—a synthetic, foam-based system). EIFS repairs often require specialized knowledge; consult a professional if unsure.
Patching Cracks in Traditional Stucco
Tools: Cold chisel, hammer, wire brush, bonding agent, stucco patch mix, hawk, trowel, texture tools (sponge, brush, trowel edge).
1. Prepare Crack: Chisel the crack into a “V” groove (wider inside than at the surface). Remove all loose material. Brush clean.
2. Dampen Area: Lightly mist the crack with water. Do not saturate. Dry stucco draws moisture from patch mix too quickly, causing shrinkage cracks.
3. Apply Bonding Agent: Brush on a liquid bonding agent (e.g., Weldbond) to enhance adhesion to the existing surface.
4. Pack Patch Mix: Force patch mix deep into the crack with a trowel. Overfill slightly. Let set until “thumbprint firm” (typically 30–60 minutes).
5. Match Texture: Study the surrounding texture closely:
– Cat Face (Rough): Dab with a crumpled plastic bag or stiff brush.
– Smooth: Trowel flat, then lightly drag a damp sponge.
– Swirl: Use a circular motion with the edge of the trowel.
Practice texture techniques on scrap wood first. Photograph the original texture for reference.
6. Cure Gradually: Mist the patch lightly 2–3 times daily for 2–3 days. Rapid drying encourages new cracks.
Repairing Larger Holes or Suspected Delamination
Sign of Delamination: Hollow sound when tapped, visible bulging.
1. Cut Out Damaged Area: Use an oscillating tool with a carbide blade to cut a square/rectangle around the damage, extending to sound stucco. Remove all loose material down to the lath (wire mesh).
2. Prepare Lath: Clean the exposed lath. Apply bonding agent. If lath is damaged, staple new galvanized wire mesh over the opening, overlapping sound lath by at least 2 inches.
3. Apply Base Coat: Mix stucco base coat. Force it into the lath mesh. Scratch the surface lightly with a nail board to create a “key” for the finish coat. Cure 24–48 hours.
4. Apply Finish Coat: Match the original thickness (typically 1/8″). Texture immediately using your practiced technique. Cure slowly with light misting.
Realistic Expectation: Color matching cured stucco is extremely difficult. For highly visible areas, consider repairing the entire wall section or consulting a stucco specialist experienced in color blending. Keep a small physical sample of your original stucco stored in a dark, dry place for future reference.
The Repair vs. Replace Decision Framework: Making Informed Choices
Emotionally, repair feels economical. Practically, replacement is sometimes the wiser investment. Use this balanced framework—not impulse—to guide your decision.
The Scope Guideline
As a general reference point, if damage affects more than 25–30% of a single, continuous wall section (between corners or major architectural breaks), full replacement of that section is often more practical and visually cohesive than multiple repairs. Consider:
– Labor Efficiency: Mobilization costs for professionals are similar for scattered repairs versus a section replacement. DIY time investment also scales poorly with fragmented damage.
– Visual Harmony: New patches rarely match aged siding perfectly in color, texture, or sheen—especially vinyl, fiber cement, or painted wood. Multiple repairs can create a fragmented appearance.
– Underlying Conditions: Extensive visible damage may signal widespread hidden issues (compromised sheathing, degraded weather barrier) that spot repairs cannot resolve.
Evaluating Key Factors
Consider these interconnected elements:
| Factor | Repair May Be Suitable When… | Replacement May Be Preferable When… |
|---|---|---|
| Cost | Repair cost is significantly lower than replacement for the affected area | Repair cost approaches half the replacement cost for the section |
| Longevity Expectation | Repair addresses root cause; material is sound elsewhere | Repair is likely temporary due to system age or recurring issues |
| Visual Impact | Damage is small, in a low-visibility area, or material blends well | Damage is prominent, material is discontinued, or color match is unlikely |
| System Age & Condition | Siding system is relatively young with isolated incident damage | Siding is near end-of-service-life with multiple failure points |
Illustrative Scenario:
– Situation: Three cracked fiber cement panels on a highly visible front gable. Original product is discontinued; perfect color match is unlikely.
– Repair Path: Patching costs modestly (materials + time) but may result in noticeable mismatch. Longevity of patches on already-cracked panels is uncertain.
– Replacement Path: Replacing the entire gable section ensures visual consistency and addresses potential hidden issues. Higher initial cost.
– Balanced View: If curb appeal is a priority (e.g., upcoming sale) or patches would be highly visible, replacing the section may offer better long-term value and peace of mind. If the house is occupied long-term and the mismatch is acceptable, repair may suffice. There is no single “right” answer—weigh your priorities.
Material Lifespan Context
Factor in the typical service life and current condition of the entire system:
– Vinyl (20–40+ years): If the system is over 25 years old and shows widespread brittleness, fading, or multiple failures, repairs may be short-term solutions. Budget for eventual full replacement.
– Wood (15–40+ years): Varies by species and maintenance history. Cedar typically outlasts pine. If over half the boards require attention or repainting within a short timeframe, replacement warrants consideration.
– Fiber Cement (30–50+ years): Highly durable when installed correctly. Repair is usually preferred unless panels are severely damaged or original installation had critical flaws (e.g., missing primer, incorrect fasteners).
– Metal (20–50+ years): Aluminum generally outlasts steel. Widespread rust or extensive denting may justify replacement to restore protection and appearance.
– Stucco (50+ years): Traditional stucco can last generations with proper crack maintenance. EIFS systems over 20 years old with recurring moisture issues may need professional evaluation for system integrity.
The “Pattern Recognition” Check
Ask: “If I repair this spot today, how likely is similar damage to appear nearby within the next year?”
– Higher Likelihood (Lean Toward Replacement): Wood rot near grade on a decades-old house with known drainage issues. Moisture problems are often systemic.
– Lower Likelihood (Repair May Suffice): A single vinyl panel cracked by a specific, isolated event (e.g., falling branch) on a well-maintained, younger system.
Situations Strongly Suggesting Professional Replacement
- Structural Concerns: Sheathing feels soft, spongy, or shows mold when accessed behind siding.
- Active Infestations: Evidence of termites, extensive carpenter bee tunnels, or rodent nesting within the wall cavity.
- Confirmed Moisture Intrusion: Interior wall stains, persistent musty odors, or visible mold growth inside the wall.
- Critical Installation Deficiencies: Original work lacked a required weather-resistant barrier (housewrap), or flashing is missing at key junctions (roof-wall, window heads).
- Insurance or Code Requirements: After significant storm damage, insurers or local codes may mandate replacement of affected sections.
Professional Consultation Tip: For extensive damage, obtain assessments from two reputable contractors. A trustworthy professional will explain why replacement is recommended (showing photos of underlying conditions, moisture readings) rather than just providing a price. Be cautious of high-pressure sales tactics or requests for large upfront payments.
Matching Existing Siding: Strategies for Visual Harmony
A successful repair blends seamlessly. Achieving this requires methodical strategy, not guesswork.
Color Matching Approaches
- Vinyl: Take a sample (loose piece or carefully cut fragment from an inconspicuous area) to a siding supplier. Many use spectrophotometers to identify the closest current match. Note: South-facing vinyl fades more. Match to the least faded area possible. If an exact match isn’t available, replacing the entire wall section often yields better visual results than a mismatched patch.
- Painted Surfaces (Wood, Fiber Cement): Scrape a chip from a protected, unfaded area (e.g., under an eave). Take it to a paint store for computer color matching. Refinement Tip: Mix the matched paint with a small amount of your existing wall paint (if available) to bridge the aging gap. Apply a test patch; view it at different times of day under natural light.
- Metal: Automotive paint suppliers may match using manufacturer codes. Otherwise, use a color-matching app (like Sherwin-Williams ColorSnap) as a starting point, then refine with sample pots.
- Stucco: Matching cured stucco color is exceptionally challenging. For small patches, universal tints added to patch mix may help. For larger or visible areas, consult a stucco specialist experienced in color blending. Keep a physical sample of your original stucco stored away from light.
Profile and Texture Matching
- Profile Identification: Measure the exposure (visible width) and profile shape (bevel, Dutch lap, shake). Take clear, well-lit photos of the edge profile. Suppliers can often identify the profile from images.
- Texture Replication: For wood grain, fiber cement texture, or stucco finish, take high-resolution macro photos. Bring physical samples if feasible. When replacing boards, orient the wood grain direction to match adjacent pieces where possible.
- Aging Simulation (Use Sparingly): For wood repairs, lightly sand new boards to mimic weathering. Caution: Techniques like diluted tea/coffee staining for vinyl are anecdotal and risky—test extensively first. Over-application looks artificial.
Sourcing Discontinued Materials
- Contact Manufacturer: Provide any stamps, codes, or photos. They may have archive records or suggest the closest current equivalent.
- Salvage Resources: Check Habitat for Humanity ReStores, local architectural salvage yards, or demolition companies. Call ahead with specifics.
- Online Channels: Search eBay, Facebook Marketplace, or Craigslist using precise terms: “[Material] + [Color/Profile] + salvage.” Include location.
- Community Networks: Post in neighborhood apps (Nextdoor) or community groups: “Seeking matching siding for repair—will compensate for leads or materials.”
- Strategic Update: If matching proves impossible, consider replacing the entire architectural section (e.g., one gable) with a complementary modern material. Frame it as a deliberate aesthetic update.
Respect Historic Context: If your home is in a historic district, consult local preservation guidelines before removing or altering original materials. Document original details thoroughly prior to any change.
Preventing Future Damage: A Practical Maintenance Rhythm
Repairs address the present; prevention safeguards the future. This seasonal framework supports siding longevity through manageable, recurring actions. Adjust timing based on your local climate and home specifics.
Spring: Post-Winter Review & Renewal
- Inspect: Walk the perimeter after snow melt or heavy rains. Check for cracks from freeze-thaw cycles, loose panels from wind, or branch damage.
- Clean Gently: Wash siding with a garden hose and soft brush. For mildew, use an oxygen bleach solution (e.g., 1 cup OxiClean™ per gallon of water). Avoid chlorine bleach on vinyl or painted surfaces. Rinse thoroughly.
- Manage Vegetation: Trim vines, shrubs, or tree branches to maintain at least 12 inches of clearance from siding. Improves airflow and reduces moisture retention and pest access.
- Verify Drainage: Ensure downspouts extend 5+ feet from the foundation. Repair or replace splash blocks. Regrade soil near the foundation to slope away (aim for 6 inches of drop over 10 feet).
Summer: Vigilance During Peak Stress
- Monitor Sun-Exposed Walls: Check south/west walls for signs of warping (vinyl), paint blistering (wood), or excessive fading. Consider UV-protective coatings for vulnerable wood areas if recommended for your climate.
- Post-Storm Protocol: After hail, high winds, or severe weather, inspect promptly. Document any damage with dated photos for insurance purposes. Address punctures or cracks within a few days to prevent water entry.
- Pest Awareness: Look for sawdust (carpenter ants), perfectly round holes (carpenter bees), or gnaw marks (rodents). Seal potential entry points with steel wool and caulk. Install bee traps early in the season if needed.
Fall: Prepare for Colder Months
- Clean Gutters & Downspouts: Perform cleanouts early fall and again after leaf drop. Clogged gutters cause water to cascade down walls, saturating siding and sheathing.
- Inspect Sealants: Check caulk around windows, doors, vents, and corners. Re-caulk any cracks or gaps using a high-quality, paintable silicone or polyurethane caulk. Remove old caulk completely for best adhesion.
- Relocate Storage: Move firewood piles, compost bins, or storage containers at least 18 inches away from the foundation. Reduces moisture buildup and deters pests.
- Adjust Irrigation: Ensure sprinkler heads are directed away from the house foundation and siding. Constant wetting accelerates material deterioration.
Winter: Observation Over Intervention
- Ice Dam Awareness: After heavy snow, check roof edges from the ground. Ice dams can force water under roofing and behind siding. Safely remove snow from the lower roof edge using a roof rake before ice forms. Never climb on a snow-covered roof.
- Indoor Monitoring: On rainy or snowy days, check interior walls opposite known exterior concerns for new stains, peeling paint, or musty odors—potential early indicators of failure.
- Tool Care: Clean, oil, and store tools properly. Keep a labeled repair kit (zip tool, caulk, patch compounds) accessible for quick spring action.
Annual Deep Inspection (Recommended: Early Fall)
- [ ] Probe wood siding within 18″ of grade with a screwdriver (check for softness)
- [ ] Confirm no soil, mulch, or debris contacts siding (maintain 6″ clearance minimum)
- [ ] Inspect all flashing at roof-wall intersections, chimneys, and dormers
- [ ] Verify weep holes in vinyl siding (bottom of panels) are clear of paint/debris
- [ ] Test operation of exterior lights or fixtures mounted on siding
- [ ] Review insurance policy coverage details for wind, hail, or water damage
- [ ] Take dated, well-lit photos of each wall elevation for year-over-year comparison
Long-Term Record Keeping: Maintain a “Home Maintenance Log” (digital or physical). Note repair dates, product details (paint codes, siding lot numbers), and photos. This history proves invaluable during future sales, renovations, or insurance claims. Example entry: “Oct 15, 2023: Repaired rotted cedar clapboard on NW corner (3 boards). Used LP SmartSide 7/16″, primed all sides, painted with Sherwin-Williams Duration in ‘Agreeable Gray’.”
Knowing When to Seek Professional Help
Some situations benefit significantly from specialized expertise. Recognizing these moments protects your home and investment.
Situations Warranting Professional Assessment
- Suspected Structural Compromise: Noticeable wall sagging, soft spots when pressing on the wall surface, or interior cracks aligning with exterior damage.
- Significant Moisture Evidence: Persistent musty odors near walls, widespread interior staining, or visible mold growth inside wall cavities.
- Electrical Proximity: Damage occurring near meter boxes, outdoor electrical outlets, or lighting fixtures where wiring may be exposed.
- Potential Hazardous Materials: Pre-mid-1980s cementitious siding showing damage. Do not disturb. Contact a certified asbestos inspector.
- Extensive Damage: Hail or wind damage affecting large sections of the home, fire damage, or damage beyond comfortable working height.
- Complex Systems: Uncertainty about stucco type (traditional vs. EIFS) or repairs involving intricate architectural details.
Selecting a Qualified Contractor: A Verification Checklist
- Verify Credentials: Confirm active state contractor license via your state licensing board website. Request certificates of insurance for general liability ($1M+ minimum) and workers’ compensation. Never hire uninsured contractors—you could be liable for job-site injuries.
- Seek Relevant Experience: Ask: “What percentage of your work involves siding repair or replacement?” Specialists understand material-specific nuances (vinyl expansion, flashing details) better than generalists.
- Request Contextual References: Ask for 2–3 references for projects similar to yours (e.g., “fiber cement repair on a two-story home”). Contact them. Ask: “Were unexpected issues communicated clearly? Was the site left clean? Would you hire them again?”
- Require a Detailed Scope: Avoid vague estimates like “repair damaged siding.” Insist on a written scope: “Remove and replace 10 linear feet of cedar clapboard on north wall; install new Z-flashing at roof-wall junction; prime and paint with [Product Name].” Should include materials, labor, timeline, and cleanup details.
- Clarify Warranties: Get warranty details in writing. Distinguish between:
- Material Warranty: Provided by the manufacturer (e.g., 30-year on fiber cement). Confirm transferability.
- Workmanship Warranty: Provided by the contractor (typically 1–5 years). Understand coverage scope and claim process.
Navigating Insurance Claims Thoughtfully
- Document Thoroughly: Take clear, date-stamped photos/videos of all damage before any temporary repairs. Note weather conditions and timeline.
- Understand Your Policy: Review your deductible and coverage specifics for wind, hail, or water damage. Some policies have exclusions for “cosmetic damage” without structural impact.
- Request Re-inspection if Needed: If an initial adjuster denies coverage and you disagree, politely request a re-inspection. For complex claims, a public adjuster (paid a percentage of the settled claim) can advocate on your behalf.
- Avoid Fraudulent Offers: Legitimate contractors will never offer to “waive your deductible” or pressure you to sign immediately. This is insurance fraud. Report such offers to your state insurance department.
Ethical Contractor Indicator: They explain why work is needed, show you the issue, discuss options (repair vs. replace), provide clear timelines, and never demand large upfront payments (deposits >10–15% are uncommon). Trust your instincts—if pressured, walk away.
Your Questions, Answered
Q: Can I repair siding in cold weather?
A: Temperature significantly impacts material behavior and product performance. Vinyl becomes brittle below 40°F (4°C)—avoid cutting, bending, or forcing panels. Wood repairs using epoxy fillers typically require ambient temperatures above 50°F (10°C) for proper curing. Caulks and paints have specific minimum application temperatures listed on the technical data sheet (often 35°F–50°F). If a repair is urgent during cold weather, creating a temporary, well-ventilated enclosure with tarps and a safe heat source may allow work, but prioritize safety and product guidelines. When feasible, waiting for milder conditions yields more reliable results. Always consult product instructions for precise requirements.
Q: How long can I expect a siding repair to last?
A: Repair longevity depends on multiple interconnected factors: the base material, quality of the repair work, whether the root cause was resolved, local climate, and ongoing maintenance. For instance, an epoxy wood repair on sound substrate, where moisture sources were corrected, can provide many years of service. A vinyl patch using flexible adhesive in a stable location may also endure well. However, if the underlying issue (like poor drainage causing wood rot) remains unaddressed, even a meticulously executed repair may fail prematurely. Regular inspections help monitor repair integrity over time. There is no universal timeframe—focus on thorough diagnosis and execution.
Q: Is pressure washing safe for cleaning siding before repair?
A: Generally, avoid pressure washing near damaged areas or as a routine cleaning method for repair preparation. High-pressure water (typically above 1,500 PSI) can force moisture behind siding through cracks, seams, or weep holes, causing hidden damage that may not be immediately visible. For pre-repair cleaning, use a garden hose with a soft-bristle brush and a mild detergent solution. For stubborn mildew on vinyl or metal, a low-pressure (under 500 PSI) soft-wash system using an oxygen bleach solution, applied from bottom to top and rinsed thoroughly, is a safer alternative. Never aim spray nozzles upward under siding laps.
Q: My vinyl siding is faded but not damaged. Can I paint it?
A: Painting vinyl is possible but requires specific products and precautions. Use paint explicitly formulated for vinyl siding (e.g., Sherwin-Williams VinylSafe®, Benjamin Moore Revive®). Standard exterior paint is likely to peel due to vinyl’s expansion and contraction. Essential steps: clean thoroughly, lightly scuff-sand for adhesion, use a primer if recommended by the paint manufacturer, and select a color no darker than the original (darker shades absorb more heat, increasing warping risk). Test on a small, inconspicuous area first and monitor for several weeks. Important: Painting typically voids the manufacturer’s original warranty—verify before proceeding.
Q: How do I determine if damage is covered under my siding warranty?
A: Siding warranties vary widely by material, manufacturer, and installation details. Vinyl warranties often cover manufacturing defects (excessive fading, cracking) but exclude damage from impact, weather events, or improper installation. Fiber cement warranties (e.g., James Hardie) usually require installation per their specific guidelines to remain valid. Wood siding rarely carries long-term warranties beyond initial defect coverage. Steps to take: 1) Locate original warranty documents or contact the manufacturer with installation date and photos, 2) Review exclusions carefully (hail, wind, maintenance neglect are commonly excluded), 3) Contact the manufacturer directly—they can clarify coverage based on your situation. Do not assume coverage; verify specifics.
Q: Is it acceptable to reuse old nails or fasteners during repair?
A: Reusing removed fasteners is not recommended. Nails or screws that have been extracted are often bent, weakened, or corroded. Reusing them risks poor holding power, premature failure under wind load, or causing new cracks (especially in brittle materials like fiber cement or cold vinyl). Always use new, corrosion-resistant fasteners rated for your specific siding material: hot-dipped galvanized or stainless steel nails for wood/fiber cement; aluminum or stainless steel screws for metal; vinyl-specific nails with oversized heads. The minimal cost of new fasteners is insignificant compared to the risk of repair failure.
Q: What is the most frequent oversight in DIY siding repairs?
A: Overlooking the root cause is the most common critical error. Patching a rotted wood board without fixing the leaking gutter or poor drainage above it almost guarantees recurrence. Similarly, nailing vinyl siding too tightly restricts necessary thermal movement, leading to buckling as temperatures rise. The second frequent issue is inadequate sealing—failing to properly caulk joints on wood or fiber cement repairs, or using caulk incompatible with the material. Always pause to investigate why the damage occurred before beginning the physical repair.
Q: What is the safest way to remove old caulk before re-caulking?
A: Use a dedicated caulk removal tool (plastic or metal scraper with a sharp, controlled edge) to carefully slice along both sides of the old caulk bead. Work slowly to avoid gouging the siding substrate. For stubborn residue, apply a commercial caulk softener (like Goof Off Caulk Remover) and wait the recommended time (usually 15–30 minutes) before scraping. Exercise caution with utility knives: hold the blade at a shallow angle, never perpendicular to the surface, to reduce slip risk and substrate damage. For painted caulk, a heat gun on low setting can soften it—keep the gun moving constantly to avoid damaging paint or vinyl. Clean the groove thoroughly with isopropyl alcohol before applying new caulk.
Q: Is repairing siding worthwhile on a home I plan to sell soon?
A: Strategic repairs can positively impact sale price, speed, and buyer perception. Focus on highly visible areas (front facade, entryway) and address any issues noted in a pre-listing inspection. Small, well-executed repairs signal a well-maintained property and prevent lowball offers based on perceived deferred maintenance. However, major siding replacements immediately before selling often have lower return on investment unless required by inspection or lender. Document all repairs with before/after photos for disclosure and marketing materials. A clean, intact exterior creates strong curb appeal and buyer confidence.
Q: Can insect activity mimic weather-related siding damage?
A: Yes. Carpenter bees drill precise 1/2-inch holes, often under eaves or in soft wood. Powderpost beetles leave tiny holes with fine, powdery frass (sawdust) below. Termites may create mud tubes along foundations and cause wood to feel soft or honeycombed. Woodpeckers cause irregular holes and splintering while foraging for insects. If insect activity is observed near damage, address the infestation before repairing the siding. Consult a licensed pest management professional for accurate identification and treatment. Repairing without eliminating the pest source leads to rapid re-damage.
Conclusion and Next Step: Building Confidence Through Action
Siding repairs represent meaningful stewardship of your home’s integrity, efficiency, and appearance. This guide has emphasized a foundational principle: lasting solutions begin with thoughtful diagnosis, not hurried action. You now have a structured framework to assess damage across common siding types, execute appropriate repairs, make balanced repair-versus-replace decisions, and implement proactive care. Remember the three interconnected pillars of effective siding management: Identify contributing factors, Intervene with material-appropriate techniques, and Inspect regularly to catch issues early.
The 24-Hour Rule: Your Simple Starting Point
Within the next 24 hours, complete this single, manageable task:
👉 Walk the perimeter of your home during early morning or late afternoon (when low-angle light highlights shadows and imperfections). Identify one area warranting attention—such as siding near soil level, a section below a downspout, or a board showing early discoloration. Take a clear photo with your phone. Note its location precisely (e.g., “East wall, 3 feet left of back door”). This becomes your documented “Priority One” spot.
This small step breaks the inertia of uncertainty. That photo establishes a baseline. Next weekend, assess it using the 5-Point Framework. Within a few weeks, you can address it—transforming concern into capability. Momentum grows from one intentional observation.
The Integrated Perspective: Your Home as a Connected System
Your siding does not function in isolation. It interacts dynamically with roofing, gutters, drainage, landscaping, ventilation, and even interior humidity management. A repair that acknowledges these connections—like extending a downspout while fixing splash-damaged wood—builds resilience. View ongoing maintenance not as a chore, but as attentive partnership with your home. Each inspection deepens your understanding; each thoughtful repair strengthens your home’s performance and your peace of mind. This mindful approach cultivates lasting value, both tangible and intangible.
Explore Our Complete Home Exterior System:
Understanding Roof Damage: A Visual Guide to Shingles, Leaks, and Repairs | Gutter Maintenance Mastery: Prevent Clogs, Leaks, and Foundation Damage | Window & Door Flashing: The Invisible Shield Against Water Intrusion | Landscaping for Drainage: Protect Your Foundation and Siding Naturally | Exterior Paint Longevity: Surface Prep, Product Selection, and Climate Considerations