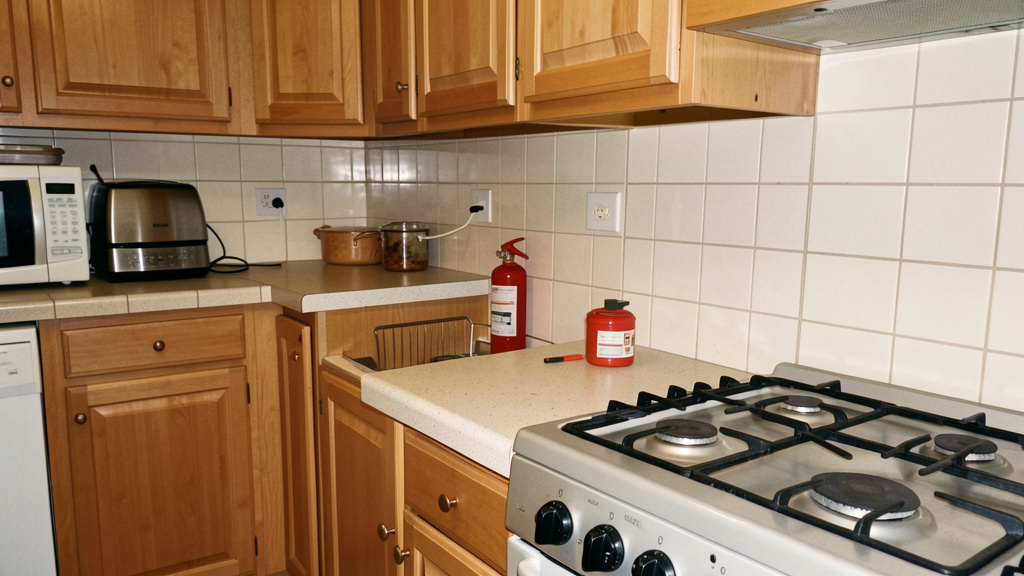
A Step-by-Step Framework to Stay Calm, Take Control, and Improve Emergency Outcomes When Every Second Counts
When crisis strikes within your home’s walls, the clock begins ticking with quiet urgency. Actions taken—or not taken—in the initial moments of an emergency significantly influence outcomes: safety, injury severity, property impact, and emotional recovery. This guide offers a clear, time-aware protocol applicable across medical events, fires, natural phenomena, and security concerns. Forget fragmented checklists or overwhelming technical manuals. Here, you’ll find a practical mental model, adaptable steps, and scenario-focused guidance designed to help transform uncertainty into purposeful action. Keep this resource accessible. Review it with household members. Because when moments matter, thoughtful preparation builds resilience.
Introduction
Emergencies arrive without warning. A sharp cry from another room, the scent of smoke, the sudden shake of the ground—these moments disrupt ordinary rhythm. In that disruption, the human nervous system may default to instinct: fight, flight, or freeze. Yet decades of emergency response insight reveal a consistent pattern: structured action supports clarity amid stress. This protocol draws upon widely recognized principles from community emergency frameworks, resuscitation guidelines, fire safety standards, and psychological research on decision-making under pressure. It is not a substitute for professional training but a practical bridge—the organized response that sustains safety until trained help arrives. Understanding that cardiac events frequently occur in home settings (American Heart Association), that residential fires can escalate rapidly (NFPA), and that timely bystander actions meaningfully influence trauma outcomes (Journal of Trauma and Acute Care Surgery) underscores why focused preparation for these initial moments matters deeply. This guide meets you where life happens: in kitchens, hallways, bedrooms, and living spaces. It speaks to parents, caregivers, seniors living independently, apartment residents, and rural households alike. Your awareness today helps build the mental readiness that may support calm action tomorrow.
The 10-Minute Triage Framework: Your Universal Emergency Protocol
Imagine emergency response as a river with four distinct currents. Fighting against them creates strain. Moving with them—understanding their sequence and purpose—creates momentum. This framework reframes emergency moments into a predictable, manageable sequence. It applies broadly because most urgent situations share core dynamics: an immediate safety consideration, a need for external support, a requirement for stabilization, and a transition to professional care. Familiarize yourself with these four phases. Visualize them calmly. They can serve as a cognitive anchor when stress rises.
The Fundamental Principle: Time itself is neutral; how we use each moment gives it purpose. Assigning clear intent to minutes converts anxiety into grounded action.
Phase 1: Seconds 0–60 — Scene Safety and Rapid Assessment
Before assisting others, confirm your own ability to act safely. This step is essential. Entering an unsafe scene without assessment risks creating additional harm—a pattern noted in fire safety reports and incident reviews. Your sixty-second focus: answer three questions with calm clarity.
Question 1: Is the scene currently safe for me to enter?
Scan horizontally and vertically. For a fall in the kitchen: Is the floor wet? Is a stove burner active? Are sharp objects nearby? In a suspected gas odor: Do you detect a sulfurous smell (added for detection)? Do you hear hissing? Never operate light switches, appliances, or phones near suspected gas leaks—sparks may ignite fumes. During aftershocks: Are ceiling fixtures swaying? Is debris falling? If the scene is unsafe, prioritize moving to safety and alerting others from a secure location. Protecting your capacity to help remains paramount.
Question 2: What is the nature of the situation?
Gather observable clues without disturbing the scene or person.
– Medical: Is the person responsive? Breathing comfortably? Speaking? Note skin tone (pale, flushed, bluish), visible bleeding, posture, or medical identification jewelry.
– Fire: Where is smoke or flame visible? What material appears involved? (Grease, electrical, fabric?) Is smoke dense or light?
– Intrusion/Violence: Is a threat present? Can you safely secure doors, close blinds, or move to a more protected space?
– Natural Event: Assess immediate surroundings. Are walls cracked? Windows broken? Water rising?
Question 3: How many people are involved, and what appears most urgent?
Quickly note who is mobile versus needing support. Identify the most time-sensitive need (e.g., someone not breathing versus a minor cut). This helps prevent focus narrowing. In multi-person situations, a swift but systematic scan matters: “Adult near doorway appears unresponsive; child nearby is crying but moving; no visible flames.”
Why this phase matters: Scene assessment directs all next steps. Without it, effort may be misdirected.
Common pitfall to avoid: The impulse to rush toward a loved one without checking for hazards like live wires, broken glass, or ongoing risks. True support begins with situational awareness.
Resource-conscious adaptation: No tools required. Use your senses. Turn slowly. Listen carefully. Note unusual sounds or smells.
If visibility is limited: Crawl low where air may be clearer (in smoke). Use a phone light only if confirmed safe (avoid near gas odors). Tap walls gently to orient yourself.
Phase 2: Minutes 2–4 — Alerting Help and Clear Communication
You’ve assessed. Now, request professional support with calm precision. Vague alerts (“Help! Something’s wrong!”) require dispatchers to spend critical seconds gathering basics. Your goal: share clear, factual details that help responders prepare effectively. If safe, use speakerphone to continue Phase 3 actions while staying connected. Dispatchers are trained to provide pre-arrival guidance—remaining on the line is valuable.
The C.L.E.A.R. Communication Approach:
Use this structure for efficient information sharing:
– Crisis Type: “Medical concern—adult not responsive,” “Small kitchen fire near stove,” “Unfamiliar person in yard.”
– Location: Full address plus helpful landmarks. “123 Oak Street, blue house with red front door. We’re in the basement unit.” Rural location? “Half-mile past Miller Farm on Route 7, white mailbox.”
– Essential Details: “Person is not breathing,” “Flames visible on stovetop,” “Individual left heading east.”
– Affected Persons: “One adult male, appears to be in 60s,” “Two children present, unharmed,” “Family pet confined to back bedroom.”
– Resources Nearby: “AED accessible from community lobby,” “Fire extinguisher mounted in kitchen,” “Neighbor with medical background is assisting.”
Why this phase matters: Specific details help dispatchers send appropriate resources efficiently. Clear location information supports faster arrival.
Common pitfall to avoid: Ending the call prematurely. Dispatchers may offer real-time guidance (CPR steps, evacuation tips) or alert you to unseen risks (“Is there a gas line near that area?”).
Resource-conscious adaptation: No cell signal? Send a capable person to a visible location (street corner, neighbor’s porch) to flag help. Give clear instructions: “Go to 45 Maple—tell them we need fire assistance for a kitchen incident!”
If communication is limited: Text-to-911 if available locally (verify ahead of time). Use rhythmic signals (three sharp knocks, pause, repeat) to indicate distress. Flash a light deliberately at night.
Phase 3: Minutes 5–7 — Targeted Support and Stabilization
With help en route, focus shifts to actions that support safety and stability. Only perform steps you feel prepared to do. This phase varies by situation—refer to scenario adaptations later. Core principles apply broadly:
For Medical Situations:
– If trained and appropriate: Begin chest compressions (push firmly and steadily in the center of the chest). Humming “Stayin’ Alive” can help maintain rhythm.
– For significant bleeding: Apply firm, continuous pressure with any clean fabric (t-shirt, towel). Elevate the area only if no injury to bones is suspected. Do not remove soaked material—add layers atop it.
– For choking (if person cannot cough, speak, or breathe): Perform abdominal thrusts if trained. For infants, use back blows and chest thrusts.
– Important: Do not offer food, water, or medication to someone who is unresponsive or confused. Risk of complication increases.
For Fire Situations:
– Only attempt to extinguish if:
1) Fire is very small (contained to wastebasket or pan)
2) You have a clear path to exit behind you
3) You have an appropriate extinguisher (Class K for kitchens, ABC for general use)
– Use PASS method: Pull pin, Aim low at fire’s base, Squeeze handle, Sweep side to side.
– If fire grows or smoke thickens, evacuate immediately. Close doors behind you—a practice shown to slow fire progression (UL Firefighter Safety Research Institute).
– Important: Never use water on grease or electrical fires. Water may spread burning grease or conduct electricity.
For Natural Events/Structural Concerns:
– Earthquake: Drop, Cover, Hold On. Stay indoors until shaking stops. Avoid windows and heavy fixtures.
– Tornado: Move to the lowest interior room without windows (bathroom, closet). Cover head with cushioning if available.
– Flood: Move to higher ground promptly. Even shallow moving water can be hazardous (NOAA).
– Important: Avoid re-entering a damaged structure immediately after shaking or high winds. Secondary risks may exist.
Why this phase matters: These minutes often determine whether a situation stabilizes. Proper bleeding control supports circulation. Correct fire response may limit spread.
Common pitfall to avoid: Moving an injured person unless the location is immediately dangerous (active fire, structural instability). Unnecessary movement may worsen injury. Wait for trained responders when possible.
Resource-conscious adaptation: No extinguisher? Smother small grease fires with a metal lid. Baking soda (not flour) may help tiny stovetop flames. For bleeding, any absorbent cloth works—pressure matters more than sterility.
If tools are limited: No CPR barrier? Focus on compressions if trained. If spine injury is suspected and movement is unavoidable, minimize motion using available padding (rolled towels, clothing) only if you have relevant guidance.
Phase 4: Minutes 8–10 — Handoff Preparation and Ongoing Awareness
Help is approaching. Final minutes focus on smooth transition. This supports responder efficiency, accelerates care, and maintains household safety.
Prepare the Path:
– Unlock doors. Open gates. Turn on exterior lights if safe.
– If possible, have someone guide responders: “Follow me—they’re in the backyard.”
– Clear major obstacles from entryways (toys, furniture). In smoky conditions, stay low and offer verbal direction.
Gather Key Information:
– Person details: Name, age, known health considerations (diabetes, allergies), recent medications, emergency contact.
– Timeline: “Symptoms noticed at approximately 3:05 PM,” “Smoke observed around 3:08.”
– Actions taken: “Chest compressions began at 3:07,” “Fire extinguisher used on stove.”
– Note details on paper or phone. Stress affects memory; written notes support accuracy.
Support the Environment:
– Guide household members to a pre-identified safe meeting area (neighbor’s driveway, mailbox). Prevent well-meaning but untrained assistance near responders.
– If safe, secure pets in a closed room with water to avoid escape or interference.
– Note relevant scene details without altering evidence (e.g., “Wet floor near where fall occurred”).
Document Thoughtfully:
– If appropriate and non-intrusive, photograph the scene before responders alter it (fire origin, weather conditions, structural details). This may assist insurance or future prevention.
– Note responder unit numbers for follow-up.
Why this phase matters: Clear handoff reduces confusion. Accurate information prevents assumptions (“Are they on blood thinners?”). A secure scene protects everyone.
Common pitfall to avoid: Overwhelming responders with emotional details. State facts calmly: “John Doe, 68, diabetic, became unresponsive at 3:02. CPR started at 3:07.” Then allow space for professionals.
Resource-conscious adaptation: No paper? Verbally review key points with another adult. Use landmarks for meeting spots: “Everyone gather at the blue mailbox.”
If communication barriers exist: Write key terms (ALLERGY, DIABETES) on paper. Use universal gestures (hand on chest for discomfort).
The Cognitive Peak: Your role evolves from initial responder to informed partner. The most valuable contribution you offer professionals is clear, calm information—not heroics.
Applying the Framework: Scenario-Specific Guidance
The 10-Minute Triage Framework provides structure. These adaptations offer focused guidance for specific situations. Review them with household members. Discuss how they apply to your home’s layout, health considerations, and local context.
Cardiac Event Response
Phase 1 (0–60 sec):
– Scene Safety: Check for water near the person (electrical safety if AED may be used). Note medical alert jewelry.
– Assessment: Tap shoulders, ask “Are you okay?” Observe breathing (is it normal or gasping?). Note signs like chest discomfort, sweating, nausea—possible indicators before loss of responsiveness.
– Clarifying Note: Cardiac arrest involves sudden collapse, no breathing, no response. A heart attack may include symptoms while conscious and can lead to arrest. Respond promptly to either.
Phase 2 (2–4 min):
– Call emergency services. State clearly: “Person is unresponsive and not breathing normally.”
– Ask: “Is there a public AED nearby?” Many communities maintain accessible AED locations.
– If others are present, request: “Please retrieve the AED from the community lobby.”
Phase 3 (5–7 min):
– If trained: Begin chest compressions (push hard and fast in center of chest). If trained in breaths, follow current guidelines.
– AED Arrival: Turn on device. Follow voice prompts exactly. Expose chest (cut clothing if needed). Wipe away moisture. Apply pads as shown. Ensure no one touches the person during analysis. Resume compressions immediately after a shock (if advised).
– Note: If vomiting occurs, gently roll the person to their side only if trained, clear the airway, then resume compressions. Minimize interruptions.
Phase 4 (8–10 min):
– Share with responders: “Compressions started at [time]. AED applied at [time].”
– Note any visible medications (e.g., nitroglycerin container).
– Designate someone to guide EMS: “I’ll wait at the street corner with a light.”
Illustrative Example: A household member notices their spouse unresponsive on the living room floor. They call for another person to dial emergency services and retrieve the community AED (previously noted during a safety walk). While the dispatcher provides guidance, compressions begin. The AED advises one shock. Paramedics later note the early actions supported a positive outcome. This example shows how framework steps create continuity of care.
Stroke Recognition and Response (B.E. F.A.S.T. Plus)
Phase 1 (0–60 sec):
– Assessment: Use an expanded B.E. F.A.S.T.:
– Balance: Sudden loss? Stumbling?
– Eyes: Sudden vision changes? (Often overlooked)
– Face: Ask to smile. Does one side droop?
– Arms: Raise both. Does one drift down?
– Speech: Repeat a simple phrase. Slurred or incorrect words?
– Time: Note when symptoms began. Critical for treatment options.
– Key Detail: “Time last known well.” When did you last see them without symptoms? This timestamp informs medical decisions.
Phase 2 (2–4 min):
– Call emergency services. State: “Possible stroke. Symptoms began at approximately [time].”
– Ask: “Which facility is equipped for stroke care?” (Capabilities vary.)
– Gather medications, insurance card, phone.
Phase 3 (5–7 min):
– Do NOT: Offer aspirin, food, water, or suggest resting.
– Keep the person calm and still. Loosen tight clothing.
– Note changes: “Arm weakness noticed at 3:02, speech changed at 3:05.”
– If seizure occurs: Clear space near head, note duration, turn head gently to side after movement stops. Do not restrain.
Phase 4 (8–10 min):
– Share the “time last known well” and symptom notes with responders.
– Prepare to accompany to hospital—bring essentials.
– Assign someone to contact family using a pre-shared list.
Why Timing Matters: Brain tissue is sensitive during a stroke event. Prompt medical evaluation significantly influences recovery potential (American Stroke Association). Earlier arrival supports more treatment options.
Significant Bleeding Management
Phase 1 (0–60 sec):
– Scene Safety: Use gloves if available. Note embedded objects (glass, metal). Do not remove impaled items.
– Assessment: Observe bleeding characteristics:
– Arterial: Bright red, pulsing flow (requires urgent attention).
– Venous: Dark red, steady flow.
– Capillary: Oozing (less urgent).
– Check thoroughly for all injury sites.
Phase 2 (2–4 min):
– Request help. State: “Significant bleeding from leg wound.”
– Ask someone to bring clean cloth, first aid supplies, or tourniquet if trained in its use.
– If alone, apply pressure while using speakerphone.
Phase 3 (5–7 min):
– Direct Pressure: Fold cloth into thick pad. Apply firm, continuous pressure. Use body weight if helpful.
– Elevation: Raise area above heart level only if no bone injury is suspected.
– Tourniquet Use (if trained, limb injury, life-threatening bleeding):
– Place 2–3 inches above wound (not over a joint).
– Tighten until bleeding slows. Note application time visibly.
– Note: Commercial tourniquets (CAT, SOFT-T) are preferred. Improvised versions (belt, rope) are less reliable—use only as a last resort with wide material.
– Impaled Object: Stabilize with padding on both sides. Do not pull out.
– Reassurance: Speak calmly: “Help is on the way. Pressure is applied. You’re doing well.”
Phase 4 (8–10 min):
– Inform responders: “Tourniquet applied at 3:06 on right thigh,” or “Pressure maintained since 3:02.”
– Keep used dressings visible (shows blood loss).
– Note changes in alertness (“Initially alert, now drowsy”).
Common Pitfall: Releasing pressure to check bleeding. This disrupts clotting. Maintain steady pressure until responders assume care. Add layers if soaked—do not remove.
Choking Response: Adults, Children, Infants
Phase 1 (0–60 sec):
– Assessment:
– Mild: Coughing forcefully, able to speak. Do not intervene. Encourage continued coughing.
– Severe: Cannot cough, speak, or breathe. Hands at throat (universal sign). Face reddening or bluing.
– Confirm age: Technique differs for infants (<1 year) versus others.
Phase 2 (2–4 min):
– Ask someone to call emergency services immediately for severe choking. Medical evaluation is advised even if resolved.
– If alone with infant/child: Provide care for about two minutes first, then call (per current AHA guidance for lone rescuers with children).
Phase 3 (5–7 min):
– Adult/Child (conscious):
– Stand behind. Fist against abdomen, thumb side in, just above navel.
– Grasp fist. Perform quick upward thrusts.
– If person collapses: Begin compressions. Before breaths, check mouth for visible object. If seen, remove carefully. If not, continue compressions.
– Infant (conscious):
– Support head/neck. Place face-down on forearm, head lower than chest.
– Give 5 firm back blows between shoulder blades.
– Turn infant face-up. Give 5 chest thrusts (two fingers on breastbone).
– Repeat until object clears or infant becomes unresponsive.
– Pregnant/Larger Body: Use chest thrusts (same position as compressions) instead of abdominal thrusts.
Phase 4 (8–10 min):
– Even if resolved: Seek medical evaluation. Internal effects may require assessment.
– Inform responders: “Choking incident at 3:07. Breathing restored. Mild abdominal discomfort noted.”
– Keep expelled object for medical review if safe.
Critical Reminder: Never perform thrusts on someone coughing effectively. Trust the body’s natural reflex. Intervention is for severe choking only.
House Fire: Response and Evacuation
Phase 1 (0–60 sec):
– Scene Safety: Crawl low under smoke. Feel doors with the back of your hand before opening. If hot, do not open.
– Assessment: Locate smoke/flame source. Identify escape paths. Account for household members. Note trapped pets.
– Key Check: Is fire very small and contained? Or spreading (flames on ceiling, thick smoke)? This guides Phase 3.
Phase 2 (2–4 min):
– Activate fire alarm if not sounding.
– Call emergency services from outside or a safe room. State: “Fire at [address]. All occupants accounted for [or not].”
– Alert neighbors calmly if safe.
Phase 3 (5–7 min):
– If fire is very small AND correct extinguisher is available: Use PASS method. Aim at base. Evacuate immediately if fire grows.
– If fire is growing or smoke is heavy: EVACUATE PROMPTLY.
– Crawl low. Cover mouth with damp cloth if available.
– Close doors behind you to slow fire spread.
– Use alternate escape route if primary is blocked (window ladder for upper floors).
– If trapped: Seal door cracks with wet towels. Signal at window (light, bright cloth). Call 911 with exact location (“Third floor, northwest room”).
– Never use elevators. Never stop for possessions.
Phase 4 (8–10 min):
– Go to pre-designated meeting spot (e.g., large tree across street).
– Conduct headcount. Report missing persons immediately to firefighters.
– Inform responders: “Fire observed near kitchen stove,” “Teen may be in attic bedroom,” “Propane tank in backyard shed.”
– Do not re-enter for any reason. Await official all-clear.
Supportive Practice: Closing doors during evacuation may significantly slow fire progression (UL FSRI “Close Before You Doze” initiative). Practice home drills with two escape routes per room. Test smoke alarms monthly. Install alarms inside/outside sleeping areas and on every level.
Earthquake or Structural Event: During and After
Phase 1 (0–60 sec):
– During shaking: DROP to hands and knees. COVER head/neck under sturdy furniture. HOLD ON until shaking stops. If no shelter, crouch against an interior wall away from windows.
– Immediately after: Assess safety. Watch for falling debris, broken glass, downed wires, gas odors. Check yourself first.
Phase 2 (2–4 min):
– Call emergency services only if you have critical, time-sensitive information: “Structural concern at 123 Oak,” “Gas odor at Maple and 5th.” Avoid tying up lines for non-urgent reports.
– Use text messages if cellular networks are congested.
– Listen to battery-powered radio for updates if available.
Phase 3 (5–7 min):
– Evacuate carefully: Wear sturdy shoes if possible. Watch footing. Use flashlight (not candles).
– If trapped: Tap pipes/walls rhythmically (SOS pattern: 3 taps, pause, 3 taps). Shout sparingly (to avoid inhaling dust). Cover mouth with cloth.
– Utilities: If safe and you detect gas or hear hissing, shut off gas only if you know the valve location and operation. Shut off electricity at main breaker if sparks/fire are visible. Do not shut off water unless the main line is broken.
– Assisting others: Provide comfort and bleeding control if trained. Avoid moving seriously injured people unless immediate danger exists.
Phase 4 (8–10 min):
– Move to a pre-identified open area (park, field). Avoid buildings, bridges, power lines.
– Account for all household members. Report concerns to authorities.
– Document damage discreetly with photos for insurance.
– Follow official instructions via radio or authorities.
Preparedness Step: Secure tall furniture (bookcases, water heaters) to wall studs before an event. This reduces common non-structural hazards. Keep sturdy shoes and a flashlight under each bed.
Unwanted Intrusion: Safety and Lockdown
Phase 1 (0–60 sec):
– Scene Safety: Prioritize distance and barriers. Avoid confrontation.
– Assessment: Note location and movement of concern. Number of individuals? Visible objects?
– Immediate Action:
– If safe to leave: Exit to nearest safe location. Go to a trusted neighbor’s home. Call police after reaching safety.
– If unable to leave: LOCK DOWN.
– Move to an interior room with a lockable door (bathroom, closet).
– Barricade door with heavy furniture if possible.
– Turn off lights. Silence devices. Stay behind solid cover.
Phase 2 (2–4 min):
– Call emergency services only if safe to speak. Whisper: “Unwanted person at [address]. [Number] people in [room location].”
– If unable to speak: Leave line open. Dispatchers may trace location and monitor audio.
– Text 911 if voice call is unsafe (confirm local availability beforehand).
Phase 3 (5–7 min):
– Remain silent and concealed. Cover windows if possible.
– Comfort children with quiet reassurance (hand squeeze, calm whisper).
– Do not investigate noises. Wait for official “all clear.”
Phase 4 (8–10 min):
– When authorities arrive: Follow instructions precisely.
– Keep hands visible.
– State calmly: “We are residents. We are in the [room].”
– Do not approach officers suddenly.
– After resolution: Preserve the scene. Avoid cleaning disturbed areas.
– Seek emotional support resources. Stress reactions are normal and manageable.
Preventive Insight: Most intrusions target easy access. Reinforce sliding doors with security bars. Install motion-sensor lighting on all sides. Trim shrubbery near windows. These measures support deterrence (Department of Justice resources).
Gas Odor or Chemical Concern: Sensory Awareness
Phase 1 (0–60 sec):
– Scene Safety: DO NOT operate switches, lighters, phones, or appliances. Sparks may ignite fumes.
– Assessment:
– Natural Gas: Rotten egg smell (added odorant). Hissing near pipes/appliances.
– Propane: Similar odor. Heavier than air—may collect in low areas.
– Chemical Spill: Identify substance if safe (read label). Note fumes, color, reaction.
– Evacuate everyone immediately upwind and uphill.
Phase 2 (2–4 min):
– Call emergency services from outside, well away from the building. State: “Strong gas odor at [address]. All occupants evacuated.”
– If safe and familiar with the valve: Shut off gas supply at main valve (turn lever 90 degrees with wrench). Only attempt if you can do so safely and without delay.
– Alert neighbors if leak appears significant.
Phase 3 (5–7 min):
– Do not re-enter for any reason.
– If chemical contacts skin: Remove contaminated clothing while moving away. Rinse skin with water for 15+ minutes only if safe to do so away from the spill area.
– If fumes are inhaled: Move to fresh air. Sit calmly. Loosen tight clothing.
– Never induce vomiting for chemical ingestion—contact Poison Control (1-800-222-1222) or emergency services for specific guidance.
Phase 4 (8–10 min):
– Inform responders: “Odor strongest near water heater,” “Chemical is [product name] from garage.”
– Provide Safety Data Sheet (SDS) if available (keep digital copies accessible).
– Await utility or hazmat team declaration before re-entry.
Preventive Practice: Install natural gas and carbon monoxide detectors on every level, near sleeping areas. Test monthly. Know your main gas shutoff location. Store chemicals in original containers, in ventilated areas, away from heat.
Navigating Real-World Challenges: Adapting When Plans Shift
No protocol accounts for every variable. These common challenges are predictable. Anticipating them builds adaptable resilience.
Challenge 1: Panic or Mental Freeze
The Experience: Adrenaline surges. Thoughts scatter. Time feels distorted.
Adaptive Strategies:
– Pre-Program Responses: Practice “if-then” mentally. “IF I smell smoke, THEN I drop low, check the door, and move left toward the window.” Visualization builds neural pathways.
– Anchor Phrase: Choose a short mantra: “Breathe. Assess. Act.” Repeat softly during Phase 1.
– Physical Grounding: Splash cool water on face (may support calm). Press feet firmly into floor three times to reconnect with the present.
– Supportive Insight: Many responders use paced breathing (inhale 4 sec, hold 4, exhale 4, hold 4) to regain focus. Practice occasionally—it becomes accessible under stress.
Challenge 2: Conflicting Input or Multiple Voices
The Experience: Several adults present, offering different instructions. Confusion escalates.
Adaptive Strategies:
– Assign Roles Clearly: In Phase 1, state directly: “Sarah, please call emergency services and stay on speaker. Mark, retrieve the fire extinguisher. I will assess the situation.” Use names. Be specific.
– Single Point of Contact: Designate one person to communicate with dispatchers or responders. Others support silently.
– Pre-Established Understanding: Discuss beforehand: “In urgent situations, [Name] will coordinate communication.” Reduces debate in the moment.
– Why It Helps: This mirrors widely used incident management principles. Clear roles reduce gaps and duplication.
Challenge 3: Limited Resources (Remote Location, No Kit)
The Experience: Rural setting with longer response times. Limited supplies.
Adaptive Strategies:
– Thoughtful Improvisation:
– Bleeding: Clean cotton shirt > paper towels > dry leaves (for pressure).
– Splint: Rolled magazine + tape (from garage).
– Signal: Mirror reflection, bright fabric on a pole.
– Pre-Position Essentials: Keep a small “grab-and-go” pouch by your bed: whistle, flashlight, power bank, emergency contacts, cash.
– Community Awareness: Know which neighbors have medical training, extinguishers, or vehicles for rough terrain. Build connections before need arises.
– Context Note: For very remote homes, satellite communicators (e.g., Garmin inReach) that work without cell service may be considered. Program emergency contacts.
Challenge 4: Supporting Vulnerable Household Members
The Experience: Standard steps assume mobile, able-bodied adults.
Adaptive Strategies:
– Personalized Plans:
– For wheelchair users: Identify two accessible exits per room. Keep evacuation aids (sling, stair chair) near sleeping areas. Practice transfers with caregiver.
– For cognitive conditions: Use simple, calm directions (“Let’s go outside now”). Avoid complex explanations. Keep recent photo accessible.
– For infants: Store baby carrier (not stroller) near escape routes. Practice one-handed evacuation.
– Medical Summary Cards: Create laminated cards for each person: “Maria, 78, diabetic, insulin at 8 AM, penicillin allergy.” Keep on fridge, in wallet, emergency kit.
– Empowering Step: Involve members in planning at their comfort level. A child with asthma can learn to grab their inhaler during drills. Participation builds confidence.
Challenge 5: Aftermath and Emotional Support
The Experience: The immediate event ends, but stress, worry, or fatigue remains.
Adaptive Strategies:
– Immediate Post-Event (Minutes 11–30):
– Move to a calm, safe space. Offer small sips of water.
– Use grounding: “Name 5 things you see, 4 things you feel, 3 things you hear, 2 things you smell, 1 thing you taste.”
– Avoid repeatedly replaying events. State gently: “We used our preparation with the resources we had.”
– Within 24 Hours:
– Contact support resources (Employee Assistance Program, community mental health).
– Limit exposure to media coverage of the event.
– Re-establish simple routines (meal times, bedtime).
– Watch For: Persistent distress, withdrawal, or hypervigilance beyond two weeks—professional support is helpful and available.
– Compassionate Note: Feeling unsettled is a normal human response. Seeking support is a sign of strength. Hold a blame-free household debrief: “What felt helpful? What might we adjust?”
Your Questions, Answered
Q: What if I’m alone during an emergency? How do I manage all steps?
A: Prioritize essentials. Phase 1 (assess safety) and Phase 2 (request help) are foundational. If alone with a medical concern, call first before beginning compressions (dispatchers provide speakerphone guidance). For fire, evacuate immediately—your safety enables you to assist others later. Keep your phone charged and accessible. Consider medical alert systems with fall detection for those at higher risk living alone.
Q: Are Good Samaritan laws protective? Could I face liability for trying to help?
A: Most regions have Good Samaritan provisions encouraging bystander aid. Generally, protection applies when: 1) You act in good faith, 2) You avoid grossly negligent actions (e.g., performing complex procedures beyond your training), and 3) You do not expect payment. Coverage typically includes basic first aid, compressions, and AED use. Important: Laws vary locally—review your area’s statutes. However, ethical and legal consensus strongly supports that reasonable, well-intentioned aid carries far less risk than inaction. Dispatcher guidance further supports your actions.
Q: How often should we review these steps with our household?
A: Hold a brief “tabletop” discussion (verbal scenario review) every few months. Practice physical drills (evacuation routes, supply locations) twice a year. Weave micro-practices into daily life: “If the alarm sounded now, what’s your first move?” For children, frame positively: “Let’s practice our quiet crawl like ninjas!” Update plans after home changes (new furniture, renovations). Consistency builds automaticity—practiced actions emerge more readily under stress.
Q: What’s a highly useful but often overlooked item for emergencies?
A: A whistle. It requires minimal energy (critical if injured or trapped), carries farther than shouting, and universally signals distress. Three blasts is the international SOS signal. Attach one to keychains and keep extras in emergency kits. Next priority: a battery-powered or hand-crank NOAA weather radio for alerts during power outages.
Q: During a medical event, should I drive the person to the hospital myself?
A: In nearly all situations, calling emergency services is strongly recommended. Reasons include: 1) Dispatchers send the closest available unit, which may be nearer than you realize, 2) Paramedics begin critical care during transport (oxygen, monitoring), 3) Hospitals are alerted ahead of arrival, 4) Driving while distressed increases collision risk. Rare exception: In extremely remote areas with confirmed very long response times (>30 minutes), and only if the person is stable and you can drive safely. When uncertain, call professionals—they provide real-time advice.
Q: How do I support young children who are frightened during an emergency?
A: Give older children a calm, simple role: “You’re my light captain—hold this flashlight right here.” For younger children: use distraction (“Let’s count red things we see”) or a comfort object. Speak in a low, steady voice—children attune to adult tone. Pre-teach “emergency quiet” through gentle games. Afterward, validate feelings: “It’s okay to feel scared. We’re safe now.” Avoid dismissing emotions (“Don’t cry”). Reassurance through action (“I’m checking the door is locked”) builds security.
Q: What if my pet is trapped during a fire or event?
A: Prioritize human safety. Firefighters are trained and equipped for animal rescue. Upon evacuation:
1) Close doors to rooms where pets may hide (narrows search area).
2) Inform responders immediately: “Tabby the cat is likely under the bed in the blue room.”
3) Keep leashes/harnesses near exits for quick securing.
Preparation: Place pet rescue stickers on windows (indicating type/number of pets). Ensure pets are microchipped and photos are accessible. Include pet carriers in drills.
Q: How do I verify emergency information online during a crisis?
A: Rely only on verified official sources:
– Local emergency management agency (verified social media)
– NOAA Weather Radio
– Official police/fire department channels
– FEMA app
Disable non-essential notifications to avoid misinformation. If uncertain, call your non-emergency police line for confirmation. Avoid sharing unverified reports—they can cause unnecessary alarm.
Q: What should I know about legal considerations for home security situations?
A: Self-defense laws vary significantly by location and are complex. General considerations include:
– Imminence: Threat must be immediate and unavoidable.
– Proportionality: Response should align with the perceived threat.
– Reasonableness: Would a reasonable person perceive the same danger?
Guidance: Focus on prevention, escape, and lockdown protocols covered earlier. If confrontation occurs, de-escalate verbally if safe. Consult a local attorney to understand your area’s specific laws. Document incidents thoroughly for authorities. Prioritize contacting law enforcement the moment it is safe.
Q: How can I prepare if I have limited mobility or use mobility aids?
A: Proactive planning makes a difference:
– Escape Routes: Identify two accessible exits per room. Remove permanent obstacles. Install ramps if needed.
– Supplies: Keep phone, medications, water within reach of primary seating/sleeping areas. Consider battery-powered door openers.
– Communication: Program speed-dial for trusted neighbors. Wear a medical alert device with fall detection.
– Community: Register with local fire department vulnerability programs (many offer free safety assessments). Inform neighbors of your needs.
– Drills: Practice evacuation transfers with a caregiver. Time your drills to understand duration.
Q: After an emergency, how do I approach insurance claims without feeling overwhelmed?
A: Begin documentation during Phase 4:
1) Take timestamped photos/video of damage before cleanup.
2) Keep damaged items (if safe) for adjuster review.
3) Maintain a dedicated notebook: Record conversations (date, name, summary).
4) Contact your insurer promptly—most have 24/7 claim lines.
5) Request a written checklist of required documents.
6) Verify contractor licenses; get multiple quotes. Beware of unverified solicitations.
Many insurers offer advance payments for urgent needs. Non-profits (Red Cross, Team Rubicon) often provide free cleanup support and advocacy.
Q: Is formal CPR or first aid training valuable for homeowners?
A: Yes. While this guide offers conceptual understanding, hands-on training builds confidence and muscle memory that written material cannot replicate. Organizations like the American Heart Association, American Red Cross, and local fire departments offer accessible courses. Benefits include:
– Practicing compressions on manikins to learn effective depth/rhythm
– Using AED trainers
– Earning certification (useful for workplaces)
– Learning age-specific techniques
– Reducing hesitation through guided repetition
Schedule refreshers annually. Invite neighbors—strengthen community resilience. Knowledge benefits from renewal; practice supports readiness.
Conclusion and Your Next Step
The initial moments of a home emergency are shaped not by chance alone, but by preparation, practiced awareness, and the choice to act with intention. You now hold a framework informed by broad emergency response patterns—a mental guide for navigating uncertainty. Remember the four currents: Confirm scene safety. Request help with clarity. Provide calm, targeted support. Prepare for professional handoff. This protocol does not promise to eliminate concern; it offers a reliable structure to lean on when concern arises.
Recap: Three Foundational Practices
- Scene Safety First: Protect your ability to help. Assess before acting.
- Clear Communication: Share precise details with dispatchers—location, situation, people involved. Stay on the line.
- Know Your Scope: Focus on actions within your comfort and training. Your calm presence and timely alert are profoundly valuable.
Your 24-Hour Action Step
Within the next day, complete one of these:
– With household members: Spend 10 minutes walking through your home. Identify two exit paths from each bedroom. Choose a family meeting spot outside. Do this today.
– If living alone: Save emergency contacts with speed-dial labels (ICE: In Case of Emergency). Place a laminated card with your health notes on your refrigerator.
– For everyone: Test every smoke alarm in your home now. Replace batteries if needed. This simple act supports safety more than almost any other single step.
This is not about fear. It is about care—for your space, your people, and your own capacity to respond with clarity. Preparation is an expression of care. It communicates to your household: We are mindful. We are ready. It cultivates a legacy of resilience that extends far beyond any single moment.
The Broader View: Weaving Readiness into Daily Life
True preparedness lives in consistent, small choices: the smoke alarm tested monthly, the hallway kept clear for easy movement, the conversation where you learn a parent’s medication list, the neighbor you greet who becomes a trusted contact. It is the quiet confidence that comes from knowing your home is not just a structure, but a thoughtfully maintained sanctuary. Share this guide. Discuss it. Adapt it to your unique household. Then, release tension. You have taken meaningful steps. You are prepared. And in that preparation lies deep, enduring peace.
Explore Our Complete System:
Creating a Home Emergency Kit: A Room-by-Room Checklist | Childproofing Your Home: Beyond Outlet Covers | How to Conduct a Home Safety Audit in One Weekend | Weathering the Storm: Preparing Your Home for Natural Disasters | First Aid Basics Every Household Should Practice | Smart Home Safety Devices That Provide Peace of Mind | Teaching Emergency Preparedness to Children Without Fear