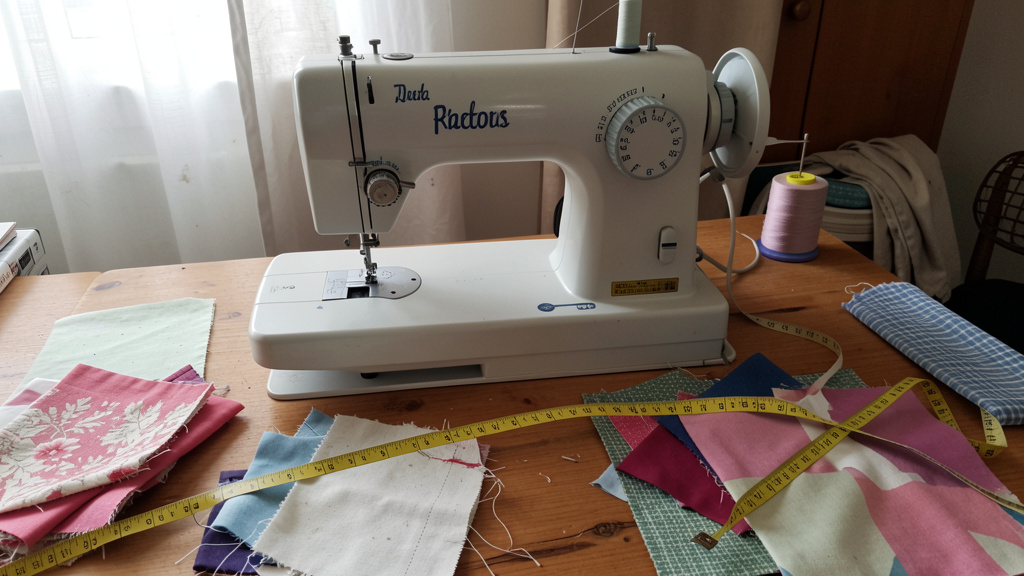
Skip the overwhelm. We break down everything from fabric selection to finishing touches—with zero prior experience required.
Imagine running your fingers over a custom pillow sham that harmonizes with your sofa’s accent tones. Picture morning light softening through curtains you crafted yourself, or the satisfaction of using a zippered pouch designed precisely for your daily essentials. Fabric DIY transcends mere cost savings—it’s about weaving personal narrative into the spaces you inhabit. Yet for many beginners, initial enthusiasm meets friction: uncertainty about fabric behavior, hesitation around tools, or not knowing where to begin. This guide systematically addresses those barriers. Drawing on widely observed patterns in crafting communities, we present a progressive framework where each project intentionally builds transferable skills while delivering visible results. No vague inspiration boards—just clear, adaptable steps designed to transform uncertainty into quiet confidence, one thoughtful stitch at a time.
Introduction
Walk into any home goods retailer, and you’ll encounter rows of identical textiles: mass-produced pillows, standardized curtains, uniform table linens. These items serve functional purposes, yet often lack the subtle resonance of human intention. Fabric DIY bridges that gap. It’s accessible creation: transforming accessible materials into objects that reflect your environment, your aesthetic sensibilities, and your hands.
The journey, however, often encounters predictable friction points. A crafter selects beautiful linen for a table runner, only to discover significant fraying after the first wash. Another attempts hand-sewing a cushion cover, growing discouraged when stitches gather unevenly. These moments rarely reflect skill deficiency—they reveal gaps in foundational knowledge. Observations across crafting communities suggest sustainable progress begins not with ambitious leaps, but with intentional scaffolding. Understanding why fabrics behave as they do, how tools interact with materials, and where to place foundational stitches cultivates compounding confidence. This guide is structured around that principle. We move beyond fragmented inspiration to offer a cohesive system where each project reinforces prior learning while delivering immediate visual reward. Your home deserves beauty infused with meaning—and the capacity to create it resides within reach.
The Fabric Confidence Framework: Your Path from Novice to Creator
Before needle meets thread, preparation shapes outcomes. The Fabric Confidence Framework rests on three interconnected pillars designed to reduce uncertainty and build intuitive understanding. This isn’t about rigid rules; it’s about developing a adaptable mental model applicable to any fabric project—today or years from now.
Pillar 1: Fabric Fundamentals—Choosing Material Aligned with Purpose
Fabric is not monolithic. A cotton sheet behaves fundamentally differently than polyester satin or wool felt. Thoughtful selection prevents frustration; mismatched choices complicate execution. Let’s clarify the textile landscape through three practical lenses: fiber content, weave structure, and weight.
Fiber Content: Understanding Material Personality
Natural fibers (cotton, linen, wool, silk) offer breathability and develop character with use but may require specific care. Cotton softens over time and accepts dye readily—ideal for pillowcases or children’s items. Linen provides crisp texture and exceptional durability while embracing natural wrinkling (often considered part of its charm). Synthetic fibers (polyester, nylon, acrylic) resist wrinkles, stains, and moisture, making them practical for high-traffic applications like dining chair cushions. Blends (e.g., 60% cotton/40% polyester) seek balance: cotton’s comfort with polyester’s resilience.
Practical application: For a no-sew fabric basket lining, medium-weight cotton canvas provides structure without rigidity. For a bathroom shower curtain liner, polyester’s moisture resistance becomes essential. Always check the selvage edge (the tightly woven border) for fiber content and care symbols—this small detail prevents project complications.
Weave Structure: How Construction Influences Behavior
Weave determines drape, strength, and stability. Plain weave (threads cross over-under alternately) creates stable fabrics like quilting cotton or muslin—excellent for structured projects like tote bags. Twill weave (diagonal rib pattern) yields durable, fluid fabrics like denim or chino—suitable for upholstery accents. Satin weave (long floats over threads) creates smooth, lustrous surfaces more prone to snagging—best reserved for low-traffic decorative pillows. Knits (interlocking loops) offer stretch; jersey knit creates comfortable cushion covers but may shift during cutting for beginners.
Illustrative example: A crafter attempting a simple table runner with satin-weave polyester noticed edges unraveled during handling. Switching to a tightly woven cotton twill resolved the issue. Always perform a “fray test”: snip a 1-inch square from a scrap, wash and dry per care instructions, and observe. Minimal fraying? Proceed confidently. Significant unraveling? Finish edges with pinking shears or seam sealant first.
Weight and Drape: Aligning Material with Function
Fabric weight is commonly referenced in ounces per square yard (oz/yd²) or grams per square meter (gsm). Lightweight (2–4 oz): voile, chiffon—ideal for sheer curtains. Medium-weight (4–7 oz): quilting cotton, linen—versatile for pillows, table linens. Heavyweight (7+ oz): canvas, denim, upholstery-weight cotton—suited for structured baskets or chair pads. Drape describes how fabric flows: stiff burlap holds geometric shapes; fluid rayon cascades softly.
Important nuance: “Upholstery fabric” isn’t automatically heavy. Some performance fabrics mimic linen’s drape while offering stain resistance. Conversely, thick cotton duck may feel sturdy but lack the abrasion resistance needed for high-use seating. For home projects under light-to-moderate use, medium-weight natural fibers or quality blends offer reliable starting points. Seasonal consideration matters too: lightweight linens suit spring/summer table settings, while heavier wools or corduroys bring warmth to autumn/winter decor.
Fabric Selection Guide for Common Home Projects
| Project Type | Recommended Fabrics | Use With Caution | Reasoning |
|———————–|—————————————–|——————————–|————————————————————————|
| Throw Pillows | Cotton duck, linen, medium-weight velvet | Slippery satins, delicate lace | Structure maintains shape; fibers withstand regular handling |
| Table Runners/Linens | Quilting cotton, linen, canvas | Stretchy knits, loose weaves | Stable weave resists snagging; presses smoothly |
| Curtains (Sheer) | Voile, lightweight cotton, muslin | Heavy denims, thick upholstery | Allows gentle light diffusion; hangs gracefully |
| Curtains (Blackout) | Thermal-backed cotton, heavyweight linen| Thin polyesters, sheer fabrics | Density blocks light; weight ensures clean hanging |
| Storage Bins/Baskets | Canvas, denim, upholstery-weight cotton | Jersey knits, silk | Rigidity maintains form; durability supports repeated use |
| Reusable Bags | Medium-weight cotton, canvas | Stretchy knits, flimsy rayon | Strength carries contents; minimal stretch prevents sagging |
Always pre-wash fabric before cutting unless project instructions specify otherwise (e.g., pre-shrunk upholstery fabric). Use cold water and gentle cycle to minimize distortion. This step prevents post-completion shrinkage that can warp seams or distort shapes. When possible, visit a local fabric store to handle swatches. Rub the fabric between your fingers. Does it feel substantial? Does it drape as envisioned? Trust tactile feedback—it provides insight no digital description can fully convey.
Pillar 2: Tool Mastery—Building an Effective Kit Within Constraints
You don’t need an extensive studio to begin. Strategic tool selection reduces physical strain, improves accuracy, and transforms routine tasks into satisfying rituals. We categorize tools into three practical groups: Essentials (start here), Skill-Expanders (add gradually), and Adaptive Substitutes (for immediate starts with limited resources).
Essential Toolkit ($25–$40 Initial Investment)
– Fabric Shears (8-inch): Why essential: Paper dulls blades rapidly. Dedicated fabric shears ensure clean cuts that minimize fraying. Correct use: Cut with full blade motion; store in protective case. Common pitfall: Using them on paper or thread—this compromises precision.
– Seam Ripper: Why essential: Mistakes offer learning opportunities. A sharp seam ripper (with colored ball tip for visibility) allows gentle correction without damaging fabric. Pro technique: Work from the wrong side of fabric; slide tip under stitches, lift gently, and snip threads individually.
– Glass-Head Pins: Why essential: Plastic heads can melt under iron heat; glass heads remain stable. Fine, sharp pins glide through layers without distorting fabric. Correct use: Insert perpendicular to fabric edge (“in the seam allowance”) to prevent shifting during sewing.
– Flexible Measuring Tape: Why essential: Rigid rulers cannot measure curves (like pillow corners). A 60-inch tape with dual inch/cm markings ensures accuracy. Critical habit: Measure twice before cutting—fabric is unforgiving.
– Iron and Ironing Board: Why essential: Pressing seams open (not just flattening) reduces bulk and creates professional results. Steam relaxes fibers for precise folding. Safety note: Always test heat settings on a scrap first; silk requires low heat, cotton tolerates higher settings.
Skill-Expander Toolkit (Add as Projects Evolve)
– Rotary Cutter + Self-Healing Mat: Streamlines straight cuts for quilting or multiple identical pieces. Requires practice—always cut away from your body.
– Pinking Shears: Zigzag blades reduce fraying on seams for stable fabrics or quick projects.
– Bias Tape Maker: Creates consistent folded binding strips for finishing raw edges on aprons or placemats.
– Walking Foot (for sewing machines): Grips layered fabrics evenly—helpful for thicker materials like denim.
Adaptive Substitutes for Immediate Starts
No fabric shears? Use sharp kitchen scissors dedicated solely to fabric (label clearly!). No glass-head pins? Fine straight pins work if kept away from ironing zones. No iron? Press seams carefully with a hair straightener (wrap plates in parchment paper first; test on scrap). No measuring tape? Use a dollar bill (approximately 6 inches) for small references—but prioritize proper tools after your first project.
The Fundamental Principle: Tools don’t create skill—but the right tools reduce friction so emerging skill can flourish. A dull seam ripper causes torn fabric and frustration; a sharp one turns correction into calm problem-solving. Honor your effort with tools that support your process.
Pillar 3: Project Progression—A Skill-Building Roadmap
Attempting complex constructions before mastering foundational techniques often leads to discouragement. Progression builds competence incrementally. Our tiered system ensures each project introduces one or two new techniques while reinforcing prior learning:
-
Tier 1: No-Sew Foundations (Confidence in under 60 minutes)
Skills embedded: Fabric selection, precise measuring, edge finishing, spatial planning.
Psychological benefit: Immediate visual transformation with minimal technical pressure. -
Tier 2: Simple Sew Projects (Mastering straight lines and consistent seams)
Skills embedded: Threading needles, maintaining seam allowances, pressing discipline, basic hemming.
Psychological benefit: “I created something functional with my own hands.” -
Tier 3: Intermediate Skill Builders (Precision techniques and problem-solving)
Skills embedded: Zipper insertion, curved seams, gathering, layered construction.
Psychological benefit: “I can adapt techniques to meet specific needs.”
This sequence reflects observed learning patterns. Skipping foundational tiers can increase cognitive load, as unfamiliar techniques compound stress. By isolating variables (e.g., learning zipper insertion on a small pouch before attempting floor-length curtains), focus remains clear. Celebrate completing Tier 1—it’s not “too simple.” It’s intentional scaffolding that builds lasting confidence.
Your First Project Tier: No-Sew Foundations (Build Confidence in Under an Hour)
These projects require no stitching. They leverage fabric glue, iron-on adhesives, or clever folding to deliver polished results. Ideal for renters (no permanent modifications), time-limited creators, or anyone seeking a quick, satisfying win.
Project 1: Customized Fabric-Covered Bulletin Board
Why this project works: Transforms a functional office item into a personalized command center. Uses stable fabric that remains manageable during application. Teaches precise measuring, tension awareness, and spatial reasoning.
Materials Needed
– Pre-made cork bulletin board (any size; 12″x16″ ideal for starters)
– Fabric 2–3 inches larger than board on all sides (medium-weight cotton, linen, or canvas)
– Spray adhesive (follow ventilation instructions) OR heavy-duty fabric glue
– Scissors, ruler, pencil
– Cardboard scrap (for testing adhesive)
– Optional: Decorative ribbon, push pins coordinating with fabric
Step-by-Step Instructions
1. Prepare Workspace: Work in a well-ventilated area. Lay down cardboard or drop cloth. Place bulletin board face-down on protected surface.
2. Test Adhesive: Apply adhesive to cardboard scrap; press fabric snippet to confirm bond strength and drying time (typically 30–60 seconds).
3. Position Fabric: Lay fabric right-side down on clean surface. Center bulletin board on top. Smooth out wrinkles with hands.
4. Apply Adhesive:
– Spray method: Hold can 8 inches from board back. Apply light, even coat. Wait until tacky (follow product instructions).
– Glue method: Apply thin bead of glue along board edges using a toothpick for precision.
5. Attach Fabric: Starting at one edge, slowly press fabric onto board back. Use a ruler edge to smooth bubbles outward. Work methodically to the opposite side.
6. Fold Corners: At each corner, fold fabric like wrapping a present: create a neat triangle fold, then secure with adhesive. Trim excess if needed.
7. Secure Edges: Press firmly around entire perimeter. Place heavy books on board for 15 minutes while adhesive sets.
8. Final Touch: Insert coordinating push pins. Optional: Glue ribbon in a crisscross pattern over fabric before attaching to board for added texture.
Pro Tips & Customization
– Pattern alignment: For directional prints (stripes, florals), position board so key motif centers visually.
– Texture considerations: Burlap adds rustic character but may require extra adhesive due to open weave. Felt eliminates fraying concerns entirely.
– Renter-friendly adaptation: Skip adhesive. Cut fabric slightly larger than board. Wrap tightly and secure edges to back with strong double-sided tape.
– Common pitfall: Over-applying adhesive causes seepage through fabric. Less is more—apply light, even coats.
Skill Builder Insight
This project develops spatial reasoning: visualizing how two-dimensional fabric wraps a three-dimensional object. Notice how tension affects the final appearance—too loose causes sagging; too tight distorts patterns. This awareness transfers directly to future projects involving curved surfaces or upholstery.
Project 2: No-Sew Throw Pillow Envelope Cover
Why this project works: Creates an instant refresh for sofas or beds without sewing machine access. The envelope closure is forgiving—no precise zipper alignment required. Uses minimal fabric and builds measuring confidence.
Materials Needed
– Existing pillow insert (standard 18″x18″ or 20″x20″)
– Fabric: Cut one square measuring (Pillow Width × 1.5) + 6 inches (e.g., for 18″ pillow: 33″ square)
– Iron-on hem tape (¼-inch width)
– Fabric scissors, ruler, iron
– Optional: Fabric glue for reinforcement
Step-by-Step Instructions
1. Cut Fabric: Measure and cut one square piece per formula above.
2. Create Flaps: Fold fabric right sides together vertically. Measure and mark two lines parallel to the fold:
– Line A: Pillow width + 1 inch (e.g., 19″ from fold)
– Line B: Pillow width + 5 inches (e.g., 23″ from fold)
3. Hem Flap Edges: Unfold fabric. Along the Line B edge (longer flap), apply iron-on hem tape to the raw edge. Fold edge over tape, press with hot iron (dry heat) for 10 seconds. Repeat for opposite edge.
4. Form Envelope: Refold fabric right sides together along original center fold. Align raw edges of the shorter flap (Line A side). Apply hem tape along both side edges. Press firmly with iron to seal.
5. Insert Pillow: Turn cover right-side out. Slide pillow insert through the envelope opening. Flaps should overlap by 3–4 inches.
6. Secure (Optional): For high-use areas, add small dots of fabric glue where flaps overlap internally.
Pro Tips & Customization
– Fabric choice: Quilting cotton works beautifully. Avoid very slippery satins—they may slide out of the envelope closure.
– Sizing adjustment: If pillow feels tight, increase fabric square by 1–2 inches next time. Too loose? Decrease by 1 inch.
– Style variations:
– Contrast binding: Cut a 2-inch wide strip of contrasting fabric. Fold lengthwise, press, and glue along opening edges before step 4.
– Tassel accent: Glue pre-made fabric tassels to flap corners.
– Common pitfall: Ironing hem tape with steam can activate adhesive prematurely. Always use dry heat. Test temperature on a scrap first.
Skill Builder Insight
You’ve intuitively learned the concept of “seam allowance”—the extra fabric beyond the finished edge. Here, the 1-inch buffer at Line A ensures the pillow fits snugly. This principle underpins nearly all sewn projects. Notice how precise measuring prevents gaping or tightness—a direct parallel to maintaining consistent seam allowances in machine sewing.
Project 3: Fabric-Wrapped Storage Boxes
Why this project works: Organizes clutter while adding cohesive color to shelves. Uses rigid cardboard boxes (cereal, tea, gift boxes) as accessible foundations. Reinforces measuring, cutting, adhesive application, and corner treatment.
Materials Needed
– Sturdy cardboard box (shoebox size ideal)
– Fabric: Enough to cover all sides + 2 inches overlap per edge
– Mod Podge or decoupage glue
– Foam brush (1-inch width)
– Scissors, ruler, pencil
– Bone folder or credit card (for crisp folds)
– Optional: Fine-grit sandpaper, acrylic paint for box edges
Step-by-Step Instructions
1. Prepare Box: Lightly sand box edges to improve glue adhesion. Wipe away dust. Optional: Paint box edges with acrylic paint matching fabric for a seamless look.
2. Measure Panels: Mentally unfold the box. Measure each side separately: front, back, left, right, lid top, lid bottom. Add 1 inch to each dimension for overlap.
3. Cut Fabric: Cut fabric pieces for each panel. For corners, cut small triangles from fabric corners where panels meet (reduces bulk).
4. Apply Glue: Work on one panel at a time. Brush a thin, even layer of Mod Podge onto the box panel.
5. Attach Fabric: Center fabric piece over glued area. Smooth from center outward with bone folder to eliminate bubbles. Fold excess fabric neatly over box edges; secure with glue.
6. Handle Corners: At box corners, fold fabric like wrapping a present: create a crisp mitered fold, glue down. Trim excess if needed.
7. Seal: Once all panels are covered and dry (1–2 hours), apply a thin top coat of Mod Podge over the entire fabric surface. This seals fibers and adds durability. Allow to cure 24 hours before heavy use.
Pro Tips & Customization
– Pattern placement: Position key motifs (like a floral center) on the most visible panel (front of box).
– Texture enhancement: Glue thin batting under fabric on the lid top for a subtle padded effect.
– Lid solutions: For lift-off lids, cover separately. For hinged lids, leave the hinge area bare or cover with a flexible fabric strip.
– Common pitfall: Thick glue application causes fabric to wrinkle as it dries. Thin coats yield smoother, stronger results.
– Eco-conscious option: Use fabric scraps from previous projects. Patchwork boxes celebrate resourcefulness.
Skill Builder Insight
This project introduces “grain awareness.” Fabric has a directional grain (threads run lengthwise and crosswise). When wrapping curved box edges, cutting fabric on the bias (a 45-degree angle to the grain) allows gentle stretching for smoother corners. You’ve intuitively applied a technique professional upholsterers use for curved furniture—a foundational concept for future Tier 3 projects.
Tier 2: Simple Sew Projects (Mastering Straight Lines and Basic Construction)
Ready to introduce needle and thread? These projects focus exclusively on straight seams—the foundation of most home sewing. Whether using a machine or hand-sewing, consistency matters more than speed. Parallel instructions support both methods.
Project 4: Basic Pillow Sham with French Seam Finish
Why this project works: A sham (envelope-back pillow cover) offers durability. The French seam encloses raw edges within the seam—creating an elegant, fray-resistant finish. Teaches precise seam allowances and the critical role of pressing.
Materials Needed
– Pillow insert (standard 20″x26″ for queen sham)
– Fabric: 1¼ yards of 44″-wide medium-weight cotton or linen
– Matching thread
– Pins, scissors, ruler, fabric marker
– Iron
– Sewing machine OR hand-sewing needle
Step-by-Step Instructions
Part A: Cutting
1. Cut one main rectangle: Width = Pillow Width + 4 inches; Length = Pillow Length + 8 inches (e.g., 20″x26″ pillow → 24″x34″ fabric).
2. Cut two flap pieces: Width = Same as main piece; Length = (Pillow Length ÷ 2) + 3 inches (e.g., 26″ ÷ 2 = 13″ + 3″ = 16″).
Part B: French Seam Construction (Machine Method)
1. First Seam (Wrong Sides Together): Place main rectangle and one flap wrong sides facing. Pin along one long edge. Sew with ¼-inch seam allowance. Do not backstitch.
2. Trim and Press: Trim seam allowance to ⅛ inch. Press seam flat toward the flap.
3. Second Seam (Right Sides Together): Fold fabric so right sides now face, enclosing the first seam inside. Pin carefully. Sew with ⅜-inch seam allowance. This encases raw edges completely. Press seam flat.
4. Repeat: Attach second flap to opposite edge of main rectangle using the same French seam method.
5. Side Seams: With right sides together, pin main rectangle edges to flaps, aligning raw edges. Sew both side seams with standard ½-inch seam allowance. Backstitch at start and end.
6. Finish: Turn right-side out. Insert pillow. Press entire sham.
Hand-Sewing Adaptation
– Use a small running stitch for the first seam (¼-inch allowance). Keep stitches even (approximately ⅛ inch long).
– For the second seam, use a backstitch for strength (⅜-inch allowance). Knot thread securely at start and end.
– Pressing remains essential—use a thimble to protect fingers during tight folds.
Pro Tips & Customization
– Flap overlap: Ensure flaps overlap by at least 3 inches when the sham is closed. Measure before sewing final side seams.
– Sharp corners: When sewing side seams, stop ½ inch from the corner. Clip diagonally into the seam allowance (not through stitches). Turn right-side out; use a pencil eraser to gently push the corner sharp.
– Style upgrades:
– Flange edge: Cut the main rectangle 2 inches larger on all sides. After sewing side seams, fold the raw edge inward 1 inch twice to create a self-border. Topstitch.
– Contrast piping: Insert store-bought piping between main fabric and flaps during side seam sewing.
– Common pitfall: Skipping the press-after-first-seam step leads to bulky, uneven French seams. Patience here creates elegance.
Skill Builder Insight
The French seam exemplifies proactive problem-solving: it addresses fraying during construction rather than as an afterthought. This mindset—anticipating challenges and designing solutions into the process—elevates functional items toward heirloom quality. Notice how pressing after each step transforms layered fabric into crisp geometry. This discipline applies universally across sewing disciplines.
Project 5: Simple Table Runner with Mitered Corners
Why this project works: Mitered corners (45-degree folds) create a professional finish on hems. Builds precision in cutting, folding, and topstitching. Highly adaptable for seasons or occasions—light florals for spring, warm plaids for autumn.
Materials Needed
– Fabric: Length = Table length + 20 inches; Width = Desired runner width + 4 inches (e.g., 72″ table → 92″ long x 18″ wide runner)
– Matching thread
– Iron, ironing board
– Ruler with 45-degree angle guide (quilting ruler ideal)
– Fabric marker, pins
– Sewing machine OR hand-sewing needle
Step-by-Step Instructions
1. Cut Fabric: Cut rectangle to measurements above. Press thoroughly to remove wrinkles.
2. Mark Hem Allowance: On the wrong side, mark a 1-inch fold line along all four edges using fabric marker and ruler.
3. Press Initial Fold: Fold fabric along the marked line toward the wrong side. Press the entire perimeter.
4. Create Mitered Corner:
– At one corner, unfold the last 3 inches of the pressed hem.
– Fold the corner diagonally so raw edges align, forming a 45-degree triangle. Press the crease.
– Refold side hems over the triangle. Press sharply. Pin in place.
– Visual cue: The folded corner should resemble a paper airplane tip.
5. Stitch Hem: Starting 1 inch from the corner, stitch along the folded edge with ⅛-inch seam allowance. Stop 1 inch before the corner. Backstitch. Repeat for all sides.
6. Secure Corners: Hand-stitch corner folds discreetly with a slip stitch for durability (optional but recommended).
Pro Tips & Customization
– Fabric choice: Linen or cotton-linen blend drapes beautifully and hides minor stitching variations. Avoid very slippery satins for a first attempt.
– Perfect miters: If the corner appears bulky, trim excess fabric from the inside triangle before the final pressing.
– Style variations:
– Layered runner: Cut two fabrics (e.g., solid base + patterned strip down center). Sew strips together lengthwise before hemming.
– Fringed ends: Instead of hemming short ends, pull horizontal threads to create a 2-inch fringe. Knot groups of threads.
– Common pitfall: Rushing the corner fold. Take time to align edges precisely before pressing—this determines final sharpness.
– Hand-sewing note: Use a blind hem stitch for a nearly invisible finish. Practice on a scrap first.
Skill Builder Insight
Mitered corners teach spatial geometry in fabric form. That 45-degree fold isn’t arbitrary—it’s the precise angle where two perpendicular edges meet seamlessly. This mathematical precision appears in quilting blocks, curtain headers, and tailored clothing. Mastering it builds confidence to tackle angled seams elsewhere. Notice how pressing creates the seam line before stitching—a reminder that ironing is active construction, not just finishing.
Project 6: Lined Curtain Panels (Rod Pocket Style)
Why this project works: Rod pocket is the most accessible curtain header style. Lining adds body, light control, and longevity. Scales to any window size. Reinforces long straight seams, consistent hemming, and spatial planning.
Materials Needed
– Main fabric: Width = Window width × 1.5 (for soft fullness); Length = Desired curtain length + 8 inches
– Lining fabric: Same dimensions as main fabric (use blackout lining for bedrooms)
– Matching thread
– Measuring tape, pins, fabric marker
– Iron, sewing machine
– Optional: Drapery weights (small metal bars)
Step-by-Step Instructions
1. Cut Fabric: Cut main and lining pieces to identical dimensions. Press both thoroughly.
2. Join Widths (If Needed): For wide windows, sew two main fabric panels right-sides together along selvage edges with ½-inch seam. Press seam open. Repeat for lining.
3. Create Rod Pocket:
– On the wrong side of the main fabric top edge, fold down 1 inch. Press.
– Fold down again 3 inches (total 4 inches from raw edge). Press sharply. Pin.
– Stitch close to the inner folded edge, leaving a ½-inch opening at each end for rod insertion. Backstitch.
4. Attach Lining:
– Place main fabric and lining right sides together. Align side and bottom raw edges. Pin.
– Sew side seams with ½-inch allowance. Leave the top edge (rod pocket area) open.
– Clip corners diagonally. Turn right-side out through the top opening. Press seams flat.
5. Hem Bottom:
– Fold bottom edge up 1 inch toward the wrong side. Press.
– Fold up again 3 inches. Press. Pin.
– Topstitch along the inner folded edge. For the lining, hand-stitch the hem with a blind stitch to avoid visible stitches on the front.
6. Finish Top: Tuck the raw top edge of the lining under the rod pocket fold. Hand-stitch the lining to the main fabric inside the pocket. Insert drapery weights into bottom hem corners before final stitching (prevents billowing).
Pro Tips & Customization
– Fullness ratio: 1.5x width creates soft folds. For more dramatic gathers, use 2x width (requires more fabric).
– Rod pocket size: Measure your curtain rod diameter. Pocket depth should be rod diameter + 1 inch (e.g., 1″ rod → 2″ pocket depth).
– No-sew adaptation: Use iron-on hem tape for rod pocket and bottom hem. Skip lining for sheer curtains.
– Common pitfall: Uneven hems. Mark hem depth with pins every 6 inches before pressing. Use tailor’s chalk for long edges.
– Professional touch: Stitch vertical “tacking” lines through all layers at side seams to prevent the lining from shifting.
– Seasonal note: For summer, choose lightweight linens or cottons; for winter, thermal-backed fabrics add insulation and light control.
Skill Builder Insight
This project integrates multiple foundational techniques: seam construction, pressing discipline, spatial planning (fullness ratios), and problem-solving (lining attachment). Notice how working “right sides together” creates clean interiors—a universal sewing principle. The choice to hand-stitch the lining hem reflects intentionality: visible machine stitches would detract from the front view. This attention to hidden details defines thoughtful craftsmanship.
Project 7: Reusable Produce Bags
Why this project works: Small scale minimizes fabric waste. Straight seams only. Immediate practical use. Teaches casing construction (for drawstring) and working with lightweight fabrics.
Materials Needed
– Lightweight mesh fabric or unbleached muslin (½ yard makes approximately 3 bags)
– Matching thread
– ¼-inch cotton cord or ribbon (24 inches per bag)
– Safety pin (for threading cord)
– Ruler, pins, scissors
– Sewing machine
Step-by-Step Instructions
1. Cut Fabric: Cut rectangles: 12 inches wide x 16 inches tall (adjust based on produce size).
2. Create Casing:
– Fold the top edge down ½ inch toward the wrong side. Press.
– Fold down again 1 inch. Press. Pin.
– Stitch close to the inner folded edge, leaving a 1-inch opening at the side seam area for cord insertion.
3. Sew Sides: With right sides together, sew side seams with ½-inch allowance. Backstitch at top and bottom.
4. Box Bottom (Optional):
– Flatten the bottom corner so the side seam aligns with the bottom edge.
– Measure 1.5 inches from the point; sew across. Trim excess. Creates a flat base for standing bags.
5. Finish Bottom: Zigzag stitch or serge the raw bottom edge to prevent fraying.
6. Insert Cord: Attach a safety pin to the cord end. Thread through the casing opening, around the entire bag, and out the same opening. Tie cord ends securely.
Pro Tips & Customization
– Fabric choice: Mesh allows contents visibility; muslin offers sturdiness for heavier items. Pre-wash to prevent shrinkage.
– Sizing guide:
– Small (herbs, mushrooms): 8″x10″
– Medium (apples, potatoes): 10″x14″
– Large (leafy greens): 12″x18″
– Style upgrades:
– Label bags: Use fabric paint to mark sizes on bottom corners.
– Color-code: Use different cord colors for different produce types.
– Common pitfall: Casing too tight for cord. Test casing width with cord before stitching closed.
– Environmental note: One set of 5 reusable bags can significantly reduce single-use plastic consumption over time.
Skill Builder Insight
The casing technique appears universally: waistbands, curtain headers, pillow ties. You’ve learned to create a functional tunnel within the seam allowance—a spatial skill that prevents bulk. Boxing the bottom introduces three-dimensional construction from two-dimensional fabric, a foundational concept for totes, baskets, and upholstery projects.
Tier 3: Intermediate Skill Builders (Curves, Zippers, and Precision)
You’ve mastered straight seams and pressing discipline. Now we layer in techniques that unlock complex projects: inserting zippers cleanly, managing curved seams, and constructing layered items. These projects demand patience but deliver profound satisfaction and expanded capability.
Project 8: Zippered Cosmetic Pouch
Why this project works: Small scale makes zipper practice low-stakes. Teaches precise zipper insertion, boxing corners, and using interfacing for structure. Highly practical and giftable.
Materials Needed
– Exterior fabric: Two 8″x6″ rectangles (quilting cotton, canvas)
– Lining fabric: Two 8″x6″ rectangles (cotton, satin)
– 7-inch nylon zipper (closed-end)
– Lightweight fusible interfacing (same size as exterior pieces)
– Matching thread
– Zipper foot for sewing machine
– Iron, pins, seam ripper
Step-by-Step Instructions
1. Fuse Interfacing: Iron interfacing to the wrong side of exterior fabric pieces. Adds body and prevents zipper teeth from showing through.
2. Mark Seam Allowance: On the wrong side of all four fabric pieces, mark a ½-inch seam allowance along one long edge (where the zipper attaches).
3. Attach Zipper to Exterior:
– Place zipper face down on the right side of one exterior piece, aligning zipper teeth with the marked line. Pin.
– Attach zipper foot to machine. Sew slowly along the marked line.
– Repeat with the second exterior piece on the other zipper side.
4. Attach Zipper to Lining:
– Open zipper halfway (critical step!).
– Place lining pieces right sides together with the zipper (lining right side against zipper tape). Pin.
– Sew along the same seam line.
5. Create “Zipper Sandwich”:
– Flip the entire piece so exterior and lining are right sides together, enclosing the zipper.
– Pin around the entire perimeter, ensuring the zipper is centered in the seam.
– Sew around the rectangle with ½-inch allowance, leaving a 2-inch gap in the lining bottom for turning. Backstitch at gap edges.
6. Box Corners:
– Push corners out gently. Flatten one bottom corner so the side seam aligns with the bottom seam.
– Measure 1.5 inches from the point; sew across. Repeat for the other corner.
7. Finish: Turn right-side out through the lining gap. Push corners sharp with a pencil. Hand-stitch the lining gap closed with a ladder stitch.
Pro Tips & Customization
– Zipper foot technique: Adjust needle position to sew close to teeth. Practice on scrap fabric first.
– Alignment aid: Use washi tape to temporarily hold the zipper in place before sewing.
– Style variations:
– Contrast zipper: Use a brightly colored zipper as a design feature.
– Wrist strap: Attach a D-ring to the side seam before final sewing; add a detachable strap.
– Common pitfall: Forgetting to open the zipper halfway before the final seam. The pouch becomes impossible to turn right-side out.
– Troubleshooting: If the zipper pull catches fabric, apply a tiny amount of clear-drying fabric glue to the fabric edge near the teeth (seals fibers).
Skill Builder Insight
Zipper insertion is a gateway skill. The “sandwich method” (sewing exterior and lining simultaneously) ensures perfect alignment and hides all raw edges—a technique used in professional bag construction. Notice how interfacing transforms flimsy cotton into structured material. This principle applies to tote bags, cushion covers, and garment details. Mastery here builds confidence for future projects involving closures.
Project 9: Gathered Bed Skirt
Why this project works: Teaches controlled gathering (essential for ruffles, curtains, sleeves), precise measuring for furniture, and working with large fabric pieces. Creates a significant visual transformation in bedrooms.
Materials Needed
– Main fabric: Calculate as follows:
– (Bed width + bed length) × 2 = Total perimeter
– Total perimeter ÷ fabric width (usually 44″) = Number of panels needed
– Panels × (Drop length + 6 inches) = Total fabric required
(Example: Queen bed 60″x80″, 14″ drop → (60+80)×2=280″ perimeter → 280÷44≈6.4 → round up to 7 panels → 7 × (14+6)=140″ or approximately 3.9 yards)
– Matching thread
– Safety pins
– Measuring tape, pins
– Sewing machine (gathering foot optional)
Step-by-Step Instructions
1. Cut Panels: Cut rectangles: Width = Fabric width (44″); Length = Drop length + 6 inches (e.g., 14″ drop → 20″ long).
2. Join Panels: Sew panels right-sides together along selvage edges with ½-inch seam. Press seams open.
3. Create Gathering Threads:
– Set machine to the longest stitch length (4.0–5.0).
– Sew two parallel lines along the top raw edge: first line ¼ inch from edge, second line ½ inch from edge. Do not backstitch. Leave 3-inch thread tails.
4. Gather Fabric:
– Pin the skirt to the mattress underside at four corners and midpoints.
– Pull the bobbin threads (not top threads) gently to gather fabric. Distribute gathers evenly between pins.
– Adjust until the skirt fits the mattress perimeter snugly.
5. Attach to Platform:
– Fold the top edge down 1 inch. Press.
– Hand-stitch the gathered edge to the mattress platform or box spring using strong thread and a whip stitch. Work in sections, maintaining even tension.
6. Hem Bottom: Fold the bottom edge up 1 inch, then 2 inches. Press. Machine stitch or hand-hem.
Pro Tips & Customization
– Gathering ratio: Aim for approximately 2:1 fullness (fabric length twice the mattress perimeter). Adjust thread tension for tighter or looser gathers.
– No-sew alternative: Use iron-on hem tape for the bottom hem. Attach the skirt to the platform with heavy-duty adhesive Velcro strips.
– Style variations:
– Ruffled tiers: Cut additional fabric strips; gather and attach to the bottom edge before hemming.
– Contrast band: Sew a 4-inch wide contrasting fabric strip along the bottom edge before hemming.
– Common pitfall: Uneven gathers. Pin frequently during adjustment. Work from center outward.
– Professional technique: Lightly spray the gathered section with starch before final stitching—it helps hold gathers precisely in place.
Skill Builder Insight
Gathering transforms flat fabric into dimensional texture. The dual-thread method provides control and redundancy: if one thread breaks, the other holds the gathers. This principle of building in fail-safes appears across design and engineering disciplines. Notice how pinning the fabric to the mattress before gathering ensures a perfect fit. This “measure in place” technique prevents costly errors on large-scale projects.
Project 10: Upholstered Headboard Accent Panel
Why this project works: Combines fabric wrapping, precise cutting, and structural attachment. Creates a high-impact focal point. Teaches working with batting, plywood, and staple guns. Adaptable to various bed sizes and styles.
Materials Needed
– Plywood cut to desired headboard size (e.g., 60″x36″ for queen)
– High-loft polyester batting (same size + 4 inches)
– Fabric: Plywood dimensions + 8 inches on all sides
– Staple gun with ¼-inch staples
– Scissors, ruler
– Optional: Decorative nailhead trim, spray adhesive
Step-by-Step Instructions
1. Layer Materials: Lay fabric right-side down on a clean floor. Smooth flat. Center batting on top. Center plywood on top.
2. Attach Center Edges:
– Pull fabric and batting tightly over one long edge of the plywood.
– Staple the center point first.
– Move to the opposite edge; pull taut and staple the center.
– Repeat for the remaining two edges (centers only).
3. Work Toward Corners:
– Starting from center staples, work toward corners, pulling fabric taut with each staple. Space staples 1–2 inches apart.
– Critical: Pull batting and fabric together as one layer to avoid wrinkles.
4. Handle Corners:
– At corners, fold fabric like wrapping a present: create a neat triangle fold.
– Trim excess batting to reduce bulk.
– Staple the folded corner securely.
5. Final Check: Run hands over the surface. If wrinkles appear, carefully remove nearby staples, re-pull fabric taut, and re-staple.
6. Mounting: Attach D-rings to the back of the plywood. Hang on wall-mounted hooks rated for the weight.
Pro Tips & Customization
– Fabric choice: Upholstery-weight fabric withstands abrasion. For tufting (advanced), use high-loft batting and pre-drill holes for buttons.
– Pattern placement: For large prints, position the key motif centered on the panel before stapling.
– Style variations:
– Channel tufting: Before stapling, mark vertical lines. Insert cording under the fabric along lines; staple securely.
– Nailhead trim: Apply adhesive-backed trim along edges after stapling.
– Common pitfall: Loose fabric causing sagging. Pull firmly with each staple—fabric should feel drum-tight.
– Safety first: Wear safety glasses when stapling. Point the staple gun away from your body.
Skill Builder Insight
This project embodies “tension management”—a core principle in upholstery, tailoring, and woodworking. Consistent tension across the surface prevents distortion. Notice how starting at centers and working outward distributes stress evenly. This methodical approach prevents the “domino effect” of wrinkles. You’ve also learned material layering: fabric provides aesthetics, batting adds comfort and hides the substrate, plywood delivers structure. Understanding material roles empowers adaptation to future projects.
Troubleshooting and Adaptation: Solving Common Fabric DIY Challenges
Even experienced crafters encounter hurdles. What transforms frustration into resolution is a systematic approach. Below, we address frequent friction points with actionable solutions, plus guidance for adapting projects to your home’s unique context and constraints.
Fraying Fabric: Prevention and Repair
Symptom: Threads unraveling at cut edges during handling or washing.
Root Cause: Loose weave structure (linen, canvas) or dull cutting tools.
Solutions:
– Prevention: Always cut with sharp fabric shears (dull blades crush fibers). For high-fray fabrics, finish edges immediately after cutting:
– Pinking shears: Create a zigzag edge that resists unraveling.
– Zigzag stitch: Machine stitch close to the raw edge.
– Fray Check: Liquid seam sealant (apply sparingly to edge; test on scrap first).
– Repair: If fraying occurs mid-project, carefully trim loose threads. Apply a tiny dot of clear-drying fabric glue to the affected area. Press with a cloth-covered iron to set. For severe cases, fold the edge under ¼ inch and topstitch.
Thoughtful note: Some fraying is intentional—raw-edge linen curtains develop a charming “lived-in” texture over time. Assess whether fraying compromises function (e.g., pillow seam integrity) or adds desirable character (decorative edge).
Puckered Seams: Achieving Smooth Stitching
Symptom: Fabric gathers unevenly along the seam line, creating ripples.
Root Cause: Often tension imbalance (machine) or inconsistent hand-stitching pressure.
Solutions:
– Machine Sewing:
1. Test tension on a scrap fabric sandwich. An ideal stitch shows top thread on top, bobbin thread on bottom, with no loops.
2. If puckering persists, slightly loosen the upper tension (counterintuitive for many!).
3. Use a walking foot for thick or slippery fabrics.
4. Place tissue paper under the fabric while sewing; tear away afterward. Provides grip and stabilizes feed.
– Hand Sewing:
– Maintain consistent stitch length (¼ inch is ideal).
– Pull thread gently after each stitch—never yank.
– Use a thimble to control pressure.
Critical Check: Ensure the needle is sharp and appropriate for the fabric (universal needle for woven cotton; ballpoint for knits). A bent or dull needle distorts fabric.
Fabric Shifting During Cutting or Sewing
Symptom: Layers slide out of alignment, causing mismatched seams.
Root Cause: Slippery fabrics (satin, silk) or insufficient stabilization.
Solutions:
– Cutting: Place fabric between two sheets of tissue paper. Cut through all layers. Tissue stabilizes fabric and tears away easily.
– Pinning: Use extra-fine silk pins placed perpendicular to the edge. For curved seams, pin every ½ inch.
– Sewing: Spray temporary adhesive (like 505 Spray) between layers. Bonds temporarily during sewing; releases after pressing.
– *Alternative: Use binding clips instead of pins for vinyl or leather—no holes left behind.
Adapting Projects to Your Home’s Style and Context
Your DIY creations should feel intentional, not “crafty.” Align projects with your existing aesthetic and living context:
| Home Style | Fabric Suggestions | Project Adaptations | Color & Pattern Guidance |
|---|---|---|---|
| Modern/Minimal | Linen, cotton sateen, wool felt | Clean lines; hidden seams; geometric shapes | Monochromatic; subtle textures; avoid busy prints |
| Coastal | Burlap, canvas, lightweight cotton | Raw edges; rope accents; relaxed fits | Navy/white stripes; seafoam; sandy neutrals |
| Bohemian | Velvet, macramé, embroidered cotton | Layered textures; tassels; mixed patterns | Jewel tones; global prints; embrace “imperfections” |
| Farmhouse | Gingham, ticking stripe, chambray | Distressed finishes; visible topstitching | Cream, charcoal, sage; vintage-inspired motifs |
| Scandinavian | Wool blend, organic cotton | Functional simplicity; hidden storage | Light neutrals; single accent color; nature motifs |
Implementation Tip: Pull three existing items from your room (pillow, rug, artwork). Match new fabric to one dominant color and one accent color from this palette. This creates cohesion without requiring exact matches. Consider seasonal shifts: swap lightweight linen table runners for heavier wool blends as temperatures change.
When Projects Don’t Fit: Scaling and Adjusting Thoughtfully
- Size adjustments: Modify seam allowances. Reducing from ½-inch to ⅜-inch adds ¼ inch per seam to the finished size. For significant changes, recalculate using project formulas (e.g., pillow sham: Finished Width = Cut Width – (2 × Seam Allowance)).
- Fabric substitution: If replacing recommended fabric, compare weights and drape. Hold swatches against window light—similar opacity often suggests similar behavior. Test wash a scrap to check shrinkage.
- Tool limitations: No rotary cutter? Use a cardboard template traced with fabric marker. No walking foot? Place parchment paper under fabric while sewing; tear away after.
- Time constraints: Break projects into 30–45 minute sessions. Complete cutting one day, sewing the next. This reduces fatigue and maintains enjoyment.
Practical Insight: When seams pucker—a common frustration for new sewers—the root cause is often tension imbalance. Adjusting the upper tension dial incrementally while testing on scrap fabric resolves many cases. Document your ideal settings for different fabric types in a small notebook kept near your machine. This personalized reference prevents repeating calibration efforts.
Your Questions, Answered
Q: How do I know if a fabric is colorfast?
A: Perform a simple rub test: dampen a white cotton cloth and press firmly on an inconspicuous area of the fabric (like the selvage edge). If color transfers to the white cloth, the fabric may bleed. Pre-wash separately in cold water with 1 tablespoon of salt (which can help set some dyes) before starting your project. For valuable fabrics, use color catcher sheets during washing.
Q: Can I use old bedsheets or clothing for these projects?
A: Absolutely—and it’s an eco-conscious choice! Prioritize 100% cotton sheets (higher thread count often indicates durability). Check thoroughly for thinning, stains, or weak seams. Wash before use. For garments, deconstruct carefully along seams to maximize usable fabric. Note: Knit fabrics (like T-shirts) require stretch stitches or serging to prevent unraveling—best approached in Tier 3 projects once foundational skills are solid.
Q: My sewing machine keeps jamming. What’s wrong?
A: Most jams stem from three common issues: 1) Incorrect threading (re-thread with the presser foot up), 2) Bent or dull needle (replace with a new needle appropriate for your fabric), or 3) Lint buildup under the throat plate (clean gently with a small brush). Always test on scrap fabric before sewing project pieces. If jams persist, consult your machine manual’s troubleshooting section—many issues resolve with routine maintenance.
Q: How much extra fabric should I buy for mistakes?
A: A common practice is to add 15–25% to your calculated yardage. For complex patterns (large florals, stripes requiring matching), consider adding 25–30%. For beginners, leaning toward 25% reduces stress, knowing minor errors won’t derail the project. Store scraps systematically (by color or fabric type) for future small projects like patchwork or stuffing.
Q: Are there truly durable “no-sew” projects?
A: Yes, when adhesives and techniques match the intended use. Fabric glue bonds permanently on stable fabrics (canvas, felt) for low-stress items (wall hangings, bulletin boards). Iron-on hem tape works well for hems on curtains or table linens with gentle use. Avoid adhesives for high-stress areas (bag handles, seat cushions)—stitching provides necessary durability. Always follow the adhesive manufacturer’s instructions for cure time and care.
Q: How do I store fabric to prevent damage?
A: Fold fabric neatly (avoid wire hangers that cause permanent creases). Store in acid-free tissue paper inside breathable cotton bags or plastic bins with silica gel packs to deter moisture. Keep away from direct sunlight (which fades colors) and cedar chests (oils can stain some fabrics). Label each piece with fiber content and purchase date using removable tags.
Q: What’s a common beginner mistake to avoid?
A: Skipping pressing. Ironing isn’t optional finishing—it’s active construction. Pressing seams open reduces bulk, ensures accuracy, and creates professional results. Invest in a quality iron with variable steam control. Press before sewing (remove wrinkles), during construction (after each seam), and after completion. This single habit elevates projects significantly.
Q: Can I wash handmade fabric items?
A: Yes, with precautions. Turn items inside out. Use cold water, gentle cycle, mild detergent. Air dry flat whenever possible—machine drying can shrink fabrics and stress seams. For lined items (curtains, pillows), spot clean first. Test your washing method on a scrap or hidden area. When in doubt, hand-wash in a basin with lukewarm water.
Q: How do I choose thread color when fabric has multiple colors?
A: Match the dominant background color, not the accent. Hold thread spools against the fabric in natural light. If an exact match isn’t available, choose a shade darker than the fabric—light thread shows less on dark fabrics than dark thread on light fabrics. For topstitching (decorative visible stitches), intentionally contrasting thread can add design detail.
Q: What if my project looks “homemade” instead of polished?
A: “Homemade” often stems from inconsistent details. Elevate with: 1) Pressing every seam thoroughly, 2) Trimming thread tails flush, 3) Ensuring corners are sharp (use a point turner), 4) Using matching thread for hidden seams, 5) Adding thoughtful finishing touches (hand-stitched hems, labeled tags). Professionalism lives in the details you don’t immediately notice—until they’re missing.
Q: How long should I expect these projects to take?
A: Time varies based on skill, method, and project complexity. General guidelines:
– No-sew projects: 30–60 minutes
– Simple sew projects: 1.5–3 hours (including pressing)
– Intermediate projects: 3–6 hours (often spread over multiple sessions to reduce fatigue)
Focus on the process, not speed. A calmly executed seam surpasses a rushed, uneven one. Schedule short sessions (45 minutes) with clear stopping points to maintain enjoyment.
Q: Where can I find affordable fabric as a beginner?
A: Start locally: Joann Fabrics (use coupons), remnant bins, or estate sales (linen tablecloths make excellent project fabric). Online: Fabric.com sales, Etsy vintage fabric shops, or Spoonflower for custom prints (order swatches first). Repurpose thoughtfully: Thrift store curtains, men’s dress shirts (for small projects), or damaged quilts (salvage usable sections). Build a small stash gradually—quality and suitability matter more than quantity.
Q: How do I know when I’m ready for the next tier of projects?
A: Readiness is personal. Consider moving forward when: 1) You complete a project without significant frustration, 2) You understand why each step matters, not just how to do it, and 3) You feel curious about the next technique. There’s no rush—repeating a Tier 1 or 2 project with a new fabric or color builds confidence organically. Mastery unfolds through consistent, mindful practice.
Conclusion: Your Creative Home Awaits
This guide provides more than ten project instructions. It offers a framework: the ability to assess fabric with intention, select tools purposefully, and progress through techniques deliberately. This knowledge compounds. The French seam mastered on a pillow sham prepares you for lined tote bags. The zipper insertion practiced in a cosmetic pouch builds confidence for cushion closures. Each pressed seam, each solved challenge, strengthens your creative capacity.
Recall the three pillars anchoring this journey:
1. Fabric Fundamentals transform material selection from uncertainty into informed choice.
2. Tool Mastery turns potential frustration into focused flow.
3. Project Progression ensures every effort builds tangible, transferable skill.
These principles extend beyond crafting. Starting small builds momentum. Preparing thoroughly prevents setbacks. Celebrating micro-wins sustains motivation. Your home is a living canvas for this philosophy.
The 24-Hour Rule
Within the next 24 hours, take one concrete, gentle step:
– Visit a fabric store and handle three swatches. Notice weight, drape, texture.
– Pull one existing pillow from your sofa. Measure it. Calculate fabric needed for a sham.
– Gather the essential toolkit items you already own (scissors, ruler, pins).
This small action breaks inertia. Momentum favors the initiated.
The Big Picture
Fabric DIY is rarely only about the object created. It’s about reclaiming agency in a mass-produced world. It’s the quiet pride of running your hand over a seam you engineered with care. It’s the story you share when guests admire your curtains: “I made those.” That narrative—of capability, patience, and personal expression—infuses your space with meaning no store-bought item can replicate.
Your hands are capable. Your home deserves your voice. Begin where you are. Use what you have. Do what you can. The thread is waiting.
Explore Our Complete System:
The Ultimate Guide to Reading and Adapting Sewing Patterns | Sustainable Fabric Sourcing: Eco-Friendly Choices for Conscious Crafters | Mastering Hand Stitches: 10 Essential Techniques for Precision and Repair | From Scraps to Style: Zero-Waste Projects for Every Fabric Remnant | The Home Decor Color Wheel: Choosing Fabrics That Harmonize With Your Space | Seasonal Sewing: Adapting Projects for Spring, Summer, Autumn, and Winter | Tool Care Fundamentals: Maintaining Your Sewing Kit for Longevity and Precision